Table of Contents
Advertisement
Cisco ASA 5508-X and ASA 5516-X Hardware Installation Guide
First Published: 2015-04-07
Last Modified: 2017-06-16
Americas Headquarters
Cisco Systems, Inc.
170 West Tasman Drive
San Jose, CA 95134-1706
USA
http://www.cisco.com
Tel: 408 526-4000
800 553-NETS (6387)
Fax: 408 527-0883
Text Part Number: Online Only
Advertisement
Table of Contents

Related Manuals for Cisco ASA 5508-X


Summary of Contents for Cisco ASA 5508-X
- Page 1 Cisco ASA 5508-X and ASA 5516-X Hardware Installation Guide First Published: 2015-04-07 Last Modified: 2017-06-16 Americas Headquarters Cisco Systems, Inc. 170 West Tasman Drive San Jose, CA 95134-1706 http://www.cisco.com Tel: 408 526-4000 800 553-NETS (6387) Fax: 408 527-0883 Text Part Number: Online Only...
- Page 2 Cisco and the Cisco logo are trademarks or registered trademarks of Cisco and/or its affiliates in the U.S. and other countries. To view a list of Cisco trademarks, go to this URL: www.cisco.com/go/trademarks . Third-party trademarks mentioned are the property of their respective owners. The use of the word partner does not imply a partnership relationship between Cisco and any other company.
-
Page 3: Table Of Contents
Mount and Connect C H A P T E R 3 Rack-mount the ASA Connect Cables, Turn on Power, and Verify Connectivity Connect to a Console Terminal or PC Cisco ASA 5508-X and ASA 5516-X Hardware Installation Guide Online Only... - Page 4 Connect to the Console Port with Mac OS X Connect to the Console Port with Linux Maintenance and Upgrades C H A P T E R 4 Replace the SSD Cisco ASA 5508-X and ASA 5516-X Hardware Installation Guide Online Only...
-
Page 5: Overview
About the ASA 5508-X and 5516-X The Cisco ASA 5508-X and the ASA 5516-X adaptive security appliances are part of the ASA 5500-X of next-generation mid-range ASAs, and are built on the same security platform as the rest of the ASA family. -
Page 6: Package Contents
VPN support. It also provides enhanced support for intelligent information networks through improved network integration, resiliency, and scalability. The ASA 5508-X and the ASA 5516-X are a standard 1 RU chassis. To compare the performance metrics and capabilities of the 5500-X ASAs, see Cisco ASA 5500-X Series Next-Generation Firewalls. -
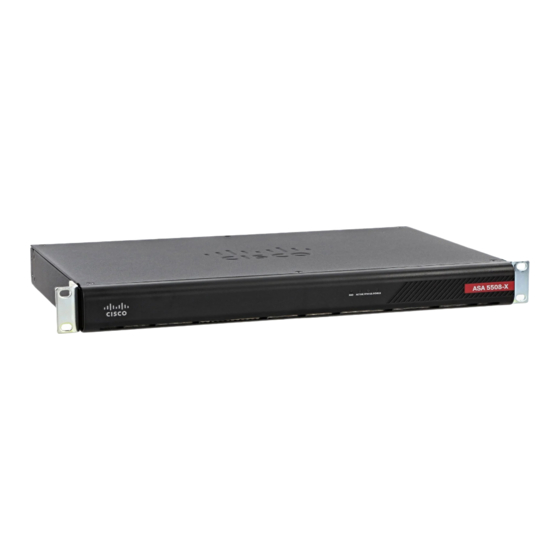
Page 7: Front Panel
Overview Front Panel Front Panel The following figure shows the front panel of the ASA 5508-X. The ASA 5516 has an identical front panel. There are 4 LEDS on the front panel. See LEDs, on page 4 for the descriptions. -
Page 8: Leds
SSD LED to the right of the Reset port. Description Power Power supply status: • Unlit – Power supply off. • Solid green – Power supply on. Power Supply Modules, on page 7 for additional power information. Cisco ASA 5508-X and ASA 5516-X Hardware Installation Guide Online Only... -
Page 9: Cisco Asa 5508-X And Asa 5516-X Hardware Installation Guide
• Flashing green – Link activity. Connection-speed status (S): • One blink every three seconds – 10 Mbps. • Two rapid blinks – 100 Mbps. • Three rapid blinks – 1000 Mbps. Cisco ASA 5508-X and ASA 5516-X Hardware Installation Guide Online Only... -
Page 10: Network Ports
The RJ-45 (8P8C) port supports RS-232 signaling to an internal UART controller. The RJ-45 console port does not support a remote dial-in modem. You can use a standard management cable (Cisco part number 72-3383-01) to convert the RJ45-to-DB9 connection if necessary. -
Page 11: Solid State Drive
Solid State Drive The ASA 5508-X and 5516-X ship with an SSD installed that provides storage support. The SSD in the ASA 5508-X has 80 GB of useable space and is field-replaceable. The SSD in the ASA 5516-X has 1000 GB of usable space and is also field replaceable. -
Page 12: Power Cord Specifications
Only the approved power cords provided with the security appliance are supported. The following table lists the supported power cords. Table 2: Supported Power Cords Description Amperage Voltage Plug Connector CAB-ACE 250V CEE 7 VII IEC 60320/C13 AC power cord (Europe) Cisco ASA 5508-X and ASA 5516-X Hardware Installation Guide Online Only... -
Page 13: Cisco Asa 5508-X And Asa 5516-X Hardware Installation Guide
Power cord (China) CAB-IND-10A 250V IS 6538-1971 IEC 60320/C13 Power cord (India) CAB-C13-ACB 250V NBR 14136 IEC 60320/C13 AC power cord (Brazil) CAB-AC-C13-KOR 250V KSC8305 IEC 60320/C13 AC power cord (Korea) Cisco ASA 5508-X and ASA 5516-X Hardware Installation Guide Online Only... -
Page 14: Cisco Asa 5508-X And Asa 5516-X Hardware Installation Guide
Figure 4: CAB-ACE (Europe) Plug: CEE 7 VII Cord set rating: 10A, 250V Connector: IEC 60320/C13 Figure 5: CAB-AC (North America) Plug: NEMA 5-15P Cord set rating: 10A, 125V Connector: IEC 60320/C13 Cisco ASA 5508-X and ASA 5516-X Hardware Installation Guide Online Only... -
Page 15: Cisco Asa 5508-X And Asa 5516-X Hardware Installation Guide
Figure 6: CAB-ACA (Australia) Plug: A.S. 3112 Cord set rating: 10A, 250V Connector: IEC 60320/C13 Figure 7: CAB-ACI (Italy) Plug: CE123-16-VII Cord set rating: 10A, 250V Connector: IEC 60320/C13 Cisco ASA 5508-X and ASA 5516-X Hardware Installation Guide Online Only... -
Page 16: Cisco Asa 5508-X And Asa 5516-X Hardware Installation Guide
Figure 8: CAB-ACR (Argentina) Plug: IRAM 2073 Cord set rating: 10A, 250V Connector: IEC 60320/C13 Figure 9: CAB-ACS (Switzerland) Plug: SEV 1011 Cord set rating: 10A, 250V Connector: IEC 60320/C13 Cisco ASA 5508-X and ASA 5516-X Hardware Installation Guide Online Only... -
Page 17: Cisco Asa 5508-X And Asa 5516-X Hardware Installation Guide
Figure 10: CAB-ACU (United Kingdom) Plug: BS1363a/SS145 Cord set rating: 10A, 250V Connector: IEC 60320/C13 Figure 11: CAB-JPN-3PIN (Japan) Plug: JIS C8303 Cord set rating: 12A, 125V Connector: IEC 60320/C13 Cisco ASA 5508-X and ASA 5516-X Hardware Installation Guide Online Only... -
Page 18: Cisco Asa 5508-X And Asa 5516-X Hardware Installation Guide
Figure 12: AIR-PWR-CORD-SA (South Africa) Plug: SABS 1661 Cord set rating: 10A, 250V Connector: IEC 60320/C13 Figure 13: CAB-ACC (China) Plug: GB2009.1-2008 Cord set rating: 10A, 250V Connector: IEC 60320/C13 Cisco ASA 5508-X and ASA 5516-X Hardware Installation Guide Online Only... -
Page 19: Cisco Asa 5508-X And Asa 5516-X Hardware Installation Guide
Figure 14: CAB-IND-10A (India) Plug: IS 6538-1971 Cord set rating: 10A, 250V Connector: IEC 60320/C13 Figure 15: CAB-C13-ACB (Brazil) Plug: NBR 14136 Cord set rating: 10A, 250V Connector: IEC 60320/C13 Cisco ASA 5508-X and ASA 5516-X Hardware Installation Guide Online Only... -
Page 20: Cisco Asa 5508-X And Asa 5516-X Hardware Installation Guide
Power Cord Specifications Figure 16: CAB-AC-C13-KOR (Korea) Plug: KSC8305 Cord set rating: 10A, 250V Connector: IEC 60320/C13 Figure 17: CAB-ACTW (Taiwan) Plug: CNS10917 Cord set rating: 10A, 250V Connector: IEC 60320/C13 Cisco ASA 5508-X and ASA 5516-X Hardware Installation Guide Online Only... -
Page 21: Installation Preparation
Warning This product requires short-circuit (overcurrent) protection to be provided as part of the building installation. Install only in accordance with national and local wiring regulations. Cisco ASA 5508-X and ASA 5516-X Hardware Installation Guide Online Only... -
Page 22: Safety Recommendations
• Never attempt to lift an object that is too heavy for one person. Maintain Safety with Electricity Warning Before working on a chassis, be sure the power cord is unplugged. Follow these guidelines when working on equipment powered by electricity: Cisco ASA 5508-X and ASA 5516-X Hardware Installation Guide Online Only... -
Page 23: Prevent Electrostatic Discharge Damage
• Use the chassis within its marked electrical ratings and product usage instructions. • The ASA 5508-X and the ASA 5516-X are equipped with an AC-input power supply, which is shipped with a three-wire electrical cord with a grounding-type plug that fits into a grounding-type power outlet only. -
Page 24: Site Considerations
• Baffles can help to isolate exhaust air from intake air, which also helps to draw cooling air through the chassis. The best placement of the baffles depends on the airflow patterns in the rack. Experiment with different arrangements to position the baffles effectively. Cisco ASA 5508-X and ASA 5516-X Hardware Installation Guide Online Only... -
Page 25: Mount And Connect
Attach both brackets to the sides of the ASA chassis, either to the front or rear. After the brackets are secured to the chassis, you can mount it in the rack. Step 2 Attach the chassis to the rack. Cisco ASA 5508-X and ASA 5516-X Hardware Installation Guide Online Only... -
Page 26: Connect Cables, Turn On Power, And Verify Connectivity
Ethernet cable, or you can connect the computer and the ASA to the same management network. Be sure the PC is configured to obtain an IP address using DHCP. Cisco ASA 5508-X and ASA 5516-X Hardware Installation Guide Online Only... -
Page 27: Cisco Asa 5508-X And Asa 5516-X Hardware Installation Guide
Gigabit Ethernet ports – For the network interfaces; use standard RJ-45 Ethernet cables. You can use any available Gigabit Ethernet port on the ASA 5508-X or ASA 5516-X as a failover link. The failover link interface is not configured as a normal networking interface; it should only be used for the failover link. You can connect the failover link by using a dedicated switch with no hosts or routers on the link. -
Page 28: Connect To A Console Terminal Or Pc
When it is solid green, the ASA has passed power-on diagnostics. Step 5 See the Cisco ASA 5508-X and ASA 5516-X Quick Start Guide to continue setting up your ASA. Note Your ASA ships with either ASA or Firepower Threat Defense software preinstalled. To reimage your device, Reimage the Cisco ASA or Firepower Threat Defense Device. -
Page 29: Cisco Asa 5508-X And Asa 5516-X Hardware Installation Guide
Step 3 Connect a USB 5-pin Mini USB Type B to the USB console port as shown in the following figure. Figure 20: ASA 5508-X and ASA 5516-X Console Port Connection Mini USB Type B console port Mini USB Type B to USB Type A... -
Page 30: Connect To The Console Port With Mac Os X
Connect to the USB port with the following command followed by the ASA USB port speed Example: root@usb-suse /dev# screen /dev/ttyACM0 9600 Step 5 To disconnect the Linux USB console from the Terminal window, enter Ctrl-a followed by : then quit. Cisco ASA 5508-X and ASA 5516-X Hardware Installation Guide Online Only... -
Page 31: Maintenance And Upgrades
Tighten the thumb screws on both sides of the SSD bay. Step 4 Check the SSD LED to make sure the SSD is seated properly and functioning. See LEDs, on page 4 for a description of the SSD LED. Cisco ASA 5508-X and ASA 5516-X Hardware Installation Guide Online Only... - Page 32 Maintenance and Upgrades Replace the SSD Cisco ASA 5508-X and ASA 5516-X Hardware Installation Guide Online Only...
Need help?
Do you have a question about the ASA 5508-X and is the answer not in the manual?
Questions and answers