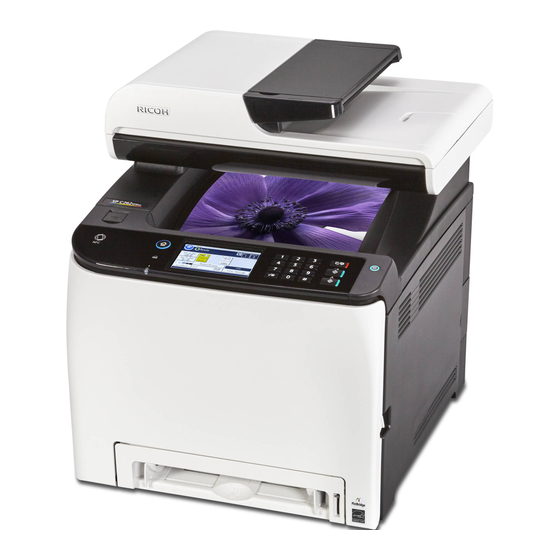
Ricoh SP C260SFNw Setup Manual
Hide thumbs
Also See for SP C260SFNw:
- User manual (444 pages) ,
- User manual (444 pages) ,
- User manual (444 pages)
Advertisement
Table of Contents
- 1 Setup Guide
- 2 Setting up the Machine
- 3 Installing the Software
- 4 Check How the Computer Is Connected
- 5 Connecting the Machine (Usb/Network)
- 6 Connecting the Machine Via Wi-Fi
- 7 Fax Settings
- 8 Selecting the Telephone Line Type and Telephone Network Connection Type
- 9 Setting the Outside Line Access Number
- 10 Basic Operation for Sending a Fax
- 11 Scan Settings
- 12 Control Panel Sheet
- Download this manual
See also:
User Manual
Advertisement
Table of Contents

Subscribe to Our Youtube Channel
Summary of Contents for Ricoh SP C260SFNw
-
Page 1: Setup Guide
Setup Guide Setting Up the Machine Installing the Software FAX settings Scan settings Control Panel Sheet... -
Page 3: Setting Up The Machine
1. Setting Up the Machine 24 cm (9.5 inches) 89.6 20 cm (7.9 inches) 10 cm Power Source (4.0 inches) 120 - 127 V, 60 Hz, 11 A 220 - 240 V, 50/60 Hz, 6 A 20 cm DAC501 (7.9 inches) 70 cm (27.6 inches) DUE001... - Page 4 DUE014 DUE015 DUE016 DUE018 DUD042 DUE020 DUE021 DUE022 DUE023 DUE024 DUE025 DUE032 DUE026 DUE027 DUE028...
- Page 5 DUE029 DUE030 DUE031 Install the software to use the machine. Go to page 4 “2. Installing the Software”. For OS X, see User’s Guide in the provided CD-ROM or our website.
-
Page 6: Installing The Software
"Connecting the Machine via Wi-Fi". the machine to the smart device After scanning the following QR code with • Printing photographs and documents stored on your smart device, search for the "RICOH SP a smart device C260 series Scan" or "RICOH Smart Device DUE033 Connector"... -
Page 7: Connecting The Machine (Usb/Network)
Connecting the Machine (USB/Network) Windows DUE036 DUE037 Select [USB Connection] or [Network Connection] according to communication environment or your device. ● The following items are necessary to set up a wired connection. ● USB interface cable or Ethernet interface cable ●... -
Page 8: Connecting The Machine Via Wi-Fi
Connecting the Machine via Wi-Fi Windows DUE038 Select [Wireless Connection]. Easy Setup Using the CD-ROM ● The following items are necessary to set up a wireless connection. ● USB interface cable or Ethernet interface cable ● Router (access point) ● CD-ROM supplied with the machine ●... - Page 9 Press [Wi-Fi Enable]. Easy Setup Using the Wi-Fi Setup Wizard The following item is necessary to set up a wireless connection. ● Router (access point) Checking the SSID and Encryption key The SSID and Encryption key for the router (access point) may be printed on a label affixed to the router (access point).
- Page 10 Press [WPS]. Easy Setup Using the WPS Button ● Before doing the following procedure, install the printer driver according to the procedure on page 5 "Connecting the Machine (USB/Network)". ● Make sure the Ethernet cable is not connected to the machine.
- Page 11 Press the wireless LAN icon. Easy Setup Using a PIN Code ● Before doing the following procedure, install the printer driver according to the procedure on page 5 "Connecting the Machine (USB/Network)". ● Make sure the Ethernet cable is not connected to the machine.
-
Page 12: Fax Settings
16. Press [Connect]. 17. Check the result. Connection has succeeded: "Connected to access point." is displayed. Press [OK] to return to the screen displayed in Step 12, and then press the [Home] key to return to the initial screen. Connection has failed: "Failed to connect to access point."... -
Page 13: Selecting The Telephone Line Type And Telephone Network Connection Type
Selecting the Telephone Line Type and Telephone Network Connection Type Press [Setting]. Press [Dial/Push Phone]. Press the telephone line type appropriate for your telephone service. Press [Administrator Tools]. Press [PSTN / PBX]. If you are requested to enter a password, enter the password using the number keys, and then press [OK]. -
Page 14: Scan Settings
Scan settings ■ For those using the scanner features for the first time For information about specifying the initial scan settings, see “What You Can Do with the Scanner Function”, User’s Guide in User’s Guide Guide to the Machine Paper Specifications and Adding Paper Printing Documents the provided CD-ROM or our website. - Page 15 Trademark Android is a trademark of Google Inc. IOS is a trademark or registered trademark of Cisco in the U.S. and other countries and is used under license. Wi-Fi, Wi-Fi Direct, Wi-Fi Protected Setup, WPA, Wi-Fi Protected Access, WPA2, and Wi-Fi Protected Access 2 are registered trademarks of Wi-Fi Alliance.
- Page 16 M0AX-8603...


Need help?
Do you have a question about the SP C260SFNw and is the answer not in the manual?
Questions and answers