
Related Manuals for Range Master 52916


Summary of Contents for Range Master 52916
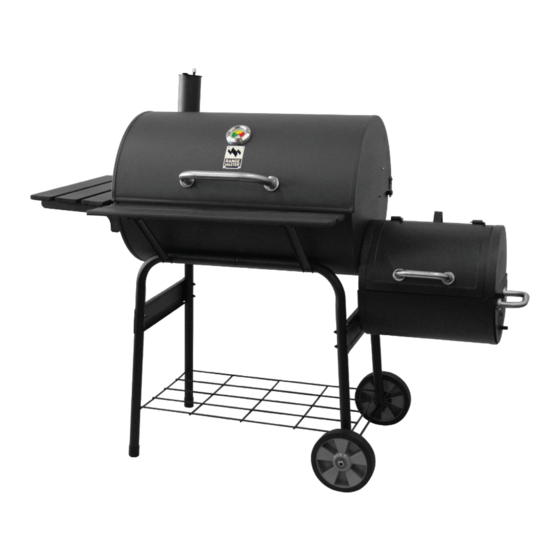
- Page 1 User Manual Manual del usuario 30" BARREL GRILL WITH OFFSET SMOKER PARRILLA DE BARRIL DE 30” CON AHUMADOR LATERAL English . . . . . . . 2 Español . . . . . . 28...
-
Page 2: Table Of Contents
Contents Important Safeguards . . . . . . . . . . . . . . . . . . . . . . . . 3 Preparation . -
Page 3: Important Safeguards
Important safeguards OUT DOOR USE ONLY! NEVER USE INDOORS! CARBON MONOXIDE HAZARD Burning charcoal inside may be fatal. It gives off carbon monoxide, which has no odor. NEVER burn charcoal in enclosed spaces . Read and follow all of the manufacturer’s instructions before beginning assembly or operation. -
Page 4: Preparation
Preparation GRILL PREPARATION SAFETY WARNING • DO NOT use this grill without the ash catcher (if available), ash pan, or ash tray in place. • DO NOT use this grill unless all parts are in working condition and properly installed. CHARCOAL LIGHTING SAFETY WARNING •... - Page 5 Preparation GRILL USE SAFETY WARNING • DO NOT use the grill in windy conditions. • NEVER leave a hot grill unattended. • Grill is hot when in use . To avoid burns: • DO NOT attempt to move the grill while lit or still hot. •...
- Page 6 Preparation AFTER-USE SAFETY WARNING • ALWAYS allow grill and all components to cool completely before handling . • DO NOT remove ashes or used coals from the grill until they are fully extinguished. • To extinguish charcoal, close all vents and place lid on grill until coals are completely out. •...
-
Page 7: Exploded View
Exploded view EXPLODED VIEW... -
Page 8: Parts List
Parts list PARTS LIST 1) R ear Wheel Leg 2) R ear Stationary 3) F ront Wheel Leg 4) F ront Stationary 5) Wire Shelf (1pc) (1pc) Leg (1pc) (1pc) Leg (1pc) 6) L eft Support Leg 7) Wheels (2pcs) 8) Axle (1pc) 9) Bowl (1pc) 10) F ront Shelf (1pc) Supporting Piece (2pcs) 11) F ront Shelf 12) Air Vent (2pcs) 13) S ide Shelf 14) Side Shelf (1pc) 15) L id Handle (1pc) Brackets (2pcs) Spacers (2pcs) -
Page 9: Hardware & Tools
Hardware & tools HARDWARE & TOOLS A) M 6*42 Screws B) M 6 Flange Nuts C) M 6*12 Screws D) M6*20 (x2) E) M 6*18 Flat (x 12) (x 14) (x 18) Washers (x2) F) M 5*10 Screws G) Hinge Pins (x2) H) C otter Pins on I) C otter Pins on J) M 10 Lock Nuts (x6) Hinge Pin (x2) Warming Rack (x2) (x2) K) M5*15 (x4) L) M 5*10 Screws M) M 5*14 Spacers N) Wrench (x1) -
Page 10: Assembly Instructions
Assembly instructions ASSEMBLY INSTRUCTIONS STEP 1 Connect Rear Wheel Leg (1) and Rear Stationary Leg (2). Connect Front Wheel Leg (3) and Front Stationary Leg (4). STEP 2 Insert the Wire Shelf (5) into the holes on the insides of legs (1) and (2) and legs (3) and (4). Stand legs upright. - Page 11 Assembly instructions STEP 3 Install the Left Leg Support (6) onto legs (2) and (4) using M6*42 Screws (A) and M6 Flange Nuts (B). Install the Right Leg Support (31) using the same hardware as the Left Leg Support. Do not tighten screws until Step 5 is completed. Insert Axle (8) through the holes at the bottom of legs (1) and (3). Put the Wheels (7) on the ends of the Axle. Thread M10 Lock Nuts (K) onto each end of the Axle and tighten with Wrench (O). STEP 4 Put the Bowl (9) on top of the legs.Note that the holes for the hinges should be at the back of the grill. Assemble the Front Shelf Support Piece (10) and the Bowl (9) through legs (3) and (4) using M6*42 Screws (A) and M6 Flange Nuts (B). Assemble the Bowl (9) through legs (1) and (2) using M6*42 Screws (A) and M6 Flange Nuts (B).
- Page 12 Assembly instructions STEP 5 Attach the Front Shelf (11) to the front of the Bowl (9) using M6*12 Screws (C). Install the Front Shelf Support Piece (10) to the Front Shelf (11) using M6*12 Screws (C). Note: Now tighten all screws securing in steps 1 through 5. STEP 6 Attach Air Vent (12) to the Bowl using M6*12 Screw (C) and M6 Flange Nut (B). Do not over tighten, Air Vent should move freely.
- Page 13 Assembly instructions STEP 7 Install one of the Side Shelf Brackets (13) to the front side hole location of the Bowl with M6*12 Screws (C). STEP 8 Put the Side Shelf (14) onto the already assembled Side Shelf Bracket (13). Place the second Side Shelf Bracket (13) onto the other side of the Side Self (14). Attach the Side Shelf Bracket (13) to the rear of the Bowl using M6*12 Screws (C).
- Page 14 Assembly instructions STEP 9 Attach the Lid Hinges (18) on both sides of the Lid using M5*10 Stage Screws (F). STEP 10 Remove the nut, spring and chimney lid from the Chimney. Install Chimney (19) into the Lid using M6*12 Screws (C). Reassemble the chimney lid, spring and nut.
- Page 15 Assembly instructions STEP 11 Attach the Lid Handle (16) and Lid Handle Spacers (15) to the Lid with M6*18 Washers (F) and M6*20 Screws (D). STEP 12 Unscrew the preassembled nut from the Temperature Gauge (20). Place the Temperature Gauge (20) into the Lid and reassemble the nut.
- Page 16 Assembly instructions STEP 13 Align the holes of the Lid Hinges and the Bowl. Put the Hinge Pin (H) through the holes of the Lid Hinges and the Bowl. Insert the Cotter Pin (I) through the hole on the Hinge Pin (H). STEP 14 Install the Warming Rack (21) inside the Lid and Bowl. Insert the Cotter Pins (J) through the holes in the Warming Rack.
- Page 17 Assembly instructions STEP 15 Use the Charcoal Tray Brackets (22) to lower the Charcoal Tray (23) into the grill base. Rest the Charcoal Tray Brackets (22) on the supports inside the Bowl. STEP 16 Place the Cooking Grids (24) on the s upport rim of the Bowl.
- Page 18 Assembly instructions STEP 17 Partially screw two M6*12 Screws (C) to the grill bowl as shown below. Install the Firebox Supporting Piece (32) to the Right Leg Support (31) using two M5*15 Screws (L). STEP 18 Install the Firebox Handle (25) and Firebox Handle Spacers (26) to the Firebox Lid (30) with M5*10 Screws (M) anad M5*14 Washers (K). Position the two pieces of the firebox together. Align and seat the upper piece screws into the holes in the lower piece as shown. Lock four screws and holes into position by sliding the upper piece to the right.
- Page 19 Assembly instructions STEP 19 Tighten six M5*15 Screws (L) through hole as shown. Hang the firebox onto the two partially tightened screws from Step 17. STEP 20 Use one M5*15 Screws (L) from inside of the firebox through the hole and tighten into the Firebox Supporting Piece. Tighten all the screws (C) from Step 17 and add four more M6*12 Screws (C) to connect the firebox to the grill.
- Page 20 Assembly instructions STEP 21 Place the Firebox Cooking Grid (28) onto the support rims of the firebox body. STEP 22 Attach the Firebox Handle (25) and Firebox Handle Spacers (26) to the Firebox Charcoal Tray (27) with M5*14 Washers (M) and M5*15 Screws (K). Attach Air Vent (12) onto the Firebox Charcoal Tray (27) as show below using one M5*10 Screw (C) and M6 Flange Nut (B).
- Page 21 Assembly instructions STEP 23 Slide the Firebox Charcoal Tray (27) into the Firebox as shown below.
-
Page 22: Care & Maintenance
Care & maintenance CARE & MAINTENANCE • Wash cooking grids and charcoal grates with hot, soapy water. Rinse well and dry com- pletely with a towel to prevent rusting. • After washing and drying, lightly coat grids with vegetable oil or vegetable oil spray. • Clean the inside and outside of the grill by wiping it with a damp cloth. Apply a light coat of vegetable oil or vegetable oil spray to the interior surfaces to prevent rusting, but not on the charcoal grate. • If rust appears on the outside of your grill, clean and buff the affected area with steel wool or a fine grit emery cloth. Touch up spots with a good quality high-temperature rust resistant paint. • NEVER APPLY PAINT TO THE INTERIOR SURFACE. Doing so could cause a fire resulting in serious bodily harm or property damage. • If rust appears on the interior surface of you grill, clean and buff the affected area with steel wool or a fine grit emery cloth. Coat the interior lightly with vegetable oil or vegetable oil spray. OPERATING INSTRUCTIONS Only use high grade charcoal briquettes, lump charcoal, cooking wood or charcoal/wood mixtures. Wood chips and wood chunks may be used for a more robust flavor. Wood chips are available in a variety of flavors. FIRST USE • Please make sure all labels, packaging and protective films have been removed from the charcoal grill. • Remove manufacturing oils before cooking on this charcoal grill for the first time. Do this by operating the charcoal grill for at least 15 minutes with the lid closed, prior to adding food. This will “heat clean” the internal parts and dissipate odors. -
Page 23: Lighting Instructions
Operating instructions LIGHTING INSTRUCTIONS • Stack charcoal briquettes or wood into a pyramid-shaped pile on top of the charcoal grate. We recommend using 2 pounds (approximately 30 briquettes) to start your fire, adding more as needed. • If using starter fluid, saturate the charcoal briquettes with starter fluid and let it soak in for approximately 5 minutes. If using a chimney starter, electric starter, or other type of fire starter, light your fire according to the manufacturer’s instructions. • After allowing the starter fluid to properly soak in, light the pile of briquettes in several locations to ensure an even burn. Leave lid open until briquettes are fully lit. Failure to do so could trap fumes from charcoal starter fluid in grill and may result in a flash fire when lid is opened. • Never add charcoal starter fluid to hot or warm coals as flashbacks may occur causing injury. • You are ready to begin cooking when the pile of briquettes ashes over and produces a red glow (approximately 10-15 minutes). • Depending on your cooking method, either leave the briquettes in a pile or spread evenly across the charcoal grate using a long handle tool. ALWAYS use caution when handling hot coals. DIRECT GRILLING Grilling directly over hot coals is ideal for searing in juices and grilling food requiring less than 25 minutes of grilling time, such as steaks, hamburgers, hot dogs, chicken parts, vegetables and fruit. • Open the lid and remove cooking grid. • Load and light charcoal per “Lighting Instructions” section. • While wearing hand protection, carefully spread hot coals evenly across charcoal grid with a long handle tool. • While wearing hand protection replace the cooking grid, close the lid and allow the charcoal grill to preheat. - Page 24 Operating instructions INDIRECT GRILLING Not cooking directly over hot coals is ideal for slow cooking and grilling foods requiring more than 25 minutes such as most roasts, loins, chops, whole chickens, turkey, fish and baked goods. • Open the offset fire box and remove the cooking grid. • Load and light charcoal per “Lighting Instructions” section. • While wearing hand protection, carefully spread hot coals to the outside of charcoal grid with a long handle tool. • Close the offset fire box lid and allow charcoal grill to preheat. • Open the air vent on the offset fire box and chimney to start the indirect grill/smoking air flow. • While wearing hand protection open the lid of the primary barrel. Use a long handled tool to place the food onto the cooking grids. • With lid closed, cook until desired internal food temperatures are achieved. • When finished, allow charcoal to burn out by closing lid and all vents. For more tips on Indirect Grilling, please see “Tips for Better Cookouts and Longer Grill Life” section. CONTROLLING FLARE UPS Flare-ups are a part of cooking meats on a charcoal grill and adds to the unique flavor of grilling. Excessive flare-ups can over cook your food and cause a dangerous situation for you and your charcoal grill. Excessive flare-ups are result from the build-up of grease in the bottom of your charcoal grill. If grease fire occurs, close the lid until the grease burns out. Use caution when opening the lid as sudden flare-ups may occur. If excessive flare-ups occur, DO NOT pour water onto the flames. MINIMIZING FLARE UPS • Trim excess fat from meats prior to cooking.
- Page 25 Operating instruction TIPS FOR BETTER COOKOUTS A ND LONGER GRILL LIFE • To reduce flare-ups keep the charcoal grill clean, use lean cuts of meat (or trim fat) and avoid cooking on very high temperatures. • Place delicate foods like fish and vegetables in aluminum foil pouches and indirect grill or place on upper cooking levels (warming rack), if available. • To avoid losing natural juices, use long handled tongs or spatulas instead of forks and turn foods over just once during cooking. • When indirect grilling roasts and larger cuts of meat, place meat onto a roasting rack inside a heavy gauge metal pan. • Try water pans to reduce flare-ups and cook juicier meats. Before starting coals remove cooking grids and place a heavy duty shallow pan directly on charcoal grid. Fill half way with water, fruit juices or other flavored liquids. Place coals around grid per “Lighting Instructions”, replace cooking grids and position food over the loaded pan. • Enhance food flavors by using wood chips in smoker boxes or aluminum foil pouches. Follow the wood manufacturer’s instructions. • Rotisseries, charcoal grill baskets, vertical poultry holders and other accessories can enhance your experiences, reduce cooking times and aid in clean up. • Clean cooking grids and racks after every use with a quality charcoal grill brush designed for your grid material. Wear protective hand gear and gently remove the build-up while grids are hot. • Allow charcoal grill to fully cool after every use. Then protect clean cooking grids with a light coat of vegetable oil or vegetable spray, clean out all ashes, wipe outside surfaces with a suitable kitchen cleaner and protect surfaces with a quality cover that properly fits your grill.
-
Page 26: Cleaning & Care
Cleaning & care CLEANING & CARE CAUTION! All cleaning and maintenance should be done when charcoal grill is cool and with the fuel supply removed. NOTICES • Abrasive cleaners will damage this product. • Never use oven cleaner to clean any part of this charcoal grill. CLEANING SURFACES • Wipe surfaces clean with mild dishwashing detergent or baking soda. • For stubborn surfaces use a citrus based degreaser and a nylon scrubbing brush. • Rinse clean with water and dry immediately. TIPS • Keep charcoal grill covered when not in use to help prevent rust. • Applying a light coat of vegetable oil or vegetable spray to the interior surfaces of the charcoal grill can help prevent rust. DO NOT coat charcoal grate or bottom of bowl. - Page 27 Notes...
- Page 28 Contenido Información importante de seguridad . . . . . . . . . . . . . . . . . . 29 Preparación .
-
Page 29: Información Importante De Seguridad
Instrucciones de seguridad ¡USAR AL AIRE LIBRE! ¡NUNCA USAR EN INTERIORES! PELIGRO DE MONÓXIDO DE CARBONO Quemar carbón en interiores puede ser fatal. Emite monóxido de carbono, un gas inodoro. NUNCA queme carbón en espacios cerrados. Lea y siga todas las instrucciones del fabricante antes de comenzar el ensamblaje u operación. De no hacerlo podría provocar un incendio, quemaduras, u otras lesiones personales graves. - Page 30 Instrucciones de seguridad COLOCACIÓN SEGURA DE LA PARRILLA ADVERTENCIA • ¡Esta parrilla es PARA USAR SOLAMENTE EN EXTERIORES! NUNCA use esta parrilla en un área cerrada o bajo una cubierta elevada de ningún tipo, incluyendo una tienda de campaña, techo de patio, o cualquier otro edificio o estructura. •...
- Page 31 Instrucciones de seguridad ENCENDIDO SEGURO DEL CARBÓN ADVERTENCIA • Recomendamos utilizar un encendedor de chimeneas de carbón para evitar los peligros de un líquido para encender el carbón. SIEMPRE lea y siga las instrucciones y advertencias del fabricante del encendedor de chimeneas . El no hacerlo podría resultar en lesiones graves . •...
- Page 32 Instrucciones de seguridad USO SEGURO DE LA PARRILLA ADVERTENCIA • Las tapas son pesadas, y estarán extremadamente calientes durante y después de su uso. • Tapa extraíble: NUNCA coloque la tapa caliente sobre la hierba, muebles, terrazas de madera o materiales combustibles. •...
-
Page 33: Preparación
Instrucciones de seguridad PREPARACIÓN • NO DEVUELVA EL PRODUCTO A LA TIENDA • Para obtener ayuda, envíe un correo electrónico a customerservice@sanxinint.com o llame al 855-328-4769 . • Tenga el manual del usuario y el número de modelo disponibles como referencia. • Para evitar la pérdida de los componentes o piezas pequeños, arme su producto sobre una superficie nivelada que no tenga grietas o aberturas. -
Page 34: Vista Desglosada
Vista desglosada VISTA DESGLOSADA... -
Page 35: Lista De Piezas
Lista de piezas LISTA DE PIEZAS 1) P ata trasera con 2) P ata trasera 3) P ata delantera 4) P ata delantera 5) E stante de rueda (1pc) estacionaria con rueda (1pc) estacionaria alambre (1pc) (1pc) (1pc) 6) S oporte de la 7) Ruedas (2pcs) 8) Eje (1pc) 9) Recipiente (1pc) 10) Pieza de pata izquierda soporte del estante (1pc) delantero (2pcs) 11) E stante 12) R espiradero 13) S oportes del 14) E stante lateral... -
Page 36: Hardware Y Herramientas
Hardware y herramientas HARDWARE Y HERRAMIENTAS A) T ornillos M6*42 B) T uercas con C) T ornillos M6*12 D) T ornillos M6*20 E) A randelas (x 12) brida M6 (x 14) (x 18) (x2) M6*18 (x2) F) T ornillos M5*10 G) P asadores de las H) C lavijas del I) C lavijas de la J) Contratuercas (x6) bisagras (x2) pasador de rejilla de M10 (x2) -
Page 37: Instrucciones De Ensamblaje
Instrucciones de ensamblaje INSTRUCCIONES DE ENSAMBLAJE PASO 1 Conectar la pata trasera con rueda (1) y la pata trasera estacionaria (2). Conectar la pata delantera con rueda (3) y la pata delantera estacionaria (4). PASO 2 Inserte el estante de alambre (5) en los orificios de la parte interior de las patas (1) y (2) y de las patas (3) y (4). Parar las patas en posición vertical. - Page 38 Instrucciones de ensamblaje PASO 3 Instalar el soporte de la pata izquierda (6) en las patas (2) y (4) usando los tornillos M6*42 (A) y las tuercas con bridas M6 (B). Instalar el soporte de la pata derecha (31) utilizando el mismo hardware del soporte de la pata izquierda. No apriete los tornillos hasta que complete el paso 5. Insertar el eje (8) a través de los agujeros en la parte inferior de las patas (1) y (3). Poner las ruedas (7) en los extremos del eje. Enroscar las contratuercas M10 (K) en cada extremo del eje y apretar con la llave (O). PASO 4 Poner el recipiente (9) sobre la parte superior de las patas. Tenga en cuenta que los agujeros para las bisagras deben estar en la parte trasera de la parrilla. Montar la pieza de soporte del estante delantero (10) y el recipiente (9) a través de las patas (3) y (4) usando los tornillos de M6*42 (A) y las tuercas con brida M6 (B). Montar el recipiente (9) a través de las patas (1) y (2) usando los tornillos M6*42 (A) y las tuercas con brida M6 (B).
- Page 39 Instrucciones de ensamblaje PASO 5 Fijar el frente del estante (11) al frente del recipiente (9) utilizando los tornillos M6*12 (C). Instalar la pieza de soporte del estante delantero (10) al estante delantero (11) utilizando los tornillos M6*12 (C). Nota: apretar ahora todos los tornillos de sujeción de los pasos 1 a 5. PASO 6 Fijar el respiradero (12) al recipiente utilizando un tornillo M6*12 (C) y una tuerca con brida M6 (B). No apriete en exceso, el respiradero debe moverse libremente.
- Page 40 Instrucciones de ensamblaje PASO 7 Instalar uno de los soportes del estante lateral (13) al orificio ubicado en la parte lateral delantera del recipiente con los tornillos M6*12 (C). PASO 8 Poner el estante lateral (14) en el soporte del estante lateral anteriormente montado (13). Colocar el segundo soporte del estante lateral (13) en el otro lado del estante lateral (14). Fijar el soporte lateral del estante (13) a la parte trasera del recipiente usando los tornillos M6*12 (C).
- Page 41 Instrucciones de ensamblaje PASO 9 Fijar las bisagras de la tapa (18) en ambos lados de la tapa usando los tornillos M5*10 (F). PASO 10 Quitar la tuerca, resorte y tapa de la chimenea de la chimenea. Instalar la chimenea (19) en la tapa utilizando los tornillos M6*12 (C). Volver a montar la tapa de la chimenea, resorte y tuerca.
- Page 42 Instrucciones de ensamblaje PASO 11 Fijar la agarradera de la tapa (16) y los espaciadores de la agarradera de la tapa (15) a la tapa con las arandelas M6*18 (F) y los tornillos M6*20 (D). PASO 12 Desenroscar la tuerca pre-ensamblada del medidor de temperatura (20). Colocar el medidor de temperatura (20) en la tapa y volver a montar la tuerca.
- Page 43 Instrucciones de ensamblaje PASO 13 Alinear los orificios de las bisagras de la tapa y los del recipiente. Poner el pasador de bisagra (H) a través de los orificios de la tapa y del recipiente. Insertar la clavija (I) a través del orificio en el pasador de bisagra (H). PASO 14 Instalar la rejilla de calentamiento (21) dentro del recipiente y la tapa. Insertar las clavijas (J) a través de los orificios en la rejilla de calentamiento.
- Page 44 INSTRUCCIONES DE ENSAMBLAJE PASO 15 Utilice los soportes de la bandeja para carbón (22) para bajar la bandeja para carbón (23) en la base de la parrilla. Apoyar los soportes de la bandeja para carbón (22) en los apoyos dentro del recipiente. PASO 16 Colocar las parrillas de cocción (24) en el borde de sostén del recipiente.
- Page 45 Instrucciones de ensamblaje PASO 17 Atornillar parcialmente dos tornillos M6*12 (C) al recipiente de la parrilla como se muestra a continuación. Instalar la pieza de soporte del fogón (32) al soporte de la pata derecha (31) utilizando dos tornillos M5*15 (L). PASO 18 Instalar la agarradera del fogón (25) y los espaciadores del fogón (26) a la tapa del fogón (30) con tornillos M5 *10 (M) y arandelas M5 *14 (K). Poner juntas las dos piezas del fogón. Alinear y asentar los tornillos de la pieza superior con los orificios de la pieza inferior como se muestra. Trancar los cuatro tornillos y orificios en posición deslizando la pieza superior a la derecha.
- Page 46 Instrucciones de ensamblaje PASO 19 Apretar los seis tornillos pasantes M5*15 (L) como se muestra. Colgar el fogón en los dos tornillos apretados parcialmente del paso 17. PASO 20 Utilice un tornillo M5*15 (L) desde el interior del fogón a través del agujero y apretar en la pieza de soporte del fogón. Apriete todos los tornillos (C) del paso 17 y adicione cuatro tornillos M6*12 (C) para conectar el fogón a la parrilla.
- Page 47 Instrucciones de ensamblaje PASO 21 Colocar la rejilla de cocción del fogón (28) sobre los bordes de sostén del cuerpo del fogón. PASO 22 Fijar la agarradera del fogón (25) y los espaciadores del fogón (26) a la bandeja para carbón (27) con las arandelas M5*14 (H) y tornillos M5*15 (K). Fijar el respiradero (12) a la bandeja para carbón del fogón (27) como se muestra a continuación utilizando un tornillo M5*10 (C) y una tuerca con brida M6 (B).
- Page 48 Instrucciones de ensamblaje PASO 23 Deslizar la bandeja para carbón del fogón (27) en el fogón, como se muestra a c ontinuación.
-
Page 49: Cuidado Y Mantenimiento
Cuidado y mantenimiento CUIDADO Y MANTENIMIENTO • Lavar las parrillas de cocción y rejillas para el carbón con agua caliente jabonosa. En- juáguelas bien y séquelas completamente con un paño para prevenir la oxidación. • Limpiar el interior y exterior de la parrilla frotándola con un paño húmedo. Aplique una capa ligera de aceite vegetal o aceite vegetal en aerosol a las superficies interiores para evitar la oxidación, pero no lo haga en la rejilla para el carbón. • Si aparece óxido en el exterior de su parrilla, limpiar y pulir al área afectada con un estropajo de acero o una lija de grano fino. Retocar las manchas con una pintura resistente al oxido de alta calidad. • NUNCA APLIQUE LA PINTURA A LA SUPERFICIE INTERIOR. Hacerlo podría provocar un incen- dio con daños corporales graves o daños a la propiedad. • Si aparece óxido en la superficie interior de la parrilla, limpiar y pulir el área afectada con un estropajo de acero o una lija de grano fino. Cubra el interior ligeramente con aceite vegetal o aceite vegetal en aerosol. INSTRUCCIONES DE FUNCIONAMIENTO • Sólo use briquetas con alto grado de carbón, carbón en trozos, madera para cocinar o m ezclas de carbón/madera. • Se pueden usar astillas y trozos de madera para obtener un sabor más robusto. Las astillas de madera están disponibles en una variedad de sabores. • Si aparece óxido en el exterior de su parrilla, limpiar y pulir al área afectada con un estropajo de acero o una lija de grano fino. Retocar las manchas con una pintura resistente al oxido de alta calidad. • NUNCA APLIQUE LA PINTURA A LA SUPERFICIE INTERIOR. Hacerlo podría provocar un i ncendio con daños corporales graves o daños a la propiedad. • Si aparece óxido en la superficie interior de la parrilla, limpiar y pulir el área afectada con un estropajo de acero o una lija de grano fino. Cubra el interior ligeramente con aceite vegetal o aceite vegetal en aerosol. PRIMER USO • Por favor asegúrese de que todas las etiquetas, embalajes y láminas protectoras se han extraído de la parrilla de carbón. • Elimine los aceites de fabricación antes de usar la parrilla de carbón por primera vez. - Page 50 Instrucciones de funcionamiento INSTRUCCIONES PARA EL ENCENDIDO • Amontone las briquetas de carbón o madera en una pila en forma de pirámide en la parte superior de la rejilla del carbón. Recomendamos usar 2 libras (1 kg) (aproximadamente 30 briquetas) para empezar el fuego, añadiendo más si es necesario. • Si utiliza líquido de encendido, sature las briquetas de carbón con el líquido de encendido y déjelas que lo absorban aproximadamente 5 minutos. Si utiliza un encendedor de chime- nea, encendedor eléctrico, u otro tipo de iniciador del fuego, encienda su fuego de acuerdo con las instrucciones del fabricante. • Después de permitir que el líquido de encendido se absorba apropiadamente, encienda la pila de briquetas por varios lados para garantizar una combustión uniforme. SIEMPRE encienda el fuego con la tapa de la parrilla abierta. Deje la tapa abierta hasta que las b riquetas estén totalmente encendidas. El no hacerlo podría atrapar los vapores del líquido de encendido en la parrilla y puede resultar en un incendio repentino al abrir la tapa. • Nunca agregue líquido de encender carbón a las brasas calientes o tibias pues pueden ocurrir llamaradas causando lesiones. • Usted está listo para empezar a cocinar cuando la pila de briquetas se haga cenizas y pro- duzca una incandescencia roja (aproximadamente de 10 a 15 minutos). • Dependiendo de su método de cocción, deje las briquetas en una pila o distribúyalas de forma uniforme a través de la rejilla para carbón con una herramienta de mango largo. SIEMPRE tenga cuidado al manipular las brasas.
- Page 51 Instrucciones de funcionamiento ASADO DIRECTO A sar a la parrilla directamente sobre las brasas es ideal para dorar en los jugos y asar los alimentos que requieran menos de 25 minutos de tiempo de cocción, tales como filetes, hamburguesas, perros calientes, trozos de pollo, verduras y frutas. • Abra la tapa y extraiga la parilla de cocción. • Eche y encienda el carbón según la sección “Instrucciones de encendido.” Deje la tapa abierta. • Usando protección para las manos, extienda cuidadosa y uniformemente las brasas a través de la rejilla de carbón con una herramienta de mango largo. • Usando protección para las manos, vuelva a colocar la parilla de cocción, cierre la tapa y deje que la rejilla de carbón se precaliente. • Usando protección para las manos, abra la tapa y coloque los alimentos en la rejilla de cocción encima de las brasas con una herramienta de mango largo. • Con la tapa abierta o cerrada, cocine hasta que se alcancen las temperaturas internas deseadas de los alimentos. • Deje que el carbón se queme completamente cerrando la tapa y todos los conductos de venti- lación. • Para más consejos sobre el asado directo vea la sección “Consejos para una mejor cocina al aire libre y mayor vida útil de la parrilla.”...
- Page 52 Instrucciones de funcionamiento ASADO INDIRECTO No cocinar directamente sobre las brasas es ideal para la cocción lenta y asar alimentos que requieran más de 25 minutos tales como la mayoría de los asados, lomos, chuletas, pollos enteros, pavo, pescado y productos horneados. • Abra la tapa y extraiga la parilla de cocción. • Eche y encienda el carbón según la sección “Instrucciones de encendido.” Deje la tapa abierta. • Usando protección para las manos, extienda cuidadosamente las brasas al exterior de la rejilla de carbón con una herramienta de mango largo. • Usando protección para las manos, vuelva a colocar la parilla de cocción, cierre la tapa y deje que la rejilla de carbón se precaliente. • Usando protección para las manos abra la tapa. Utilice una herramienta de mango largo para colocar los alimentos en las rejillas de cocción sobre la zona sin brasas. • Con la tapa cerrada, cocine hasta que se alcancen las temperaturas internas deseadas de los alimentos. • Deje que el carbón se queme completamente cerrando la tapa y todos los conductos de ventilación. • Para más consejos sobre el asado indirecto vea la sección “Consejos para una mejor cocina al aire libre y mayor vida útil de la parrilla.” CONTROL DE LAS LLAMARADAS • Las llamaradas son una parte de cocinar carnes en una parrilla de carbón y contribuyen al sabor único de la parrillada. • Las llamaradas excesivas pueden quemar los alimentos y producir una situación peligrosa para usted y su parrilla de carbón. Las llamaradas excesivas son el resultado de la acumu- lación de grasa en la parte inferior de su parrilla de carbón. • Si la grasa se incendia, cierre la tapa hasta que la grasa se queme por completo. Tenga cuidado cuando abra la tapa ya que se pueden producir llamaradas repentinas. • Si se producen llamaradas excesivas, NO eche agua a las llamas.
- Page 53 Instrucciones de funcionamiento PARA MINIMIZAR LAS LLAMARADAS • Recorte el exceso de grasa de la carne antes de cocinarla. • Cocine las carnes con alto contenido de grasa de manera indirecta. • Asegúrese de que su parrilla de carbón está en una superficie nivelada y dura no combustible. CONSEJOS PARA UNA MEJOR COCINA AL AIRE LIBRE Y MAYOR VIDA UTIL DE LA PARRILLA • Para reducir las llamaradas, mantenga la parrilla de carbón limpia, utilice cortes magros de carne (o recorte la grasa) y evite cocinar a temperaturas muy altas. • Coloque los alimentos delicados como el pescado y las verduras en bolsas de papel de aluminio y áselos indirectamente o póngalos en el nivel superior de cocción (rejilla de calentamiento), si está disponible. • Para evitar la pérdida de los jugos naturales, use pinzas o espátulas de mango largo en lugar de tenedores, y voltee los alimentos solamente una vez durante la cocción. • Cuando ase indirectamente asados y trozos grandes de carne, coloque la carne en una parrilla de asar en el interior de un recipiente grueso de metal. • Pruebe usar recipientes con agua para reducir las llamaradas y cocinar carnes más jugosas. Antes de adicionar carbón remueva las rejillas de cocción y coloque un recipiente grueso poco profundo directamente en la parrilla de carbón. Llénelo hasta la mitad con agua, jugos de frutas u otros líquidos condimentados. Coloque los carbones alrededor de la rejilla guiándose por las “Instrucciones de encendido,” reemplace las rejillas de cocción y coloque los alimentos sobre el recipiente lleno.
-
Page 54: Limpieza Y Cuidado
Limpieza y cuidado LIMPIEZA Y CUIDADO ¡PRECAUCIÓN! • Toda limpieza y mantenimiento se debe realizar cuando la parrilla de carbón está fría y con el suministro de combustible removido. AVISOS • Los limpiadores abrasivos dañarán este producto. • Nunca use un limpiador de hornos para limpiar ninguna parte de esta parrilla de carbón. PARA LIMPIAR LAS SUPERFICIES • Limpie las superficies con un detergente suave para lavar platos o bicarbonato de sodio. • Para las superficies tercas de limpiar utilice un desgrasante a base de cítricos y un cepillo de fregar de nailon. • Enjuagar con agua y secar inmediatamente. CONSEJOS • Mantenga la parrilla de carbón cubierta cuando no esté en uso para evitar la oxidación. • La aplicación de una capa ligera de aceite vegetal o aceite vegetal en aerosol a las superfi- cies interiores de la parrilla de carbón puede ayudar a prevenir la oxidación. NO recubra la rejilla para carbón o el fondo del recipiente. - Page 55 Date of purchase* ________________ * We recommend you keep the receipt with this warranty card Location of purchase _______________________________________________________________ Description of malfunction: AFTER SALES SUPPORT PRODUCT CODE: 52916 Return your completed warranty card 1-855-328-4769 together with the faulty product to: customerservice@sanxinint.com Sanxin International, Ltd.
-
Page 56: Aldi Full Warranty Conditions
ALDI INC . FULL WARRANTY CONDITIONS Dear Customer, The ALDI warranty is a full warranty offering you the following benefits. Warranty period: 2 year from date of purchase. 6 months for movable parts and consumables under normal and proper c onditions of use (e.g. rechargeable batteries). Costs: F ree repair/exchange or refund. No transport costs. ADVICE: Please contact our service hotline by phone, e-mail or fax before sending in the device . This allows us to provide support in the event of possible operator errors . - Page 57 Fecha de compra* ________________ *Recomendamos guardar el recibo junto con esta tarjeta de garantía Lugar de compra __________________________________________________________________ Descripción del defecto: SERVICIO POSVENTA PRODUCT CODE: 52916 Envíe la tarjeta de garantía rellenada junto 1-855-328-4769 con el producto defectuoso a: customerservice@sanxinint.com Sanxin International, Ltd.
-
Page 58: Condiciones De La Garantía Completa De Aldi Inc
CONDICIONES DE LA GARANTÍA COMPLETA DE ALDI INC . Estimado cliente: La Garantía ALDI es una garantía completa que la ofrece los siguientes beneficios: Pedriodo de garantía: 2 años a partir de la fecha de compra. 6 meses para piezas de recambio y consumibles en condiciones normales y adecuadas de uso (por ejemplo, baterías recargables) Costes: R eparación/sustitución gratis o reembolso No hay costos de transporte AVISO: Póngase en contacto con nuestra linea directa de atención por teléfono, correo electrónico o fax antes de retornar el producto. Esto nos permite proporcionar ayuda en caso de posibles errores del operador . - Page 59 Notas...
- Page 60 DISTRIBUTED BY • DISTRIBUIDO POR: ALDI INC., BATAVIA, IL 60510 WWW.ALDI.US AFTER SALES SUPPORT • SERVICIO POSVENTA 52916 1-855-328-4769 customerservice@sanxinint.com YEAR WARRANTY AÑOS DE GARANTÍA MODEL: RMBA-3001X 06/2017...
Need help?
Do you have a question about the 52916 and is the answer not in the manual?
Questions and answers