
Subscribe to Our Youtube Channel
Related Manuals for Range Master 47262


Summary of Contents for Range Master 47262
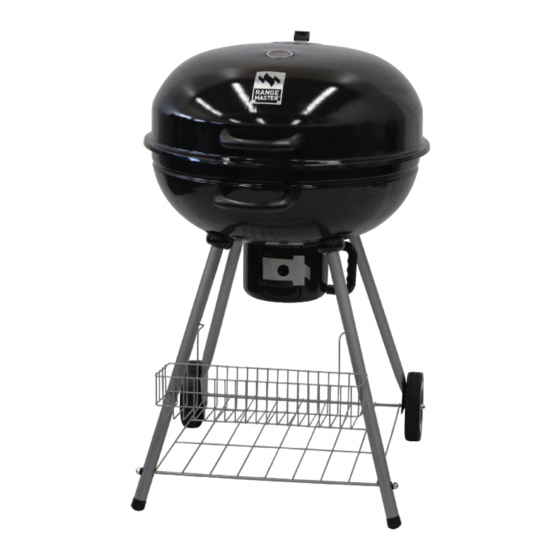
- Page 1 User Manual Manual del usuario 22.5 INCH CHARCOAL KETTLE GRILL PARRILLA A CARBÓN DE 22.5 PULGADAS English... 2 Español ..20...
-
Page 2: Table Of Contents
Contents Important Safety Information ..... Preparation ......Parts List . -
Page 3: Important Safety Information
Safety instructions OUT DOOR USE ONLY! NEVER USE INDOORS! CARBON MONOXIDE HAZARD Burning charcoal inside may be fatal. It gives off carbon monoxide, which has no odor. NEVER burn charcoal in enclosed spaces. Read and follow all of the manufacturer’s instructions before beginning assembly or operation. - Page 4 Safety instructions GRILL PREPARATION SAFETY WARNING • DO NOT use this grill without the ash catcher (if available), ash pan, or ash tray in place. • DO NOT use this grill unless all parts are in working condition and properly installed. CHARCOAL LIGHTING SAFETY WARNING •...
- Page 5 Safety instructions GRILL USE SAFETY WARNING • DO NOT use the grill in windy conditions. • NEVER leave a hot grill unattended. • Grill is hot when in use. To avoid burns: • DO NOT attempt to move the grill while lit or still hot. •...
-
Page 6: Preparation
Preparation PREPARATION • TO AVOID LOSING ANY SMALL COMPONENTS OR HARDWARE, ASSEMBLE YOUR PRODUCT ON A LEVEL SURFACE THAT DOES NOT HAVE CRACKS OR OPENINGS. • CLEAR AN AREA LARGE ENOUGH TO LAY OUT ALL COMPONENTS AND HARDWARE THAT IS SOFT ENOUGH TO NOT SCRATCH OR DAMAGE ANY SURFACE FINISHES. •... -
Page 7: Parts List
Parts list PARTS LIST ITEM DESCRIPTION ILLUSTRATION Top Lid Bottom Bowl Cooking Grid Charcoal Grate Warming Rack Ash Catcher Stationary Legs (Round Feet) Wheel Legs (Narrow at End) Lid Vent... - Page 8 Parts list PARTS LIST (continued) ITEM DESCRIPTION ILLUSTRATION Wheels Wire Shelf Leg Bowls Handles Upper Right Hinge Upper Left Hinge Lower Left Hinge Lower Right Hinge Condiment Basket Ash Catcher Handle Temperature Gauge...
-
Page 9: Hardware & Tools
Parts list HARDWARE LIST The following tools are needed for assembly: Star-head Screwdriver and Adjustable Wrench (not provided). ITEM DESCRIPTION ILLUSTRATION Hardware Kit 1-5/8" Leg Bolts 1/2" Lid Vent Bolt 3/8" Hinge Bolts Handle Bolts Lid Vent Lock Nut Hinge Nuts Wheel Lock Nuts Metal Washers (Hinges &... -
Page 10: Assembly Instructions
Assembly instructions STEP 1 Insert Lid Vent Bold (2) through the Lid Vent (I) and the Top Lid (A). Thread the Lid Vent Lock Nut (5) onto the Lid Vent Bolt (2). Tighten with a screwdriver and adjustable wrench. Place Temperature Gauge (T) into the Top Lid (A) and use the preassembled hardware to secure it into the Top Lid. - Page 11 Assembly instructions STEP 3 Insert Bolts (1) through the Large Metal Washers (9), Bottom Bowl (B), Leg Bowls (L) and thread into the Stationary Legs (G). Repeat this process to attach the Wheel Legs (H) to the Bottom Bowl (B). STEP 4 Align the leg holes with the ends of the Wire Shelf (K).
- Page 12 Assembly instructions STEP 5 To attach the Upper Right Hinge (N) and Upper Left Hinge (O), insert the Hinge Bolts (3) through the Metal Washers (8), Upper Hinge, Top Lid (A) and Fiber Washers (10). Thread the Wing Nuts (14) onto the Hinge Bolts. To attach the Lower Right Hinge (Q) and Lower Left Hinge (P), insert the Hinge Bolts (3) through the Metal Washers (8), Lower...
- Page 13 Assembly instructions STEP 7 To assemble the Ash Catcher (F), insert 2 Handle Bolts (4) through 2 Metal Washers (8), Ash Catcher (F), 2 Fiber Washers (10) and thread into the Ash Catcher Handle (S). Slide the assembled Ash Catcher into the slots on the right side of the Bottom Bowl (B). Attach Warming Rack (E) to the Top Lid (A) and Bottom Bowl (B) by inserting the ends at the back of the Warming Rack into the holes on each side of the Top Lid (A) and the wire handles at the front bottom of the Warming Rack into the holes on each side of the Bottom Bowl (B).
-
Page 14: Care & Maintenance
Care & maintenance CARE & MAINTENANCE • Wash cooking grids and charcoal grates with hot, soapy water. Rinse well and dry complete- ly with a towel. NEVER allow grates to drip dry, or dry in a dishwasher, as rusting may occur. •... -
Page 15: Lighting Instructions
Operating instructions LIGHTING INSTRUCTIONS • Stack charcoal briquettes or wood into a pyramid-shaped pile on top of the charcoal grate. We recommend using 2 lb (1 kg) (approximately 30 briquettes) to start your fire, adding more as needed. • If using starter fluid, saturate the charcoal briquettes with starter fluid and let it soak in for approximately 5 minutes. - Page 16 Operating instructions INDIRECT GRILLING Not cooking directly over hot coals is ideal for slow cooking and grilling foods requiring more than 25 minutes such as most roasts, loins, chops, whole chickens, turkey, fish and baked goods. • Open lid and remove cooking grid. •...
-
Page 17: Cleaning & Care
Cleaning & care TIPS FOR BETTER COOKOUTS A ND LONGER GRILL LIFE • To reduce flare-ups, keep the charcoal grill clean, use lean cuts of meat (or trim fat) and avoid cooking at very high temperatures. • Place delicate foods like fish and vegetables in aluminum foil pouches and indirect-grill or place on upper cooking levels (warming rack), if available. -
Page 18: Limited Warranty
Cleaning & care TIPS • Keep charcoal grill covered when not in use to help prevent rust. • Applying a light coat of vegetable oil or vegetable spray to the interior surfaces of the charcoal grill can help prevent rust. DO NOT coat charcoal grate or bottom of bowl. - Page 19 Notes...
- Page 20 Contenido Información importante de seguridad ....21 Preparación ......22 Lista de piezas .
-
Page 21: Información Importante De Seguridad
Instrucciones de seguridad ¡USAR AL AIRE LIBRE! ¡NUNCA USAR EN INTERIORES! PELIGRO DE MONÓXIDO DE CARBONO Quemar carbón en interiores puede ser fatal. Emite monóxido de carbono, un gas inodoro. NUNCA queme carbón en espacios cerrados. Lea y siga todas las instrucciones del fabricante antes de comenzar el ensamblaje u operación. De no hacerlo podría provocar un incendio, quemaduras, u otras lesiones personales graves. -
Page 22: Preparación
Instrucciones de seguridad COLOCACIÓN SEGURA DE LA PARRILLA ADVERTENCIA • ¡Esta parrilla es PARA USAR SOLAMENTE EN EXTERIORES! NUNCA use esta parrilla en un área cerrada o bajo una cubierta elevada de ningún tipo, incluyendo una tienda de campaña, techo de patio, o cualquier otro edificio o estructura. •... - Page 23 Instrucciones de seguridad ENCENDIDO SEGURO DEL CARBÓN ADVERTENCIA • Recomendamos utilizar un encendedor de chimeneas de carbón para evitar los peligros de un líquido para encender el carbón. SIEMPRE lea y siga las instrucciones y advertencias del fabricante del encendedor de chimeneas. El no hacerlo podría resultar en lesiones graves. •...
- Page 24 Instrucciones de seguridad SEGURIDAD POSTERIOR AL USO ADVERTENCIA • SIEMPRE permita que la parrilla y todos los componentes se enfríen completamente antes de manipularla. • NO quite las cenizas o brasas usadas de la parrilla hasta que se hayan extinguido por completo.
-
Page 25: Lista De Piezas
Lista de piezas LISTA DE PIEZAS ARTÍCULO CANTIDAD DESCRIPCIÓN ILUSTRACIÓN Tapa superior Tazón inferior Parrilla de cocción Rejilla del carbón Estante para calentar Recogedor de cenizas Patas fijas (base redonda) Patas con ruedas (estrechas en el extremo) Rejilla de ventilación de la tapa... - Page 26 Lista de piezas LISTA DE PIEZAS (CONTINUACIÓN) ARTÍCULO CANTIDAD DESCRIPCIÓN ILUSTRACIÓN Ruedas Estante de alambre Patas del tazón Asas Bisagra superior derecha Bisagra superior izquierda Bisagra inferior izquierda Bisagra inferior derecha Cesto de condimentos Asa del recogedor de cenizas Medidor de temperatura...
-
Page 27: Hardware Y Herramientas
Hardware y herramientas LISTA DEL HARDWARE Para el ensamblaje se necesitan las siguientes herramientas : Destornillador de estrías y llave ajustable (no se incluyen). ARTÍCULO CANTIDAD DESCRIPCIÓN ILUSTRACIÓN Juego de hardware Tornillos de 1-5/8” de las patas Tornillos de ½” de la rejilla de ventilación de la tapa Tornillos de 3/8”... -
Page 28: Instrucciones De Ensamblaje
Instrucciones de ensamblaje PASO 1 Inserte el tornillo de la rejilla de venti- lación de la tapa (2) a través de la rejilla de la tapa (I) y la tapa superior (A). Enrosque la contratuerca de la rejilla de ventilación de la tapa (5) en el tornillo de la rejilla (2). - Page 29 Instrucciones de ensamblaje PASO 3 Inserte los tornillos (1) a través de las arandelas grandes de metal (9), tazón inferior (B), patas del tazón (L) y en- rósquelos en las patas estacionarias (G). Repita este proceso para unir las patas con ruedas (H) al tazón inferior (B).
- Page 30 Instrucciones de ensamblaje PASO 5 Para colocar la bisagra superior derecha (N) y la bisagra superior izquierda (O), inserte los tornillos de las bisagras (3) a través de las arandelas de metal (8), bisagra superior, tapa superior (A) y arandelas de fibra (10). Enrosque las tuercas de mariposa (14) en los tornillos de las bisagras.
- Page 31 Instrucciones de ensamblaje PASO 7 Para montar el recogedor de cenizas (F), inserte los 2 tornillos del asa (4) a través de 2 arandelas de metal (8), recogedor de cenizas (F), 2 arandelas de fibra (10) y enrósquelos en el asa del recogedor de cenizas (S). Deslice el recogedor de cenizas ensamblado en las ranuras de la parte derecha del tazón inferior (B).
-
Page 32: Cuidado Y Mantenimiento
Cuidado y mantenimiento CUIDADO Y MANTENIMIENTO • Lave la parilla de cocción y la rejilla para el carbón con agua caliente jabonosa. Enjuáguelas bien y séquelas completamente con un paño. NUNCA permita que las rejillas se sequen escur- riéndolas, ni las seque en el lavavajillas, ya que podrían oxidarse. •... - Page 33 Instrucciones de funcionamiento INSTRUCCIONES PARA EL ENCENDIDO • Amontone las briquetas de carbón o madera en una pila en forma de pirámide en la parte superior de la rejilla del carbón. Recomendamos usar 2 libras (1 kg) (aproximadamente 30 briquetas) para empezar el fuego, añadiendo más si es necesario. •...
- Page 34 Instrucciones de funcionamiento ASADO DIRECTO Asar a la parrilla directamente sobre las brasas es ideal para dorar en los jugos y asar los alimentos que requieran menos de 25 minutos de tiempo de cocción, tales como filetes, hamburguesas, perros calientes, trozos de pollo, verduras y frutas. •...
- Page 35 Instrucciones de funcionamiento ASADO INDIRECTO No cocinar directamente sobre las brasas es ideal para la cocción lenta y asar alimentos que requieran más de 25 minutos tales como la mayoría de los asados, lomos, chuletas, pollos enteros, pavo, pescado y productos horneados. •...
-
Page 36: Limpieza Y Cuidado
Limpieza y cuidado PARA MINIMIZAR LAS LLAMARADAS • Recorte el exceso de grasa de la carne antes de cocinarla. • Cocine las carnes con alto contenido de grasa de manera indirecta. • Asegúrese de que su parrilla de carbón está en una superficie nivelada y dura no combustible. CONSEJOS PARA UNA MEJOR COCINA AL AIRE LIBRE Y MAYOR VIDA UTIL DE LA PARRILLA •... -
Page 37: Garantía Limitada
Limpieza y cuidado LIMPIEZA Y CUIDADO PRECAUCION • Toda limpieza y mantenimiento se debe realizar cuando la parrilla de carbón está fría y con el suministro de combustible removido. AVISOS • Los limpiadores abrasivos dañarán este producto. • Nunca use un limpiador de hornos para limpiar ninguna parte de esta parrilla de carbón. PARA LIMPIAR LAS SUPERFICIES •... - Page 38 Date of purchase* ________________ * We recommend you keep the receipt with this warranty card Location of purchase _______________________________________________________________ Description of malfunction: AFTER SALES SUPPORT PRODUCT CODE: 47262 Return your completed warranty card 1-855-328-4769 together with the faulty product to: customerservice@sanxinint.com Sanxin International, Ltd.
-
Page 39: Warranty Conditons
ALDI INC. FULL WARRANTY CONDITIONS Dear Customer, The ALDI warranty is a full warranty offering you the following benefits. Warranty period: 2 year from date of purchase. 6 months for movable parts and consumables under normal and proper conditions of use (e.g. rechargeable batteries). Costs: Free repair/exchange or refund. - Page 40 Fecha de compra* ________________ *Recomendamos guardar el recibo junto con esta tarjeta de garantía Lugar de compra __________________________________________________________________ Descripción del defecto: SERVICIO POSVENTA PRODUCT CODE: 47262 Envíe la tarjeta de garantía rellenada junto 1-855-328-4769 con el producto defectuoso a: customerservice@sanxinint.com Sanxin International, Ltd.
-
Page 41: Condiciones De La Garantía
CONDICIONES DE LA GARANTÍA COMPLETA DE ALDI INC. Estimado cliente: La Garantía ALDI es una garantía completa que la ofrece los siguientes beneficios: Período de garantía: 2 años a partir de la fecha de compra. 6 meses para piezas de recambio y consumibles en condiciones normales y adecuadas de uso (por ejemplo, baterías recargables) Costes:... - Page 42 Notas...
- Page 43 Notas...
- Page 44 DISTRIBUTED BY • DISTRIBUIDO POR: ALDI INC., BATAVIA, IL 60510 WWW.ALDI.US AFTER SALES SUPPORT • SERVICIO POSVENTA 47262 1-855-328-4769 customerservice@sanxinint.com YEAR WARRANTY MODEL: RMR-2250 06/2017 AÑOS DE GARANTÍA...
Need help?
Do you have a question about the 47262 and is the answer not in the manual?
Questions and answers