
Related Manuals for Cosori C3120-PC


Summary of Contents for Cosori C3120-PC
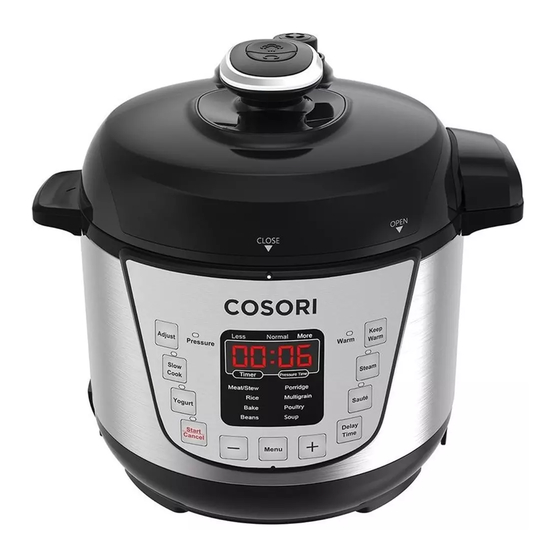
- Page 1 Electric Pressure Cooker Model No.: C3120-PC COSORI SUPPORT: Mon - Fri 9:00 AM - 5:00 PM PST (888) 402-1684 | support@cosori.com...
- Page 2 THANK YOU. Thank you for purchasing the C3120-PC Personal Electric Pressure Cooker by Cosori. We are dedicated to providing our customers with high quality products to live life tastefully. Should you have any questions or concerns about using your new product, feel free to reach out to our helpful customer support team at (888) 402-1684 or by email at support@cosori.com.
-
Page 3: Table Of Contents
Table of Contents Safety Information Product Diagram Control Panel Button Functions Operation Preparing to Cook Preset Cooking Modes Cooking Times Manual Cooking Modes Safely Removing the Lid Care & Maintenance Specifications Basic Recipe Guide Troubleshooting Warranty Information Customer Support Package Contents 1 x Pressure cooker 1 x Rice spoon 1 x Ladle... -
Page 4: Safety Information
Safety Information IMPORTANT SAFEGUARDS Please read, understand, and comply with all the instructions provided in this manual before using the device. Failure to comply with the instructions given in this manual and/or using the device in ways other than the ones mentioned in this manual may result in serious injury and/or damage to the product. - Page 5 • Check and wash the anti-clog filter and pressure release valve regularly to avoid blockage. • DO NOT open the lid when the float valve is down. • DO NOT put anything on or use other objects to replace the pressure release valve. • Never use a towel to clog the gap between the lid and edge of the Housing. • The bottom of the inner pot and heating plate should be kept clean. Do not put the inner pot on other heat sources.
-
Page 6: Product Diagram
Function Diagram CUPm Control panel 10. Inner pot Float valve 11. Sealing ring Float valve sealing ring 12. Anti-clog filter Pressure release valve 13. Measuring cup Pressure release button 14. Water collection cup Pressure release reset button 15. Ladle Lid handle 16. -
Page 7: Control Panel
Control Panel Keep Adjust Warm Pressure Warm Slow Steam Cook Meat/Stew Porridge Rice Multigrain Yogurt Sauté Bake Poultry Beans Soup Start Delay Time Cancel Digital display Slow Cook button 13. Delay Time button Adjust indicator Yogurt button 14. Sauté button Pressure indicator Start/Cancel button 15. -
Page 8: Button Functions
Button Functions Starts or cancels any cooking process; also cancels any Start selections that are made. Cancel The warming function keeps food warm for up to 24 hours when the unit is finished cooking. Press the ‘Keep Warm’ button, then the ‘Start/Cancel’ button to turn on the warming function. -
Page 9: Operation
Operation Preparing to Cook NOTE: • Thoroughly wash the inner pot before each use. • The minimum amount of ingredients needed to cook in the pressure cooker is 1/5 of the capacity of the inner pot. • The minimum amount of liquid needed for cooking is 160mL. (This may vary depending on the recipe you are following.) Open the pressure cooker by holding the lid handle and turning it clockwise to the open position. - Page 10 Place pot back into pressure cooker. Close the lid by lowering it down onto the housing; use the handle to turn the lid counterclockwise. The ‘Close’ arrow on the lid should now line up with the mark at the top of the control panel, indicating that the lid is locked into place.
-
Page 11: Preset Cooking Modes
Preset Cooking Modes If the unit is not already plugged in, connect it to a power source. The unit will beep, indicating it is in standby mode. Press the ‘Menu’ button to select a preset cooking function on the pressure cooker. -
Page 12: Manual Cooking Modes
Manual Cooking Modes NOTE: The following cooking functions have no pressure applied when selected. Slow Cook:This function allows you to cook various recipes slowly at low temperatures ranging from 204°-210°F (96°-99°C). Open the pressure cooker and detach the lid. Only use the glass lid for this feature. -
Page 13: Care & Maintenance
Unlock the lid by turning it counterclockwise, then carefully lift the lid away from your face. The steam coming out from the pressure cooker will be hot. NOTE: • For your safety, open the lid slowly. Do not open the lid before all pressure has escaped through the exhaust valve and the float valve has completely fallen back into the lid. - Page 14 OPEN UNHINGE Installation Line up sealing ring on top of metal ring. Gently push down on sealing ring, ensuring that the metal ring is inside the sealing ring’s groove as shown below. Continue pushing the sealing ring all around until it is secured by the metal ring.
-
Page 15: Specifications
Specifications Voltage: AC 120V / 60Hz Power: 720W Capacity: 2.1 Qt (2L) Inner Pot Dimensions: 6.25 x 4 in (15.8 x 10.1 cm) Working Pressure: 10 PSI (70 kPa) Keep Warm Temperature: 140-176°F (60 -80°C) Basic Recipe Guide Rice / Grains Quantity of Quantity of Setting... - Page 16 Meats / Proteins Quantity of Quantity of Setting Time Ingredients Liquid Eggs Steam 7 minutes 6 eggs 1 c water Chicken (bone- Poultry 13-16 minutes 1 ¾ lbs 1 ½ c broth in thigh and chicken ½ c BBQ drumstick) sauce Chili Verde Poultry...
-
Page 17: Troubleshooting
Troubleshooting Problem Cause Solution Lid not closing properly. Lid is not properly Properly position lid onto positioned on body. the housing. Sealing ring is not properly Check sealing ring to installed. make sure it is properly aligned inside the lid. Float valve is being Check to make sure float blocked. -
Page 18: Warranty Information
• Unsupervised use by children under 18 years of age. Cosori and its subsidiaries assume no liability for damage caused by the use of the product other than for its intended use or as instructed in the user manual. Some states do not allow this exclusion or limitation of incidental or consequential losses so the foregoing disclaimer may not apply to you. This warranty gives you specific legal... -
Page 19: Customer Support
* Please have your order confirmation number ready before contacting customer support. Thank You We thank you for purchasing a new Electric Pressure Cooker by Cosori, and we’re excited to see what you’ll cook up very soon. We’re looking forward with you to preparing many fresh meals in your kitchen with minimal operation or effort. And when we say “with you,” we mean it—our helpful... - Page 20 COSORI SUPPORT: Mon - Fri 9:00 AM - 5:00 PM PST (888) 402-1684 | support@cosori.com...
Need help?
Do you have a question about the C3120-PC and is the answer not in the manual?
Questions and answers