Advertisement
Advertisement
Table of Contents

Summary of Contents for Funlux NVR
- Page 1 NVR Security System Quick Start Guide...
-
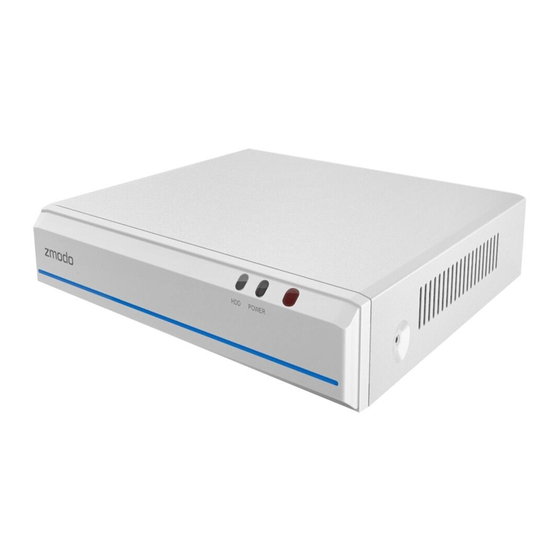
Page 2: Hdd Installation
WD10PURX hard drives. Make sure that your NVR is powered off and unplugged from the power source. Slide the cover off of the NVR. (Image may vary for your specific NVR model.) Connect the HDD to the NVR using the corresponding SATA power and data cables. - Page 3 While keeping the HDD in place, turn the NVR over and line up the holes on the HDD with the holes on the bottom of the NVR. Using the four provided HDD screws, fasten the HDD to the NVR until secure.
-
Page 4: Connecting Your System
Power indicator: Solid green The NVR is powered on. No light means that the NVR is off. HDD indicator: Solid green There is no HDD, your HDD is not recording, or there is a problem with your HDD. Blinking green The hard drive is recording properly. -
Page 5: Configuring Your System
NVR to a local display, and connect a USB mouse to control it. Note: There will be no password when you first use your NVR locally. However, we strongly recommend that you set a password after you configure your NVR. - Page 6 Remote Viewing If you want to access your system from any location with internet, you will need to configure your NVR for remote- viewing. Follow the steps below to configure your system for remote viewing: Connect your mobile device to the same WiFi network that your NVR is connected to.
- Page 7 If you’re installing your cameras outdoors, all wired connections must be weatherproofed. Before you perform any permanent installation and route wires, plug in your cameras to the NVR using the provided cables to make sure no components were damaged during shipping.
- Page 8 Position the camera for an optimal viewing angle, and tighten the bracket. (image may wary for your specific camera model) Connect the cameras to the back of the NVR using the provided simplified Power over Ethernet (sPoE) cables. Repeat steps 1-4 for all cameras in your camera kit.
-
Page 9: Viewing Options
“Add Device” menu from your NVR’s interface. Select the “Search and Add All Devices Automatically” option, and wait 3-5 minutes for the NVR to add the camera. If this fails, you can also disable the automatic search and add your camera manually. - Page 10 Support Having difficulty? You can use the Live Chat function in Funlux app if you have any technical problems. Please follow the steps below: Go to "Me" in the bottom right corner in Funlux app and select "Support". REV-A03...
Need help?
Do you have a question about the NVR and is the answer not in the manual?
Questions and answers