Table of Contents
Advertisement
Advertisement
Table of Contents

Subscribe to Our Youtube Channel
Related Manuals for Tramigo T23 Series


Summary of Contents for Tramigo T23 Series
- Page 1 Series Devices Installation Guide V1.08.5...
-
Page 2: Table Of Contents
Internal Backup Battery ................8 Recommended Installation Sequence ............ 8 3 Plan ....................9 Identifying I/O ports on your T23 Series ..........9 T23 Track Ports ..................10 Configuring I/O ports ................10 Mounting the T23 Series unit ..............11 4 Connect .................. - Page 3 10 Troubleshooting ................28 © 2007 - 2014Tramigo™ Ltd. All rights reserved. Under the copyright laws, this manual cannot be reproduced in any form without the prior written permission of Tramigo™. Page 3 of 30...
-
Page 4: Preface
Also, SIM card holder has a different design. Metal belt secures SIM card in place, see for example T23 Track image below. In this document “T23” refers to previous T23 model and “T23 Series” to T23, T23 Fleet and T23 Track. - Page 5 Unauthorized changes or alterations to the equipment or on the installation will invalidate certification issued by the Approved Accreditation Body and may also affect the vehicle manufacturers warranty. Under no circumstances may any part of the T23 Series system be installed inside the engine compartment area.
-
Page 6: Installation
2 Installation Before you begin installing and configuring the system please ensure that you have read this manual thoroughly, referring to any supplementary information provided for the T23 Series unit and user options as required. Figure 1 – T23 and T23 Fleet and Automotive Installation Kit Figure 2 –... -
Page 7: Installation Tools
2.3 Unit Location Your T23 Series unit can be mounted anywhere inside your vehicle or boat where the unit will not get wet and not exposed to excessive heat. The most common locations are behind the dashboard, under the center console, and under a side panel in the back of the vehicle. Pick a location where you can secure the unit firmly to prevent any rattling sounds after installation. -
Page 8: Personal Assistance Button Location
1. Plan the whole installation and determine suitable locations, mounting arrangements and cable routes for all hardware items. 2. Connect Fit SIM card. Temporarily mount the main T23 Series unit and temporarily connect all wiring, while still able to see the status lights on the unit. -
Page 9: Plan
3 Plan Plan your complete installation first to avoid re-wiring later. T23 Series has four inputs, T23 has three outputs and T23 Track and T23 Fleet has 2 outputs. INPUT consists of the following: OUTPUT consists of the following: 1. Ignition Sensing 1. -
Page 10: T23 Track Ports
INPUT,4,GENERAL,INPUT,1,500,ON • (1) T23: This is the correct SOS default setting when T23-ATB is used with Tramigo Intelligent Immobilizer T23 Series: When T23-ATB used as a separate accessory; INPUT,2,SOS,SOS,1,2000,ON (2) T23 Fleet and T23 Track: Output 2 is giving a ground all the time, until set ON and ground is lost. -
Page 11: Mounting The T23 Series Unit
After checking that all the functions are working properly, you are ready to permanently mount your unit. Your T23 Series unit can be mounted anywhere inside your vehicle or boat where the unit will not get wet. The most common locations are behind the dashboard, under the center console, and under a side panel in the back of the vehicle. -
Page 12: Connect
It is recommended to use a new SIM card to ensure good contact with the SIM reader. • Record the phone number of the SIM card. • NOTE: If using GPRS, be sure that SIM card is 2G GSM network compliant, T23 Series • does not support 3G/4G only SIM cards. Important Note! When inserting or removing the SIM card from the T23 Series, it is necessary to: Remember to turn off the power first before removing the battery. - Page 13 5. Put the back panel/cover. You may return the back cover loosely screwed or unscrewed since it may fit well on the unit. © 2007 - 2014Tramigo™ Ltd. All rights reserved. Under the copyright laws, this manual cannot be reproduced in any form without the prior written permission of Tramigo™. Page 13 of 30...
-
Page 14: Steps In Fitting The Sim Card To T23 Track
Note: Remember to check first the GSM signal stability before assembling the unit back, the RED light should be OFF. © 2007 - 2014Tramigo™ Ltd. All rights reserved. Under the copyright laws, this manual cannot be reproduced in any form without the prior written permission of Tramigo™. Page 14 of 30... -
Page 15: T23 Series Wiring And Connections
3 for detailed steps. 4.5 Power Connection T23 Series I/O cable is used to connect to permanent vehicle power in the fuse box or in regulated car radio output. NOTE: Permanent power source must be selected carefully. -
Page 16: Ignition Sensing Connection
Any sensor that has a digital circuit can be used, i.e. giving ON or OFF state, just note according inputs when giving Ground and when giving Voltage. © 2007 - 2014Tramigo™ Ltd. All rights reserved. Under the copyright laws, this manual cannot be reproduced in any form without the prior written permission of Tramigo™. Page 16 of 30... -
Page 17: Gps External Antenna Option
4.10 T23 Series 24V Installation Older truck installations which have been measured to provide constantly more than 24V can cause unwanted behavior, such as, T23 Series unit stops charging due to damaged I/O port; or unit stops responding; or unit hangs. -
Page 18: Configure
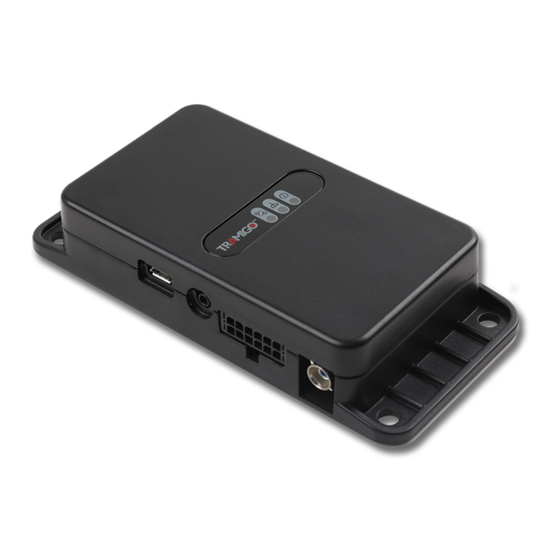
Figure 7 - T23 Track lights and button Your T23 Series has 3 lights to indicate the status of the unit. Green means OK and red and blue means that you have a problem. T23 and T23 Fleet buttons require you to press for 2 seconds to prevent accidental triggering. -
Page 19: Configuration Steps
• Tramigo: Owner, +635551234 registered This means that you are now the Owner of T23 Series and it will accept any commands that you • issue to it, provided they came from the same mobile phone number as you used for this setup. - Page 20 NOT move from where it will be fixed inside the car. To check status of installation, send: GET,INSTALLSTATUS © 2007 - 2014Tramigo™ Ltd. All rights reserved. Under the copyright laws, this manual cannot be reproduced in any form without the prior written permission of Tramigo™. Page 20 of 30...
-
Page 21: Test
Activate and deactivate the sensor and by default you should receive one (1) SMS during activation. © 2007 - 2014Tramigo™ Ltd. All rights reserved. Under the copyright laws, this manual cannot be reproduced in any form without the prior written permission of Tramigo™. Page 21 of 30... -
Page 22: Mount
7 Mount Tips: You now have an option to install the T23 Series units without the battery. This installation can be done in areas where temperature exceeds the battery operation range of 60°C. There are 2 primary methods of mounting the T23 Series unit: 1. -
Page 23: How To Remove Fakra From Gps Antenna
2. Avoid tinting the front windshield where the T23 Series unit is located (Worldwide legislative trend is to ban windshield tinting due to increased risk of accidents). 3. Leave a 15 cm gap at the bottom of the windshield and place the T23 Series by this opening. This still provides security for vehicle occupants. - Page 24 WARNINGS: T23 Series should be installed in a cool place where air can pass through to avoid • unit overheating. If you are to install T23 Series under the dashboard, make sure that upper or lower • base of the unit is touching the surface to allow air to pass through as stated above.
-
Page 25: Wiring Diagrams
Most common setup is to connect the power wires, ignition sensing and SOS button. Figure 10 – T23 Series common installation wiring diagram © 2007 - 2014Tramigo™ Ltd. All rights reserved. Under the copyright laws, this manual cannot be reproduced in any form without the prior written permission of Tramigo™. - Page 26 T23 Track is the same as T23 Fleet, excluding Analog Input and 1-Wire interface. • © 2007 - 2014Tramigo™ Ltd. All rights reserved. Under the copyright laws, this manual cannot be reproduced in any form without the prior written permission of Tramigo™. Page 26 of 30...
-
Page 27: T23 Series Accessories
9 T23 Series Accessories Figure 12 – T23 and T23 Fleet-GPS (optional) Figure 13 - T23 Series-IO (Note: Supply T23 Series model information and target usage.) Figure 14 - T23 Series-SOS (optional) Figure 15 - T23 Series-USB + T23 Series-CLA (optional) ©... -
Page 28: Form Without The Prior Written Permission Of Tramigo
Unknown problem Remove and re-insert the battery after 1 minute. © 2007 - 2014Tramigo™ Ltd. All rights reserved. Under the copyright laws, this manual cannot be reproduced in any form without the prior written permission of Tramigo™. Page 28 of 30... -
Page 29: Form Without The Prior Written Permission Of Tramigo
Phone number in user list is incorrect. If you have just added a new user, check that the phone number is correct. Problem: GPS light is on (T23 Series does not have a current location) Possible Cause: Resolution: Unit does not have clear view of the sky. - Page 30 Set,MinTripDistance,1000 Problem: Vehicle shows as parked, but its moving Possible Cause: Resolution: Your T23 Series will report a state of Parked None. Once a Trip Start is detected, the when a Trip has not been started which takes vehicle state will change to moving or...
Need help?
Do you have a question about the T23 Series and is the answer not in the manual?
Questions and answers