TRENDnet TEW-752DRU User Manual
Hide thumbs
Also See for TEW-752DRU:
- User manual (58 pages) ,
- Quick installation manual (11 pages) ,
- Brochure & specs (3 pages)
Table of Contents
Advertisement
Quick Links
Advertisement
Table of Contents

Related Manuals for TRENDnet TEW-752DRU


Summary of Contents for TRENDnet TEW-752DRU
- Page 1 Cover Page TRENDnet User’s Guide TEW- 752DRU User’s Guide...
-
Page 2: Table Of Contents
Status > Active Sessions ................45 Main > Time ....................20 Status > Wireless ..................46 Main > Dynamic DNS ................... 21 Status > IPv6 ....................46 Main > IPv6 ....................22 Routing > Static ................... 47 © Copyright 2013 TRENDnet. All Rights Reserved. - Page 3 Tools > Email Settings .................. 58 Tools > Syslog ....................59 Tools > Schedules ..................59 Networking Basics ..............60 Wireless Basics ................61 Wireless Security ................ 62 Frequently Asked Questions ............63 Technical Specifications............. 64 © Copyright 2013 TRENDnet. All Rights Reserved.
-
Page 4: Product Overview
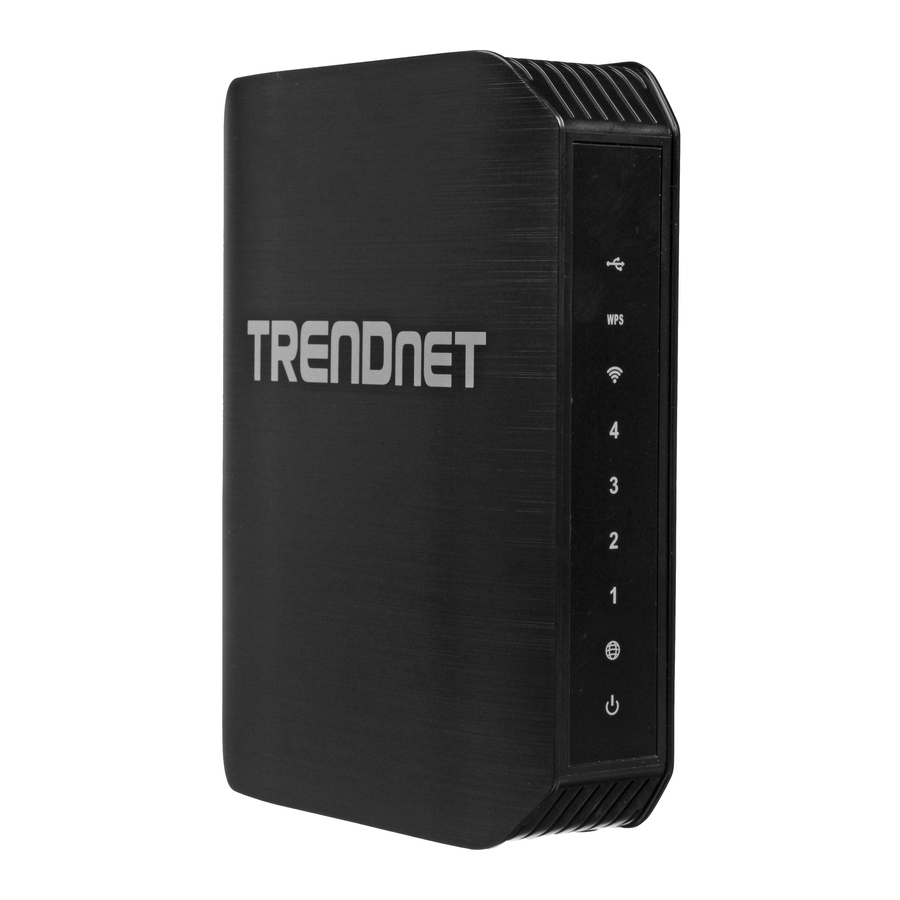
TRENDnet User’s Guide TEW752DRU Features Product Overview TRENDnet TEW-752DRU Dual Band Wireless Router produces the ultimate wireless experience with up to 300Mbps for the 802.11n wireless connection. • 4 x 10/100/1000Mbps Auto-MDIX LAN ports • 1 x 10/100/1000Mbps Internet Port •... -
Page 5: Product Hardware Features
Note: Use only the adapter that came with the router. • ON/OFF Button – Press the button to power on and off. Reset Button WPS Button LAN Ports WAN Port Power Port ON/OFF Button © Copyright 2013 TRENDnet. All Rights Reserved. -
Page 6: Installation
WPS LED – This indicator is turned on and blinks when WPS is as ceiling fans, lights, and home security systems), your wireless activated. The LED will turn off automatically once WPS is completed. connection may degrade dramatically or drop completely. Make sure © Copyright 2013 TRENDnet. All Rights Reserved. -
Page 7: Hardware Installation
IP address you assigned to the router. Refer to the Configuration and Wireless Security sections for more information on If you are connecting the TEW-752DRU router to an existing router to use as a setting up your wireless network. -
Page 8: Configuration
Click Main > Wizard on the left side to access the Setup Wizard. Welcome to the Setup Wizard This is the welcome page of the Setup Wizard. Follow the instructions to setup the router. Click Next to continue. © Copyright 2013 TRENDnet. All Rights Reserved. -
Page 9: Step 1: Check Internet Connection
PPPoE user name and password provided by the ISP. Click Save to implement the changes and continue. Step 2: Configure Your Internet Connection Select one of the connection types for the router. Click the radio button and Next to continue. © Copyright 2013 TRENDnet. All Rights Reserved. - Page 10 ISP. Click Save to user name, password and other information provided by the ISP. Click Save to implement the changes and continue. implement the changes and continue. © Copyright 2013 TRENDnet. All Rights Reserved.
-
Page 11: Step 3: Confirm Wi-Fi Settings
IP and DNS settings provided by the ISP. Click Save to implement the the information of wireless connection. Click Exit to finish the configuration. changes and continue. The router starts to check the WAN connection. © Copyright 2013 TRENDnet. All Rights Reserved. -
Page 12: Main > Lan
TRENDnet User’s Guide TEW752DRU Main > LAN This window allows you to configure the local network settings and DHCP settings. © Copyright 2013 TRENDnet. All Rights Reserved. - Page 13 MAC Address: Enter the MAC address of the computer or device. Clone Your PC’s MAC Address: If you want to assign an IP address to the computer you are currently on, click this button to populate the fields. © Copyright 2013 TRENDnet. All Rights Reserved.
-
Page 14: Main > Wan
By doing so, we can utilize the IEEE 802.11n connection speed to its optimum speed. Enable Access Point Mode: Tick the check box to change the router to an access point. © Copyright 2013 TRENDnet. All Rights Reserved. -
Page 15: Internet Connection Type - Static Ip
MAC address unless required by your ISP. Clone Your PC’s MAC Address: Click to replace the Internet port’s MAC address with the MAC address of your Ethernet card. IP Address: Enter the IP address assigned by your ISP. © Copyright 2013 TRENDnet. All Rights Reserved. -
Page 16: Internet Connection Type - Dynamic Ip (Dhcp)
Host Name: The Host Name is optional but may be required by some ISPs. Leave blank if you are not sure. Use Unicasting: Tick this option if your ISP uses the unicast method to provide IP addresses. © Copyright 2013 TRENDnet. All Rights Reserved. - Page 17 MAC address on the broadband router. It is not recommended that you change the default MAC address unless required by your ISP. Clone Your PC’s MAC Address: Click to replace the Internet port’s MAC address with the MAC address of your Ethernet card. © Copyright 2013 TRENDnet. All Rights Reserved.
-
Page 18: Internet Connection Type - Pptp (Username / Password)
MAC address on the broadband router. It is not recommended that you change the default MAC address unless required by your ISP. Clone Your PC’s MAC Address: Click to replace the Internet port’s MAC address with the MAC address of your Ethernet card. © Copyright 2013 TRENDnet. All Rights Reserved. -
Page 19: Internet Connection Type - L2Tp (Username / Password)
MAC address on the broadband router. It is not recommended that you change the default MAC address unless required by your ISP. Clone Your PC’s MAC Address: Click to replace the Internet port’s MAC address with the MAC address of your Ethernet card. © Copyright 2013 TRENDnet. All Rights Reserved. -
Page 20: Internet Connection Type - Ds-Lite
IPv6 WAN Default Gateway: Once connected, the IPv6 WAN Default Gateway Verify Password: Re-type the administrator password. address will be displayed here. System Name Gateway Name: Enter a name for the router. Click the Save Settings button to accept the changes made. Administration © Copyright 2013 TRENDnet. All Rights Reserved. -
Page 21: Main > Time
Click the Don’t Save Settings button to discard the changes made. Time and Date Configuration Time: Displays the current date and time of the router Time Zone: Select your time zone from the drop-down menu. © Copyright 2013 TRENDnet. All Rights Reserved. -
Page 22: Main > Dynamic Dns
Host Name: Enter the host name that you registered with your Dynamic DNS service provider. Username or Key: Enter the user name or key for your Dynamic DNS account. Password or Key: Enter the password or key for your Dynamic DNS account. © Copyright 2013 TRENDnet. All Rights Reserved. -
Page 23: Main > Ipv6
This window allows you to configure the IPv6 connection. The available IPv6 Status: Displays the current connection status. connection are Auto Detection, Static IPv6, Auto-configuration (SLAAC/DHCPv6), PPPoE, IPv6 in IPv4 Tunnel, 6to4, 6rd and Link-local Only. © Copyright 2013 TRENDnet. All Rights Reserved. -
Page 24: Ipv6 Connection Type - Auto Detection
IPv6 Address Range (End): Enter the end IPv6 address in the range. This field is only available when Stateful DHCPv6 is selected. IPv6 Address Lifetime: Displays the IPv6 address lifetime in minute. This field appears when Stateful DHCPv6 is selected. © Copyright 2013 TRENDnet. All Rights Reserved. -
Page 25: Ipv6 Connection Type - Static Ipv6
IPv6 Address Range (End): Enter the end IPv6 address in the range. This field is only available when Stateful DHCPv6 is selected. IPv6 Address Lifetime: Displays the IPv6 address lifetime in minute. This field is only available when Stateful DHCPv6 is selected. © Copyright 2013 TRENDnet. All Rights Reserved. -
Page 26: Ipv6 Connection Type - Auto-Configuration (Slaac/Dhcpv6)
IPv6 Address Range (End): Enter the end IPv6 address in the range. This field is only available when Stateful DHCPv6 is selected. IPv6 Address Lifetime: Displays the IPv6 address lifetime in minute. This field appears when Stateful DHCPv6 is selected. © Copyright 2013 TRENDnet. All Rights Reserved. -
Page 27: Ipv6 Connection Type - Pppoe
LAN IPv6 Address: Enter the LAN IPv6 address. LAN IPv6 Link-local Address: This field displays the LAN IPv6 link-local address. Address Auto-configuration Settings Enable automatic IPv6 address assignment: Tick the check box to enable automatic IPv6 address assignment. © Copyright 2013 TRENDnet. All Rights Reserved. -
Page 28: Ipv6 Connection Type - Ipv6 In Ipv4 Tunnel
IPv6 Address Range (End): Enter the end IPv6 address in the range. This field is only available when Stateful DHCPv6 is selected. IPv6 Address Lifetime: Displays the IPv6 address lifetime in minute. This field appears when Stateful DHCPv6 is selected. © Copyright 2013 TRENDnet. All Rights Reserved. - Page 29 IPv6 Address Range (Start): Enter the start IPv6 address in the range. This field is only available when Stateful DHCPv6 is selected. IPv6 Address Range (End): Enter the end IPv6 address in the range. This field is only available when Stateful DHCPv6 is selected. © Copyright 2013 TRENDnet. All Rights Reserved.
-
Page 30: Ipv6 Connection Type - 6To4
IPv6 Address Range (End): Enter the end IPv6 address in the range. This field is only available when Stateful DHCPv6 is selected. IPv6 Address Lifetime: Displays the IPv6 address lifetime in minute. This field appears when Stateful DHCPv6 is selected. © Copyright 2013 TRENDnet. All Rights Reserved. -
Page 31: Ipv6 Connection Type - 6Rd
IPv6 Address Range (End): Enter the end IPv6 address in the range. This field is only available when Stateful DHCPv6 is selected. IPv6 Address Lifetime: Displays the IPv6 address lifetime in minute. This field appears when Stateful DHCPv6 is selected. © Copyright 2013 TRENDnet. All Rights Reserved. -
Page 32: Ipv6 Connection Type - Link-Local Only
Click the Save Settings button to accept the changes made. Click the Don’t Save Settings button to discard the changes made. Wireless > Basic This window allows you to set up wireless settings of the Router. © Copyright 2013 TRENDnet. All Rights Reserved. -
Page 33: Wireless Network Settings - 2.4Ghz Band
Options to choose from are 802.11b only, 802.11g only, 802.11n only, Mixed 802.11g and 802.11b, Mixed 802.11n and 802.11g, and Mixed 802.11n, 802.11g and 802.11b. If you are not sure, select Mixed 802.11n, 802.11g and 802.11b. © Copyright 2013 TRENDnet. All Rights Reserved. -
Page 34: Wireless Security Mode - Wep
WEP Key Length: Select the WEP Key Length value as 64 bit (10 hex digits) or 128 bit (26 hex digits). Authentication: Select the WEP authentication option. Options to choose from are Both and Shared Key. © Copyright 2013 TRENDnet. All Rights Reserved. -
Page 35: Wireless Security Mode - Wpa-Personal
WPA Mode: Select which WPA mode to use. Options to choose from are Auto (WPA or WPA2), WPA2 Only, and WPA Only. © Copyright 2013 TRENDnet. All Rights Reserved. -
Page 36: Wireless Security Mode - Wpa-Enterprise
Second RADIUS Server Port: Enter the external RADIUS server port number. Second RADIUS Server Shared Secret: Enter the RADIUS server shared secret. This key must be configured on all the wireless clients for them to be able to connect to your wireless network. © Copyright 2013 TRENDnet. All Rights Reserved. -
Page 37: Wireless Network Settings - 5Ghz Band
802.11a and 802.11n. If you are not sure, select Mixed 802.11a and 802.11n. Enable Auto Channel Scan: Tick the check box to allow the router to find and use the wireless channel with the least interference in your environment. © Copyright 2013 TRENDnet. All Rights Reserved. -
Page 38: Wireless Security Mode - Wep
WEP Key: Enter a wireless security key here. This key must be configured on all the wireless clients for them to be able to connect to your wireless network. © Copyright 2013 TRENDnet. All Rights Reserved. -
Page 39: Wireless Security Mode - Wpa-Personal
Router. This key must be configured on all the wireless clients for them to be able to connect to your wireless network. © Copyright 2013 TRENDnet. All Rights Reserved. -
Page 40: Wireless Security Mode - Wpa-Enterprise
This key must be configured on all the wireless clients for them to be able to connect to your wireless network. Click the Save Settings button to accept the changes made. Click the Don’t Save Settings button to discard the changes made. © Copyright 2013 TRENDnet. All Rights Reserved. -
Page 41: Wireless > Advanced
WMM is QoS for your wireless network. This will improve the quality of video and PIN Settings voice applications for your wireless clients. PIN: Displays the WPS PIN. Click the Save Settings button to accept the changes made. © Copyright 2013 TRENDnet. All Rights Reserved. - Page 42 Click the Cancel button to discard the changes made and return to the main menu. Step 2: Connect your Wireless Device After selecting the Auto radio button in Step 1, the window will be available. Step 1: Select Configuration Method for your Wireless Network © Copyright 2013 TRENDnet. All Rights Reserved.
- Page 43 Press the WPS button on the wireless client to initiate the connection within 120 seconds. This information can then be configured of the wireless clients manually to initiate a wireless connection. © Copyright 2013 TRENDnet. All Rights Reserved.
-
Page 44: Status > Device Information
After clicking the Wireless Status button, the following window appears. Status > Device Information This window displays the detail information about the Router. You can view General, WAN, LAN, Wireless LAN, LAN Computers and IGMP Multicast Memberships information. © Copyright 2013 TRENDnet. All Rights Reserved. -
Page 45: Status > Log
Click the Next button to view the next page. Click the Clear button to the log. Click the Save Settings button to accept the changes made. Click the Don’t Save Settings button to discard the changes made. © Copyright 2013 TRENDnet. All Rights Reserved. -
Page 46: Status > Statistic
Click the Refresh button to refresh the information on this page. Click the Refresh Statistics button to refresh the information on this page. Click the Reset Statistics button to clear the information on the page. © Copyright 2013 TRENDnet. All Rights Reserved. -
Page 47: Status > Wireless
TRENDnet User’s Guide TEW752DRU Status > Wireless Status > IPv6 This window displays a list of wireless clients connected to the Router. This window displays the detail IPv6 network information. © Copyright 2013 TRENDnet. All Rights Reserved. -
Page 48: Routing > Static
Checkbox: Tick the check box of each entry to enable the selected route. Name: Enter the name of the route. Netmask: Enter the Netmask address of the route. Destination IP: Enter the destination IP address of the route. © Copyright 2013 TRENDnet. All Rights Reserved. -
Page 49: Access > Mac Filters
ALLOW computers listed to access the network to enable this feature and only allow the computers, by MAC address, to access the network. Select Turn MAC Filtering ON and DENY computers listed to access the network to © Copyright 2013 TRENDnet. All Rights Reserved. -
Page 50: Access > Protocol / Ip Filter
Click the Add button to add or modify the rule. Click the Cancel button to discard the changes made. Inbound Filter Rules List This section displays a list of configured inbound filter rules. © Copyright 2013 TRENDnet. All Rights Reserved. -
Page 51: Access > Virtual Server
Name: Enter or select the application name for the rule. IP Address: Enter or select the IP address or computer name for the rule. Public Port: Enter the public port number. Private Port: Enter the private port number. © Copyright 2013 TRENDnet. All Rights Reserved. - Page 52 Schedule: Select the time schedule for the rule. Click the New Schedule button Enable SPI: Tick the check box to enable the Stateful Packet Inspection (SPI) to create time schedules. feature. SPI, also known as dynamic packet filtering, helps to prevent cyber- © Copyright 2013 TRENDnet. All Rights Reserved.
-
Page 53: Access > Port Forwarding
Click the Don’t Save Settings button to discard the changes made. Checkbox: Tick the check box of each entry to enable the selected rule. Name: Enter or select the application name for the rule. © Copyright 2013 TRENDnet. All Rights Reserved. -
Page 54: Access > Application Rules
Traffic Type: Select the traffic type. Options to choose from are All, TCP, and UDP. Schedule: Select the time schedule option. Click the Save Settings button to accept the changes made. Click the Don’t Save Settings button to discard the changes made. © Copyright 2013 TRENDnet. All Rights Reserved. -
Page 55: Access > Internet Bandwidth Control
Click the Don’t Save Settings button to discard the changes made. button to create time schedules. Wireless Network Name: Enter a wireless network name (SSID) that is different from your main wireless network. © Copyright 2013 TRENDnet. All Rights Reserved. -
Page 56: Access > Advanced Network
This window is used to configure more advanced network settings on the Router. Click the Save Settings button to accept the changes made. Click the Don’t Save Settings button to discard the changes made. © Copyright 2013 TRENDnet. All Rights Reserved. -
Page 57: Access > Parental Control
Router’s configuration to the settings configured on the computers access to ONLY these sites to enable this feature and only allow configuration file. the computers to access the specified URL. Select DENY computers access to © Copyright 2013 TRENDnet. All Rights Reserved. -
Page 58: Tools > Firmware
Upload button to initiate the firmware upgrade procedure. The firmware upgrades sometimes will reset the configuration to the factory defaults. Make sure to save the current configuration to the management computer, before performing firmware upgrade. © Copyright 2013 TRENDnet. All Rights Reserved. -
Page 59: Tools > Email Settings
Click the Don’t Save Settings button to discard the changes made. Email Notification Enable Email Notification: Tick the check box to enable the email notification feature. Email Settings From Email Address: Enter the sender’s email address. © Copyright 2013 TRENDnet. All Rights Reserved. -
Page 60: Tools > Syslog
Time Format: Select the time format. Options to choose from are 12-hour and 24-hour. Start Time: Enter the starting time of a day. End Time: Enter the ending time of a day. Click the Add button to add this schedule into the schedule rules list. © Copyright 2013 TRENDnet. All Rights Reserved. -
Page 61: Networking Basics
Some firewall software programs may block a DHCP request on newly installed adapters. Statically Assign an IP address If you are not using a DHCP capable gateway/router, or you need to assign a static IP address, please follow the steps below: © Copyright 2013 TRENDnet. All Rights Reserved. -
Page 62: Wireless Basics
There are two different types of like the freedom of mobility and it’s becoming so popular that more and more wireless networks Wireless Local Area Network (WLAN), and Wireless Personal Area Network (WPAN). © Copyright 2013 TRENDnet. All Rights Reserved. -
Page 63: Wireless Security
• Ad-Hoc – Directly connecting to another computer, for peer-to-peer communication, using wireless network adapters on each computer, such as two or more wireless network Cardbus adapters. © Copyright 2013 TRENDnet. All Rights Reserved. -
Page 64: Frequently Asked Questions
Wait about 30 seconds to access the router. The default IP address is 192.168.10.1. When logging in, the username is “admin” and the password (Web password) can be found on the label at the bottom of the Router. © Copyright 2013 TRENDnet. All Rights Reserved. -
Page 65: Technical Specifications
Operating: 0 C~40 C (32 F~104 11 for 802.11b, 802.11g,802.11n(HT20) • Non-Operating: -20 C~70 C (-4 F~149 7 for 802.11n(HT40) • For 15.247(5G) Humidity 5 for 802.11a,802.11n(HT20) • Operating: 10%~95% non-condensing 2 for 802.11n(HT40) © Copyright 2012 TRENDnet. All Rights Reserved. - Page 66 Dimensions & Weight • 120 x 164 x 45 mm Reorient or relocate the receiving antenna. • 241.7 grams Increase the separation between the equipment and receiver. © Copyright 2012 TRENDnet. All Rights Reserved.
- Page 67 For operation within 5.15 ~ 5.25GHz frequency range, it is restricted to indoor environment. This device meets all the other requirements specified in Part 15E, Section 15.407 of the FCC Rules. © Copyright 2012 TRENDnet. All Rights Reserved.
- Page 68 Note: The country code selection is for non-US model only and is not available to all US model. Per FCC regulation, all WiFi product marketed in US must fixed to US operation channels only. © Copyright 2012 TRENDnet. All Rights Reserved.
Need help?
Do you have a question about the TEW-752DRU and is the answer not in the manual?
Questions and answers