Table of Contents
Advertisement
Advertisement
Table of Contents

Related Manuals for sky rider DRC376


Summary of Contents for sky rider DRC376
- Page 1 QUADCOPTER DRONE WITH VIDEO CAMERA User’s Guide for Model DRC376 v1648-01...
- Page 2 Warnings & Precautions Important Safety Instructions • Reorient or relocate the receiving antenna. • Increase the separation between the equipment and • Read and follow all instructions. receiver. • Keep these instructions for future reference. • Connect the equipment into an outlet on a circuit • Heed all Warnings. different from that to which the receiver is connected. • Intended for children ages 14 and higher. Adult • Consult the dealer or an experienced radio/TV supervision is required. technician for help. • Only use attachments/accessories specified by the manufacturer. Additional Warnings & Precautions • Before flying, always check the body, rotors, and • WARNING: To reduce the risk of fire or electric battery for any damage or obstructions. shock, do not expose this apparatus to rain, moisture, • Battery should be free from cracks or swelling. dripping, or splashing.
-
Page 3: Table Of Contents
Who Can Register? Flying Tips & Features – 17 What Do You Need to Register? Tips for Safe Operation Additional Info Speed Setting Sky Rider Falcon Pro – 5 Flips & Tricks Features Headless Mode Includes Auto-Reverse Factory Default Settings Orientation –... -
Page 4: Faa Registration
The Online Registration requirement applies to all UAS that weigh between 0.55 lbs (250g) and 55 lbs (25kg). The Sky Rider Falcon Pro meets this requirement, and must be registered, with the Registration Number permanently affixed to the craft. Who Can Register? • ... -
Page 5: Sky Rider Falcon Pro
Sky Rider Falcon Pro Features • 360° flips & tricks • 2 speed settings • 6-axis gyroscope • .3 MP Camera (photo & video) with SD card slot • Control distance: up to 150 feet • Headless Mode • Auto-Reverse • ... -
Page 6: Orientation
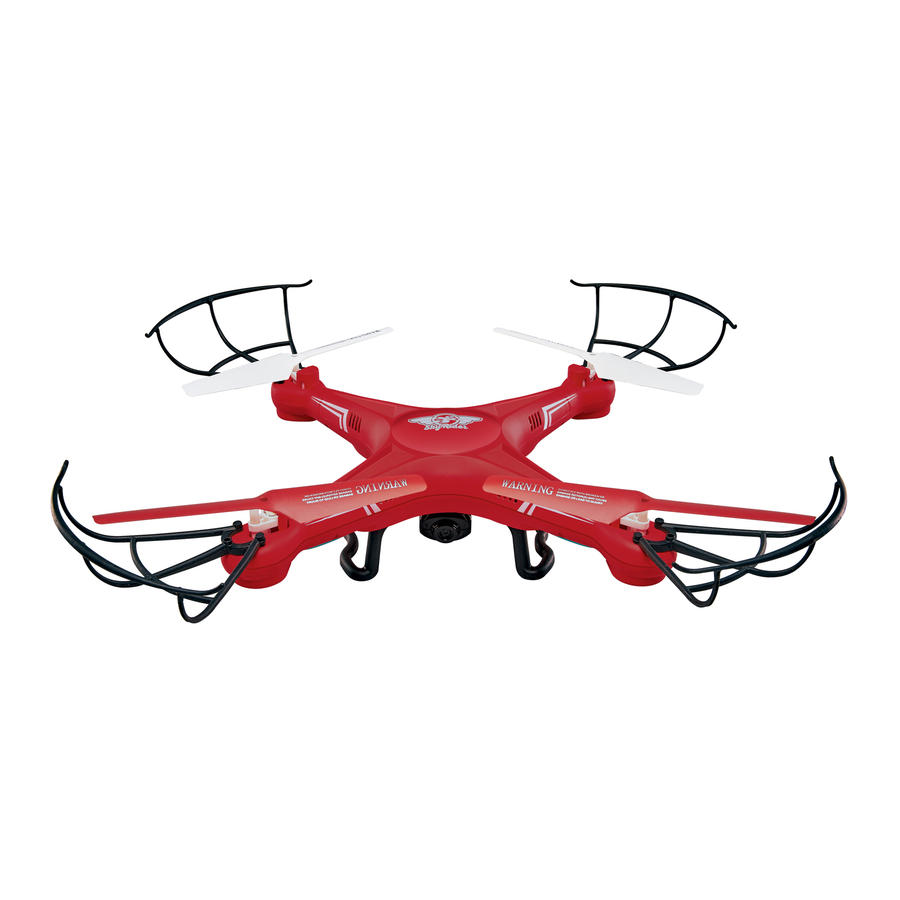
Orientation Overview Battery Bay/ Camera Mount Rotor Guard (underside) Landing Skids Rotors Formation Lights (underside) Red rotors indicate front of craft. Red LEDs indicate front of craft... -
Page 7: Remote Control
Remote Control Reset/Speed Photo Press to change craft Press to take a speed setting. photo. Flip Press and hold to reset Press and craft to factory settings. move the Right Thumbstick to perform a flip. Video Press to take video. Pitch Trim Correct forward/... -
Page 8: Camera
Camera Attach Camera Mount the camera to the battery door by Open the battery door with the camera aligning the tab on the camera to the slot attached to access the inside of the door. on the battery door. Tighten the camera to the door using the Attach the camera’s power cable to the included screws and screwdriver. -
Page 9: Functions
Functions Make sure the remote and the craft have been successfully paired (indicated by a red light on the remote) before attempting to use the camera. Video To record video, press the Video button on the remote. The indicator light will turn green for as long as the camera is recording. -
Page 10: Batteries & Charging
Batteries & Charging Battery Charging Procedure The craft’s lithium-polymer (Li-Po) battery must be charged before the unit can be flown. Before charging, be sure the craft and remote control are powered off. Failure to do so may result in injury. Step 1 Make sure the craft is powered OFF, then remove the battery cover. - Page 11 Step 4 Plug the charging cable into the USB port of a powered ON computer or USB power adapter (not included). The battery will now charge. AC/DC Charger Status LIGHT STATUS Red Light ON Charging Red Light OFF Ready Step 5 When charging is complete, reinstall the battery in its bay, reconnect the power plugs from the battery to the craft, and...
-
Page 12: Remote Control Battery Installation
Batteries & Charging Remote Control Battery Installation Use screwdriver (not included) and remove battery cover. Insert 6 x AA Batteries (not included). 6 x AA Batteries... -
Page 13: Pre-Flight Calibration
Pre-Flight Calibration Craft/Remote Link Before flying, the craft and the remote must be linked together, and the gyroscopes on the craft must be allowed to calibrate to ensure smooth and level flight. Begin with the craft and remote powered OFF. Step 1 Place the craft on a flat and level surface. -
Page 14: When You're Done Flying
Pre-Flight Calibration Step 4 Push the Left Control Stick directly forward, wait for a chime to sound, then pull the stick directly backward, and wait for a second chime. When this last chime has sounded, the craft is calibrated and ready to fly. Step 5 Attempt a stable hover, low to the surface you started on. -
Page 15: Trim Adjustment
Trim Adjustment Setting Trim & Countering Drift Even after the craft is calibrated, it may show a tendency to drift while airborne. Adjusting the trim will help counter this effect and allow you to better control the craft. To avoid potential damage, adjust the trim while in a stable hover, and do not make any sudden movements with the flight controls. - Page 16 Trim Adjustment Drift Type Solution Craft banks/rolls Adjust Roll Trim. left or right. Craft pitches/angles Adjust Pitch Trim. forward or backward.
-
Page 17: Flying Tips & Features
Flying Tips & Features Tips for Safe Operation • Only fly in large, open spaces, such as a field or a very large indoor area, free of obstacles like power lines, trees, ceiling fans, etc. • When flying indoors, avoid walls and ceilings, as the craft will be drawn towards them if closer than 2 to 3 feet. -
Page 18: Flips & Tricks
Flying Tips & Features Flips & Tricks Before attempting any stunts, be sure that there is ample clear space around the craft, ideally 9 to 10 ft. in every direction. It is not recommended to attempt to flip around or through any obstacles, as this may result in unintended damage. To perform a flip, follow the diagram below. -
Page 19: Factory Default Settings
Factory Default Settings If the craft is experiencing difficulty flying or is behaving erratically, the craft and remote may need to have the factory default settings restored. Do not attempt to do this while flying. Safely land the craft before attempting this procedure. Press and hold the Reset button for 2-3 seconds. -
Page 20: Troubleshooting
Troubleshooting If you are experiencing problems using or flying the hexacopter, consult this table. PROBLEM POSSIBLE CAUSES SOLUTION Craft is unresponsive • No power to remote • Check remote batteries, or craft replace if needed • Poor contact between • Check craft’s battery, be power plugs sure it is fully charged • ... -
Page 21: Repair
Repair REMINDER: Pilots are responsible for any damage caused by improper use. Rotor Replacement The craft comes with 4 replacement rotors, to be used if the originals are broken or badly damaged. To replace a rotor, use a small Phillips head screwdriver (included) and remove the screw connecting the rotor to the electric motor shaft. -
Page 22: Parts
Parts Parts Replacement If any major components of the craft are damaged beyond repair, use the contact information on the next page to order replacements. The following parts are available for order. -
Page 23: Parts List
Parts List... -
Page 24: Company Information
Email Support: prodinfo@dpiinc.com the most up-to-date version of this User’s Guide can also be found at: Email Parts: partsinfo@dpiinc.com http://gpx.com/drc376.html Phone Support: 1-888-999-4215 International Support To download this User’s Guide in English, Spanish, and French, or to get answers to frequently asked questions, visit the support section at: www.gpx.com...
Need help?
Do you have a question about the DRC376 and is the answer not in the manual?
Questions and answers
What battery does this drone take