Numatic TTB 1840G Owner's Instructions Manual
Scrubber dryer
Hide thumbs
Also See for TTB 1840G:
- Original instructions manual (40 pages) ,
- Original instructions manual (44 pages) ,
- Owner's instructions manual (20 pages)

Related Manuals for Numatic TTB 1840G


Summary of Contents for Numatic TTB 1840G
- Page 1 TTB 1840G S C R U B B E R D RY E R Owner Instructions Warning! Read instructions before using the machine www.numatic.co.uk...
-
Page 2: Table Of Contents
S C R U B B E R D RY E R TTB 1840G Index PLEASE READ Machine Overview ........ Pages 2 BEFORE COMMENCING Control Panel Overview ........ Page 3 OPERATION Quick Set up Guide ........ Page 4 Machine Set up Guide ........ Page 5 Fitting the Brush / Pad ........ -
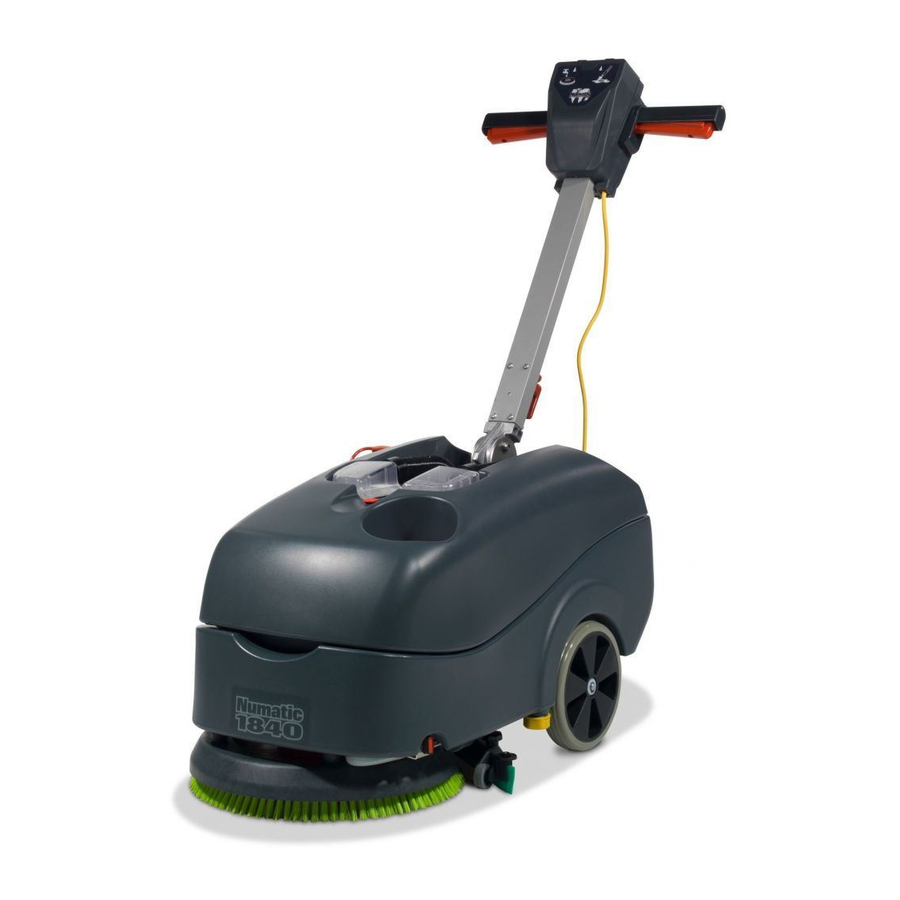
Page 3: Machine Overview
Machine Overview... -
Page 4: Control Panel Overview
Vacuum Indicator Water Flow Indicator Hi / Lo Button In the event of a breakdown contact Mode Select Button your Numatic dealer or the Water Flow On / Off Button Numatic Technical Handle Position Lever help line +44 (0)1460 269268... -
Page 5: Quick Set Up Guide
Quick Set-up Guide PLEASE READ BEFORE COMMENCING ANY OPERATION AFTER THE REMOVAL OF ALL THE PACKAGING, CAREFULLY OPEN AND CHECK THE CONTENTS. TTB1840G CONTENTS ● Owner Manual ● Battery Charger & Lead ● Battery Pack ● Scrub Brush ● Squeegee Assembly Using the handle position lever, (Fig.1) move the handle into the upright position, (Fig.2) Slide the brush / pad under the brush deck Fit the brush / pad onto the Nulock drive... -
Page 6: Machine Set Up Guide
Secure to the carrier using the two knobs fitted to the floor-tool carrier (Fig.2) - (Fig.3). Do not over tighten the retaining knobs. Ensure inspection cap is in place on the fluid pipe. (Fig.4) - (Fig.5) For fitting the floor tool blades (See Page 10). www.numatic.co.uk... -
Page 7: Filling The Clean Water Tank
Machine Set-up Guide Filling the Clean Water Tank The TTB 1840 is equipped with a large 18 litre clean-water tank allowing large areas to be cleaned in a single fill. Fill Indicator To fill the clean-water tank, remove the filler cap (Fig.1). Fill using a hose, bucket or a suitable container (Fig.2). Use the fill indicator (Fig.3). -
Page 8: Setting The Cleaning Controls
(Fig.F). Releasing the handle triggers will allow the machine to reset. IMPORTANT If the brush motor keeps overloading consider using a different type of brush. Heavy brush load decreases the available battery run time. www.numatic.co.uk... -
Page 9: Raising/Lowering Floor Tool
Machine Operation Raising/Lowering the Floor Tool To raise the floor-tool, ensure the floor-tool carrier is central to the machine. Lift the lever near the base of the handle and lock into position. Emptying Top Tank After use, empty waste-water tank using emptying hose and flush-out with clean water. -
Page 10: Regular Maintenance
(Fig.4). Rinse using clean water. Remove the two filters clipped into the separator and flush with clean water (Fig.A & B). Replace by fitting the rear of the filter first then clipping the front to lock in place. www.numatic.co.uk... -
Page 11: Changing Floor Tool Blades
Refit the floor-tool using the two central knobs to the floor-tool. Floor Tool Overview 1. Retaining knobs x 4 2. Front blade (slotted) 3. Blade carrier 4. Rear blade 5. Floor tool main body NOTE: The blades are designed to be reversible, thus extending their useful working life. www.numatic.co.uk... -
Page 12: Removing Battery
Removing The Battery Pack Fuse The battery pack comes fitted with a 40 amp safety fuse. Replace the fuse using (208526) Numatic approved part Battery Charging Recharge the machine fully after its last use. Do not leave the machine in a discharged state. -
Page 13: Specifications
(page 14) Blown fuse in Battery pack Replace 40 Amp fuse (page 18) Failure to rectify the problem or in the event of a breakdown contact your Numatic dealer or Numatic Technical helpline +44 (0)1460 269268 T 01460 68600... -
Page 14: Rating Label / Personal Protective Equipment / Recycling
NOTE: A risk assessment should be conducted to determine which PPE should be worn. In the event of a breakdown contact Safety Critical Component: your Numatic dealer or the Charging Leads: H05VV-F x 1.0 mm x 3 Core Numatic Technical... -
Page 15: Safety Precautions
Operators shall be adequately instructed as to the correct use of the machine. If this product does not have a factory installed Numatic battery charger, then it is the responsibility of the owner and user of the product to ensure that the charging system and battery combination are compatible, fit for purpose and safe to use. - Page 16 The batteries are to be disposed of safely and in accordance with the battery directive. 10. Only use genuine Numatic replacement batteries. 11. Do not allow the batteries to become fully discharged; it may not be possible to re-charge them.
-
Page 17: Recommended Spare Parts
Spare Parts Part No. SPARES & ACCESSORIES Part No. SPARES & ACCESSORIES 606260 BATTERY PACK (BOXED) 903531 SERILOR REPLACEMENT BLADE SET 606266 BATTERY & CHARGER PACK (UK) 903532 SERILOR COMPLETE SQUEEGEE ASSEMBLY 606267 BATTERY & CHARGER PACK (EURO) 303985 FILLER CAP ASSEMBLY 606268 BATTERY &... -
Page 18: Eu Declaration Document
EU Declaration of Conformity www.numatic.co.uk... -
Page 19: Warranty
Warranty T 01460 68600... -
Page 20: Company Address
Tel: 0861 686 284 www.numatic.co.za Numatic International Schweiz AG. Sihlbruggstrasse 142, 6340 Baar. SCHWEIZ Tel: 0041 (0) 41 76 80 76 - 0 www.numatic.ch Numatic International ULDA. Centro de Negócios da Maia, Rua Albino José Domingues, 581, 4470 – 034 Maia PORTUGAL Tel: +351 220 047 700 www.numatic.pt...
Need help?
Do you have a question about the TTB 1840G and is the answer not in the manual?
Questions and answers