
Related Manuals for SoundLogic 927032


Summary of Contents for SoundLogic 927032
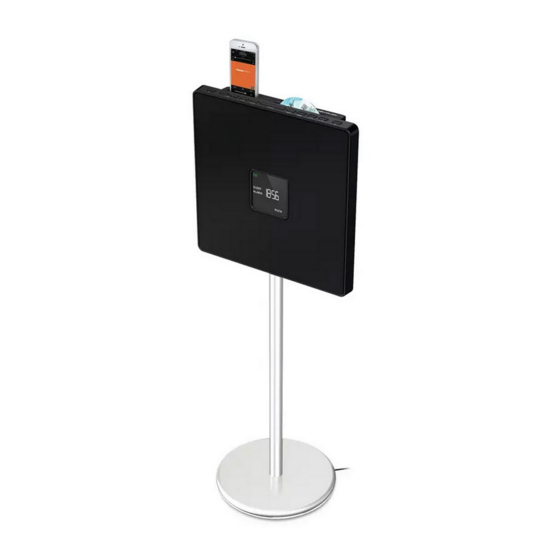
- Page 1 BLUTHTOOTH ENTERTAINMENT SPEAKER SYSTEM INSTRUCTION MANUAL MODEL:927032 PLEASE READ ALL INSTRUCTIONS CAREFULLY AND RETAIN FOR FUTURE USE...
-
Page 2: Table Of Contents
Contents Safety Information Important safety information Assembling the unit Assembling the unit Assembling the unit Assembling the unit on wall Assembling the unit on wall Functions and Controls Overview of controls User Instructions Making the connections General operation Time setting Alarm setting Snooze Sleep timer... -
Page 3: Safety Information
Safety Information Important – Please read these instructions fully before installation CAUTION CAUTION: TO REDUCE THE RISK OF ELECTRIC SHOCK, DO NOT REMOVE ANY COVER. NO RISK OF ELECTRIC SHOCK! DO NOT OPEN! USER-SERVICEABLE PARTS INSIDE, REFER ANY SERVICING TO QUALIFIED SERVICE PERSONNEL. - Page 4 IMPORTANT SAFETY INSTRUCTION 13.Unplug this apparatus during lightning 1. Read these Instructions. storms or when unused for long periods of 2. Keep these Instructions. time. 3. Heed all warnings. 14. Refer all servicing to service 4. Follow all instructions. personnel. Servicing is required when 5.
-
Page 5: Assembling The Unit
ASSEMBLING THE UNIT step one step one ---insert the pipe from the bottom of the stand and fix it with screws supplied... -
Page 6: Assembling The Unit
ASSEMBLING THE UNIT step two step two ---Insert the wire into the steel pipe until out of the bottom of stand... - Page 7 ASSEMBLING THE UNIT step three step four step three ---insert the upper part of the unit into the steel pipe ---then use screw to fix two parts step four ---pull wire straight ---use rubber brackets and screws to fix the wire to the bottom of the stand ---assembling is done...
-
Page 8: Assembling The Unit On Wall
ASSEMBLING THE UNIT ON WALL Step one: drilling holes according to the size in Fig 1 Step two: after drilling holes,insert the wall plug, fix the metal bracket on the wall with screw. -
Page 9: Assembling The Unit 7
ASSEMBLING THE UNIT ON WALL Step three: then fixing the bracket at the back of the unit. Step four: after fixing the bracket at the back of the unit, hang the unit on the wall. -
Page 10: Functions And Controls
Functions & Controls Please familiarize yourself with the parts and accessories listed below Accessories included ● 1 x Instruction manual ● 1 x RCA cable ● 1 x AUX IN cable with 3.5mm stereo plaug ● Wall mount brackets and scews ●1 x Remote control (with battery) Overview of controls USB PLAYER... - Page 11 Overview of controls TIME Power standby Time 13. Mute Stop Dimmer Radio preset recall 14. AM/FM Sleep 15. USB source Snooze Time + button Disc eject Volume up 16. Program Alarm CD source ( [ ] Tune down/ previous Bluetooth pairing Bluetooth Play/ pause Random...
-
Page 12: User Instructions
User Instructions Making the connections 1.Connect the AV cable to the Audio Output Jacks (White Jack=L, Red Jack=R) on DVD player and Audio Input Jacks on the rear of the unit. AUX AUDIO CONNECTION NOTE: Using a 3.5mm audio cable ( supplied), it is A TV can also be connected to watch video files in possible to connect an external audio device DVD player/VCR/DVR and etc. -
Page 13: Fm/Am Operation
3. When appears on the list, "SOUNDLOGIC DES" exit after 20 seconds, the character disappear. choose to pair with it. 3.If continuing to add tracks, repeat number 2 4. bt on the display will be solid light, when connection operation. -
Page 14: Care And Maintenance
Care & Maintenance Important: Always unplug the appliance from the power socket during cleaning and maintenance. • Never use any sharp instruments or abrasive substances, soap, household cleaner, detergent or wax polish for cleaning. • Clean the external surfaces with a damp soft cloth only. Never use abrasive products or solvents as it may damage the appliance. -
Page 15: Technical Specifications
Technical Specifications General Power source AC 120V~60Hz Audio output BT working range 32 feet AUX input Ø 3.5mm stereo headphone jack USB File system FAT 16 / FAT 32 USB max capacity 32GB FM coverage 87.5 - 108 MHz AM coverage 520 - 1710 KHz... -
Page 16: Fcc Statement
FCC Statement This equipment has been tested and found to comply with the limits for a Class B digital device, pursuant to Part 15 of the FCC Rules. These limits are designed to provide reasonable protection against harmful interference in a residential installation. This equipment generates, uses and can radiate radio frequency energy and, if not installed and used in accordance with the instructions, may cause harmful interference to radio communications. -
Page 17: Limited Warranty
LIMITED WARRANTY This manufacturer's product warranty extends to the original consumer purchaser of the product. Neither the retailer nor any other company involved in the sale or promotion of this product is a co-warrantor of this manufacturer warranty. WARRANTY DURATION: This product is warranted against defective meterials or workmanship.
Need help?
Do you have a question about the 927032 and is the answer not in the manual?
Questions and answers