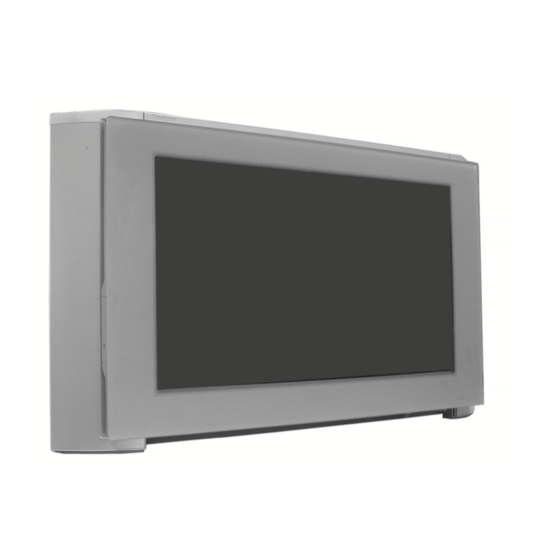
Sony KD-32DX100U Service Manual
Hide thumbs
Also See for KD-32DX100U:
- Quick start manual (2 pages) ,
- Operating instructions manual (40 pages)
Table of Contents
Troubleshooting

Related Manuals for Sony KD-32DX100U


Summary of Contents for Sony KD-32DX100U
-
Page 1: Service Manual
SERVICE MANUAL AE-6D CHASSIS MODEL MODEL COMMANDER DEST CHASSIS NO. COMMANDER DEST CHASSIS NO. KD-32DX100U KD-32NX100U RM-933 SCC-Q84B-A RM-935 SCC-Q84A-A KD-32NS100B RM-935 SCC-Q85A-A RM-933 KD-32DX100 KD-32NX100/KD-32NS100 RM-935 - 1 -... -
Page 2: Table Of Contents
THESE COMPONENTS WITH SONY PARTS WHOSE PART TANCE CRITIQUE POUR LA SÈCURITÈ DU FONCTIONNEMENT, NUMBERS APPEAR AS SHOWN IN THIS MANUAL OR IN NE LES REMPLACER QUE PAR DES COMPSANTS SONY DONT SUPPLEMENTS PUBLISHED BY SONY. LE NUMÈRO DE PIÈCE EST INDIQUÈ DANS LE PRÈSENT MANUEL OU DANS DES SUPPLÈMENTS PUBLIÈS PAR SONY. -
Page 3: Caution
Due to the higher melting point of Lead Free Solder the soldering iron tip temperature needs to be set to 370 degrees centigrade. This requires soldering equipment capable of accurate temperature control coupled with a good heat recovery characteristics. For more information on the use of Lead Free Solder, please refer to http://www.sony-training.com - 3 -... - Page 4 i r T t i n ) y l ° 2 l f e o i t . s l o i t . s l . s l . s l . s l e i l o i t t c i , t x n i l...
-
Page 5: Connectors
21 pin connector Pin No Signal Signal level Audio output B Standard level : 0.5V rms (right) Output impedence : Less than 1kohm* Audio input B Standard level : 0.5V rms (right) Output impedence : More than 10kohm* Audio output A Standard level : 0.5V rms (left) Output impedence : Less than 1kohm*... -
Page 6: Self Diagnostic Software
AE-6D SELF DIAGNOSTIC SOFTWARE The identification of errors within the AE-6D chassis is triggered in one of two ways :- 1: Busy or 2: Device failure to respond to IIC. In the event of one of these situations arising the software will first try to release the bus if busy (Failure to do so will report with a continuous flashing LED) and then communicate with each device in turn to establish if a device is faulty. - Page 7 Error Detection Monitor Device acknowledge is used to check IIC errors. Device acknowledge is checked by sending an IIC start sequence during CRT power on. Each device is checked three times, if there is no acknowledge after each attempt, it will be regarded as an error. There are three steps to check for errors.
- Page 8 2. Error Reader Display The error reader display is connected to the service connector to read actual error codes. The part number for the error reader display is S-188-900-10. Once an error has been detected it will then be displayed on the two digit error reader. The errors displayed refer to the following table.
- Page 9 SECTION 1 GENERAL - 9 -...
- Page 10 - 10 -...
- Page 11 - 11 -...
- Page 12 - 12 -...
- Page 13 - 13 -...
-
Page 14: Rear Cover Removal (Step 1)
SECTION 2 DISASSEMBLY 2-1. Rear Cover Removal (Step 1) 2-2. Rear Cover Removal (Step 2) Speaker Grill Ornamental Plate Screws Screws Remove the speaker grills by holding top and bottom and Using a narrow blade screwdriver lever off the 4 screw sliding away from the set. -
Page 15: Chassis Removal
2-5. Chassis Removal and Refitting When refitting the chassis ensure that the main bracket is located in the beznet guide slots before sliding the chassis forwards. Refit the interconnecting leads in their respective purse locks. To remove lift the main bracket rear slightly and slide the chassis away from the beznet. -
Page 16: G1 Bracket Removal
2-8. G1 Bracket Removal 2-9. F1 Board Removal Screw Remove the F1 bracket by removing the screw indicated and sliding the bracket away from the beznet. Clips Clips To remove the G1 Bracket release the four clips (two on each side of the bracket) and carefully lift away from the chassis. -
Page 17: Picture Tube Removal
2-12. Picture Tube Removal WARNING: BEFORE REMOVING THE ANODE CAP High voltage remains in the CRT even after the power is disconnected. To avoid electric shock, discharge CRT before attempting to remove the anode cap. Short between anode and CRT coated earth ground strap. - Page 18 - 18 -...
-
Page 19: Removing The Glass Panel
Re-fitting the glass panel NEVER attempt to re-fit the glass panel on your own - for safety reasons Sony recommends that two people carry out the following procedure at all times. Insert the bottom locating pins of... -
Page 20: Beam Landing
SECTION 3 SET-UP ADJUSTMENTS • Carry out the adjustments in the following order : When complete readjustment is necessary or a new picture 3-1. Beam Landing. tube is installed, carry out the following adjustments. 3-2. Convergence. • Unless there are specific instructions to the contrary, carry 3-3. -
Page 21: Convergence
If the V.STAT magnet is moved in the direction of the (a) 3-2. Convergence and (b) arrows, the Red, Green and Blue points move as indicated below. Preparation: • Before starting this adjustment, adjust the focus, horizontal size and vertical size. •... - Page 22 Geometry Adjustment. YCH Adjustment Preparation: YCH VR Before starting this adjustment, adjust the horizontal and Deflection Yoke vertical static convergence. Remove the deflection yoke spacer. Tilt the deflection yoke as indicated in the figure below and TLV Adjustment optimise the geometry. Tilting the DY Up and Down will balance the upper and lower pin adjustment.
-
Page 23: Focus Adjustment
Layout of each control 3-4. Screen (G2), White Balance [Adjustment in the service mode using the remote commander] G2 adjustment Input a dot signal from the pattern generator. Set the Picture, Brightness and Colour to minimum. Apply 175V DC from an external power supply to the R,G and V.STAT B cathodes of the CRT. - Page 24 SECTION 4 CIRCUIT ADJUSTMENTS Initialising Menu 4-1. Electrical Adjustments Service adjustments to this model can be performed using the supplied remote Commander RM-933 (KD-32DX100U) s i l and RM-935 (KD-32NX100U/ KD-32NS100B). Programming the Remote Commander for Operation in Service Mode Press the VCR/TV/DVD button until the TV LED lights.
- Page 25 Device Register Setting t s i i t l c t i y t i y t i l l a c t i t l i f a l i a l i a l i & - 25 -...
- Page 26 t l i - 26 -...
- Page 27 Deflection System Adjustment Program the Remote Commander for operation in Service Mode. [ See Page 24 ] and enter into ‘Service Mode’ by pressing ‘VIDEO’ button twice. Enter into the ‘Device Register Setting’ t i s then ‘Deflection’ service menu. Select and adjust each item in order to obtain the optimum image.
- Page 28 4-3. TEST MODE 2: Test Mode 2 is available by programming the remote commander for operation in service mode (see page 24) and pressing the ‘VIDEO’ button twice, OSD ‘TT’ appears. The functions described below are available by selecting the two numbers. To release the ‘Test mode 2’, press ‘0’ twice or switch the TV set into Stand-by mode.
- Page 29 5-1. BLOCK DIAGRAMS (1) CN1203 CN2000 TO G BOARD CN6006 CN1201 LEFT SP CN1602 TO SPEAKER RIGHT SP MAIN RY TO G BOARD DGC RY CN6008 CN1202 WOOFER SP SUBWOOFER CN1703 HM(1) KEY 2/SCL 3.3 TO FRONT CN1001 CONTROL FBLK HM(2) KEY 1/SDA 3.3 (3 PIN)
- Page 30 5-1. BLOCK DIAGRAMS (2) +12V IC1401 BACKEND BLOCK RESPONSIBILITY D1803 D1811 IC1801 IC1808 IC1811 IC1805 DF, DQP PHASE CONTROL QP CONTROL QP OUTPUT AMPLIFIER DQP AC MOD DQP V PARABOLA QP OUTPUT DF DRIVE AC AMP SET LEVEL TO SHEET 1 SWITCHING FET D1801 DF FOCUS PHASE...
- Page 31 5-1. BLOCK DIAGRAMS (3) CN4001 A 3/3 TO D BOARD POWER ON SWITCH IC5300 PIC/SOUND +12V FV (T6804) Q5350 VIDEO OUT (RED) CN5400 J5375 TO N1 BOARD CN9000 STANBY SW Q5300 IC5325 V SYNC VIDEO OUT (GREEN) TO SHEET 2 H SYNC TO SHEET 1 CN4000...
- Page 32 5-1. BLOCK DIAGRAMS (4) CN503 IVDD IHDD W13ID DIYD 7 IC314 IC313 IC315 AND GATE SUBWRITE PLL AND GATE DIYD 6 VDO CLK IN INHBIT DIYD 5 HP SUB PLL VDO PLL HLD FINA FINB DIYD 4 DIYD 3 DIYD 2 IC316 AND GATE TO N1 BOARD...
- Page 33 5-1. BLOCK DIAGRAMS (5) DF DRIVE Q8851 COMPARATOR IC8103 CN8810 V STAT DF DRIVE T8852 TO A BOARD CN1807 H CENTRE DY ASSY CN8611 M PIN CONT V- DY+ CN8620 V- DY- V DY DF PARA SWITCH MP PARA H DY Q8201, 8202,8118 H- DY-...
- Page 34 5-1. BLOCK DIAGRAMS (6) CN7103 IC9105 AV3 CHROMA OUT MAIN MICROCONTROLLER IC9109 AV3 LUMINANCE OUT A(20) PROGRAMMABLE O.T.P. CN9501 MICRO TEXT SCLO A(19) A(20) TO A BOARD A 19 VIDEO SCLO A(19) A(18) CN1708 J7900 A 18 SWITCH SCL1 AV3 L OUT Q9106,9107 A(18) A(17)
- Page 35 5-1. BLOCK DIAGRAMS (7) CN4602 CN4601 TO G BOARD RELAY KICK VCC ACT PWR RELAY TO A BOARD SWITCH CN6013 Q4600 CN1604 D4600 CN4600 T4601 AC IN RY4601 TO G BOARD CN6007 AC IN D4607 CN7104 HEADPHONE R IN D4609 TO A BOARD J7925 IC4604...
- Page 36 5-1. BLOCK DIAGRAMS (8) 5-2. CIRCUIT BOARD LOCATION KV-32NX100U/KV-32NS100B KV-32DX100U C Board AV SWITCH WITH CHROMA C Board CN8806 H3 Board RTV (1) H6 Board RIN (2) VM Board A Board LTV (3) VM Board M3 Board D Board H5 Board A Board LIN (4) D Board...
- Page 37 ~ A Printed Wiring Board Conductor side A ~ - 37 -...
- Page 38 ~ A Printed Wiring Board Conductor side B ~ - 38 -...
- Page 39 A Board Schematic Diagram [ Picture and Sound ] page 1/3 ~ - 39 - - 39 -...
- Page 40 A Board Schematic Diagram [ Picture and Sound ] page 2/3 ~ - 40 - - 28 -...
- Page 41 ~ A Board Waveforms ~ 10us/div 10us/div 1.08 Vp-p (H) 4.48 Vp-p (H) 10us/div 10us/div 3.92 Vp-p (H) 3.96 Vp-p (H) 5ms/div 5ms/div 600 mVp-p (V) 51.2 Vp-p (V) 10us/div 20us/div 2.68 Vp-p (H) 1.90 Vp-p (H) ~ A Board Difference Table ~ A Board Schematic Diagram [ Picture and Sound ] page 3/3 ~ - 41 - - 41 -...
- Page 42 M3 Board Schematic Diagram [ Micro Text ] ~ - 42 - - 28 -...
- Page 43 M3 Printed Wiring Board Conductor side A ~ M3 Printed Wiring Board Conductor side B ~ ~ A Board Location Table (A Side) ~ ~ A Board Location Table (B Side) ~ - 43 -...
- Page 44 ~ A Board Semiconductor Voltage Table ~ ~ A Board IC Voltage Table ~ - 44 -...
- Page 45 J1 Printed Wiring Board Conductor side A ~ J1 Printed Wiring Board Conductor side B ~ - 45 -...
- Page 46 B4 Printed Wiring Board Conductor side A ~ B4 Printed Wiring Board Conductor side B ~ - 46 -...
- Page 47 J1 Board Schematic Diagram [ AV Switch with Chroma ] ~ - 47 - - 27 -...
- Page 48 To (2/6) (3/6) (5/6) (6/6) To (5/6) (3/6) (3/6) To (4/6) To (4/6) (5/6) (5/6) 2 To (2/6) 24 To (5/6) To (4/6) To (2/6) To (2/6) To (3/6) (3/6) To (5/6) (6/6) To (5/6) To (3/6) (4/6) 26 To (6/6) To (3/6) To (5/6) 20 To (2/6)
- Page 49 15 To (1/6) To (1/6) To (1/6) To (1/6) To (1/6) To (1/6) (3/6) (3/6) (5/6) (5/6) (6/6) (6/6) To (1/6) 18 To (1/6) 4 To (1/6) To (1/6) To (1/6) To (4/6) To (4/6) 20 To (1/6) 15 To (1/6) To (4/6) To (1/6) To (1/6) 23...
- Page 50 To (1/6) To (1/6) (3/6) (5/6) (6/6) 10 To (1/6) (5/6) 36 To (6/6) 8 To (1/6) (5/6) (6/6) 25 To (1/6) (4/6) 29 To (6/6) 37 To (6/6) To (5/6) 11 To (1/6) 38 To (6/6) 39 To (6/6) 1 To (1/6) (4/6) (5/6)
- Page 51 35 To (2/6) 31 To (2/6) 33 To (2/6) 30 To (5/6) 32 To (2/6) To (3/6) (1/6) To (3/6) (5/6) (6/6) To (3/6) To (5/6) 40 To (3/6) 7 To (1/6) 25 To (1/6) (3/6) 42 To (3/6) B4 Board Schematic Diagram [ 100 Hz Board ] page 4/6 ~ - 51 -...
- Page 52 8 To (1/6) (3/6) (6/6) 15 To (1/6) (2/6) (3/6) (1/6) To (2/6) (3/6) (1/6) 20 To (1/6) To (4/6) To (3/6) (2/6) (4/6) To (1/6) (1/6) To (2/6) (3/6) To (3/6) 28 To (3/6) (1/6) To (3/6) To (4/6) (4/6) To (1/6) (6/6)
- Page 53 F Board Schematic Diagram [ Lightening/Fuse ] ~ (1/6) To (3/6) (4/6) (5/6) To (3/6) To (1/6) (2/6) To (2/6) (3/6) (5/6) To (3/6) F1 Board Schematic Diagram [ AC Input ] ~ To (3/6) 46 To (3/6) To (1/6) (3/6) (4/6) (5/6) F3 Board Schematic Diagram [ Power Switch ] ~ To (3/6) To (3/6)
- Page 54 G Board Schematic Diagram [ Power Supply ] ~ - 54 -...
- Page 55 ~ G Board Semiconductor Location Table ~ ~ G Printed Wiring Board Conductor side ~ ~ F Printed Wiring Board Conductor side ~ ~ H2 Printed Wiring Board Conductor side ~ Note : Portions of the circuit contained within the marked areas as shown have high voltages present.
- Page 56 D Printed Wiring Board Conductor side ~ D Board Waveforms ~ D Board IC Voltage Table ~ D Board Semiconductor Voltage Table ~ 10us/div 10us/div 10us/div 10us/div 10us/div 2.44 Vp-p (V) 148 Vp-p (V) 2.36 Vp-p (H) 152 Vp-p (H) 1.12 kVp-p (H) 10us/div 10us/div...
- Page 57 D Board Schematic Diagram [ Deflection ] ~ - 57 -...
- Page 58 ~ C Printed Wiring Board Conductor side ~ ~ N1 Printed Wiring Board Conductor side A ~ ~ C Board Waveforms ~ 5us/div 10us/div 115 Vp-p (H) 115 Vp-p (H) 10us/div 5us/div ~ N1 Printed Wiring Board Conductor side B ~ 108 Vp-p (H) 2.4 Vp-p (H) 10us/div...
- Page 59 CN5633 TAB(CONTACT) FV FOCUS C..-32DX/NS/NX100 CN5634 R, G, B CRT DRIVE +200V TO D BOARD external CN8614 RV5375 R5383 110M CN5600 R5375 R5376 R5300 R5325 L5376 +200V D5375 R5384 J5375 1SS133T G2 (+1100V) D5376 R5385 R5377 R5387 L5377 1SS133T D5381 2.2K C5378 1/2W...
- Page 60 ~ N1 Board Schematic Diagram [ Digital Interface ] ~ - 60 -...
- Page 61 ~ G1 Printed Wiring Board Conductor side ~ ~ VM Printed Wiring Board Conductor side ~ ~ VM Board Semiconductor Voltages ~ ~ VM Board Waveforms ~ 20us/div 20us/div 20us/div 760 mVp-p (V) 616 mVp-p (V) 25.2 Vp-p (V) ~ H5 Printed Wiring Board Conductor side ~ ~ H6 Printed Wiring Board Conductor side ~ - 61 -...
- Page 62 G1 Board Schematic Diagram [ Digital Power Supply ] ~ H5 Board Schematic Diagram [ Headphone SVHS and Phono ] ~ VM Board Schematic Diagram [ Velocity Modulation ] ~ H6 Board Schematic Diagram [ IR Receiver ] ~ - 62 -...
- Page 63 5-4. SEMICONDUCTORS LM318P LM393PS-E20 M27C800-100K1 BA09T LM358DR M24C32-MN6T SE-012N-LF4 LM393DT TDA2822D013TR LM393N NJM3403AM NJM3404AD-W NJM3404AM-T1 CXA1875AM-T4 MB3793-42PNF-ER HE4094BT ( TOP VIEW ) ( TOP VIEW ) PCF8591T PCF8593/T118 CXD2064Q MB88141APF-ER CXD2095AQ ( TOP VIEW ) KA278R05-YDTU PST573IMT-T1 MCZ3001D 1 : V IN 2 : V OUT 3 : GND 4 : ON/OFF CONTROL...
- Page 64 STR-L474-LF428 TDA6111Q/N4 74LVC00-PW 74LVC32A-PW 74LVC08APW 74LVC374AD-T 74LVC163-PW 74LVC377D-T 74LVC273PW 74LVC541APW ( TOP VIEW ) TDA7482 IRF614-037 IRF620 STV9379 TLC2932IPWR TLC2933IPWR-12 BYV98-200-RAS 15/12 TCET1103G CATHODE ANODE TLC5733AIPM DAN202K TC55257DFTL-70V TLP721(D4-G) DAP202K TC74HC4066AF - 64 -...
- Page 65 2SA1037AK-T146 FBIU4D7MA-B RU4AM-T3 DTA144EKA-T146 2SA1037K-T-146-R S1VB40 DTC114EK 2SA1162-G DTC114YKA-T146 2SC1623-L5L6 DTC144EKA 2SC12K-T-146-R DTC144EKA-T146 TLG124A DTA144ESA DTC114ESA 2SA933AS-QT 2SC2785-HFE LETTER SIDE GS1B460/45 UF4005PKG23 ANODE DTZ-TT11-6.8B UDZSTE-176.2B DTZ4.7C UDZSTE-179.1B CATHODE RD12SB2 UDZS-4.7B SARS01V1 UDZS-12B UDZSTE-173.9B UDZ-TE-17-12B UDZSTE-175.1B UDZ-TE-17-33B L-59SRSGC-CC UDZSTE-175.6B UDZ-TE-17-8.2B ANODE CATHODE D1NL20U EL1Z...
-
Page 66: Ic Block Diagrams
5-5 IC BLOCK DIAGRAMS A BOARD IC1005/IC1010/IC1011 BA05T REFERENCE VOLTAGE A BOARD IC1202 LM1876TF MUTE/STBY PROTECTIONS OP AMP OP AMP MUTE/STBY PROTECTIONS G BOARD IC6001 MCZ3001D Remote DVLD Internal Driver Sel=34v ref 5v Reg. 10v 15v/8v Level Shift Vsense Control Logic Latch Centre... - Page 67 A BOARD IC1231 MSP3411G SBUS Interface I2C Interface DEMODULATOR IDENT SCART Switching Facilities G BOARD IC6003 SE135N-LF4 A BOARD IC1801/IC1804/IC1808 LM393DT D BOARD IC8100/IC8101/IC8102/IC8103 LM393N NJM3404AD A BOARD IC1701 STV9379 A BOARD IC1401/IC1802 LM358D FLYBACK GENERATOR POWER AMPLIFIER THERMAL PROTECTION - 67 -...
- Page 68 SECTION 6 EXPLODED VIEWS NOTE : Items with no part number and no description are not Items marked “*” are not stocked stocked because they are seldom required for routine since they are seldom required for service. routine service. Some delay should The construction parts of an assembled part are indicated be anticipated when ordering these with a collation number in the remarks column.
- Page 69 6-2. PICTURE TUBE KD-32DX100 REF.NO. PART.NO DESCRIPTION REMARK REF.NO. PART.NO DESCRIPTION REMARK X-4200-778-1 BEZNET ASSY *A-1644-126-A VM BOARD, COMPLETE 4-203-128-31 SHEET, BLOTTING *A-1638-162-A C BOARD, COMPLETE A-1610-103-A FRONT CONTROL ASSY 54-63 4-200-433-01 SPRING, EXTENSION 4-205-464-12 GUIDE, LIGHT £ 1-424-888-11 COIL, DEGAUSSING *A-1646-259-A H6 BOARD, COMPLETE *4-203-390-41 CUSHION, DGC 4-205-463-12 WINDOW, ORNAMENTAL...
- Page 70 SECTION 6 EXPLODED VIEWS NOTE : Items with no part number and no description are not Items marked “*” are not stocked stocked because they are seldom required for routine since they are seldom required for service. routine service. Some delay should The construction parts of an assembled part are indicated be anticipated when ordering these with a collation number in the remarks column.
- Page 71 6-4. PICTURE TUBE KD-32NS100/32NX100 REF.NO. PART.NO DESCRIPTION REMARK REF.NO. PART.NO DESCRIPTION REMARK X-4200-753-1 BEZNET ASSY 52-55 £ 1-424-888-11 COIL, DEGAUSSING 4-206-354-01 BUTTON, POWER *4-203-390-41 CUSHION, DGC 4-202-964-11 SPRING *4-059-569-01 HOLDER, DGC 4-206-361-01 LIGHT, GUIDE £ 1-251-317-63 CAP ASSY, HIGH-VOLTAGE 4-203-128-31 SHEET, BLOTTING 4-203-658-01 SPACER, DY *4-203-098-01 SUPPORTER, CRT £...
- Page 72 SECTION 6 EXPLODED VIEWS NOTE : Items with no part number and no description are not Items marked “*” are not stocked stocked because they are seldom required for routine since they are seldom required for service. routine service. Some delay should The construction parts of an assembled part are indicated be anticipated when ordering these with a collation number in the remarks column.
-
Page 73: Electrical Parts List
SECTION 7 ELECTRICAL PARTS LIST PARTS LISTING TABLE OF CONTENTS Page F3 BOARD COMPLETE (KD-32DX100) Parts List : ..................74 H5 BOARD COMPLETE (KD-32DX100) Parts List : ..................74 H6 BOARD COMPLETE (KD-32DX100) Parts List : ..................74 B4 BOARD COMPLETE Parts List : .................. - Page 74 H6 B4 F3 H5 REF.NO. PART.NO DESCRIPTION REMARK REF.NO. PART.NO DESCRIPTION REMARK *A-1624-085-A F3 Board, Complete (KD-32DX100) *A-1646-259-A H6 Board, Complete (KD-32DX100) < CONNECTOR > < CAPACITOR > CN7700 £ *1-695-292-11 PIN, CONNECTOR (POWER) C7150 1-126-969-11 ELECT 220UF 20.00% 50V CN7733 £...
- Page 75 REF.NO. PART.NO DESCRIPTION REMARK REF.NO. PART.NO DESCRIPTION REMARK C511 1-164-004-11 CERAMIC CHIP 0.1UF 10.00% 25V C611 1-163-021-91 CERAMIC CHIP 0.01UF 10.00% 50V C512 1-163-021-91 CERAMIC CHIP 0.01UF 10.00% 50V C612 1-163-021-91 CERAMIC CHIP 0.01UF 10.00% 50V C514 1-164-004-11 CERAMIC CHIP 0.1UF 10.00% 25V C613 1-162-970-11 CERAMIC CHIP 0.01UF...
- Page 76 B1 B4 REF.NO. PART.NO DESCRIPTION REMARK REF.NO. PART.NO DESCRIPTION REMARK C801 1-124-779-00 ELECT CHIP 10UF 20.00% 16V < FERRITE BEAD > C802 1-162-970-11 CERAMIC CHIP 0.01UF 10.00% 25V C803 1-124-779-00 ELECT CHIP 10UF 20.00% 16V FB501 1-414-235-22 FERRITE C804 1-124-779-00 ELECT CHIP 10UF 20.00% 16V FB502...
- Page 77 F4 A REF.NO. PART.NO DESCRIPTION REMARK REF.NO. PART.NO DESCRIPTION REMARK IC506 8-759-640-16 IC TC7SET04F(TE85R) Q702 8-729-026-49 TRANSISTOR 2SA1037AK-T146 IC601 8-752-409-78 IC CXD2095AQ Q901 8-729-026-49 TRANSISTOR 2SA1037AK-T146 IC602 8-759-641-60 IC MT47LC1M16A1TG-7S Q902 8-729-026-49 TRANSISTOR 2SA1037AK-T146 IC603 8-759-669-75 IC TLC2932IPWR Q903 8-729-026-49 TRANSISTOR 2SA1037AK-T146 IC710 6-700-797-01 IC CXD9666Q Q904...
- Page 78 B1 B4 REF.NO. PART.NO DESCRIPTION REMARK REF.NO. PART.NO DESCRIPTION REMARK R530 1-218-865-91 METAL CHIP 5.6K 0.5% 1/10W R603 1-216-073-91 RES-CHIP 1/10W R531 1-216-812-11 RES-CHIP 1/16W R604 1-216-813-11 RES-CHIP 1/16W R532 1-218-865-91 METAL CHIP 5.6K 0.5% 1/10W R605 1-216-295-91 SHORT R533 1-216-812-11 RES-CHIP 1/16W R608...
- Page 79 REF.NO. PART.NO DESCRIPTION REMARK REF.NO. PART.NO DESCRIPTION REMARK R686 1-216-833-11 RES-CHIP 1/16W R815 1-216-833-11 RES-CHIP 1/16W R687 1-216-295-91 SHORT R816 1-216-833-11 RES-CHIP 1/16W R688 1-216-827-11 RES-CHIP 3.3K 5% 1/16W R817 1-216-017-91 RES-CHIP 1/10W R689 1-216-825-11 RES-CHIP 2.2K 5% 1/16W R823 1-216-073-91 RES-CHIP 1/10W R690...
- Page 80 REF.NO. PART.NO DESCRIPTION REMARK REF.NO. PART.NO DESCRIPTION REMARK R880 1-216-801-11 RES-CHIP 1/16W R995 1-216-813-11 RES-CHIP 1/16W R881 1-216-009-91 RES-CHIP 1/10W R996 1-216-815-11 RES-CHIP 1/16W R882 1-216-801-11 RES-CHIP 1/16W R2801 1-208-760-11 METAL CHIP 0.5% 1/10W R883 1-216-009-91 RES-CHIP 1/10W R2802 1-208-754-11 METAL CHIP 0.5% 1/10W R884 1-216-801-11 RES-CHIP...
- Page 81 REF.NO. PART.NO DESCRIPTION REMARK REF.NO. PART.NO DESCRIPTION REMARK C1031 1-164-004-11 CERAMIC CHIP 0.1UF 10.00% 25V *A-1624-110-A F Board, Complete (KD-32DX100) C1032 1-126-916-11 ELECT 1000UF 20.00% 6.3V < CONNECTOR > C1033 1-126-916-11 ELECT 1000UF 20.00% 6.3V C1034 1-126-935-11 ELECT 470UF 20.00% 6.3V CN1001 £...
- Page 82 REF.NO. PART.NO DESCRIPTION REMARK REF.NO. PART.NO DESCRIPTION REMARK C1233 1-164-346-11 CERAMIC CHIP 1UF C1413 1-107-826-11 CERAMIC CHIP 0.1UF 10.00% 16V C1234 1-162-968-11 CERAMIC CHIP 0.0047UF 10.00% 50V C1414 1-107-826-11 CERAMIC CHIP 0.1UF 10.00% 16V C1235 1-164-346-11 CERAMIC CHIP 1UF C1415 1-163-021-91 CERAMIC CHIP 0.01UF 10.00% 50V C1236...
- Page 83 REF.NO. PART.NO DESCRIPTION REMARK REF.NO. PART.NO DESCRIPTION REMARK C1715 1-162-964-11 CERAMIC CHIP 0.001UF 10.00% 50V C4013 1-104-665-11 ELECT 100UF 20.00% 25V C1716 1-104-665-11 ELECT 100UF 20.00% 25V C4015 1-126-965-91 ELECT 22UF 20.00% 50V C1717 1-164-004-11 CERAMIC CHIP 0.1UF 10.00% 25V C4016 1-164-156-11 CERAMIC CHIP 0.1UF C1719...
- Page 84 H5 D2 REF.NO. PART.NO DESCRIPTION REMARK REF.NO. PART.NO DESCRIPTION REMARK CN7107 *1-564-518-11 PLUG, CONNECTOR 3P D1813 8-719-063-73 DIODE D1NL20U-TR CN7108 *1-564-522-11 PLUG, CONNECTOR 7P D4000 8-719-982-24 DIODE MTZJ-33A CN7109 1-793-495-11 CONNECTOR, BOARD TO BOARD 50P D4001 8-719-812-43 DIODE TLG124A D4002 8-719-914-43 DIODE DAN202K <...
- Page 85 REF.NO. PART.NO DESCRIPTION REMARK REF.NO. PART.NO DESCRIPTION REMARK IC1803 8-759-567-08 IC MB88141APF-ER < TRANSISTOR > IC1804 8-759-665-11 IC LM393DT IC1805 8-752-053-21 IC CXA1211M Q1001 8-729-120-28 TRANSISTOR 2SC1623-L5L6 IC1808 8-759-665-11 IC LM393DT Q1002 8-729-120-28 TRANSISTOR 2SC1623-L5L6 IC1809 8-759-903-16 IC LM318P Q1003 8-729-027-38 TRANSISTOR DTA144EKA-T146 Q1004 8-729-120-28 TRANSISTOR 2SC1623-L5L6...
- Page 86 REF.NO. PART.NO DESCRIPTION REMARK REF.NO. PART.NO DESCRIPTION REMARK Q4002 1-801-806-11 TRANSISTOR DTC144EKA R1032 1-216-833-11 RES-CHIP 1/16W Q4003 8-729-028-28 TRANSISTOR 2SK2036(TE85L) R1033 1-216-829-11 RES-CHIP 4.7K 5% 1/16W Q4004 8-729-028-28 TRANSISTOR 2SK2036(TE85L) R1034 1-216-829-11 RES-CHIP 4.7K 5% 1/16W Q4005 8-729-028-28 TRANSISTOR 2SK2036(TE85L) R1035 1-216-650-11 METAL CHIP 0.5% 1/10W...
- Page 87 REF.NO. PART.NO DESCRIPTION REMARK REF.NO. PART.NO DESCRIPTION REMARK R1116 1-216-864-11 SHORT R1260 1-216-809-11 RES-CHIP 1/16W R1119 1-216-864-11 SHORT R1261 1-216-809-11 RES-CHIP 1/16W R1121 1-216-864-11 SHORT R1270 1-216-815-11 RES-CHIP 1/16W R1122 1-216-864-11 SHORT R1272 1-216-821-11 RES-CHIP 1/16W R1125 1-216-864-11 SHORT R1273 1-216-831-11 RES-CHIP 6.8K 5% 1/16W...
- Page 88 REF.NO. PART.NO DESCRIPTION REMARK REF.NO. PART.NO DESCRIPTION REMARK R1435 1-216-825-11 RES-CHIP 2.2K 5% 1/16W R1493 1-216-845-11 RES-CHIP 100K 5% 1/16W R1436 1-216-821-11 RES-CHIP 1/16W R1494 1-216-821-11 RES-CHIP 1/16W R1437 1-216-809-11 RES-CHIP 1/16W R1495 1-218-889-11 METAL CHIP 0.5% 1/10W R1438 1-216-817-11 RES-CHIP 1/16W R1496 1-216-821-11 RES-CHIP...
- Page 89 REF.NO. PART.NO DESCRIPTION REMARK REF.NO. PART.NO DESCRIPTION REMARK R1833 1-216-809-11 RES-CHIP 1/16W R1978 1-216-833-11 RES-CHIP 1/16W R1835 1-216-813-11 RES-CHIP 1/16W R1979 1-216-833-11 RES-CHIP 1/16W R1836 1-216-864-11 SHORT R1982 1-216-837-11 RES-CHIP 1/16W R1838 1-216-827-11 RES-CHIP 3.3K 5% 1/16W R1983 1-216-845-11 RES-CHIP 100K 5% 1/16W R1839...
- Page 90 REF.NO. PART.NO DESCRIPTION REMARK REF.NO. PART.NO DESCRIPTION REMARK R4044 1-216-295-91 SHORT < TUNER > R4045 1-216-295-91 SHORT R4046 1-216-295-91 SHORT TU1001 8-598-529-01 FRONT END BTF-EU611 R4047 1-216-295-91 SHORT TU4000 8-598-585-00 FRONT END BTD-DU604 R4048 1-216-833-11 RES-CHIP 1/16W TU4002 NOT FITTED R4049 1-216-833-11 RES-CHIP 1/16W...
- Page 91 REF.NO. PART.NO DESCRIPTION REMARK REF.NO. PART.NO DESCRIPTION REMARK C9123 1-164-156-91 CERAMIC CHIP 0.1UF 10.00% 25V < IC > C9124 1-164-156-91 CERAMIC CHIP 0.1UF 10.00% 25V C9125 1-164-156-91 CERAMIC CHIP 0.1UF 10.00% 25V IC9100 8-759-276-28 IC LM393PS-E20 C9126 1-162-921-11 CERAMIC CHIP 33PF 5.00% 50V IC9104 8-759-281-41 IC MB3793-42PNF-ER...
- Page 92 REF.NO. PART.NO DESCRIPTION REMARK REF.NO. PART.NO DESCRIPTION REMARK R9115 1-216-837-91 RES-CHIP 1/10W R9196 1-216-073-91 RES-CHIP 1/10W R9116 1-216-833-91 RES-CHIP 1/10W R9197 1-216-073-91 RES-CHIP 1/10W R9117 1-216-833-91 RES-CHIP 1/10W R9500 1-216-864-91 SHORT R9119 1-216-833-91 RES-CHIP 1/10W R9501 1-216-864-91 SHORT R9120 1-216-833-91 RES-CHIP 1/10W R9502 1-216-864-91 SHORT...
- Page 93 REF.NO. PART.NO DESCRIPTION REMARK REF.NO. PART.NO DESCRIPTION REMARK C4606 1-162-318-11 CERAMIC 0.001UF 10.00% 500V < IC > C4607 1-165-602-91 CERAMIC 220PF C4608 1-126-967-11 ELECT 47UF 20.00% 50V IC4600 £ 6-700-292-01 IC STR-L474-LF428 C4609 1-130-777-00 MYLAR 0.1UF 5.00% 100V IC4601 £ 8-749-013-21 IC TLP721(D4-G) C4610 1-130-777-00 MYLAR 0.1UF...
- Page 94 REF.NO. PART.NO DESCRIPTION REMARK REF.NO. PART.NO DESCRIPTION REMARK < CONNECTOR > *A-1636-054-A G Board, Complete 4-382-854-01 SCREW (M3X8), P, SW (+) CN6001 £ *1-691-291-11 PIN, CONNECTOR (PC BOARD) 5P CN6002 £ *1-508-786-00 PIN, CONNECTOR (5MM PITCH) 2P < CAPACITOR > CN6003 £...
- Page 95 REF.NO. PART.NO DESCRIPTION REMARK REF.NO. PART.NO DESCRIPTION REMARK < PHOTO COUPLER > R6042 1-216-295-91 SHORT R6045 1-208-770-11 METAL CHIP 0.5% 1/10W PH6001 £ 8-749-016-21 IC TCET1103G R6047 1-208-842-11 METAL CHIP 330K 0.5% 1/10W R6048 1-215-481-00 METAL 330K 1% 1/4W < TRANSISTOR > R6049 1-208-805-11 METAL CHIP 9.1K 0.5% 1/10W...
- Page 96 B1 C REF.NO. PART.NO DESCRIPTION REMARK REF.NO. PART.NO DESCRIPTION REMARK C5328 1-128-528-11 ELECT 470UF 20.00% 16V < SOCKET > C5329 1-107-967-11 ELECT 20.00% 400V C5330 1-136-207-11 MYLAR 0.047UF 10.00% 400V J5375 £ 1-251-732-11 SOCKET, CRT C5331 1-163-089-00 CERAMIC CHIP 6PF 0.50PF 50V C5332 1-163-231-11 CERAMIC CHIP 15PF...
- Page 97 REF.NO. PART.NO DESCRIPTION REMARK REF.NO. PART.NO DESCRIPTION REMARK R5355 1-535-143-61 LEAD, JUMPER (5.0MM) C8126 1-165-176-11 CERAMIC CHIP 0.047UF 10.00% 16V R5356 1-208-790-11 METAL CHIP 2.2K 0.5% 1/10W C8128 1-162-968-11 CERAMIC CHIP 0.0047UF 10.00% 50V R5357 1-202-557-00 SOLID 1/2W C8131 1-535-143-61 LEAD,JUMPER (5.0MM) R5358 1-215-929-11 METAL OXIDE 100K 5%...
- Page 98 8-729-010-29 TRANSISTOR MSD601-RST1 FB8807 1-410-397-21 FERRITE 1.1UH Q8801 8-729-048-47 TRANSISTOR 2SC2688(5)-LK < IC > Q8802 8-729-048-47 TRANSISTOR 2SC2688(5)-LK Q8803 8-729-056-16 TRANSISTOR 2SC5698-SONY-CA IC8100 8-759-450-95 IC LM393N Q8804 8-729-056-17 TRANSISTOR 2SC5696-SONY-CA IC8101 8-759-450-95 IC LM393N Q8805 8-729-050-49 TRANSISTOR IRF1614-005 - 98 -...
- Page 99 B1 D REF.NO. PART.NO DESCRIPTION REMARK REF.NO. PART.NO DESCRIPTION REMARK Q8806 8-729-047-59 TRANSISTOR STP5NB40FP R8149 1-216-829-11 RES-CHIP 4.7K 5% 1/16W Q8807 1-801-806-11 TRANSISTOR DTC144EKA-T146 R8153 1-216-295-91 SHORT Q8822 8-729-010-29 TRANSISTOR MSD601-RST1 R8154 1-208-782-11 METAL CHIP 0.5% 1/10W Q8823 8-729-010-05 TRANSISTOR MSB709-RT1 R8155 1-218-863-11 METAL CHIP 4.7K 0.5% 1/10W...
- Page 100 D VM REF.NO. PART.NO DESCRIPTION REMARK REF.NO. PART.NO DESCRIPTION REMARK R8800 1-247-895-91 CARBON 470K 5% 1/4W < TRANSFORMER > R8804 1-249-408-11 CARBON 1/4W R8805 1-249-408-11 CARBON 1/4W T8800 £ 1-453-383-11 TRANSFORMER ASSY, FLYBACK (NX-4522//Z214) R8806 1-249-411-11 CARBON 1/4W T8801 1-437-430-11 TRANSFORMER, FERRITE (HDT) R8807 1-249-411-11 CARBON 1/4W...
- Page 101 VM J1 REF.NO. PART.NO DESCRIPTION REMARK REF.NO. PART.NO DESCRIPTION REMARK < COIL > *A-1651-144-A J1 Board, Complete L5400 1-410-784-41 INDUCTOR 0.18UH < CAPACITOR > L5401 1-408-602-31 INDUCTOR 8.2UH C8105 1-126-933-11 ELECT 100UF 20.00% 16V < TRANSISTOR > C8106 1-126-933-11 ELECT 100UF 20.00% 16V C8107...
- Page 102 B1 J1 REF.NO. PART.NO DESCRIPTION REMARK REF.NO. PART.NO DESCRIPTION REMARK C8841 1-164-156-11 CERAMIC CHIP 0.1UF C8907 1-164-156-11 CERAMIC CHIP 0.1UF C8842 1-164-156-11 CERAMIC CHIP 0.1UF C8909 1-162-927-11 CERAMIC CHIP 100PF 5.00% 50V C8843 1-164-156-11 CERAMIC CHIP 0.1UF C8910 1-162-927-11 CERAMIC CHIP 100PF 5.00% 50V C8844 1-162-974-11 CERAMIC CHIP 0.01UF...
- Page 103 B1 J1 REF.NO. PART.NO DESCRIPTION REMARK REF.NO. PART.NO DESCRIPTION REMARK C8983 1-104-665-11 ELECT 100UF 20.00% 25V D8817 8-719-158-49 DIODE RD12SB2 C8984 1-164-156-11 CERAMIC CHIP 0.1UF D8818 8-719-158-49 DIODE RD12SB2 C8986 1-164-156-11 CERAMIC CHIP 0.1UF D8819 8-719-056-85 DIODE UDZ-TE-17-8.2B C8987 1-164-156-11 CERAMIC CHIP 0.1UF D8820 8-719-158-49 DIODE RD12SB2 C8988...
- Page 104 B1 J1 REF.NO. PART.NO DESCRIPTION REMARK REF.NO. PART.NO DESCRIPTION REMARK < COIL > R8808 1-216-809-11 RES-CHIP 1/16W R8809 1-216-047-91 RES-CHIP 1/10W L8800 1-412-006-31 INDUCTOR 10UH R8810 1-216-864-11 SHORT L8804 1-412-539-11 INDUCTOR 150UH R8811 1-216-805-11 RES-CHIP 1/16W L8805 1-412-539-11 INDUCTOR 150UH R8813 1-216-821-11 RES-CHIP 1/16W...
- Page 105 B1 J1 REF.NO. PART.NO DESCRIPTION REMARK REF.NO. PART.NO DESCRIPTION REMARK R8877 1-216-864-11 SHORT R8944 1-216-071-00 RES-CHIP 8.2K 5% 1/10W R8880 1-216-809-11 RES-CHIP 1/16W R8945 1-218-285-11 RES-CHIP 1/16W R8881 1-216-817-11 RES-CHIP 1/16W R8946 1-216-813-11 RES-CHIP 1/16W R8882 1-216-817-11 RES-CHIP 1/16W R8947 1-216-813-11 RES-CHIP 1/16W R8883...
- Page 106 J1 N1 REF.NO. PART.NO DESCRIPTION REMARK REF.NO. PART.NO DESCRIPTION REMARK R8996 1-216-805-11 RES-CHIP 1/16W R9085 1-216-825-11 RES-CHIP 2.2K 5% 1/16W R8997 1-216-825-11 RES-CHIP 2.2K 5% 1/16W R9086 1-216-831-11 RES-CHIP 6.8K 5% 1/16W R8998 1-216-841-11 RES-CHIP 1/16W R9088 1-216-831-11 RES-CHIP 6.8K 5% 1/16W R8999 1-216-836-11 RES-CHIP...
- Page 107 N1 F1 REF.NO. PART.NO DESCRIPTION REMARK REF.NO. PART.NO DESCRIPTION REMARK C9003 1-107-826-11 CERAMIC CHIP 0.1UF 10.00% 16V R9023 1-216-821-11 RES-CHIP 1/16W C9004 1-126-205-11 ELECT CHIP 47UF 20.00% 6.3V R9024 1-216-821-11 RES-CHIP 1/16W C9005 1-107-826-11 CERAMIC CHIP 0.1UF 10.00% 16V R9025 1-216-864-11 SHORT C9006 1-126-205-11 ELECT CHIP...
- Page 108 H2 H3 REF.NO. PART.NO DESCRIPTION REMARK REF.NO. PART.NO DESCRIPTION REMARK < FUSE > S7104 1-692-431-21 SWITCH, TACTILE S7105 1-692-431-21 SWITCH, TACTILE F5401 £ 1-576-232-21 FUSE (H.B.C.) 5A/250V S7106 1-692-431-21 SWITCH, TACTILE *1-533-725-11 HOLDER, FUSE (F5401) *A-1646-248-A H2 Board, Complete (KD-32NS100/ <...
- Page 109 H3 L REF.NO. PART.NO DESCRIPTION REMARK REF.NO. PART.NO DESCRIPTION REMARK < COIL > C1052 1-162-964-11 CERAMIC CHIP 0.001UF 10.00% 50V C1053 1-162-964-11 CERAMIC CHIP 0.001UF 10.00% 50V L7925 1-414-183-41 INDUCTOR 10UH C1054 1-162-964-11 CERAMIC CHIP 0.001UF 10.00% 50V L7926 1-414-183-41 INDUCTOR 10UH C1055 1-162-964-11 CERAMIC CHIP 0.001UF...
- Page 110 REF.NO. PART.NO DESCRIPTION REMARK REF.NO. PART.NO DESCRIPTION REMARK < COIL > R1051 1-216-039-00 RES-CHIP 1/10W R1052 1-216-837-11 RES-CHIP 1/16W L1001 1-410-992-11 INDUCTOR 0.82UH R1054 1-216-833-11 RES-CHIP 1/16W L1002 1-410-992-11 INDUCTOR 0.82UH R1055 1-216-864-11 SHORT L1003 1-410-992-11 INDUCTOR 0.82UH R1056 1-216-864-11 SHORT L1004 1-410-992-11 INDUCTOR 0.82UH...
- Page 111 REF.NO. PART.NO DESCRIPTION REMARK REF.NO. PART.NO DESCRIPTION REMARK MISCELLANEOUS 1-529-408-11 SPEAKER (4.2X24CM) 1-424-855-11 COIL, CHOKE 29MMH £ 1-792-389-11 CORD, POWER (KD-32NS100) £ 1-776-204-12 CORD, POWER (FILTER)(KD-32DX100/32NX100) 8-598-529-01 FRONT END BTF-EU611 (KD-32DX100/32NX100) 8-598-585-00 FRONT END BTD-DU604 (KD-32DX100/32NX100) £ 1-453-383-11 TRANSFORMER ASSY, FLYBACK (NX-4522//Z214) £...
-
Page 112: Troubleshooting
• User programmable Functional Check through Infrared • Fast and documented Test Mode setting of all Sony TV chassis Additional features such as Adjustments and Troubleshooting are available in chassis-dependent software modules. Please contact your local Sony Service organisation for the latest information.