Table of Contents
Advertisement
STIHJ.:
Warning!
For safe operation
follow all safety
precautions
in Instruction
Manual - improper
use can cause serious
injury.
Advertencia!
Para su seguridad
durante el manejo de este
producto,
siga siempre
las precauciones
de
seguridad
dadas en el manual de
instrucciones
- el uso indebido
puede causar
lesiones
graves.
Advertisement
Table of Contents

Related Manuals for Stihl HT 70


Summary of Contents for Stihl HT 70
-
Page 2: Table Of Contents
Specifications ......... 44 using your pole pruner. Fuel ..........18 Special Accessories ....... 45 Contact your STIHL dealer or the STIHL Fueling ..........19 Maintenance and Repairs ....45 distributor for your area if you do not Chain Oil ......... 20... -
Page 3: Guide To Using This Manual
Engineering improvements in different ways: components. STIHL’s philosophy is to continually Step or procedure without direct Note or hint which is not essential improve all of its products. As a result, for using the machine, but may reference to an illustration. -
Page 4: Safety Precautions
These safety precautions and warnings special safety precautions must be strength to maintain control of the apply to the use of all STIHL pole observed to reduce the risk of personal pruner, do not use it. If you have any pruners. - Page 5 Most STIHL power tools are To reduce the risk of serious or fatal Warning! available with an anti-vibration injury, persons with pacemaker should ("AV") system designed to reduce consult their physician and the Prolonged use of pole pruners (or other...
- Page 6 STIHL or expressly approved by STIHL extremely high temperatures. Avoid glasses with adequate top for use with the specific STIHL pole touching the hot muffler – you could and side protection complying with pruner models are authorized. Although receive serious burns! ANSI Z 87.1.
- Page 7 If the risks associated with the possible pruner dust, vapor and smoke emissions are Your STIHL pole pruner uses an oil- not known, you should obtain the Take off the chain guard and inspect for gasoline mixture for fuel (see chapter relevant information from the contractor safety in operation.
- Page 8 Unit vibrations can cause on the STIHL product carefully so as to an improperly tightened allow any pressure build-up in the tank fuel cap to loosen or come to release slowly.
- Page 9 15m (50ft) odorless. manual. If you cannot set the correct idle speed, have your STIHL dealer check To reduce the risk of serious or fatal your pole pruner and make proper injury from breathing toxic fumes, never adjustments or repairs.
- Page 10 NIOSH / MSHA Don't work alone. Keep within calling for the type substance at issue. distance of others in case help is needed. HT 70, HT 75...
- Page 11 It is not designed for prying or control handle and shaft, keeping the establish a path of escape and remove handle and shaft between your thumb shoveling away limbs, roots or other all obstacles. and forefinger. objects. HT 70, HT 75...
- Page 12 Warning! carefully move the branch to open the pinch and release the bar. Use only STIHL replacement parts for Warning! maintenance and repair. Use of parts To reduce the risk of personal or even manufactured by others may cause fatal injury from falling objects do not cut serious or fatal injury.
- Page 13 STIHL Owner's Manual should be Warning! pruner. Do not attempt any maintenance strictly followed.
-
Page 14: Using The Pole Pruner
Cutting sequence To allow branches a free fall, always cut the lower branches first. Prune heavy branches (large diameter) in several controllable pieces. The shaft should always be held at an angle of 60° or less. HT 70, HT 75... - Page 15 Locate the hook against the branch and then perform the cross-cut (2). HT 70, HT 75...
- Page 16 Cutting from a lift bucket 30° angle drive (special accessory for HT 70) The unit's long reach enables cutting to be performed next to the trunk without The angle drive keeps the cutting the risk of the lift bucket damaging other attachment at an angle of 30°...
-
Page 17: Mounting The Bar And Chain
Fit the chain – Turn tensioning screw (1) Chain". start at the bar nose. counterclockwise until the tensioning nut (2) butts against the left end of the housing slot, then back it off 5 full turns. HT 70, HT 75... -
Page 18: Tensioning The Saw Chain
"Operating Instructions / some time – check chain tension During Operation“. frequently – see chapter "Operating Instructions / During Operation“. Check chain tension. see "Guide to Using this Manual" HT 70, HT 75... -
Page 19: Fuel
Fuel This engine is certified to operate on Use only STIHL two-stroke engine oil or unleaded gasoline and the STIHL two- equivalent branded two-stroke engine stroke engine oil at a mix ratio of 50:1. oils that are designed for use only in air cooled two-cycle engines. -
Page 20: Fueling
After fueling, tighten fuel cap as securely as possible by hand. HT 70, HT 75... -
Page 21: Chain Oil
Biological chain oil must be resistant Medical studies have shown that A full chain oil tank is sufficient for to aging (e.g. STIHL BioPlus) since renewed contact with waste oil can about one tankful of fuel. Check the it will otherwise quickly turn to resin. -
Page 22: Checking Chain Lubrication
(2) are in a dirty oil strainer: Have the oil strainer alignment. Slacken off the screw. cleaned or replaced by your STIHL Turn the filler cap clockwise as far Adjust shaft to required length. dealer. as stop. -
Page 23: Fitting The Harness
Adjust the harness and thigh belt (3) height as your right hip. as required. Rest the powerhead in the sling during cutting work. *see “Guide to Using this Manual” see “Guide to Using this Manual“ HT 70, HT 75... -
Page 24: Starting / Stopping The Engine
Press the fuel pump bulb (9) at least slide control and trigger interlock in five times, even if the bulb is still $ – STOP (6) for stopping the engine.. that order. This is the filled with fuel. starting-throttle position. HT 70, HT 75... - Page 25 This will bend the tube raised support (e.g. a branch, and result in permanent damage to mound or something similar). the telescopic shaft. Check that nobody is standing within the working range of the pruner. HT 70, HT 75...
- Page 26 Hold the unit firmly with your left hand around the fan housing – your Do not let the starter grip snap back thumb under the fan housing. – guide it slowly into the housing so that the starter rope can rewind properly. HT 70, HT 75...
- Page 27 STOP – $. necessary. Now start the engine. Pull off the spark plug boot (10). Unscrew and dry off the spark plug. Open the throttle fully. Pull the starter rope several times to clear the combustion chamber. HT 70, HT 75...
-
Page 28: Operating Instructions
Check tightness of nuts and Check chain tension frequently! screws (not adjusting screws) at regular A new chain has to be tensioned more intervals and retighten as necessary. often than one that has been in use for some time. HT 70, HT 75... -
Page 29: Taking Care Of Guide Bar
1 = oil inlet hole 2 = oil passage Ease the filter cover (2) over the tab 3 = bar groove and take it away. Clean away loose dirt from around the filter. Remove the foam and felt filter elements. HT 70, HT 75... -
Page 30: Motor Management
Do not wash. Replace damaged parts! Install the foam element (3) in the filter cover (2). Place felt element (4) (lettering facing inward) in filter housing (5). Fit filter cover so that it snaps into position. HT 70, HT 75... - Page 31 Turn low speed screw (L) operating at high altitude or at sea level. counterclockwise (about 1/4 turn) until the engine runs and accelerates smoothly. see "Guide to Using this Manual” HT 70, HT 75...
-
Page 32: Spark Arresting Screen* In Muffler
If screen is damaged or coked up, fit a new one. Refit the spark arresting screen. see “Guide to Using this Manual” HT 70, HT 75... -
Page 33: Replacing The Starter Rope And Rewind Spring
Take out the screws (1). or earlier if the electrodes are badly authorized by STIHL. Always press Remove the cable lug, if fitted. eroded. spark plug boot (2) snugly onto spark plug terminal (1) of the proper Lift the starter cover (2) away from size. - Page 34 "Special Accessories" – do not open rope rotor. To help reduce the risk of rope through the top of the grip and the wire retainer! injury, wear face protection and the rope bush (7). gloves. Refit the cap in the grip. HT 70, HT 75...
-
Page 35: Stihl
Take one turn of rope off the rotor. spring anchor loop (8) engages. Insert the screw (5) and tighten it Go to "Fitting the Starter Cover". down securely. Go to "Tensioning the Rewind Spring". HT 70, HT 75... -
Page 36: Storing The Machine
Use gauge – see "Special Accessories" – to check the depth of the wear marks. It is best to use two chains in rotation with one sprocket. Use only original STIHL chain sprockets! HT 70, HT 75... -
Page 37: Replacing Chain Sprocket
(1). Pull the washer (2) and sprocket (3) off the gear shaft. Clean the stub of the gear shaft and lubricate with STIHL grease – see "Special Accessories". Fit the new chain sprocket on the gear shaft. Fit the washer and E-clip on the gear shaft. -
Page 38: Maintaining And Sharpening
Picco Micro Mini (PMN) Other files have the wrong shape and Cutter shape: Micro = Semi-chisel cut. Specified angles A and B are more readily obtained if recommended files or sharpening tools and correct settings are used. HT 70, HT 75... -
Page 39: Stihl
The file only sharpens on the usually enough. forward stroke – lift the file off the cutter on the backstroke. Avoid touching the tie straps and drive links with the file. HT 70, HT 75... -
Page 40: Stihl
File down the depth gauge until it is level with the filing gauge. Check the depth gauge setting every time you sharpen the chain. HT 70, HT 75... -
Page 41: Stihl
0000 893 4000 Flat file 0814 252 3356 Sharpening kit (includes all parts listed above) 5605 007 1026 Place filing gauge on the chain – highest point of depth gauge must be level with the filing gauge. HT 70, HT 75... -
Page 42: Maintenance Chart
Chain lubrication Check Inspect, also check sharpness Saw chain Check chain tension Sharpen Check (wear, damage) Clean and turn over Guide bar Deburr Replace Check Chain sprocket Replace STIHL dealer * see “Guide to Using this Manual“ HT 70, HT 75... -
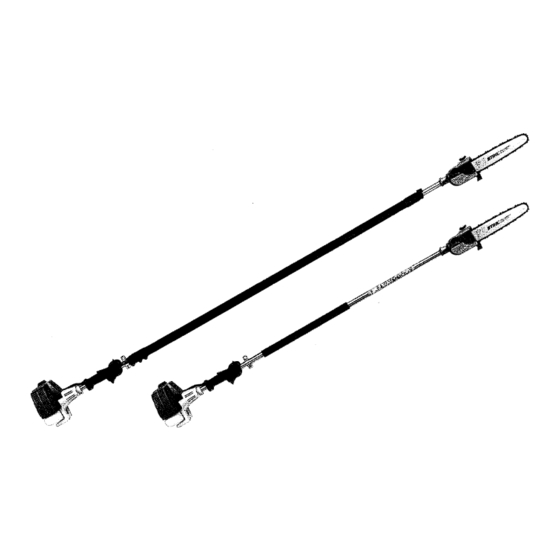
Page 43: Parts And Controls
Parts and Controls 1 Handle hose (HT 70) 2 Fixed drive tube (HT 70) 3 Carrying ring 4 Slide control 5 Throttle trigger interlock 6 Throttle trigger 7 Spark plug boot 8 Air filter cover 9 Machine support 10 Oilomatic saw chain... - Page 44 11. Guide Bar 21. Fuel Tank. and cutting work. Supports and guides the saw chain. For fuel and oil mixture. Fixed Drive Tube (HT 70) 12. Oil Tank 22. Fuel Filler Cap. Connects engine to the gearbox. Tank for chain lubricating oil.
-
Page 45: Specifications
- Part No. 3005 000 3905 Engine power to HT 70 11.2 lbs (5.1 kg) ISO 8893: 1.3 bhp - Bar length: 12" (30 cm) HT 75 15.4 lbs (7.0 kg) (0.95 kW) Idle speed: 3.000 rpm HT 70, HT 75... -
Page 46: Special Accessories
Combination wrench STIHL lubricating grease STIHL ElastoStart (starter rope with grip) Special resin-free lubricating oil Contact your STIHL dealer for the latest information on these and other special accessories. For applications in which an angled cutting attachment is an advantage for horizontal cuts or better control. -
Page 47: Stihl Incorporated Federal And California Emission Control Warranty Statement
California. STIHL service center as soon as a designed, built and equipped to meet the In other states, 1997 and later model problem exists. - Page 48 (see also instruction "Fuel"). warranty card to STIHL. If any emission owner if it is determined that a warranted Deviations from this recommendation related part on your engine is defective, part is defective.
Need help?
Do you have a question about the HT 70 and is the answer not in the manual?
Questions and answers