Table of Contents
Advertisement
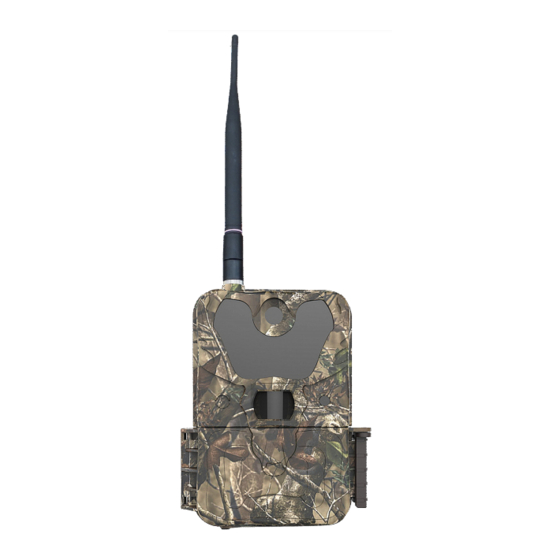
Uovision UM785-3G SMS 12MP Full HD
Wireless Camera Instruction Manual
For UM785-3G SMS 12MP Full HD Model
Declaration of Conformity to Directive 1999/5/EC
CE Caution:
Hereby, the manufacturer declares that this camera is in compliance with the essential
requirements and other relevant provisions of Directive 1999/5/EC. Please ask for your
distributor for a copy of the Declaration of Conformity to Directive 1999/5/EC.
©
Copyright 2017
Advertisement
Table of Contents

Summary of Contents for Uovision UM785-3G
- Page 1 Uovision UM785-3G SMS 12MP Full HD Wireless Camera Instruction Manual For UM785-3G SMS 12MP Full HD Model Declaration of Conformity to Directive 1999/5/EC CE Caution: Hereby, the manufacturer declares that this camera is in compliance with the essential requirements and other relevant provisions of Directive 1999/5/EC. Please ask for your distributor for a copy of the Declaration of Conformity to Directive 1999/5/EC.
-
Page 2: Table Of Contents
Content 1 General Description ..................................1 2 Camera button info diagram ................................1 3 Installing batteries ..................................... 2 4 Purchasing SIM card ..................................3 5 Installing your SIM card and SD card .............................. 3 6 Customizing camera settings ................................3 6.1 Formatting the SD card ................................. -
Page 3: General Description
1 General Description Congratulations on your purchase of UM785-3G Full HD scouting camera. UM785-3G Full HD is a powerful and reliable performance 3G wireless camera. Main features: 12MP invisible IR 3Gcamera 1080P H.264 video with audio 0.6s trigger speed 3G (WCDMA) network, faster transmission speed... -
Page 4: Installing Batteries
Figure 3 Bottom View Operation Panel MENU: To enter the menu, the power switch should be on SETUP. ▲▼◄►: Navigation arrows. (“▲”is the shortcut to choose “Video”, while “▼”for the “Photo”.) OK : Save parameter settings. Exchange between playback and preview. ►Shot: To capture a photo or record a video manually. -
Page 5: Purchasing Sim Card
4 SIM card (Dataplan speed, PIN code OFF) The camera is designed by using 3G cellular network to send MMS photos to any phone number or email address instantly once the photo or video is taken. Make sure that your SIM card 3G dataplan provides atleast 21Mb/s transmission speed Be sure that the PIN Code is OFF from the SIM card before inserting SIM card to camera. -
Page 6: Setup With Computer
Figure 6 Download Tool Figure 7 Download successful Figure 8 GSMSETUP - Unzip the GSMSETUP file to get the U Set application 6.3 Setup with computer After double click U set, you may see a warning box like below. Choose YES to continue. Figure 9 Warning box Figure 10 Select Area You will see the above screen for selecting area (Fig.10), then setting up window will shows up;... - Page 7 Setup starts from choosing operator parameters for your camera. There are three ways to setup your camera. Fill in the "E-mail" setting box before doing other settings, shown below in Fig.11. Then choose Auto in the parameter settings shown in below in Fig.12. Fill in rest of the needed information such as e-mail, phone etc. Note: the advantage of this way is that if any change on SIM card for the camera in the wood, you don´t need to bring camera back to home.
- Page 8 Choose your country and select operator, set sender email, then fill in rest of the needed information like e-mail, phone etc. If your personal cellular provider is not on the list, you can customize all the parameters by choosing Other in operator parameter, you can look all the MMS and GPRS information online or call your operator customer service, and fill in the blanks;...
- Page 9 GMAIL EXAMPLE: Please insert to E-MAIL SETTING table following SSL Protected Gmail settings: Email your.own@gmail.com address here! Account your.own@gmail.com address here! Password Your Gmail password here! SMTP server smtp.gmail.com Secure Type SSL/TLS SMTP port Important! Gmail account settings change: When you are logged in to your own Gmail e-mail account for example with your home computer, please go with the internet web-browser to following Gmail settings page www.google.com/settings/security/lesssecureapps Then click: "enable"...
-
Page 10: Send A Test Photo
the numbers of photos that are sent to your device or email every day. If you want to limit this, set the maximum number. If you want it to send every photo regardless of the number of photos each day, set this value to 0 (zero) b. - Page 11 Figure 21 Camera scene(A) Figure 22 Camera Scene(B) Camera Scene Description Auto This option is appropriate for most of the use. We recommend this option for quick setup camera. It takes 8MP photos in daytime and 3MP photos at night. Close objects This option is suitable for object which is within the distance between 3m and 5m.
-
Page 12: Video Mode
6.5.3 Video Mode When you set Camera Mode as Video, then you will see these submenu shows up. Video Size Select video resolution (in pixels per frame). Higher resolution produces better quality videos, but creates larger files that will take up more SD card space and fills it up faster. It provides Full HD 1080P (1920x1080, 30fps), HD 720P (1280x720, 60fps) and WVGA (848x480, 60fps) videos. -
Page 13: Work Time
Figure 28 Trigger Mode Figure 29 Trigger options PIR trigger When choose PIR trigger, the PIR is active. Any motion (animals or humans) that is detected by PIR will trigger camera to capture a photo or video according to the preset PIR sensitivity and PIR Interval. PIR Sensitivity The camera monitors temperature of ambient conditions. -
Page 14: Sys Tab
Figure 30 Work Time 1 Figure 31 Work time menu On: It means enable the work time function. Off: It means the camera will work all the time. If you want set two different time periods, please set more than one Work Time. 6.5.7 SYS TAB Set Clock Enter to set the date and time. -
Page 15: Control Camera By App Via Sms
The number which has control of this function (command phone number) is the one in the first position of the phone number list. Android APP: Please search ’UOVision’ or ’CamCtrl_M ’in Google play and install the APK file to your smart phone. https://play.google.com/store/apps/details?id=com.uovision.camctrl iOS APP: Please download following APP from Apple store and save most used SMS commands inside to the APP. - Page 16 Figure 36 CamCtrl_M Fig 1 There are 2 main panels as below. Slide the phone screen to change between the panels. Fig 2 Note: If you set Wireless Status to OFF, you will not receive photos or Daily reports to your phone or e‐mail. You also can’t get any response of other SMS commands.
- Page 17 Incase if you want send SMS commands to camera by normal text messages, below are few most common used SMS commands: SMS commands UM785-3G Command Function #110# Take picture and send it #360# Location #370# Camera status request #330#1#5# 5sec HD video capturing: res 720P HD / 5 sec...
-
Page 18: View Or Delete Photos On The Color Display
#211#EmailAddressHere# Adding e-mail address if e-mail sending to e-mail address is chosen 8 View or Delete photos on the color display You can view your photos on the color display when in the field. If you want to do this, make sure the Power switch is setted to SETUP. -
Page 19: Appendix Ⅰ: Technical Specifications
Appendix Ⅰ: Technical Specifications Picture Resolution 12MP, 8MP (Interpolated), 3MP, 1.3MP (CMOS 5MP) Lens F/NO=3.0 FOV (Field of View)=52° UMTS/HSPA+: 900/2100MHz Frequency Bands GSM/EDGE:850/900/1800/1900MHz IR-Flash 50% (6m), 100% (12m) Display Screen 2.4” LCD Memory Card Up to 32GB Video Resolution WVGA,720P,1080P PIR Sensor Multi Zone... - Page 20 Customer Name: Contact Tel: Date of Purchase: Series No: Fault Description: Retailer: The camera manufacturer provides 12 months of warranty service for this product against manufacturing defects or malfunctions. If your camera fails to function under normal use within 1 year, the camera manufacturer will repair or replace the camera at no charge.
Need help?
Do you have a question about the UM785-3G and is the answer not in the manual?
Questions and answers