Asus WL-520g User Manual
For 802.11g/b wireless clients
Hide thumbs
Also See for WL-520g:
- User manual (31 pages) ,
- Quick start manual (136 pages) ,
- Quick start manual (9 pages)

Related Manuals for Asus WL-520g


Summary of Contents for Asus WL-520g
- Page 1 ASUS WL-520g Wireless Router (For 802.11g/b Wireless Clients) User’s Manual Jan 2005 / E1957...
- Page 2 Product warranty or service will not be extended if: (1) the product is repaired, modified or altered, unless such repair, modification or alteration is authorized in writing by ASUS; or (2) the serial number of the product is defaced or missing.
-
Page 3: Contact Information
Technical Support General Support: +1-502-995-0883 Notebook (Tel): +1-510-739-3777 x5110 Support Email: notebooktsd@asus.com Support Fax: +1-502-933-8713 ASUS COMPUTER GmbH (Germany & Austria) Company Address: Harkort Str. 25, D-40880 Ratingen, Germany General Telephone: +49-2102-95990 General Fax: +49-2102-959911 Web Site Address: www.asuscom.de Online Contact: www.asuscom.de/sales... -
Page 4: Table Of Contents
Connections ..................14 3. Software Configuration ..............16 Configuring the ASUS Wireless Router ..........16 Connecting to the ASUS Wireless Router ........... 16 Setting IP address for Wired or Wireless Connection ..... 17 Installing the ASUS Wireless Router Utilities ........18 Using the Wireless Router for the First Time ........ -
Page 5: Introduction
ASUS Wireless products can keep you connected anywhere, any time. System Requirements To begin using the ASUS WL-520g Wireless Router, you must have the following minimum requirements: • ADSL/Cable Modem and Broadband Internet Account. -
Page 6: Features
Adopting a unique push button design, ASUS’ Wireless Router Series greatly streamlines the setup process for beginners. Just press the button located on the back of the device and use the simple ASUS EZSetup Wizard utility. The routers will automatically register various wireless-capable devices onto the network and activate security standards. -
Page 7: The Asus Wireless Family
Chapter 1 - Introduction The ASUS Wireless Family The ASUS Wireless family contains a several wireless network solutions for 802.11g & 802.11b wireless local area networks in the home or office. Access Point or Client The ASUS WLAN 802.11g The ASUS 3 in 1... - Page 8 IEEE 802.11g/b wireless standards and connects to any computer using USB2.0 connectivity. The ASUS USB Wireless LAN Adapter (WL-167g) is thumb-sized and creates a wireless network using the IEEE 802.11g/b wireless standards and connects to any computer using USB2.0 connectivity.
-
Page 9: Network Topology
(or other device) to the ASUS Wireless Router, you need a network cable (UTP-Cat5) with one end connected to one of the LAN ports on the back of the ASUS Wireless Router and the other in the 10/100 LAN port on that device. For wireless connections, wireless mobile clients must comply with the IEEE 802.11b standard. -
Page 10: Agent To An Isp
Internet Service Provider (ISP). You may use an ADSL or Cable modem to communicate with your ISP. Connect the LAN port on the modem with the WAN port at the back of the ASUS Wireless Router using a network cable as shown above. -
Page 11: Agent To Another Network
Chapter 1 - Introduction Agent to Another Network Wireless Network Backbone ASUS Wireless Router Wireless Client Wireless Client Wired Client In this topology, the wireless router is an agent between your LAN and another network. Use a network cable with one end connected to the WAN port on the wireless router and the other to the other network as shown above. -
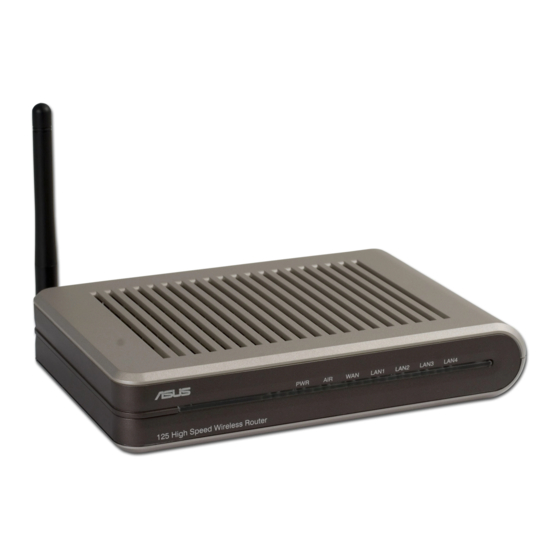
Page 12: Led Indicators
Chapter 1 - Introduction LED Indicators The LEDs on the front of the ASUS Wireless Router display the status of the ASUS Wireless Router. PWR (Power) No power System ready Flashing-slow Firmware upgrade failed Flashing-quick EZsetup processing Note: If the setup button is pushed without running the EZsetup... -
Page 13: Installation Procedure
Commission. Wall Mounting Option Out of the box, the ASUS Wireless Router is designed to sit on a raised flat surface like a file cabinet or book shelf. The unit may also be converted for mounting to a wall or ceiling. -
Page 14: Connections
Connect the Wireless Router to your computer through the LAN port. Wireless Router Wireless Client Warning: Use the ASUS Wireless Router only with the power adapter supplied in the product package. Using another power supply may damage the ASUS Wireless Router. -
Page 15: Software Configuration
ASUS Wireless Router so you can use either a straight-through or a crossover Ethernet cable. Plug one end of the cable into the WAN port on the rear of the ASUS Wireless Router and the other end into the Ethernet port of your ADSL or Cable modem. -
Page 16: Setting Ip Address For Wired Or Wireless Connection
254 that is not used by another device) • Subnet Mask 255.255.255.0 (same as the ASUS Wireless Router) • Gateway 192.168.1.1 (this is the ASUS Wireless Router) • DNS 192.168.1.1 (ASUS Wireless Router IP address or your own). ASUS Wireless Router... -
Page 17: Installing The Asus Wireless Router Utilities
Chapter 3 - Software Configuration Installing the ASUS Wireless Router Utilities Follow these steps to install the ASUS Wireless Router Utilities in Microsoft Windows. Insert the support CD provided with the ASUS Wireless Router and the menu will appear. (Double-click setup.exe if your autorun has been disabled.) -
Page 18: Using The Wireless Router For The First Time
® Internet Explorer). If your computer’s IP is not on the same subnet as the ASUS Wireless Router (192.168.1.X), you will be asked to change it. The IP address can be any number from 2 to 254 that is not used by another device. Gateway is not required. - Page 19 The factory default values are “admin” and “admin”. Note: If you cannot find any the ASUS Wireless Routers due to a problem in the IP settings, push and hold the “Restore” button over five seconds to re- store factory default settings.
-
Page 20: Setting Up A Server In Your Lan
Port Range: Port connected to WAN Local IP: IP address of the FTP Server Local Port: Oort of the FTP Server Protocol:Protocol Type (4) Click Add button to add settings (5) Click Finish button 3. Click Save&Restart”. ASUS Wireless Router... -
Page 21: Setting Up As Switching Hub And Pure Ap (No Ip Sharing Nat)
1. Connect the LAN port from a DSL or Cable modem to one of the LAN ports DSL or Cable Modem on the wireless router. ASUS Wireless Router 2. Select DHCP Server under “IP Config” 3. Turn OFF the “DHCP Server” function 4. Click Finish. -
Page 22: Setting Up Net Meeting, Msn, On-Line Gaming, And Remote Control Programs
Setting up net meeting, MSN, on-line gaming, and remote control programs 1. Open My Network Places from Windows “start”. 2. Click View network connections. 3. Right-click Local Area Connection and select “Properties”. 4. Double-click Internet Protocol (TCP/IP) ASUS Wireless Router... - Page 23 Setting up net meeting, MSN, on-line gaming, and remote control programs (Cont.) 5. Enter TCP/IP settings as shown here. 6. Choose “Virtual DMZ” from “NAT Setting” in WL-520g settings 8. Click Save&Restart”. 7. Enter the IP address and click Finish. ASUS Wireless Router...
-
Page 24: Setting Up Ddns
You then receive a letter by e-mail to activate the account. 10. Open your e-mail to find the activation letter and open it. 11. Click the confirmation link to activate your account. ASUS Wireless Router... - Page 25 15. Select Services tab. 16. Click Add Host next to Dynamic DNS to add your own DDNS. 17. Enter the “Hostname” and then click Add Host. 18. You will see this message when your Hostname is successfully created. ASUS Wireless Router...
- Page 26 21. Verify the DDNS is working. Click Windows start and select Run... 22. Type in cmd and click OK to open the DOS console. 23. Type ping wl-520g.dyndns.org (use your hostname). If you can see a reply from the hostname, the DDNS is working correctly.
-
Page 27: Setting Up Wds
“Yes”. 7. Enter the MAC address of the APs you want to connect to. 8. Click Add after you key in the “MAC address” 9. Click Finish. 10. Click Save&Restart. ASUS Wireless Router... - Page 28 Chapter 3 - Software Configuration ASUS Wireless Router...
-
Page 29: Troubleshooting
Appendix Troubleshooting The ASUS Wireless Router is designed to be very easy to install and operate. However, if you experience difficulties, use the information in this chapter to help diagnose and solve problems. If you cannot resolve a problem, contact Technical Support, as listed on the front of this manual. -
Page 30: Reset To Defaults
The following are factory default values. These values will be present when you first receive your the ASUS Wireless Router, if you push the reset button on the back of the ASUS Wireless Router over 5 seconds, or if you click the “Restore”... - Page 31 1. Try to bring the devices closer together; the PC Card may be out of range of the ASUS Wireless Router. 2. Confirm that the ASUS Wireless Router and PC Card have the same SSID. 3. Confirm that the ASUS Wireless Router and PC Card have the same Encryption settings, if enabled.
- Page 32 Solution To configure the ASUS Wireless Router through a wireless LAN card, your computer must be in the same subnet of the ASUS Wireless Router. You cannot find the ASUS Wireless Routers with subnet different from your computer within the same gateway. You must change your computer to the same subnet as the ASUS Wireless Router.
Need help?
Do you have a question about the WL-520g and is the answer not in the manual?
Questions and answers