Do you have a question about the Maestro 4000 and is the answer not in the manual?
Questions and answers
Leonardo
February 1, 2025
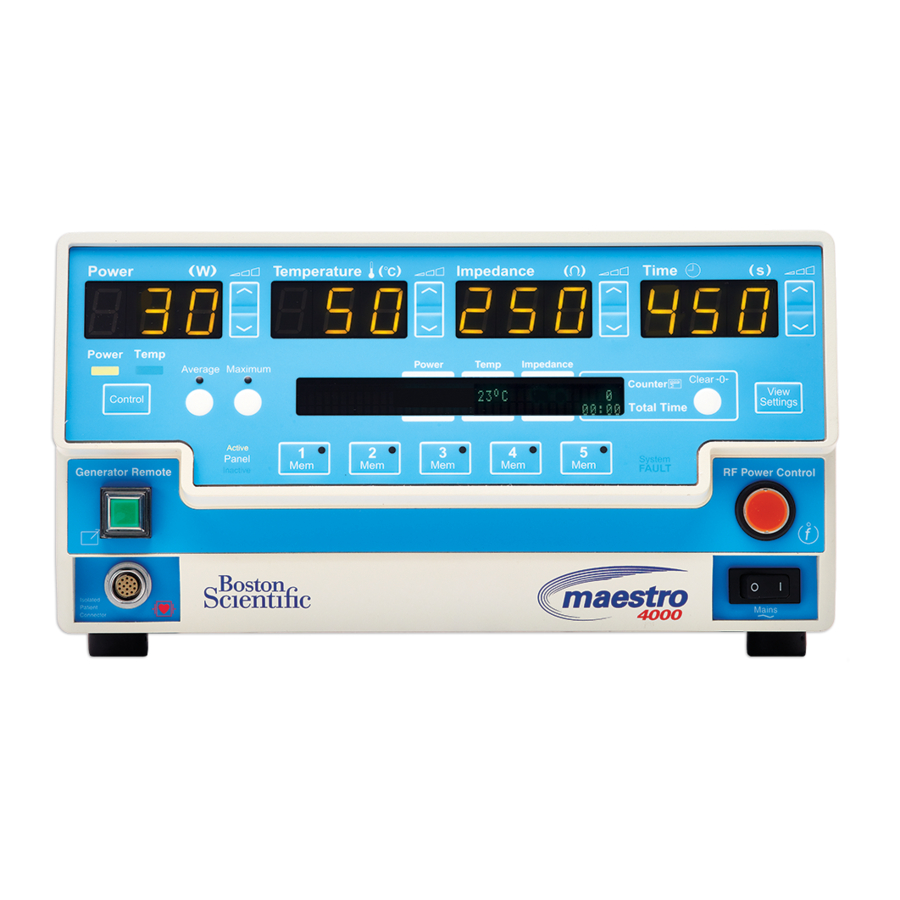
Apear a message “system fault”. What can i do?
1 comments:
Mr. Anderson
May 14, 2025
If your Boston Scientific Maestro 4000 displays a "system fault" message, follow these steps:
1. Check the Maestro 4000 for errors. 2. Refer to the Maestro 4000 manual to resolve generator errors. 3. If the communication cable is connected and the message still appears: - Check the cable connections between the Maestro 4000 and the MetriQ Pump. - Tighten the thumb screws on the connectors. - Replace the communications cable if needed.
This answer is automatically generated
Related Manuals for Boston Scientific Maestro 4000


Need help?
Do you have a question about the Maestro 4000 and is the answer not in the manual?
Questions and answers
Apear a message “system fault”. What can i do?
If your Boston Scientific Maestro 4000 displays a "system fault" message, follow these steps:
1. Check the Maestro 4000 for errors.
2. Refer to the Maestro 4000 manual to resolve generator errors.
3. If the communication cable is connected and the message still appears:
- Check the cable connections between the Maestro 4000 and the MetriQ Pump.
- Tighten the thumb screws on the connectors.
- Replace the communications cable if needed.
This answer is automatically generated