Table of Contents
Advertisement
Available languages
Available languages
Questions, problems, missing parts?
Before returning to your retailer, our customer service is available. English & Spanish speaking.
Call us toll-free at (866) 985-7877, email us at cservice@welltraveled.net, or go online
and live chat at www.wtliving.com. Our hours are: 9 a.m. – 6 p.m., EST, Monday – Friday
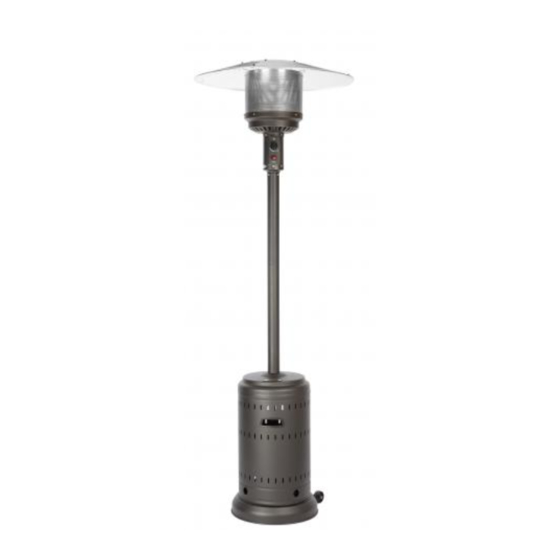
Patio Heater
ASSEMBLY / CARE & USE INSTRUCTIONS
IMPORTANT, RETAIN FOR FUTURE
REFERENCE: READ CAREFULLY
DANGER
FOR YOUR SAFETY:
If you smell gas:
1. Shut off gas to the appliance.
2. Extinguish any open flame.
3. If odor continues, keep away from the
appliance and immediately call your gas
supplier or fire department.
DANGER
Failure to comply with the precautions
and instructions provided with this heater
can result in death, serious bodily injury
and property loss or damage from hazards
of fire, explosion, burn, asphyxiation,
and/or carbon monoxide poisoning. Only
persons who can understand and follow
the instructions should use or service
this heater.
WARNING
FOR OUTDOOR USE ONLY!
ITM. / ART. 1031510
WARNING
Do not store or use gasoline or other
flammable vapors and liquids in the
vicinity of this or any other appliance.
An LP-cylinder not connected for use
shall not be stored in the vicinity of this
or any other appliance.
WARNING
Improper installation, adjustment,
alteration, service or maintenance can
cause property damage, injury or death.
Read the installation, operation and
maintenance instructions thoroughly
before installing or servicing this
equipment.
ATTACH YOUR
RECEIPT HERE
Keep a copy of your proof of
purchase or order confirmation
which will be needed if you
need to contact us about
warranty coverage.
Serial No.
Purchase Date
Advertisement
Chapters
Table of Contents

Related Manuals for Firesense 1031510


Summary of Contents for Firesense 1031510
- Page 1 Patio Heater ITM. / ART. 1031510 ASSEMBLY / CARE & USE INSTRUCTIONS IMPORTANT, RETAIN FOR FUTURE REFERENCE: READ CAREFULLY DANGER WARNING FOR YOUR SAFETY: Do not store or use gasoline or other If you smell gas: flammable vapors and liquids in the 1.
- Page 2 www.wtliving.com English Page 3 Français Page 18 Español Page 34 Contact us for assistance: (866) 985-7877 | www.wtliving.com...
-
Page 3: Table Of Contents
BEFORE YOU BEGIN TABlE OF CONTENTS Before You Begin Page 2 Safety Information Page 3 Package Contents Page 4 Hardware Contents Page 4 Assembly Page 5-8 Operating Instructions Page 9-12 Care and Maintenance Page 13 Troubleshooting Page 14 Replacement Parts list Page 15 Warranty Information Page 16... -
Page 4: Safety Information
SAFETY INFORMATION DANGER DANGER CAUTION EXPLOSION—FIRE HAZARD CARBON MONOXIDE HAZARD SERVICE SAFETY • Keep solid combustibles, such as • This heater is a combustion appliance. • Keep all connections and fittings clean. Make building materials, paper, or cardboard All combustion appliances produce carbon sure propane cylinder valve outlet is clean. -
Page 5: Package Contents
PACKAGE CONTENTS PART DESCRIPTION QUANTITY Reflector Panel 4 packed in 2 inner cartons Reflector Center Cap Head Assembly 1 packed in 1 inner carton Tank Housing Gas Hose 1 attached to Head Assembly Upper Post Lower Post Regulator 1 packed with Head Assembly Post Supports 3 packed in 1 inner carton Base with Pre-assembled... - Page 6 ASSEMBlY PREPARATION Before beginning assembly of this appliance, make sure all parts are present. Compare all parts with package contents list and hardware contents as listed on page 4 of this manual. If any part is missing or damaged, do not attempt to assemble this product.
- Page 7 ASSEMBlY Attach the lower Post to the Post Supports . Once you have tightened the bolts holding the Post Supports to the Base , align the holes in the lower Post with the holes on the tops of the Post Supports and insert a large Bolt through the hole in the Post Support.
-
Page 8: Assembly
ASSEMBLY Attach Head Assembly to Upper Post . Route Gas Hose down into Upper/Lower Posts align 4 small holes on the Head Assembly with 4 Small holes in the Upper Post . [HINT: Control knob should be above decal on post.] Insert the 4 Small Bolts with Lock Washers through the aligned 4 holes and tighten securely with the Wrench... - Page 9 ASSEMBlY While supporting heater, tilt the Head Assembly and slide 3 large Flat Washers over the Reflector Studs . Place the reflector assembly onto the Reflector Studs and slide 3 large Flat Washers over the Reflector Studs and onto the Reflector Assembly. Secure with 3 Wing Nuts. Once you have tightened the Wing Nuts, return the heater to an upright position.
-
Page 10: Operating Instructions
OPERATING INSTRUCTIONS A minimum supply pressure of .5 psi is required for the purpose of input adjustment of propane gas. Storage of this patio heater indoors is permissible • Do not store a spare LP-gas only if the cylinder is disconnected and removed from the appliance. A cylinder cylinder under or near this must be stored outdoors in a well-ventilated area out of the reach of children. - Page 11 OPERATING INSTRUCTIONS lEAK TEST BEFORE TURNING GAS SUPPlY ON: WARNING 1. Make 2-3 oz. of leak test solution 1. Your heater was designed and • Perform all leak tests outdoors. (one part liquid dish washing approved for OUTDOOR use • Extinguish all open flames. only.
- Page 12 OPERATING INSTRUCTIONS lIGHTING WARNING NOTE: For initial start or after any cylinder FOR YOUR SAFETY change, hold the control knob in for 2 Be careful when attempting to manually minutes to purge air from all gas lines PUSH IN ignite this heater. Holding in the control knob for more than 10 seconds before before proceeding.
- Page 13 OPERATING INSTRUCTIONS OPERATION CHECKlIST: WARNING For a safe and pleasurable heating experience, perform this check FOR YOUR SAFETY before each use: Heater will be hot after use. Handle with extreme care. Reflector is hot to the touch. BEFORE OPERATING: I am familiar with entire owner’s manual and understand all precautions noted.
-
Page 14: Care And Maintenance
CARE AND MAINTENANCE To enjoy years of outstanding performance from your heater, make sure you WARNING perform the following maintenance activities on a regular basis: FOR YOUR SAFETY • Do NOT touch or move heater for at least KEEP ExTERIOR SURFACES ClEAN. 45 minutes after use. -
Page 15: Troubleshooting
TROUBlESHOOTING PROBlEM POSSIBlE CAUSE CORRECTIvE ACTION Gas valve may be off Turn gas valve ON Fuel tank may be empty Refill LPG tank Orifice blocked Clean or replace orifice Purge air from lines. Open gas lines and depress control Air in supply system knob for 2-3 minutes. -
Page 16: Replacement Parts List
REPlACEMENT PARTS lIST PART DESCRIPTION QUANTITY Reflector Panel 4 packed in 2 inner cartons Reflector Center Cap Head Assembly 1 packed in 1 inner carton Tank Housing Gas Hose 1 attached to Head Assembly Upper Post Lower Post Regulator 1 packed with Head Assembly Post Supports 3 packed in 1 inner carton Base with Pre-assembled... - Page 17 1 YEAR lIMITED WARRANTY • THERE ARE NO EXPRESS WARRANTIES ExCEPT AS lISTED ABOvE Customers in the Continental US • PURCHASER ASSUMES ALL RISKS IN THE All components are warranted for a period of 1 year after date of purchase by the original ASSEMBlY AND OPERATION OF THIS UNIT owner against defects in materials and workmanship under normal use.
- Page 18 Chauffage de terrasse ÉLÉM. / ART. 1031510 INSTRUCTIONS D'ASSEMBLAGE, D'ENTRETIEN ET D'UTILISATION IMPORTANTES, À CONSERVER POUR POUVOIR VOUS Y RÉFÉRER ULTÉRIEUREMENT : À LIRE ATTENTIVEMENT AVERTISSEMENT DANGER Une installation, un réglage, une modification, une utilisation ou un entretien inadéquat peut POUR VOTRE SÉCURITÉ...
- Page 19 AVANT DE COMMENCER TABLE DES MATIÈRES Avant de commencer Page 19 Renseignements sur la sécurité Page 20 Contenu de l'emballage Page 21 Quincaillerie incluse Page 21 Assemblage Pages 22 à 25 Mode d'emploi Pages 26 à 29 Entretien et maintenance Page 30 Dépannage Page 31...
- Page 20 RENSEIGNEMENTS SUR LA SÉCURITÉ ATTENTION DANGER DANGER CONSIGNES DE SÉCURITÉ RELATIVES RISQUE LIÉ AU MONOXYDE DE CARBONE RISQUES D’EXPLOSION OU D’INCENDIE À L’ENTRETIEN • Ce chauffage est un appareil à combustion. • • Gardez le chauffage à une distance Assurez-vous que tous les branchements et tous Tous les appareils à...
- Page 21 CONTENU DE L'EMBALLAGE PIÈCE DESCRIPTION QUANTITÉ Panneau réflecteur 4 emballés dans 2 cartons inclus Capuchon central du réflecteur 1 emballé dans 1 carton inclus Ensemble de l’embout Boîtier du réservoir Tuyau de gaz 1 fixé à l'ensemble de l'embout Borne supérieure Borne inférieure 1 emballé...
- Page 22 ASSEMBLAGE ASSEMBLAGE ASSEMBLAGE PRÉPARATION Avant de commencer l’assemblage de cet appareil, assurez-vous d’avoir toutes les pièces. Comparez toutes les pièces avec la liste du contenu de l’emballage et celle de la quincaillerie indiquées à la page 4 de ce guide. S’il y a des pièces manquantes ou endommagées, ne tentez pas d’assembler cet article.
- Page 23 ASSEMBLAGE ASSEMBLAGE ASSEMBLAGE Fixez la borne inférieure Lorsque vous avez serré les boulons tout en maintenant les supports de borne (I) à la base ( , alignez les trous sur la borne inférieure ( avec les trous en haut des supports de borne et insérez un grand boulon ( dans le trou sur le support de borne.
- Page 24 ASSEMBLAGE ASSEMBLAGE ASSEMBLAGE Fixez l'ensemble de l'embout (C) à la borne supérieure (F). Faites passer le tuyau de gaz (E) dans les bornes supérieure/inférieure (F)/(G) vers le bas et alignez 4 petits trous sur l'ensemble de l'embout C avec 4 petits trous dans la borne supérieure (F).
- Page 25 ASSEMBLAGE ASSEMBLAGE ASSEMBLAGE Tout en maintenant le chauffage, inclinez l'ensemble de l'embout (C) et faites glisser 3 grandes rondelles plates (R) sur les goujons de réflecteur (W). Placez l'ensemble du réflecteur sur les goujons de réflecteur et faites glisser 3 grandes rondelles plates sur les goujons de réflecteur et sur l'ensemble du réflecteur.
- Page 26 MODE D'EMPLOI Une pression d’alimentation en gaz minimale de 0,5 psi est nécessaire pour le réglage d'entrée du gaz propane. L'entreposage de ce chauffage • Ne rangez pas de bouteille de terrasse à l'intérieur est autorisé uniquement si la bouteille est retirée de gaz de pétrole liquéfié...
- Page 27 MODE D'EMPLOI AVANT D’OUVRIR L’ALIMENTATION TEST DE FUITES EN GAZ : AVERTISSEMENT 1. Préparez de 60 à 90 ml de solution Le chauffage est conçu et pour détection des fuites (une part • Effectuez toujours la détection des fuites certifié pour un usage à de savon à...
- Page 28 MODE D'EMPLOI ALLUMAGE AVERTISSEMENT REMARQUE : avant d’allumer l’appareil pour la toute première fois ou après un changement POUR VOTRE SÉCURITÉ de bouteille, maintenez le bouton de Soyez prudent lorsque vous tentez d’allumer commande enfoncé pendant 2 minutes afin manuellement le chauffage. Si vous de purger l’air contenu dans toutes les maintenez le bouton de commande enfoncé...
- Page 29 MODE D'EMPLOI AVERTISSEMENT LISTE DE VÉRIFICATION : POUR VOTRE SÉCURITÉ Afin de profiter d’un chauffage sûr et agréable, effectuez les Le chauffage sera chaud après chaque vérifications suivantes avant chaque utilisation : utilisation. Faites preuve de beaucoup de prudence lorsque vous le manipulez. Le réflecteur est chaud.
- Page 30 ENTRETIEN ET MAINTENANCE AVERTISSEMENT Afin d’obtenir le meilleur rendement possible de votre chauffage pendant POUR VOTRE SÉCURITÉ des années, assurez-vous d’effectuer régulièrement les tâches • Ne touchez PAS le chauffage ou ne le déplacez d’entretien suivantes : pas pendant au moins 45 minutes après l’avoir utilisé.
- Page 31 DÉPANNAGE PROBLÈME CAUSE POSSIBLE MESURE CORRECTIVE La valve de la bouteille de gaz est Ouvrez la valve de la bouteille de gaz. peut-être fermée. Le réservoir de carburant est peut- Remplissez le réservoir de GPL. être vide. Un orifice est obstrué. Nettoyez ou remplacez l'orifice.
- Page 32 LISTE DES PIÈCES DE RECHANGE PIÈCE DESCRIPTION QUANTITÉ Panneau réflecteur 4 emballés dans 2 cartons inclus Capuchon central du réflecteur Ensemble de l’embout 1 emballé dans 1 carton inclus Boîtier du réservoir Tuyau de gaz 1 fixé à l'ensemble de l'embout Borne supérieure Borne inférieure Régulateur...
- Page 33 GARANTIE LIMITÉE DE 1 AN AUCUNE GARANTIE EXPRESSE NE SERA ACCORDÉE AUTRE QUE CELLE QUI EST Clients aux États-Unis (zone continentale) INDIQUÉE CI-DESSUS • L’ACHETEUR ASSUME TOUS LES RISQUES Toutes les pièces sont garanties contre les défauts de matériaux et de fabrication, dans ASSOCIÉS À...
- Page 34 CALENTADOR ITM. / ART. 1031510 PARA PATIO ENSAMBLE / INSTRUCCIONES DE CUIDADO Y DE USO, CONSERVAR PARA FUTURAS CONSULTAS: LEER DETENIDAMENTE ADVERTENCIA PELIGRO No guarde o use gasolina ni ningún vapor POR SU SEGURIDAD: o líquido inflamable cerca de este o de Si hauele a gas: cualquier otro aparato.
-
Page 35: Antes De Comenzar
ANTES DE COMENZAR ÍNDICE Antes de comenzar Página 35 Información de seguridad Página 36 Contenidos del embalaje Página 37 Herramientas incluidas Página 37 Ensamble Páginas 38-41 Instrucciones de funcionamiento Páginas 42-45 Cuidados y mantenimiento Página 46 Resolución de problemas Página 47 Lista de piezas de repuesto Página 48 Información sobre la garantía... -
Page 36: Información De Seguridad
INFORMACIÓN DE SEGURIDAD PELIGRO PELIGRO PRECAUCIÓN PELIGRO DE EXPLOSIÓN O DE FUEGO RIESGO POR MONÓXIDO DE CARBONO SEGURIDAD DURANTE EL MANTENIMIENTO • • Mantenga a una distancia segura del Este calentador es un aparato de • Mantenga limpias todas las conexiones. calentador los combustibles sólidos tales combustión. -
Page 37: Contenidos Del Embalaje
CON N TENID TENIDOS DEL EMBALAJE PIEZA DESCRIPCIÓN CANTIDAD Panel reflector 4 empacados en 2 cajas interiores Tapa central del reflector Conjunto de la cabeza 1 empacado en 1 caja interior Cubierta del tanque Manguera del gas 1 junto al conjunto de la cabeza Poste superior Poste inferior Regulador... -
Page 38: Ensamble Páginas
ENSAMBLE PREPARACIÓN Antes de empezar a ensamblar el aparato, asegúrese de que están todas las piezas. Compare todas las piezas con la lista de contenidos del embalaje y los contenidos de las herramientas que aparecen en la página 4 de este manual. - Page 39 ENSAMBLE Una el poste inferior Cuando haya apretado los tornillos que sujetan los soportes del poste (I) a la base ( , alinee los agujeros del poste inferior ( con los agujeros superiores de los soportes del poste e inserte un tornillo grande por el agujero del soporte del poste.
- Page 40 ENSAMBLE Una el conjunto de la cabeza ( al poste superior ( Pase la manguera del gas ( por los postes superior/inferior ( y alinee los 4 agujeros pequeños del conjunto de la cabeza con los 4 agujeros pequeños del poste superior ( .
- Page 41 ENSAMBLE Mientras sujeta el calentador, incline el conjunto de la cabeza (C) y deslice 3 arandelas planas grandes ( sobre los pasadores del reflector ( . Coloque el conjunto reflector sobre los pasadores del reflector y deslice 3 arandelas planas grandes por los pasadores del reflector y el conjunto reflector.
-
Page 42: Instrucciones De Funcionamiento Páginas
INSTRUCCIONES DE FUNCIONAMIENTO Se necesita un mínimo de presión de suministro de 5 psi para poder ajustar la entrada de gas propano. Solo se podrá guardar este calentador de patio en • No almacene un cilindro espacios interiores si el cilindro ha sido desconectado y separado del aparato. de gas de repuesto bajo El cilindro debe guardarse en el exterior, en un espacio bien ventilado y lejos del el aparato o cerca de él. - Page 43 INSTRUCCIONES DE FUNCIONAMIENTO ANTES DE PONER EL GAS: PRUEBA DE FUGAS Su calentador ha sido diseñado ADVERTENCIA 1. Mezcle una solución de y aprobado solo para su uso AL AIRE LIBRE. NO lo use • Realice todas las pruebas de fuga en el 60-90 ml (2-3 oz) para la exterior.
- Page 44 INSTRUCCIONES DE FUNCIONAMIENTO INSTRUCCIONES DE FUNCIONAMIENTO ENCENDIDO ADVERTENCIA NOTA: En el encendido inicial, o luego de un POR SU SEGURIDAD cambio de cilindro, sujete la perilla de control Tenga cuidado al intentar encender este durante 2 minutos para purgar el aire de todas EMPUJE calentador de forma manual.
- Page 45 INSTRUCCIONES DE FUNCIONAMIENTO COMPROBACIONES ANTES DEL FUNCIONAMIENTO: ADVERTENCIA Para un uso seguro y satisfactorio, realice estas comprobaciones antes de cada uso: POR SU SEGURIDAD Luego de su uso, el calentador estará caliente. Manipúlelo con extremo ANTES DEL FUNCIONAMIENTO: cuidado. Estoy familiarizado con el manual del usuario y comprendo todas las precauciones mencionadas.
-
Page 46: Cuidados Y Mantenimiento
CUIDADOS Y MANTENIMIENTO Para disfrutar de muchos años de excelente funcionamiento con ADVERTENCIA su calentador, asegúrese de que realiza las siguientes actividades POR SU SEGURIDAD de mantenimiento periódicamente: • NO toque ni mueva el calentador al menos durante 45 minutos tras su uso. •... -
Page 47: Resolución De Problemas
RESOLUCIÓN DE PROBLEMAS PROBLEMA POSIBLE CAUSA ACCIÓN CORRECTIVA Puede que la válvula del gas esté Abra la válvula del gas en ON (ENCENDIDO) apagada El tanque de gas puede estar vacío Rellene el tanque de gas propano Orificio bloqueado Limpie o reemplace el orificio Purgue el aire de los conductos. -
Page 48: Lista De Piezas De Repuesto
LISTA DE PIEZAS DE REPUESTO PIEZA CANTIDAD DESCRIPCIÓN 4 empacados en 2 cajas interiores Panel reflector Tapa central del reflector 1 empacado en 1 caja interior Conjunto de la cabeza Cubierta del tanque 1 junto al conjunto de la cabeza Manguera del gas Poste superior Poste inferior... -
Page 49: Información Sobre La Garantía
GARANTÍA LIMITADA DE 1 AÑO • NO HAY GARANTÍAS EXPRESAS EXCEPTO LAS ARRIBA MENCIONADAS Clientes en Estados Unidos continental • EL CONSUMIDOR ASUME TODOS LOS RIESGOS AL ENSAMBLE Y FUNCIONAMIENTO Todos los componentes tienen una garantía de 1 año tras la fecha de compra del DE ESTA UNIDAD propietario original ante los defectos de material y de fabricación durante su uso normal.
Need help?
Do you have a question about the 1031510 and is the answer not in the manual?
Questions and answers