AJA Kumo 1604 Installation And Operation Manual
Compact sdi router
Hide thumbs
Also See for Kumo 1604:
- Installation and operation manual (73 pages) ,
- Quick start manual (9 pages) ,
- Manual (108 pages)
Table of Contents
Advertisement
Quick Links
Advertisement
Table of Contents

Subscribe to Our Youtube Channel
Related Manuals for AJA Kumo 1604


Summary of Contents for AJA Kumo 1604
- Page 1 Installation and Operation Guide Version 3.1 Published: May 23, 2014 ®...
-
Page 2: Table Of Contents
Windows 7: Firefox Using Bonjour ..........23 KUMO v3.1 www.aja.com... - Page 3 Ethernet Control Specifications ........... 50 Appendix B: Safety & Compliance ......51 KUMO v3.1 www.aja.com...
- Page 4 Index............64 KUMO v3.1 www.aja.com...
-
Page 5: Notices
Copyright Copyright © 2014 AJA Video, Inc. All rights reserved. All information in this manual is subject to change without notice. No part of the document may be reproduced or transmitted in any form, or by any means, electronic or mechanical, including photocopying or recording, without the express written permission of AJA Inc. -
Page 6: Chapter 1: Introduction
It offers a powerful user interface via any standard web browser. KUMO SDI routers are available in three configurations: • KUMO 1604 - up to sixteen SDI inputs and four outputs • KUMO 1616 - up to sixteen SDI inputs and sixteen outputs •... -
Page 7: Kumo Features
An optional second power supply provides power redundancy to help protect against outages. For additional protection, connect the two supplies to different AC branch circuits so that KUMO will remain on even if there is a failure or open circuit breaker on one branch. KUMO v3.1 www.aja.com... -
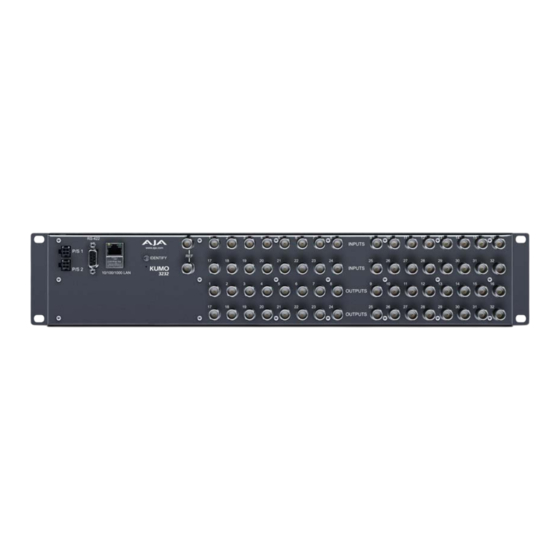
Page 8: Rj45 Ethernet Connector
29-30 25-28 15-16 31-32 29-32 RS-422 DB9 KUMO includes an RS-422 female DB9 connector for making serial connections to other Connector equipment. This control connection enables interoperability with other devices, including those that use GVG Native Protocol. KUMO v3.1 www.aja.com... -
Page 9: Older Model Rs-422 Adapter
Direct Connection In a direct connection, the control computer (Mac /PC) or a KUMO CP control panel connects to a KUMO router using an Ethernet cable (cat 5) between the RJ45 connectors on both devices. KUMO v3.1 www.aja.com... -
Page 10: Lan Connection Using A Hub Or Switch
KUMO routers and control panels ship with DHCP enabled, making system operation Settings possible simply by connecting the KUMO device’s Ethernet cabling. In addition, temporary default static IP addresses can be activated for initial KUMO system configuration. See “KUMO Temporary Static IP Address” on page KUMO v3.1 www.aja.com... -
Page 11: In This Manual
KUMO router, from a computer. Chapter 4: KUMO Remote Control Panel details the configuration and operation of the optional KUMO CP Control Panel. Appendix A: Specifications lists technical specifications for the product. Appendix B: Safety and Compliance information. Index KUMO v3.1 www.aja.com... -
Page 12: Chapter 2: Installation
KUMO dual power supplies to separate branch circuits. What’s In The Box? When you unpack your AJA KUMO SDI router, you’ll find the following components: • KUMO Chassis or KUMO CP option • AC adapter and AC power cord •... -
Page 13: Kumo Chassis Installation
• Input Voltage: 110-220VAC, 50/60Hz to 12 VDC brick converter supply (fully redundant Requirements with optional second brick supply; AJA recommends AJA p/n 103147-00) • Power Consumption: KUMO 1604 = 9 Watts; KUMO 1616 = 20 Watts; KUMO 3232 = 26.4 Watts Caution! KUMO is designed to take advantage of its chassis to aid in cooling. -
Page 14: Physical Equipment Setup
Another easy way to get your KUMO system operating is to connect the KUMO Router Network and KUMO CP to an existing network configured with a DHCP server. When the units reset during power up, they will see the DHCP server and automatically be given KUMO v3.1 www.aja.com... -
Page 15: Computer Auto Discovery
3. Double-click on the KUMO router or control panel in the Bookmarks pane. NOTE: The KUMO name will be similar to: AJA KUMO1616-555 (where 1616 is the model number and -555 is the unit’s serial #. Figure 7. Safari Bonjour Bookmarks... -
Page 16: Windows 7 Pc Configuration Using Upnp
KUMO devices also offer a factory default static IP address, allowing a direct and fail-safe Static IP Address way to connect via a computer connected to KUMO either directly or via a LAN connection. The computer you use will need to be set to a static IP address that is KUMO v3.1 www.aja.com... - Page 17 4. Start a web browser and enter 192.168.101.1 as the web address. This is the KUMO temporary static IP address. 5. Once you’ve connected using the static IP, you can then enter a desired network configuration using the KUMO device's Network tab. KUMO v3.1 www.aja.com...
-
Page 18: Network Configuration Overview
Bonjour software is built into Apple Macs with OS X from version 10.2 onward and can be installed onto Windows PC computers. Bonjour for Windows adds zero-configuration capabilities to Internet Explorer and (with the DNSSD plug-in) to Firefox. Once connected, you can use a web browser to: • Configure any TCP/IP settings KUMO v3.1 www.aja.com... -
Page 19: Direct Connection
In a LAN connection, connect one or more KUMO routers to your LAN or closed network using Cat. 5 Ethernet cable and an Ethernet hub or switch; then power up the equipment. Using a Hub or Switch KUMO v3.1 www.aja.com... -
Page 20: Setup And Control Methods
• Setup and Control from a Browser on Windows XP using a Static IP Address All of the above methods are explained on the following pages. Select the method that works the best for you and your environment. KUMO v3.1 www.aja.com... -
Page 21: Setup And Control From A Browser On Mac Osx
2. Configure your computer to talk on the 192.168.101.X subnet as shown below: IMPORTANT: First record existing TCP-IP settings so that you can return your computer to normal operation after this procedure. A. Go to your System Preferences>Network and select Ethernet and Configure: Manually. KUMO v3.1 www.aja.com... -
Page 22: Setup And Control From A Browser On Windows 7
• Setup and Control from a Browser on Windows 7 using UPnP • Setup and Control from a Firefox Browser on Windows 7 using Bonjour • Setup and Control from a Browser on Windows 7 using a Static IP Address KUMO v3.1 www.aja.com... -
Page 23: Windows 7: Using Upnp (Universal Plug And Play)
If you have iTunes running on your PC the Apple Bonjour software will already be installed. Install Apple Bonjour If necessary download and install the Apple Bonjour software. Print Services for 1. The Apple Bonjour Print Services for Windows software can be downloaded from: Windows http://support.apple.com/kb/DL999 Figure 14. Apple Bonjour Download Website KUMO v3.1 www.aja.com... -
Page 24: Install Dnssd For Firefox Add-On
Figure 15. Bonjour Print Services Installation Screen Install DNSSD for With Apple Bonjour installed, download and install the DNSSD for Firefox add-on: Firefox Add-On 1. The Firefox add-on software can be downloaded from: dnssd.me Figure 16. DNSSD Website KUMO v3.1 www.aja.com... - Page 25 A. If the menu bar is not displayed, click on the Firefox name at the top left of the screen, then click on Options, and activate the Menu Bar. B. Click on View>Toolsbars>Customize. C. Locate the DNSSD icon and drag it to your preferred Firefox toolbar location. KUMO v3.1 www.aja.com...
-
Page 26: Accessing Kumo Devices In Firefox
A. Use Control Panel to access your Local Area Network properties. In Windows 7 the path is: • Control Panel > Network and Internet > Network and Sharing Center B. Then, under “Connections” click on the Local Area Connection for the PC’s Ethernet port. KUMO v3.1 www.aja.com... - Page 27 F. Click the OK button to store the changes. NOTE: The previous step is temporary. You will later need to restore the original settings on your computer. 3. Connect the Windows 7 PC to KUMO's RJ-45 port (either direct or through your LAN) KUMO v3.1 www.aja.com...
-
Page 28: Setup And Control From A Browser On Windows Xp
LAN connection and the KUMO is powered up. With those requirements satisfied, if no Icon can be seen, then likely the UPnP services are disabled. Enabling UPnP Services 1. Go to Start > Control Panel, and then click Add or Remove Programs. in Windows XP KUMO v3.1 www.aja.com... -
Page 29: Windows Xp: Firefox Using Bonjour
KUMO offers a factory default static IP address. The default static IP address is temporary Browser: Type in and is intended only to allow an initial connection. Once you’ve connected using the static IP, you can then enter a desired network configuration using KUMO's Network tab. KUMO Static IP Address KUMO v3.1 www.aja.com... - Page 30 Figure 23. Windows Network Configuration Screen C. In the resulting General dialog screen, select the Properties button. D. Then on the Local Area Connection Properties dialog, select the Internet Protocol item and click the Properties button below it. KUMO v3.1 www.aja.com...
-
Page 31: Larger System Control Configurations
KUMO (DHCP or static IP). Manually connecting to a network, you will need to configure the KUMO IP CONFIG, IP ADDR, IP MASK, and IP GATEWAY parameters according to the information obtained from your IT administrator. KUMO v3.1 www.aja.com... -
Page 32: Tcp-Ip Network Connection
KUMO UI Network page where you will enter: • IP address type—Static IP • a unique IP address • the Subnet Mask and default gateway IP address (your LAN’s internet router) KUMO v3.1 www.aja.com... -
Page 33: Select Kumo To Control From Webpage
With multiple KUMO routers and KUMO CPs on the same network, you can assign which Control KUMO routers are able to be controlled by a panel by configuring the four Router Select buttons on the panel. Routers KUMO v3.1 www.aja.com... - Page 34 On the KUMO CP webpage, go to the Home page, click on the box below the RTR button, and select the KUMO router from the drop-down list. Figure 28. KUMO CP Router Button Assignment KUMO v3.1 www.aja.com...
-
Page 35: Chapter 3: Kumo Router Web Browser User Interface
• Configuration – custom naming for sources and destinations, and mode selection • Network – IP settings for LAN/WAN operation • Firmware – update menu for KUMO software from AJA • Alarms – log of service failures and allows alarms to be suppressed •... -
Page 36: Kumo Home
Click on the Signal switching mode drop down list to select Normal, Dual, or Quad operating mode. When Dual or Quad mode is selected, the number of Source and Destination buttons will be reduced to match that configuration. KUMO v3.1 www.aja.com... -
Page 37: Button Settings
The Settings selection allows you to pick a color from the settings panel to color code the control panel button backgrounds. The selected color is set for both the static state color and the High Tally (rollover/active) state. Figure 33. Button Settings/Color Panel KUMO v3.1 www.aja.com... -
Page 38: Network Setup
Figure 34. KUMO Network Setup Screen Firmware Updating AJA is constantly upgrading it’s product software so it is a good idea to check the AJA website often for updates and to assure optimum system performance. Go to the AJA KUMO Update page by clicking the link at the bottom of the Firmware screen. Or, enter this URL in your web browser: http://www.aja.com/en/products/kumo/#support... -
Page 39: Unpack The Software
Installing Firmware to KUMO via its browser. Follow this procedure to install the software: KUMO 1. Point your browser at the downloaded KUMO upgrade file on your computer by clicking on the “Browse” button on the Firmware screen. KUMO v3.1 www.aja.com... - Page 40 5. When done, click the Restart button to reset your KUMO and refresh the web browser and KUMO UI. Once these steps are complete, the KUMO will be running the software you just uploaded until the next time you upgrade it. The configuration of the KUMO prior to the upgrade is preserved. KUMO v3.1 www.aja.com...
-
Page 41: Safeboot Reset
• Power Supply – displays error condition if a redundant power supply is off-line • Reference – displays error condition if no valid video reference signal is found • Over Temperature – displays error if KUMO exceeds normal operating temperature KUMO v3.1 www.aja.com... -
Page 42: Locating A Specific Kumo
Click on the Identify button to flash the Identify LEDs on the front and back panels of the KUMO KUMO router enabling quick physical location of the router in a populated rack of equipment. Click again to turn it off Figure 38. Identify LEDs. Identify LED front panel Identify LED rear panel KUMO v3.1 www.aja.com... -
Page 43: Chapter 4: Kumo Remote Control Panel
(for details, see “Home Page” on page 45). Connectors and KUMO CP provides inputs for two power supplies—one included, redundant supply Indicator optional. An RJ-45 connector provides 10/100/1000 Ethernet connection to the internal Linux OS/web server. KUMO v3.1 www.aja.com... -
Page 44: Button Key Caps
Each control panel button has a removable lens cap that allows you to customize Source and Destination names. AJA has provided a template for printing custom lens chips (we suggest using 29 lb. vellum) for button designations. The template is available on your software CD and at: http://www.aja.com/support/kumo/lens_chip.zip... -
Page 45: Router Delegation Buttons (Rtr 1 - 4)
Use the Home page to assign a router to each of the panel select buttons. Each button has a pulldown menu that lists the active networked KUMOs for assignment and provides an Unassign and Refresh function. Figure 44. KUMO CP Browser Interface Home Page KUMO v3.1 www.aja.com... -
Page 46: Configuration Page
Click the Update Network Settings button to enter your settings. Figure 46. KUMO CP Network Setup Screen Identify Button Click on the Identify button to find the physical location of currently controlled panel. KUMO CP Identify Button KUMO v3.1 www.aja.com... - Page 47 The web browser button will alternate between blue and gray background color in Identify mode. On the connected control panel, the Source and Destination button rows will flash alternately. Also, the Identify LED on the back of the panel will flash. Click a second time to resume normal operation. KUMO v3.1 www.aja.com...
-
Page 48: Appendix A: Specifications
100-240 VAC 50/60Hz, 9-17 VDC, 12 VDC nominal, optional redundant power supply +12 VDC nominal, 9 – 18 VDC range, optional redundant power KUMO 1604 – 7.5 Watts, 0.8A at 12VDC KUMO 1616 – 20 Watts, 1.8A at 12VDC KUMO 3232 – 26.4 Watts, 2.2A at 12VDC Size Depth –... -
Page 49: Kumo Cp Specifications
• QD, {destname}; Gets: protect {On/Off}, chop{=OFF}, {sourceName}, level{= lev0} • Qd, {destname}; Gets: protect {On/Off}, chop{=OFF}, {sourceName}, level{= lev0} Control: • TD,{destname,srcname};Takes by name • TI,{destIndx,srcIndx}; Takes by index • PR,{destname, levelmask} Sets lock for given dest. • UP,{destname, levelmask} Unsets lock for given dest. KUMO v3.1 www.aja.com... -
Page 50: Rs-422 Control Specifications
• Stop Bit: 1 • Data Bits: 8 Serial Port: RS-422 (slave pinout), 9-pin (available beginning with version 2.0 firmware)—Connector pinout is as follows: No Connection Shell. GND Ethernet Control Specifications Ethernet Control Port: TCP/IP Port 12345 KUMO v3.1 www.aja.com... -
Page 51: Appendix B: Safety & Compliance
Cet appareil numérique respecte les limites de bruits radioélectriques visant les appareils numériques de classe A prescrites dans le Règlement sur le brouillage radioélectrique du ministère des Communications du Canada. Cet appareil numérique de la Classe A est conforme à la norme NMB-003 du Canada. KUMO v3.1 www.aja.com... -
Page 52: European Union And European Free Trade Association (Efta)
Benutzer für entsprechende Gegenmaßnahmen verantwortlich ist. Attention! Ceci est un produit de Classe A. Dans un environnement domestique, ce produit risque de créer des interférences radioélectriques, il appartiendra alors à l’utilisateur de prendre les mesures spécifiques appropriées. KUMO v3.1 www.aja.com... -
Page 53: Korea Kcc Compliance Statement
Translated Warning and Caution Messages The following caution statements, warning conventions, and warning messages apply to this product and manual. KUMO v3.1 www.aja.com... -
Page 54: Before Operating Please Read These Instructions
¡Advertencia! No utilice este dispositivo cerca del agua y límpielo solamente con un paño seco. Aviso! Não utilize este dispositivo perto da água e limpe-o somente com um pano seco. Avviso! Non utilizzare questo dispositivo vicino all'acqua e pulirlo soltanto con un panno asciutto. KUMO v3.1 www.aja.com... - Page 55 Aviso! Não instale perto de nenhuma fonte de calor tal como radiadores, saídas de calor, fogões ou outros aparelhos (incluindo amplificadores) que produzam calor. Avviso! Non installare vicino a fonti di calore come termosifoni, diffusori di aria calda, stufe o altri apparecchi (amplificatori compresi) che emettono calore. KUMO v3.1 www.aja.com...
- Page 56 Lo spinotto largo o il terzo polo sono forniti per motivi di sicurezza. Se la spina fornita non si inserisce nella presa di corrente, contattare un elettricista per la sostituzione della presa obsoleta. KUMO v3.1 www.aja.com...
- Page 57 Avviso! Proteggere il cavo di alimentazione in modo che nessuno ci cammini sopra e che non venga schiacciato soprattutto in corrispondenza delle spine e del punto in cui esce dal dispositivo. KUMO v3.1 www.aja.com...
- Page 58 Aviso! Desconecte este dispositivo da tomada durante trovoadas ou quando não é utilizado durante longos períodos de tempo. Avviso! Utilizzare soltanto i collegamenti e gli accessori specificati e/o venduti dal produttore, quali il treppiedi e l'esoscheletro. KUMO v3.1 www.aja.com...
- Page 59 è stato rovesciato del liquido è stato rovesciato o qualche oggetto è caduto nel dispositivo, il dispositivo è stato esposto a pioggia o umidità, non funziona correttamente o è caduto. KUMO v3.1 www.aja.com...
- Page 60 KUMO para separar os circuitos derivados. Attenzione! Per soddisfare i requisiti di sicurezza per la corrente di dispersione usando alimentatori ridondanti, collegare i doppi alimentatori KUMO per separare i circuiti derivati. KUMO v3.1 www.aja.com...
- Page 61 Advertência! Não abra o chassi. Não há internamente nenhuma peça que permita manutenção pelo usuário. Abrir o chassi anula a garantia, a menos que a abertura seja realizada por uma central de serviços da AJA ou por um local autorizado. Avvertenza! Non aprire lo chassis. All’interno non ci sono parti riparabili dall’utente.
- Page 62 ¡Advertencia! Cuando mueva la unidad desenchufe de la red eléctrica el/los cable(s) de la fuente de alimentación CA tipo brick. Advertência! Remova os cabos CA de alimentação brick da rede elétrica ao mover a unidade. Avvertenza! Scollegare il cavo dell’alimentatore quando si sposta l’unità. KUMO v3.1 www.aja.com...
- Page 63 (IP statico TCP/IP o DHCP). Il reparto IT potrà fornire le informazioni necessarie per installare KUMO su una LAN. I metodi di assegnazione dell’indirizzo IP statico sono illustrati nel manuale KUMO Installazione e funzionamento. KUMO v3.1 www.aja.com...
-
Page 64: Index
42 inputs default IP address video 8 temporary 17 installation summary 12 default static IP address installing software 39 procedure 17 IP address 18 Destination temporary default 17 hide 38 IP Reset 45 lock 38 KUMO v3.1 www.aja.com... - Page 65 Normal mode BNC connector 8 TCP-IP 32 TCP-IP setup fields 38, 46 outputs video 8 update files 39 Over Temperature 41 Update Network Settings 38, 46 overview 6 updates 38 upload 39 UPnP 9, 18 packaging 12 KUMO v3.1 www.aja.com...
- Page 66 8 video outputs 8 video reference signal 41 WAN 31 web browser control capabilities 18 web browsers supported 18 web server 35 zeroconf 18 Zero-configuration Bonjour Protocol 9 ZIP files 39 KUMO v3.1 www.aja.com...
Need help?
Do you have a question about the Kumo 1604 and is the answer not in the manual?
Questions and answers