AJA KUMO 1616 Installation And Operation Manual
Hide thumbs
Also See for KUMO 1616:
- Quick start manual (20 pages) ,
- Manual (108 pages) ,
- Installation and operation manual (73 pages)

Related Manuals for AJA KUMO 1616


Summary of Contents for AJA KUMO 1616
- Page 1 Published: 10/20/10 Installation and Operation Guide B e c a u s e m a t t e r s .
-
Page 2: Notice
Notice Copyright © 2010 AJA Video, Inc. All rights reserved. All information in this manual is subject to change without notice. No part of the document may be reproduced or transmitted in any form, or by any means, electronic or mechanical, including photocopying or recording, without the express written permission of AJA Inc. - Page 3 IT IS YOUR RESPONSIBILITY TO IMPLEMENT REDUNDANT CAPTURE AND BACKUP SYSTEMS AS APPROPRIATE. Limitation of UNDER NO CIRCUMSTANCES SHALL AJA VIDEO BE LIABLE IN ANY WAY FOR ANY LOST, CORRUPTED OR DESTROYED DATA, FOOTAGE OR WORK, OR FOR ANY OTHER INDIRECT, SPECIAL, Liability...
-
Page 5: Table Of Contents
KUMO Installation and Operation Manual — Table of Contents Table of Contents Trademarks ....................ii Notice . - Page 6 Chapter 3: KUMO Web Browser User Interface Router Web Browser User Interface ............... .29 Navigation Bar Information .
-
Page 7: Chapter 1: Introduction
KUMO SDI routers are available in two configurations: • KUMO 1604 – sixteen SDI inputs and four outputs • KUMO 1616 – sixteen SDI inputs and sixteen SDI outputs Because of their compact 1RU size, KUMO SDI routers are ideal for space-sensitive applications such as mobile sports trucks, edit suites, corporate video installations, or live theatrical A/V rigs. -
Page 8: Kumo Features
KUMO Features The KUMO routers offer the following features for ease of use in any environment: • SD, HD, 3G SDI inputs and outputs via BNC, SMPTE 259M/292M/424M • Automatic equalization and re-clocking • Supports all ancillary data, including embedded audio •... -
Page 9: Kumo Quick-Start
KUMO Installation and Operation Manual — KUMO Quick-start KUMO Quick-start This Quick Start Guide provides a basic overview of KUMO configuration. It is not meant as a substitute for the detailed information found throughout the rest of this manual, but as a quick way to get your KUMO set up quickly and operating. We strongly recommend that you read the full KUMO Manual to get the most out of your system. -
Page 10: Lan Connection Using A Hub Or Switch
LAN Connection In a LAN connection, connect one or more KUMO routers to your LAN or closed network using Cat. 5 Ethernet cable and an Ethernet hub or switch; then power up Using a Hub or the equipment. Switch KUMO LAN with Web Browser UI... -
Page 11: Quickstart Setup And Control Methods
KUMO Installation and Operation Manual — KUMO Quick-start QuickStart Setup Regardless of Direct Connection or LAN Connection , KUMOs are controlled over a network by connecting to KUMO’s internal webserver with a standard web browser on and Control a Mac or PC. To do this you first need to establish a network connection between the Methods computer and the KUMO to be controlled. -
Page 12: Setup And Control From A Browser On Mac Osx
3. Double-click on the KUMO router or control panel in the Bookmarks pane. Note: The KUMO name will be similar to: AJA KUMO1616-555 (where 1616 is the model number and -555 is the unit’s serial #. 4. Once you click the KUMO router item, Safari will display the KUMO web user- interface;... -
Page 13: Safari Browser-Type In Kumo Static Ip Address
KUMO Installation and Operation Manual — Setup and Control from a Safari Browser— KUMO also offers a factory default static IP address, allowing a direct and fail-safe way to connect via a Mac computer connected to KUMO either directly or via a LAN Type in KUMO connection. - Page 14 Mac Enet Setup Screen (System Preferences -> Network) Input the address information shown below: • IP Address: 192.168.101.2 • Subnet Mask: 255.255.255.0 Click Apply. 4. Ensure the KUMO device to be controlled is connected to the Mac via Ethernet (directly or via LAN). 5.
-
Page 15: Setup And Control From A Browser On Windows 7
KUMO Installation and Operation Manual — Setup and Control from a Setup and Control from a Browser on Windows 7 The easiest methods of setting up a controlling a KUMO device from a PC running Windows 7 are: • Setup and Control from a Browser on Windows 7 using UPnP •... -
Page 16: Windows 7 Firefox Using Bonjour
Windows 7 Using Bonjour with Windows 7 and the FireFox browser requires installing the “Bonjour for Windows” software—plus a FireFox plug-in. FireFox using Bonjour Bonjour for Windows can be downloaded at: http://developer.apple.com/networking/bonjour/download/ The FireFox browser plug-in (BonjourFoxy) can be download from: www.Bonjourfoxy.net To Connect (after installing both Bonjour and the plug-in): 1. -
Page 17: Windows 7 Browser-Type In Kumo Static Ip Address
KUMO Installation and Operation Manual — Setup and Control from a Windows 7 KUMO also offers a factory default static IP address, allowing a direct and fail-safe way to connect via a PC computer connected to KUMO either directly or via a LAN Browser—... - Page 18 Then, under “Connections” click on the Local Area Connection for the PC’s Ethernet port. In the resulting General dialog screen, select the Properties button. Then on the Networking tab, select Internet Protocol Version 4 and click the Properties button below. Finally, click the “Use the following IP address:”...
- Page 19 KUMO Installation and Operation Manual — Setup and Control from a • Subnet Mask: 255.255.255.0 Click the OK button to store the changes. Note: The previous step is temporary. You will later need to restore the original settings on your computer. 4.
-
Page 20: Setup And Control From A Browser On Windows Xp
Setup and Control from a Browser on Windows XP The easiest methods of setting up and controlling a KUMO router from a PC running Windows XP are: • Setup and Control from a Browser on Windows XP using UPnP • Setup and Control from a FireFox Browser on Windows XP using Bonjour •... - Page 21 KUMO Installation and Operation Manual — Setup and Control from a Check this Box 3. In the Windows Components Wizard, click Networking Services and then click the Details button below. You’ll see a Networking Services dialog: locate the UPnP User Interface checkbox and click in it to check the box and enable UPnP service. 4.
-
Page 22: Windows Xp Firefox Using Bonjour
Windows XP Using Bonjour with Windows XP and the FireFox browser requires installing the “Bonjour for Windows” software—plus a FireFox plug-in called “BonjourFoxy” . Bonjour FireFox for Windows can be downloaded at: using Bonjour http://developer.apple.com/networking/bonjour/download/ The FireFox browser plug-in (BonjourFoxy) can be download from: www.Bonjourfoxy.net To Connect (after installing both Bonjour and the plug-in): 1. -
Page 23: Windows Xp Browser-Type In Kumo Static Ip Address
KUMO Installation and Operation Manual — Setup and Control from a Windows XP KUMO also offers a factory default static IP address, allowing a direct and fail-safe way to connect via a PC computer connected to KUMO either directly or via a LAN Browser—... - Page 24 In the resulting General dialog screen, select the Properties button. Then on the Local Area Connection Properties dialog, select the Internet Protocol item and click the Properties button below it.
- Page 25 KUMO Installation and Operation Manual — Setup and Control from a Finally, click the “Use the following IP address:” radio button and enter the IP Address and Subnet Mask below: • IP Address: 192.168.101.2 • Subnet Mask: 255.255.255.0 Click the OK button to store the changes. Note: The previous step is temporary.
-
Page 26: What's In The Box
What’s In The Box? When you unpack your AJA KUMO SDI router, you’ll find the following components: • KUMO Chassis or KUMO CP option • AC Adapter and AC Power cord • The manual you’re reading (on CD) • Printed QuickStart document, plus any late-breaking news (where applicable, AJA may include additional bulletins related to your product and software). -
Page 27: Chapter 2: Getting Started
Chapter 2: Getting Started Getting Started All of the steps for KUMO Installation and Configuration are documented in this chapter, summarized as follows: 1. Install the chassis in an appropriate rack. If you are mounting multiple KUMO units, try to place them visually in the same area so if you communicate with them via a network attached computer, you can use the KUMO’s Identify feature to flash the corresponding LED of the unit you’re communicating with. -
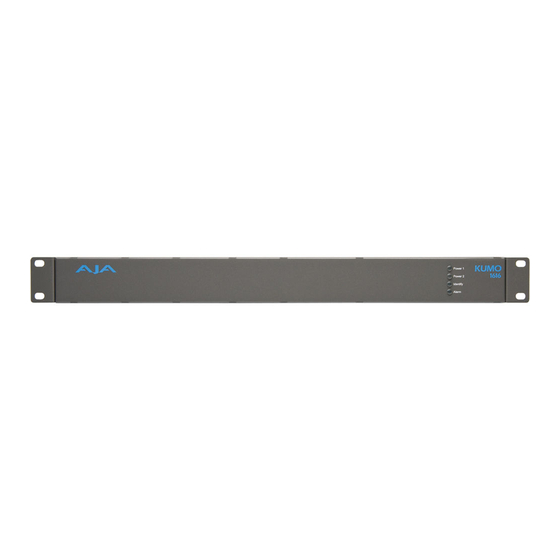
Page 28: Kumo Chassis Installation
(fully redundant with optional second brick supply; AJA recommends AJA p/n Requirements 103147-00) • Power Consumption: KUMO 1604 – 9 Watts; KUMO 1616 – 20 Watts Caution! KUMO is designed to take advantage of its chassis to aid in cooling. It is common and expected for the densely populated 1616 chassis to have a warm front panel in normal, active operating conditions. -
Page 29: Kumo Control
KUMO Installation and Operation Manual — KUMO Control KUMO Control An RJ45 connector provides a 10/100/1000 Ethernet port for connecting KUMO directly to a computer, KUMO CP control panel, or Ethernet hub or switch for connecting to a network. The control network can be a closed, locally attached computer with browser, or a TCP-IP LAN/WAN. -
Page 30: Typical System Control Configurations
Please note that KUMO supports both zeroconf Bonjour and UPnP protocols, but does not require them. For example, you can connect a PC without Bonjour by simply performing a KUMO default IP address reset and pointing your browser to the address. Then you can set it up using the KUMO browser UI Network page to set standard TCP/IP settings (discussed in detail in “TCP-IP Network Connection”... -
Page 31: Kumo Standalone
KUMO Installation and Operation Manual — Typical System Control KUMO In the most basic configuration, a KUMO Router and a KUMO CP control panel can be set up without connecting to a computer. Just use a Cat. 5 Ethernet cable and apply power. KUMO Standalone software will automatically assign the router to the first KUMO CP router select button (RTR Using a computer with Bonjour/UPNP or DHCP addressing and a simple Ethernet switch,... -
Page 32: Computer Ui With Zeroconf Or Upnp
Computer UI Using the web browser UI control method, when you connect all the devices and apply power, KUMO zeroconf or UPnP protocol software will automatically make network with Zeroconf or connection with a zeroconf or UPnP compliant (and enabled) computer. UPnP Note: In this manual, zeroconf configuration means using Bonjour for Mac or Windows. -
Page 33: Tcp-Ip Network Connection
KUMO via Bonjour or Windows Network (also called My Network Places) KUMO will come up with a name similar to AJA Kumo1616-505 (where 1616 is the KUMO model and 505 represents it’s serial number) in the Bonjour menu or Windows Network. -
Page 34: Default Local Ip Address
Default Local IP Address Important: This procedure should be done by those experienced with TCP-IP network setup. All normal computer IP address information should be recorded and reset when the procedure is done. To enable the factory default local IP address follow the procedure described in Chapter 1 “Windows 7 Browser—... -
Page 35: Router Web Browser User Interface
Chapter 3: KUMO Router Web Browser Interface Router Web Browser User Interface An optimized web server inside the KUMO allows you to remotely monitor and adjust parameter settings via a network-attached computer running a web browser. The network can be a closed local area network, a straight computer-to-KUMO Ethernet cable, or even exposed through a firewall to a broadband WAN (not generally recommended since anyone on the internet can then access the KUMO). -
Page 36: Navigation Bar Information
• Configuration – custom naming for sources and destinations • Network – IP settings for LAN/WAN operation • Firmware – update menu for KUMO software from AJA • Alarms – log of service failures • Identify – toggles activation of Identify LEDs for easy location of various system... -
Page 37: Router Configuration
KUMO Installation and Operation Manual — Router Web Browser User Router Using the Configuration screen, you can click on the name fields to assign custom Source and Destination names to the inputs and outputs of the router. Configuration KUMO Web Interface, I/O Configuration Screen Button Settings For any button, click outside the naming field to access the Button Settings panel. -
Page 38: Hide
KUMO Network Setup Screen Firmware Updating AJA is constantly upgrading it’s product software so it is a good idea to check the AJA website often for updates and to assure optimum system performance. Go to the AJA KUMO Update page by clicking the link at the bottom of the Firmware screen. Or, enter this URL in your web browser: http://www.aja.com/support/converters/converters-kumo.php... -
Page 39: Unpack The Software
KUMO Installation and Operation Manual — Router Web Browser User Unpack the Software Download the latest version of KUMO firmware and use the Firmware screen to upload it to your KUMO router. KUMO software update files are “ZIP” files, which you can open with a number of standard and third party uncompressor applications. - Page 40 3. When done, click the Restart button to reset your KUMO and refresh the web browser and KUMO UI. Once these steps are complete, the KUMO will be running the software you just uploaded until the next time you upgrade it. The configuration of the KUMO prior to the upgrade is preserved.
-
Page 41: Safeboot Reset
KUMO Installation and Operation Manual — Router Web Browser User Safeboot Reset If your KUMO software becomes corrupted to the point of freezing the device, you can always reset to the initial factory-installed safeboot firmware image by following these steps: 1. -
Page 42: Locating A Specific Kumo
Locating a Specific Click on the Identify button to flash the Identify LEDs on the front and back panels of the KUMO router enabling quick physical location of the router in a populated rack of KUMO equipment. Click again to turn it off Identify LED front panel Identify LED... -
Page 43: Chapter 4: Kumo Cp Remote Control Panel
Chapter 4: KUMO Remote Control Panel KUMO Remote Control Panel The KUMO CP Control Panel is a destination-oriented panel allowing selection of 16 sources to 16 destinations on each of up to four KUMO routers. The control panel will connect to a single KUMO router (straight Cat 5 connection) automatically without computer/browser interface. -
Page 44: Connectors And Indicator
Each control panel button has a removable lens cap that allows you to customize Source and Destination names. AJA has provided a template for printing custom lens chips (we suggest using 29 lb. vellum) for button designations. The template is available on your software CD and at: http://www.aja.com/support/kumo/lens_chip.zip... -
Page 45: Destination Lock
KUMO Installation and Operation Manual — KUMO Remote Control Panel Destination Lock Press the Destination (Dest) Lock button to prevent any changes to the KUMO destination you are currently controlling (Dest button high tallied). The lock can be removed from any other KUMO CP or browser interface on the network. The DEST and DEST LOCK buttons turn red on all panels that are assigned to the KUMO you are controlling. -
Page 46: Home Page
Home Page Use the Home page to assign a router to each of the panel select buttons. Each button has a pulldown menu that lists the active networked KUMOs for assignment and provides an Unassign and Refresh function. KUMO CP Browser Interface Home Page The assigned router name appears below each button. -
Page 47: Identify Button
KUMO Installation and Operation Manual — KUMO Remote Control Panel Identify Button Click on the Identify button to find the physical location of currently controlled panel. The web browser button will alternate between blue and gray background color in Identify mode. On the connected control panel, the Source and Destination button rows will flash alternately. -
Page 49: Appendix A: Specifications
Power +12 VDC nominal, 9 – 18 VDC range, optional redundant power KUMO 1604 – 7.5 Watts, 0.8A (0,8A) at 12VDC KUMO 1616 – 20 Watts, 1.8A (1,8A) at 12VDC Size KUMO 1604 & 1616: Depth – 1.5” (38.1 mm) Height –... -
Page 50: Kumo Cp Specifications
KUMO CP Specifications Control 10/100/1000 Ethernet, RJ-45, internal Linux OS/web server Environment Operating Termperature 0 to 40 Degrees C Relative Humidity: 0 to 90%, non-condensing Power +12VDC nominal, 9 – 18 VDC range, optional redundant power KUMO CP – 4 Watts Size KUMO CP Depth –... -
Page 51: Appendix B: Safety & Compliance
All other trademarks are the property of their respective holders. Notice Copyright © 2010 AJA Video, Inc. All rights reserved. All information in this manual is subject to change without notice. No part of the document may be reproduced or transmitted in any form, or by any means, electronic or mechanical, including photocopying or recording, without the express written permission of AJA Inc. - Page 52 FCC Caution This device complies with Part 15 of the FCC Rules. Operation is subject to the following two conditions: (1) This device may not cause harmful interference, and (2) this device must accept any interference received, including interference that may cause undesired operation.
- Page 53 KUMO Compact SDI Routers — Korea KCC Compliance Statement Warning! This is a Class A product. In a domestic environment, this product may cause radio interference, in which case, the user may be required to take appropriate measures. Achtung! Dieses ist ein Gerät der Funkstörgrenzwertklasse A. In Wohnbereichen können bei Betrieb dieses Gerätes Rundfunkstörungen auftreten, in welchen Fällen der Benutzer für entsprechende Gegenmaßnahmen verantwortlich ist.
- Page 54 In order to obtain service under this warranty, you the Customer, must notify AJA Video of the defect before the expiration of the warranty period and make suitable arrangements for the performance of service.
- Page 55 KUMO Compact SDI Routers — Before operating your KUMO unit, please Before operating your KUMO unit, please read the instructions in this document Warning! Read and follow all warning notices and instructions marked on the product or included in the documentation. Avertissement ! Lisez et conformez-vous à...
- Page 56 Warnung! Nicht in der Nähe von Wärmequellen wie Heizkörpern, Heizregistern, Öfen oder anderen Wärme erzeugenden Geräten (einschließlich Verstärkern) aufstellen. ¡Advertencia! No instale cerca de fuentes de calor tales como radiadores, registros de calor, estufas u otros aparatos (incluidos amplificadores) que generan calor. Aviso! Não instale perto de nenhuma fonte de calor tal como radiadores, saídas de calor, fogões ou outros aparelhos (incluindo amplificadores) que produzam calor.
- Page 57 KUMO Compact SDI Routers — Before operating your KUMO unit, please Avviso! Poiché il cavo di alimentazione viene usato come dispositivo di sconnessione, deve rimane prontamente accessibile e operabile. Warning! Protect the power cord from being walked on or pinched particularly at plugs, convenience receptacles, and the point where they exit from the device.
- Page 58 ¡Advertencia! Consulte al personal calificado por cuestiones de reparación. El servicio de reparación se requiere cuando el dispositivo ha recibido cualquier tipo de daño, por ejemplo cable o espigas dañadas, se ha derramado líquido o se han caído objetos dentro del dispositivo, el dispositivo ha sido expuesto a la lluvia o humedad, o no funciona de modo normal, o se ha caído.
- Page 59 ¡Advertencia! No abra el chasis. El interior no contiene piezas reparables por el usuario. El abrir el chasis anulará la garantía a menos que se lo haga en un centro de servicio AJA o en un local autorizado. Advertência! Não abra o chassi. Não há internamente nenhuma peça que permita manutenção pelo usuário.
- Page 60 B-10 Warnung! Trennen Sie die Wechselstrom-Versorgungskabel vom Netzstrom, bevor Sie das Gerät verschieben. ¡Advertencia! Cuando mueva la unidad desenchufe de la red eléctrica el/los cable(s) de la fuente de alimentación CA tipo brick. Advertência! Remova os cabos CA de alimentação brick da rede elétrica ao mover a unidade. Avvertenza! Scollegare il cavo dell’alimentatore quando si sposta l’unità.
-
Page 61: Index
KONA LH/LHe Installation and Operation Manual — Index Index Manual mounting methods assign routers multi-router network Auto Configure Network Bonjour network configurations button colors networking Button Key Caps Over Temperature CAT 5 ethernet cable color code buttons control panel identify packaging control panel resets Panel Lock... - Page 62 I-ii video reference signal Voltage web browser web browsers web server Width 23, 26 zeroconf ZIP files...
Need help?
Do you have a question about the KUMO 1616 and is the answer not in the manual?
Questions and answers