Lexicon LAMBDA Owner's Manual
Desktop recording studio
Hide thumbs
Also See for LAMBDA:
- Owner's manual (36 pages) ,
- Software installation manual (6 pages) ,
- Setup manual (2 pages)
Table of Contents
Advertisement
Quick Links
Advertisement
Table of Contents

Subscribe to Our Youtube Channel
Related Manuals for Lexicon LAMBDA


Summary of Contents for Lexicon LAMBDA
- Page 1 Owner’s Manual COMPLETE RECORDING SOLUTION...
- Page 2 2. Lexicon Professional warrants this product, when purchased new from an authorized U.S. Lexicon Professional dealer and used solely within the U.S., to be free from defects in materials and workmanship under normal use and service. This warranty is valid to the original purchaser only and is non-transferable.
-
Page 3: Table Of Contents
Table of Contents TABLE OF CONTENTS INTRODUCTION ........1 USING THE LAMBDA STUDIO ....12 Recording With The Lambda Studio ....12 FEATURES ..........1 A. Recording Using The Mic or Line Inputs ....12 B. Recording A Guitar Using The Instrument Input ..13 C. Recording Midi ............14 UNPACKING THE LAMBDA STUDIO ..2... -
Page 4: Introduction
Lambda Studio hardware provides the professional-quality inputs and outputs, metering, and level controls that computer sound cards or built-in audio connections lack. So you can make full use of the Lambda Studio right away, we’ve included the popular Steinberg Cubase LE production suite software for PC and Mac computers. -
Page 5: Unpacking The Lambda Studio
Introduction UNPACKING THE LAMBDA STUDIO Thoroughly inspect the Lambda Studio and packing materials for signs of damage. Report any shipping damage to the carrier that delivered the product or dealer from whom you purchased the product at once. COMPUTER MINIMUM REQUIREMENTS The Lexicon Lambda doesn't require an extremely powerful computer to use. -
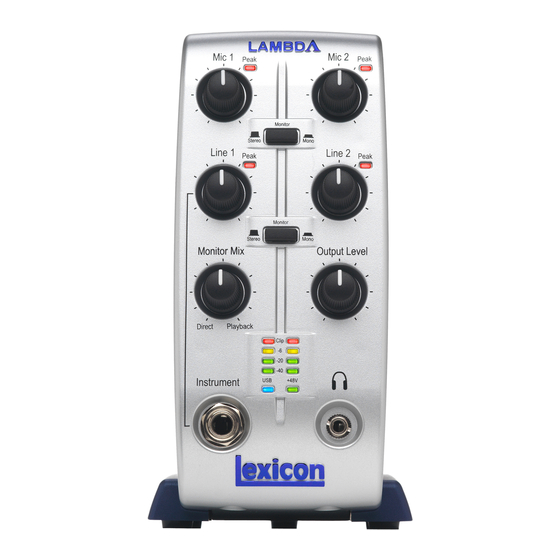
Page 6: The Front Panel
The Front Panel THE FRONT PANEL Mic 1-2 Gain Mic 1 Mic 2 Peak Peak Peak LEDs Peak LEDs Monitor Monitor Assign Stereo Mono Line 1 Line 2 Peak Peak Line 1 Gain Line 2 Gain Monitor Monitor Assign Stereo Mono Monitor Mix Output Level... -
Page 7: Monitor Mix Control
The Front Panel MONITOR MIX CONTROL The Lambda Studio gives you the ability to hear your analog input signals directly and immediately while recording, without having to adjust levels in software, and before the delay caused by digital converters and computer recording latency. This... -
Page 8: The Rear Panel
The Rear Panel THE REAR PANEL Line Line In 1-2 Insert Insert 1-2 Mic 1 Mic 1-2 Inputs Mic 2 Left/Right Line Outputs Line Out +48 V +48V Phantom Power Switch MIDI In and Out MIDI USB Port LINE IN 1-2 These ¼"... -
Page 9: Phantom Power Switch
+48V switch is turned off. USB PORT The USB Port is used to connect the Lambda Studio to your computer and provides the Lambda Studio hardware with power. A standard USB cable is included. The Lambda Studio supports USB 2.0 full speed. -
Page 10: Connecting To The Lambda Studio
Connecting to the Lambda Studio – Monitoring Connections CONNECTING TO THE LAMBDA STUDIO The Lambda Studio is both a 4 x 2 x 2 mixer and a USB audio/MIDI interface that can be used in a variety of audio applications. This section describes how to make basic connections for the following functionality: •... -
Page 11: Recording Connections
Plug a standard ¼" TS (instrument) cable directly from the instrument into the MIX CONTROL FOR Instrument input jack on the front panel of Lambda Studio. Note that this will disable THIS PURPOSE. Line In 1 jack on the back panel. -
Page 12: Mixdown Connections
12 o’clock. Adjust the knob on the Lambda Studio until the meters on your recording deck read consistently between 0 dB to +4 dB, raising the input level control on the recorder if necessary. -
Page 13: Connection Diagram
Connecting to the Lambda Studio – Connection Diagram CONNECTION DIAGRAM... -
Page 14: Software Setup
® computers will not recognize all of these devices if the Lambda Studio is connected to the USB port before the computer is turned on. The simplest way to avoid problems is to connect the Lambda Studio to the USB port after the computer is booted. -
Page 15: Using The Lambda Studio
Mic 2 XLR jack or line-level audio source to the Line 1 ¼" jack on the back of the Lambda Studio. If the mic requires phantom power, engage the +48V switch (on the back of the Lambda Studio). NOTE: Remove phantom powered mics when not in use and turn off the phantom power switch. -
Page 16: Recording A Guitar Using The Instrument Input
B. RECORDING A GUITAR USING THE INSTRUMENT INPUT Instrument This section explains how to record using the ¼" input jack on the front panel. The diagram below shows how the Lambda Studio is connected for this particular application. Guitar Powered Speakers... -
Page 17: Recording Midi
Using the Lambda Studio – Recording with the Lambda Studio C. RECORDING MIDI The Lambda Studio also functions as a MIDI interface. This allows you to record MIDI data into a MIDI track of Cubase ® LE or other MIDI compatible recording software, and then play that MIDI data back from the computer into a keyboard, sound module, or virtual instrument. -
Page 18: Recording With Cubase Le
Using the Lambda Studio – Recording with the Lambda Studio D. RECORDING WITH CUBASE LE To create a new session and prepare Cubase LE to record: 1. Open Cubase LE. 2. To create a new empty recording session, select the Prompt for project location More>Empty... - Page 19 Using the Lambda Studio – Recording with the Lambda Studio Devices Device Setup 4. Go to the menu and select the option. VST Audio System Lambda ASIO 5. Click on and, if not already selected, select (for Windows) or Lexicon Lambda In/Out (for Mac).
- Page 20 Using the Lambda Studio – Recording with the Lambda Studio To create an audio track and assign an audio input: Project Add Track>Audio 1. Click the menu and select Add Audio Track Mono 2. When the dialog appears, select the...
- Page 21 Using the Lambda Studio – Recording with the Lambda Studio Inspector 4. In the window, select the input you would like to record by clicking Input Routing Stereo field then selecting the track input source. Select " In - Left "...
- Page 22 Using the Lambda Studio – Recording with the Lambda Studio Track Input Monitor 6. In the window, make sure the button is not lit. To create a MIDI track and assign a MIDI input channel: Project Add Track>MIDI 1. Click the...
- Page 23 Using the Lambda Studio – Recording with the Lambda Studio Inspector USB MIDI Device Lexicon Lambda MIDI 3. In the window, select on Windows) for the MIDI input device. 4. For the MIDI input channel, select the channel your MIDI device (keyboard, drum machine, etc.) is assigned to transmit on.
- Page 24 Using the Lambda Studio – Recording with the Lambda Studio Track Record Enable 5. In the window, the button should already be red. If it isn't, click it so that it turns red. 6. Play your MIDI device and make sure the MIDI track's meter shows that MIDI signal is present.
- Page 25 Using the Lambda Studio – Recording with the Lambda Studio To start recording: Record 1. Click the button on Cubase ® LE’s Transport control. Record Button 2. Speak, sing, or play the instrument. 3. When you are finished recording, press the Stop button.
-
Page 26: Setting Monitor Levels
Using the Lambda Studio – Recording with the Lambda Studio E. SETTING MONITOR LEVELS To set monitor levels for a comfortable listening level: Monitor Mix 1. While playing back the recording, adjust the knob to balance the levels between the direct input signal and recording playback. To make the direct... -
Page 27: Using Software Input Monitoring
ASIO control panel. See "Adjusting The Buffer Settings" on page 26 for more information on adjusting buffer settings. To use software input monitoring: 1. When using Cubase LE’s input monitoring with the Lambda Studio, you will usually want to set the Monitor Mix... - Page 28 Using the Lambda Studio – Recording with the Lambda Studio Edit Channel Settings 3. To assign an effect to the input, click the button. Insert 4. Left click on an slot and select a plug-in from the list. If using a plug-in...
-
Page 29: Adjusting The Buffer Settings
Using the Lambda Studio – Adjusting the Buffer Settings ADJUSTING THE BUFFER SETTINGS Audio latency is the minimum time required for a computer to store recorded audio from an audio interface into the recording application memory and playback that same recorded audio back out of the audio interface output. -
Page 30: Adjusting The Buffers In Mac Os X
Using the Lambda Studio – Adjusting the Buffer Settings ADJUSTING THE BUFFERS IN MAC OS X Devices>Device Setup 1. Open Cubase LE and go to Lexicon Lambda In/Out 2. Click on 3. Click on the Control Panel button. You can now select the buffer size. Selecting lower settings will decrease any monitoring latency. -
Page 31: Specifications
95 dB typical, A-weighted, 20 Hz - 20 kHz Power Requirements: USB powered Dimensions: 6.5 x 6.7 x 3.4 Weight: 1.92 lbs. Lexicon engineers are constantly working to improve the quality of our products. Specifications are therefore subject to change without notice. -
Page 32: Signal Routing Diagram
Signal Diagram... - Page 33 (801) 566-8800 PHONE: lexiconpro.com WEB: lexiconpro.com/en-US/support SUPPORT: Lambda Owner's Manual PN: 5058920-A © 2016 Harman. All rights reserved. Lexicon is a registered trademark of Harman.
Need help?
Do you have a question about the LAMBDA and is the answer not in the manual?
Questions and answers