Table of Contents
Advertisement
Quick Links
Advertisement
Table of Contents

Related Manuals for Oxford BenchMate E


Summary of Contents for Oxford BenchMate E
-
Page 3: Table Of Contents
Oxford Benchmate E Electronic Pipette User Guide Table of Contents : Introduction Volume Range Before you start Getting Started Overview Modes 6.1 Favourites 6.1.1 Edit 6.2 Pipetting 6.3 Reverse Pipetting 6.4 Multi Dispensing 6.4.1 Repeat Dispense 6.4.2 Auto Dispense 6.4.3 Sequence Dispense 6.5 Diluting... -
Page 4: Electronic Pipette
1. Introduction The Oxford BenchMate E electronic pipette offers you the best ergonomic design in the field of liquid handling devices. The ergonomic design of the electronic pipettes reduces the risk of repetitive strain injuries (RSI). The self explanatory functions of the pipette allow for easy access of each operation. -
Page 5: Overview
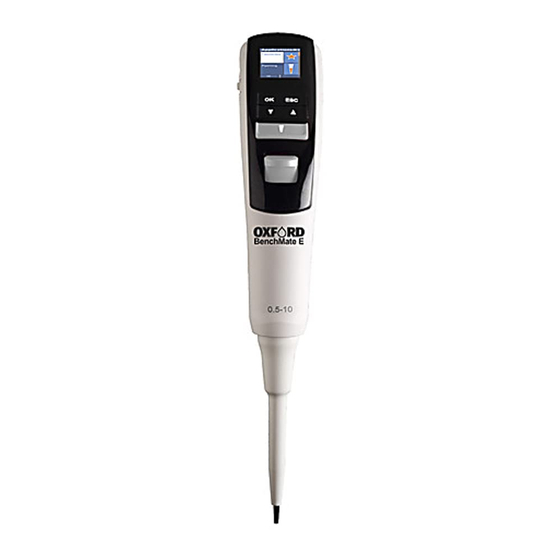
5. Overview 1. Micro USB Charging Port 2. ON/OFF Switch 3. Battery Cover 4. Display 5. OK Key 6. ESC Key 7. Down Arrow Key 8. UP Arrow Key 9. Trigger Key 10. Tip Ejector Pusher 11. Tip Ejector 12. Tip Cone 13. -
Page 6: Edit
6.1.1 Edit This program allows you to edit your saved favorite program. Also you can change the sequence of saved programs. Edit Program This program allows you to edit the mode, aspiration speed, dispensing speed and volume. Also you can delete the program from this function. Steps : 1. -
Page 7: Reverse Pipetting
6.3 Reverse Pipetting This mode is generally used for pipetting high viscous liquids accurately. It aspirates little excess liquid than the selected volume and it dispense the exact liquid of the selected volume. The rest of the liquid in the tip will need to be discarded. Steps : 1. -
Page 8: Sequence Dispense
Steps : 1. Select Multi Dispense from the applications. 2. Select Auto Dispense from the Multi Dispense menu. 3. Select volume. 4. Select Dispensing Steps. The pipette will calculate the maximum number of steps automatically once you select the volume. 5. -
Page 9: Diluting + Mixing
6.5.2 Diluting + Mixing Steps : 1. Select Diluting from applications. 2. Select Diluting + Mixing. 3. Select No. of Dilutants (Max. 2 dilutants can be selected). 4. Select 1st volume by using up / down arrow key. 5. Select 2nd volume by using up / down arrow key. 6. -
Page 10: Pipette + Mixing
6.6.2 Pipetting + Mixing Steps : 1. Select Pipetting + Mixing from the applications. 2. Select volume by using up/down arrow key. 3. Select Mixing Cycles by using up/down arrow key Max. 10 cycles can be selected. 4. Aspirate the selected volume by using trigger key. 5. -
Page 11: Sound
5. Once you will select the last character, the display will show the setting menu with all changes. 6.8 Calibration The Oxford Benchmate E pipette offers you 3 types of calibration settings depending on the user’s requirement. a.) 3 Point Calibration b.) 2 Point Calibration c.) 1 Point Calibration By default 3 Point Calibration has been adjusted on the pipette for supreme accuracy at each volume. -
Page 12: Point Calibration
6.8.1 3 Point Calibration Steps : 1. Select Calibration from the applications. 2. Select Enter Password from the sub menu by default, press “0000” if you have not set your own password. 3. Select 3 Point Cal. from the sub menu. 4. -
Page 13: Point Calibration
6.8.3 1 Point Calibration Steps : 1. Select Calibration from the applications. 2. Select Enter Password from the sub menu by default, press “0000” if you have not set your own password. 3. Select 1 Point Cal. from the sub menu. 4. -
Page 14: Due Calibration Date
6.8.6 Due Calibration Date Here you can save your due date for re-calibration of the product. Steps : 1. Select Calibration Fact. From the applications. 2. Select Enter Password from the sub menu by default, press “0000” if you have not set your own password. 3. -
Page 15: Battery And Charging
8. Battery and Charging 8.1 Inserting a Battery 1. Please follow the image to open the battery cover. 2. Insert battery supplied along with the instrument in a way that the metal pins inside the pipette establish proper contact with the metal points on the battery. -
Page 16: Technical Specification
9. Technical Specification 9.1 Single Channel Pipette Technical Specification Test Volume Inaccuracy Imprecision Volume Cat. No. Color (µl) (±) % (±) % Range (µl) 0.5-10 µl OBE-10 5-100 µl OBE-100 10-200 µl OBE-200 50-1000 µl OBE-1000 1000 250-5000 µl OBE-5000 2500 0.25 5000... -
Page 17: Maintenance
10. Maintenance 10.1 Single channel pipette maintenance You should check the pipette at the beginning of each day for accumulation of dust and dirt on the outside surfaces. Attention should be paid to the tip cone. No other solvent except Iso-propanol should be used to clean the pipette. - Page 18 Volume 5-100µl & Volume 10-200µl Step 1 Step 2 Step 3 Unscrew the Tip Ejector Unscrew the Tip Cone Pull out the Piston as as per shown direction Cap as per shown direction per shown direction Volume 50-1000µl Step 1 Step 2 Step 3 Unscrew the Tip Ejector...
- Page 19 Volume 250-5000µl Step 1 Step 2 Step 3 Unscrew the Tip Ejector Unscrew the Tip Cone Unscrew the Tip Ejector Cap as per shown direction as per shown direction as per shown direction then pull out piston as per shown direction -18-...
-
Page 20: List Of Spares
10.1.2 List of Spares: Volume 0.5-10µl Volume 5-100µl OX CEP_SP 00041-3 OX AE 50033-3 OX CEP 40111-1 OX AE 50102-1 OX SP 00029-3 OX SP 00028-3 OX SP 00301-1 OX SP 00161-1 OX SP 00158-1 OX SP 00045-3 OX SP 00048-3 OX SP 00038-3 OX SP 00038-3 OX AE 50017C-1.1... - Page 21 Volume 10-200µl Volume 50-1000µl OX AE 50032-3 OX AE 50251-1 OX AE 50102-2 OX CEP 40111-1 OX SP 00057-3C OX SP 00217-1 OX SP 00029-3 OX SP 00302-1 OX SP 00159-1 OX SP 00303-1 OX SP 00164-1 OX SP 00044-3 OX SP 00046-3 OX SP 00038-3 OX AE 50017A-1.1...
- Page 22 Volume 250-5000µl OX AE 50024-1.1 OX CEP_CM 20126-1 OX AE 50109-1 OX SP 00164-1 OX RP 30156-1 OX SP 00110-1 OX SP 00050-3 OX AE 50018-1.1 -21-...
-
Page 23: Multichannel Pipette Maintenance
10.2 Multichannel pipette maintenance Tip ejector ring lock Move upwards tip ejector ring lock (black part) to remove from bottom assembly. At the time of pipette assembly match two legs of tip ejector ring lock in pipette top half assembly. -22-... -
Page 24: List Of Spares
10.2.1 List of Spare Parts AEM 50112-1 SPM 0011-2L AE_SPM 00021-1 (08CH) RPM 30251-1 AE_SPM 0020-1 (12CH) RP 30080-3 AE 50204-1 SP 00381-1 SPM 00279-1 SPM 00280-1 SPM 00009-2L SPM 00321-1 SPM 00321-2 SPM 0016-1 (08CH) SPM 00275-1 SPM 0014-1 (12CH) SPM 00276-1 AEM 50260-1 SP 00116-1 (FOR 08CH) -
Page 25: List Of Spares
10.2.2 List of Spare Parts 5-100µl 10-200µl 15-300µl AEM 50112-1 SPM 0011-2L AE_SPM 00021-1 (08CH) RPM 30251-1 AE_SPM 0020-1 (12CH) RP 30080-3 AE 50204-1 SP 00381-1 SPM 00279-1 SPM 00280-1 SPM 00009-2L SPM 00321-1 SPM 00321-2 SPM 0017-1 (08CH) SPM 00275-1 SPM 0015-1 (12CH) SPM 00276-1 AEM 50260-1... -
Page 26: Autoclavability
11. Autoclavability The lower part of the pipette, Tip cone, ejector collar, piston and oring are autoclavable parts. Please autoclave under below condition. Temperature 121°C / 250° Fahrenheit Pressure 1 bar / 15 psi (Pounds) Time 25 minutes or less After autoclave, allow parts to cool down for 8 hours in normal condition before reassembling it.
Need help?
Do you have a question about the BenchMate E and is the answer not in the manual?
Questions and answers