Table of Contents
Advertisement
Quick Links
Advertisement
Table of Contents

Summary of Contents for BRASH IMPORTS LM7401DVD
- Page 1 CAR MULTIMEDIA ENTERTAINMENT Operation Instructions...
-
Page 2: Table Of Contents
Table of Contents ……………………………………………………… 1 Features ………………………………………………….. 2 Precautions… ………………………………… Connection Instructions ………………………. 4 Installation and Connection schematics ……………………….. Button Positions and Functions Host…………………………………………………… Card Remote controller……………………………… Basic Operations……………………………………… …………………………………… Angle Adjustment …………………………………. Picture Adjustment ………………………………………… Setup Menu ……………………………… Volume Adjustment Monitor-OFF Operations…………………... -
Page 3: Features
FEATURES Thank you for purchasing our car multimedia entertainment system. Before operating the unit, please read through this manual and keep it well for future reference. The 7-inch TFT Monitor with built-in Panel (1.440H x 234V, 336960 pixel) The innovative design of this monitor enables this machine to be fixed in a DIN slot. -
Page 4: Precautions
Precautions To avoid any injury or accident, please read through the following precautions before installation and operation. On Safety Please abide by the traffic laws and regulations of the country you are in. Never watch or operate the monitor when driving. Otherwise it may divert your attention and consequently cause an accident. - Page 5 Protect the surface of the unit from any damage Please do not expose the surface of the unit to chemicals such as pesticide, hair glue, vermicide, etc. Please do not contact the unit with rubber or plastic materials for a long time.
-
Page 6: Connection Instructions
Connection Instructions ◘ Connect the power cord ACC (red) to the ignition switch. ◘ Connect BATT (yellow) to the circuitry of storage cell of your vehicle. ◘ Connect the reverse wire (blue) to the reverse switch or the circuitry of the reversing light (applicable to 12V). -
Page 7: Installation And Connection Schematics
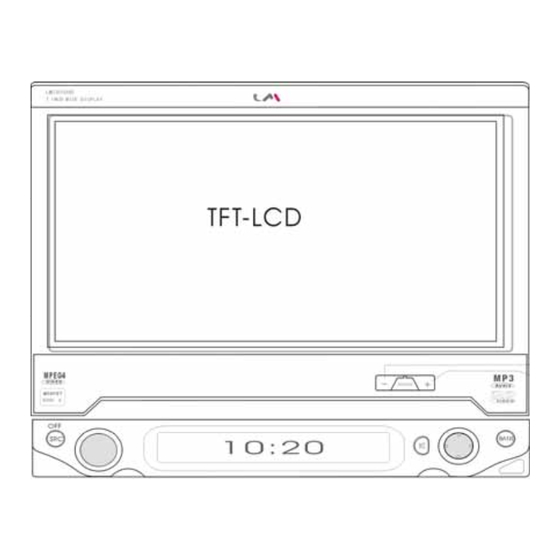
Installation and Connection... - Page 8 Control Button Positions Key Functions introduction for host panel...
- Page 9 Key Functions: POWER/EJECT Press to shut down the system, long-press to shut down the system and flip down the LCD, press to start the system and eject the LCD in idle state. MODE/SCALE Press to select preset picture modes (soft, customized, bright), long-press to adjust the aspect ratio of picture monitor (full, wide, center, zoom).
- Page 10 Operation Points: 1. Press multi-function key (11) to switch on the host; when the host is ON, this key only serves as sound menu button and volume adjusting button. 2. If ACC is turned off, the system will be in auto memory mode; it will restore automatically when ACC is started, but the monitor will not flip up.
-
Page 11: Card Remote Controller
Card Remote Controller This unit can be operated with a card style remote controller. For safety, please park your vehicle before you use the remote controller or have a passenger to operate it. Point: Please refer to “Replacing the lithium battery” in details for replacing batteries. - Page 12 Key functions of the remote controller POWER/EJECT key Press to shut down the system, long-press to shut down the system and retract the LCD, press to start the system and eject the LCD when idle. MODE key Press to select preset picture modes (soft, customized, bright), long-press to adjust the aspect ratio of picture monitor (full, wide, center, zoom).
- Page 13 Press to select the mode of repeated playback when playing a DVD. AUX (auxiliary input) key Repeatedly press to switch between AUX and CAMERA. Adjusting key “+” Main menu (MENU) key ENTER key When playing a DVD, it is an ENTER key (long-press to enter or exit the setup menu of DVD changer);...
-
Page 14: Basic Operations
Basic Operations ☆ When playing AV, CD-C (DVD) or TV, press “MENU” key to sequentially display “picture adjustment”, “setup menu” and “exit sub-menu”. Angle adjusting Repeatedly press (or long-press) the ANGLE “∆/▽” key, or press the ANGEL“+/-” key in the right-bottom corner, then the monitor will flip up or down. If the unit is normally shut down, the system will automatically store the current monitor angle. -
Page 15: Setup Menu
Setup Menu When playing AV, CD-C (DVD) or TV, double press “MENU” key, the screen will display as shown in the following picture. Press “ ” key to sequentially select mirror, blue, bell and tune; Press “ ” key to adjust the above parameters. ☆... -
Page 16: Volume Adjustment
screen won’t turn blue if there is no signal. If the function is set to be “ON”, the screen will turn blue if there is no signal. ☆ When displaying a menu, even if the function of blue screen is OFF, the screen will be in blue automatically. - Page 17 Volume values will also be shown on the screen of the panel. B . Bass adjustment ☆ Double press the knob or “SOUND” to bring up the bass adjustment menu, rotate the knob to adjust bass effects. Volume values will be shown on the screen of the panel. Bass adjustment -8-8 ☆...
- Page 18 E. Front and rear balance adjustment -8-8 Front & rear balance ☆ Press the knob or “SOUND” 5 times to bring up the balance-adjusting menu for front and rear channels, rotate the knob to adjust front and rear balance effects. On the panel screen: “——”...
- Page 19 Note: Whether the monitor is ON or not, you can always use the key on the remote controller or the knob on the panel to make the above adjustments.
-
Page 20: Fm Function Operations
FM function Operations Note: If the monitor is not turned on, Radio (BAND), CD-C (DVD) and AV can be used normally except TV. All functions and statuses of this unit are shown on the screen of the panel. Hint: If you select radio, power antenna will be automatically extended out. Monitor OFF Press BAND key to enter radio mode, sequentially press BAND to select FM1, FM2 and AM. - Page 21 C. Manual Storing Having found radio stations with the above methods, press “MENU” key, upon two tones of “tick tack”, the channel number under the channel indicator “CH” on the screen will flash. Press the “ ” key to select a channel, press “MENU”...
- Page 22 Press “MUTE” key to switch between “mute/sound” and the characters, “PLAY” on the screen of the panel will flash. Monitor OFF Press the “BAND” key to play radio. The screen will show as following picture. Press the knob on the panel in order as bass, treble, L/R balance, front and rear balance and volume adjustment.
-
Page 23: General Setup
Playback setup of the multi-disc changer Main page of playback setup To make operations of multi-disc changer such as general setup, speaker setup, audio setup, and initial setup, Long-press the “ENTER” key General setup When the setup main page appears, move the joystick or press “ OR ” to select general setup. - Page 24 Speaker setup When the setup main page appears, move the joystick or press “ ” to select speaker setup. Press the “ENTER” key to enter speaker setup page as shown in the following picture. Use the “ ” key or the “ ”...
- Page 25 Initial Setup You can perform initial setup only when the unit stops playing. When the setup main page appears, move the joystick or press “ OR ” to select initial setup. Press the “ENTER” key to enter initial setup page as shown in the following picture.
-
Page 26: Selecting Tracks
Operation of discs Preparation: To play DVD, VCD, CD and MP3 on this unit, you must connect this unit to a DVD disc changer. Monitor OFF Press the “SRC” key and select “CD C” to play discs. During playback, the screen of the panel will display as shown in the following picture: Current disc Current track... -
Page 27: Stop Playback
disc in the corresponding tray. If there is no disc in the corresponding tray, the disc in the next tray will apply. ⑥ Changing discs automatically If a disc is finished, the system will automatically play the next disc. This function may vary under different conditions. ⑦... - Page 28 you want to cancel changing disc, please again long-press the “PLAY” key to go back to the previous status. Changing discs automatically If a disc is finished, the system will automatically play the next disc. This function may vary under different conditions. Playback selecting When playing a disc, if you press the “MENU”...
- Page 29 Pausing playback Pause function lets you temporarily stop disc playback. When playing a disc, you can press the “PLAY” key to pause disc playback so that you can view the standstill picture. To resume playback at the point where you operated pause function, please press the “PLAY” key again or press the “ENTER”...
- Page 30 After the above information is shown, use numeric keys to input a desired track number, press the “ENTER” key to confirm and GOTO the inputted track. GOTO a specified time Press one time the “GOTO” key on the remote controller, the screen will display the following picture: After the above information is shown, use numeric keys to input a desired time, press the “ENTER”...
- Page 31 Corresponding information will be displayed on the right upper corner of the screen Stopping playback When playing a disc, if you long-press the “MENU” key on the upper side of the monitor, the system will stop playing the disc. You can also stop playing a disc by selecting other functions (such as AV, TV and BAND).
- Page 32 Notice: ① All the above operations and their monitor information will vary with different disc types being played. ② When playing an MP3 disc, the special operations are as follows: Play MP3 files in a specified folder: Long-press the “MENU” key on the upper side of the monitor to stop the current playback, then use the “...
-
Page 33: Av Function Operations
AV function operations Monitor OFF Press the “SRC” key to select “AV” or press “AUX” to enter AV playing. When playing, animation will be displayed on the screen of the panel as shown in the following picture: ① Volume adjustment: Please refer to the volume adjustment on page 13. - Page 34 Sign”(reversing signal input port) will be monitored on the screen, sound output will be muted simultaneously. Except the “MODE” key, all the other keys will be invalid. After the reverse gear is cancelled, all the functions of this unit will be automatically restored. If your vehicle is equipped with radar OSD distance detecting system, specific road signs will be monitored together with distance remaining tones (please refer to Page 31 for radar installation).
- Page 35 Operation of TV functions 1. Auto search Double press the “MENU” key to bring up setup menu (SETUP), press the “ OR ” key to select TUNE parameters. Press the “ ” key to select “AUTO”, the system will automatically start auto search from VLF bands until the storage memory is full (100 stations) or the search reaches the highest frequency.
- Page 36 3. Recalling preset channels Move the joystick upward or downward (or press the “ OR ” key on ☆ the remote controller) to select the previous channel or the next channel. Use numeric keys to directly input numbers, if you don’t input the ☆...
-
Page 37: Clock Setting
Clock Setting Notice: 1. For the first operation, please set the time as soon as possible. 2. When setting the clock, all the function keys will be locked except the power switch. Viewing the time In any mode (except when playing a disc), press the “ENTER” key to display the time, it will automatically be hidden 3 seconds later. - Page 38 Warning If disposed of improperly, the battery may explode. Never recharge, disassemble or throw the batteries into the fire. Battery installation procedures: ◇ Take out the battery clip Press the buckle to take out the battery clip. ◇ Replace battery Put the battery inside the clip with positive polarity (+) upward.
-
Page 39: Supplementary Information
Supplementary information Precautions before operating the card style remote controller Do not place the remote controller on the instrument board, steering wheel or in any other place exposed to direct sunlight. Especially in summer, temperature in these places is very high which may distort the shape of the remote controller. - Page 40 bright spots may appear on any LCD. LCD is a very precise device, above 99.99% of the segments are functional, but there may be less than 0.01% of defective segments which can not be lit. However, these defective segments won’t affect your viewing. Notice: This unit is equipped with protection devices for the process of each entry and exit or flip.
- Page 41 may interrupt disc playback DVD discs For some DVD discs, certain functions can’t be used. It may not to play back some DVD discs. When DVD-R/DVD-RW discs are used, playback is possible only for discs that have been recorded in video format (video mode) and it is not possible to play back general computer files.
- Page 42 conventional CD or CD-R discs. Read the precautions with CD-R/CD-RW discs before using them. MP3 files MP3 is short for MPEG Audio Layer 3 and refers to an audio compression technology standard. This unit allows playback of MP3 files on CD-ROM, CD-R and CD-RW discs.
- Page 43 increased bit rate. This unit can play recordings with bit rates from 8kbps to 320 kbps, but in order to be able to enjoy sound of a certain quality, we recommend using only discs recorded with a bit rate of at least 128 kbps. Notice: When naming an MP3 file, add the corresponding filename extension (.mp3).
-
Page 44: Basic Troubleshooting
Basic troubleshooting If there is something wrong with this unit, please first check the following points. As for the details of optional equipment, please refer to the operation instructions supplied with the product. If the problem still exists, connection may have failed or malfunction of the unit occurs. In such case, please contact Technical Information Center or your deale Common Troubles No Sound... - Page 45 When the ignition key is turned to ON, ACC or OFF positions, there are noises being made. →The wires do not match with the connection of auxiliary power. Noises are heard. →Keep the antenna cable and audio cables stay away from power cords. Power antenna cannot be extended out.
- Page 46 →The disc is upside down. Radio/TV Program of stereo broadcasting sounds mono. →If signals are too weak, this unit will be in mono receiving mode. It is not possible to tune the preset frequencies. →Please store correct frequencies into the memory. →Broadcasting signals are too weak.
Need help?
Do you have a question about the LM7401DVD and is the answer not in the manual?
Questions and answers