
Related Manuals for Winmate M101H


Summary of Contents for Winmate M101H
-
Page 1: User Guide
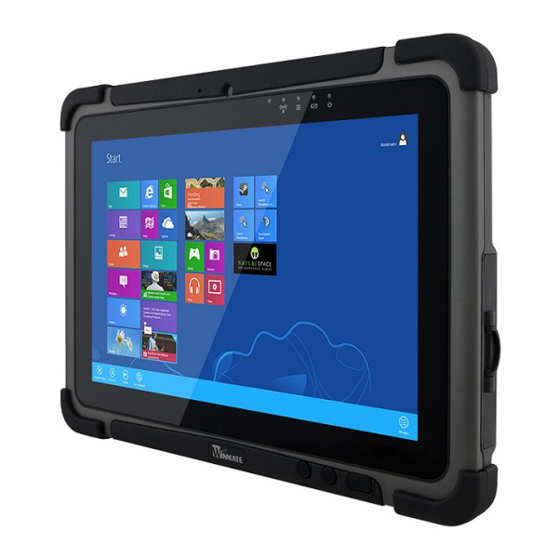
Rugged Windows Tablet M101H-series Model No: M101H User Guide Version 1.1 Manual Part Number : 9171101K1005 Please read this instructions carefully before using this product, and save this manual for future use. -
Page 2: Table Of Contents
Contents CHAPTER 1: READ ME FIRST ..............................1 ................................... 1 DVISORY ONVENTIONS ..................................1 AFETY NFORMATION ................................4 ANDLING AND AINTENANCE C) ..............................6 ECLARATION OF ONFORMITY CHAPTER 2: GETTING STARTED ..............................8 ..................................... 8 NPACKING ................................... 10 ESCRIPTION ARTS .............................. -
Page 3: Chapter 1: Read Me First
Ne pas démonter, modifier, ou insérer des objets pointus à l'intérieur du bloc-pile. Une fuite d'électrolyte, la génération de chaleur, l'amorçage ou la rupture peuvent être WARNING!/AVERTISSEMENT! occasionnés. An Electrical Shock Warning indicates the potential harm from electrical hazards and how to M101H Series User Guide... - Page 4 Ne pas bloquer les ouvertures de ventilation. rupture de la pile. Ne pas placer le produit contre un mur ou dans un espace clos de façon à entraver la circulation de l'air de refroidissement. M101H Series User Guide...
- Page 5 Ne pas casser la broche de terre du cordon d'alimentation. Use only accessories specified by the manufacturer. Utiliser uniquement les accessoires spécifiés par le fabricant. M101H Series User Guide...
-
Page 6: Handling And Maintenance
Pour maximiser la durée de vie du rétroéclairage de l'écran, autoriser le rétroéclairage résultant de la gestion de l'alimentation. Éviter d'utiliser un économiseur d'écran ou un autre logiciel empêchant la gestion de l'alimentation de fonctionner. M101H Series User Guide... - Page 7 Lorsqu'il y a un écart sensible dans le fonctionnement de l'écran tactile (votre contact ne correspond pas à la bonne position sur l'écran), recalibrer l'écran tactile. M101H Series User Guide...
-
Page 8: Declaration Of Conformity (Doc)
Declaration of Conformity (DoC) M101H User Guide... - Page 9 Das obenbeschriebeneObjekt [A] entsprichtden Anforderungen der nachfolgend aufgeführtenEU-Vorgben [B]und denharmonisierten Normen [C]. Das Produkt entspricht außerdem den EU-Direktiven [D]. [Franch] L'objetde la déclarationdécrit ci-dessus[A] esten conformité avecl'exigencede la législationde l'UEsuivantes[B]et des normes harmonisées[C]. Produitégalement conforme auxorientations du Conseil[D]. M101H User Guide...
-
Page 10: Chapter 2: Getting Started
• Powering On/Off Unpacking Check and identify the standard supplied accessories. Standard factory shipment list: • • Tablet Computer Standard Battery • • Power Adapter Power Cord and Plugs • • Capacitive Touch Stylus Driver CD M101H Series User Guide... - Page 11 Optional Accessories Your package may include optional accessories based on your order. M101H offers the following optional accessories that can be purchased: Gigabit Ethernet Adapter RS232 Ethernet Adapter • • For LAN from 30-pin extension port For RS232 from 30-pin extension port •...
-
Page 12: Description Of Parts
MicroSD Card Memory card reader port Utility Reader for MicroSD Card Menu Button Hottab Quick Access Reset Button Hardware reset button Power Button Power on/off tablet I/O Cover Protect I/O ports Fan Exhaust Exhaust for waterproof M101H Series User Guide... - Page 13 Battery Lock Latch to lock the battery Latch in place once battery is inserted. Not spring- loaded. Battery Release Spring-loaded slider that Slider latches the battery in. Touch Pen Slot Pen holder slot to store touch pen M101H Series User Guide...
-
Page 14: Hotkey For Specific Functions
No light – Battery is in use and more than 10% Disk Activity Indicator Green - Disk Activity No light - Disk Idling RF Communication Green – One of WiFi/BT/WWAN/GPS is ON No light - WiFi/BT/WWAN/GPS are all OFF M101H Series User Guide... -
Page 15: First-Time Operation
3. Locate the Battery Lock Latch and push it to the “Unlocked” position. 4. Locate the Battery Release Slider that is spring-loaded. Pull back and hold. 5. Lift the battery out using the opening on side of battery compartment. M101H Series User Guide... - Page 16 Please refer to description of LED indicator on Description of Parts. Item Hours Battery Life Standard Battery (BS101) 8.5 Hours High Capacity Battery (BL101) 17 Hours Item Hours Battery Charging hours Standard Battery (BS101) 2.5 Hours High Capacity Battery (BL101) 4.5 Hours M101H Series User Guide...
-
Page 17: Powering On / Off
4. Tap on Power. 5. Tap on Shut Down. 6. Wait for Tablet Computer to power off. Note: • The computer will forcibly be powered off if the power button is pressed and held for 6 seconds or longer. M101H Series User Guide... -
Page 18: Chapter 3: Setting Up Windows For The First Time
The next screen requests confirmation that you accept the Software License Terms and the End User License Agreement. Click both check boxes and then click Next. Protecting your computer The next screen displays options for protecting the security of your computer and for receiving Windows updates. M101H Series User Guide... - Page 19 This is a trusted home network. • Work network: Select this location if all the computers on this network are at your workplace and you recognize them. This is a trusted work network. M101H Series User Guide...
- Page 20 4. Click the location where you will most often use the computer. Completing Windows 7 Setup After completing Windows 7 setup, a Preparing your desktop screen displays. Please allow several minutes for Windows to save your settings. M101H Series User Guide...
-
Page 21: Setting Up Windows 7 Ultimate/Professional
1. Press the power button to power on the computer. 2. First select your region and language information, and then tap Next 3. Type in a user name for your account to be used on this PC and tap Next M101H Series User Guide... - Page 22 4. Type in a password for your account and tap Next 5. Now enter the product key that came with the computer and tap Next. For this version of the Windows, a product key entry is required when setting up the computer for the first time. M101H Series User Guide...
- Page 23 6. On the license terms screen, click on the I accept the license terms and tap Next 7. For the update option, choose Use recommended settings for Windows to install updates. If you do not wish Windows to do so, choose the other options accordingly. M101H Series User Guide...
- Page 24 8. Next, review the date and time settings on the computer 9. Select the computer current location for network privacy setting. Choose the location below to your actual usage accordingly. M101H Series User Guide...
- Page 25 10. Allow time for windows to setup your desktop for the first time. 11. Now the computer is ready to be used. M101H Series User Guide...
-
Page 26: Setting Up Windows Embedded 8 Standard
2. Check I accept the license terms for using Windows to accept the terms, and then click or tap Accept. 3. On the Personalize screen, choose a color you like – you can always change this later from the Start screen. M101H Series User Guide... - Page 27 4. In the PC name field, type a name for your computer, and then click or tap Next. 5. On the Settings page screen, choose Use express settings for the fastest setup. M101H Series User Guide...
- Page 28 6. On the Sign in to your PC screen, choose to create a Local account. 7. Windows will then try to connect to network. Ignore attempt to connect to internet as you do not need internet connection to finish setup your pc. M101H Series User Guide...
- Page 29 8. Type your username and password to create a local account, and then click or tap Finish. 9. Windows may take some time to finalize your settings. M101H Series User Guide...
- Page 30 10. On the Windows Sign-in screen, enter the user name and password that you set up earlier, and then press Enter. 11. Once Windows finishes login, you are now ready to use the PC M101H Series User Guide...
-
Page 31: Setting Up Windows Embedded 8.1 Industry Pro
2. Check I accept the license terms for using Windows to accept the terms, and then click or tap "I Accept". 3. On the Personalize screen, choose a color you like – you can always change this later from the Start screen. M101H Series User Guide... - Page 32 4. In the PC name field, type a name for your computer, and then click or tap Next. 5. On the Settings page screen, choose Use express settings for the fastest setup. M101H Series User Guide...
- Page 33 6. Windows will then try to connect to network. Ignore attempt to connect to internet as you do not need internet connection to finish setup your pc. 7. On Your account screen, type your username and password to create a local account, and then click or tap Finish. M101H Series User Guide...
- Page 34 8. Windows may take some time to finalize your settings. 9. On the Windows Sign-in screen, enter the user name and password that you set up earlier, and then press Enter. M101H Series User Guide...
- Page 35 10. Once Windows finishes login, you are now ready to use the PC M101H Series User Guide...
-
Page 36: Setting Up Windows 10 Iot Enterprise
3. On the Here's the legal stuff screen, read through the disclosures, then tap Accept. 4. Windows will then try to connect to network. Tap Skip this step to continue without a wireless connection as you can then set up the network later. M101H Series User Guide... - Page 37 7. The initial setup screens are complete, and the desktop is displayed. 8. Read any introductory screens describing features of your computer, and tap Next upon completing each. You are now done with the initial setup process. M101H Series User Guide...
-
Page 38: Chapter 4: Operating The Device
Device button enables/disables tablet computer’s hardware functions. The configurable functions are Wi-Fi, WWAN(3G/4G/LTE), GPS, Bluetooth, Camera, LED indicators, Barcode Reader, RFID Reader, Expansion Port, and GPS Antenna routing options. M101H Series User Guide... -
Page 39: Shortcuts
1. Open the Hottab utility by press the (Menu) Button located on the front panel, OR launching the Hottab Utility application. 2. Tap on the Shortcuts button. 3. Tap on the saved shortcut items to access the saved programs. M101H Series User Guide... -
Page 40: Camera
(Menu) Button located on the front panel OR click on the back arrow on top. 6. Tap on the Camera icon to go into the Camera menu. The Camera user interface will take up the entire screen as shown below: M101H Series User Guide... - Page 41 Camera Shutter Button. Tap to take picture. (automatically switch base on mode) Video Record Button. Tap to Start, and press again to stop recording. Open Saved Opens the location where pictures and videos are saved in a Location window. M101H Series User Guide...
-
Page 42: Device On/Off
6. Double-click a network to connect to it. Provide required authentication information if needed. 7. To check the connection status, observe wireless network connection status icon in the Windows notification area. The more bars the icon shows, the better the wireless LAN connection strength is. M101H Series User Guide... -
Page 43: Using The Wireless Wan (3G/Lte) Feature
6. Insert the SIM card into the slot located near the right side of the service window. 7. Reposition the removed 3G/LTE module screw to secure the 3G/LTE module. 8. Reposition the removed service window screw to secure the service window. M101H Series User Guide... -
Page 44: Using The Gps Feature
GPS is disabled. 4. If the GPS feature is disabled (white), tap on the GPS icon to enable it (orange). 5. Now the GPS feature is ready to be used with an application utilizing the GPS. M101H Series User Guide... -
Page 45: Using The Bluetooth Feature
3. Check the status color of the Indicator icon: Item Status Color Description Orange LED indicator is enabled. White LED indicator is disabled. 4. If the indicator is disabled (white), tap on the Indicator icon to enable it (orange). M101H Series User Guide... -
Page 46: Using The Barcode Reader Feature
Using the Barcode Reader feature IMPORTANT The 2D/1D Barcode Reader is optional for M101H Tablet PC and is not re-workable by the end user. To use this feature, please make sure the tablet PC is built-in barcode reader before use, or contact our sales contact window for more details. - Page 47 Read time options drop-down menu and choose a preferred time frame (options from 1 second to 9 seconds). Flashing Under Flashing mode, the scanning light is flashing, and the barcode scanner processes auto-scan with the same frequency. M101H Series User Guide...
- Page 48 Under this setting, the data scanned is sent like keyboard data. The scanned data can be output directly to the demo area below this window, or user can also open other utility, such as Office Word or Notepad files, for data input. Demo Area M101H Series User Guide...
- Page 49 Append TAB The check box user can defines to append an “TAB” which is followed by the characters. Regex Filter Press on “Presets…” button, user can define how many characters to show after the data scanned. M101H Series User Guide...
- Page 50 *To recover the connection, please tap on the button again to re-connect with Barcode Reader. Setting the 1D/2D Barcode Scanner Symbologies The barcode scanner is shipped with default settings shown below. If the default setting suits the usage requirement, setting symbologies is not necessary. M101H Series User Guide...
- Page 51 If user wants to change the default setting of symbologies or other advanced setting, please (1) Refer to Page 49 to disconnect the Barcode Reader from Hottab. (2) Execute the “Easyset” barcode scanner configuration application by tapping on its icon : M101H Series User Guide...
- Page 52 Port (COM15)” and select “OK” as shown in the screen capture below: (5) User can select Barcode code type of interest by pressing “5. Symbologies”. in the navigation pane, and it will show its configuration options . M101H Series User Guide...
- Page 53 Note: For more information on how to use the “EasySet” application, please refer to the complete EasySet User Manual from Intermec: http://intermec.custhelp.com/app/answers/detail/a_id/5760 M101H Series User Guide...
-
Page 54: Turn On/Off The Gps Ext. Antenna
Turn on/off the GPS Ext. Antenna IMPORTANT The vehicle dock of M101H Tablet PC supports external GPS antenna through standard SMA connector. To work with external GPS antenna, please make sure the tablet PC is well installed to vehicle dock, and the vehicle dock has connected with external GPS antenna. -
Page 55: Change Touchscreen Modes
To switch between the different touchscreen modes via the HotTab utility, perform the following procedure: Open HotTab utility by pressing (Menu) Button located on the front panel, OR launching HotTab Utility application. Choose “Device ON/OFF” and then click on “Touch Set” icon M101H Series User Guide... - Page 56 Under the “Touch Mode”, select the desired touch modes by tapping on the radio button. Now the touchscreen mode would behave as configured. Here’s also additional Touch related setting to switch the touchscreen input between mouse mode with cursor, or with multi-touch mode: M101H Series User Guide...
- Page 57 (Menu) Button located on the front panel, OR launching HotTab Utility application. Tap on the Setting button. Tap on F1 icon. Tap on the Long Press icon. Change the Long Press function to “Touch Mode” as shown below: M101H Series User Guide...
- Page 58 Once the touchscreen mode switching is set to the programmable function button, Long Press on “F1” function button to cycle through the different touchscreen modes. When touchscreen mode is switched, an icon will temporarily overlay on the lower center of the screen to indicate current touchscreen mode: M101H Series User Guide...
-
Page 59: Using The Expansion Module Feature
Using the Expansion Module feature IMPORTANT The Expansion Port is optional for M101H Tablet PC and is not re-workable by the end user. To work with Add-on module, please make sure the tablet PC is built-in expansion port before use, or contact our sales contact window for more details. -
Page 60: Settings
Backup battery level is low, and hot swapping is not recommended. Battery Charge Time: The Battery Information also displays estimated time needed to fully charge the main battery when AC adapter is plugged in. Meanwhile, the backup battery is charged by the main battery. M101H Series User Guide... - Page 61 Using the physical function keys: 1. While operating the tablet, click on the physical function keys to activate functions mapped via the setup in this section. M101H Series User Guide...
-
Page 62: Chapter 5: Frequently Used Settings
1. Tap and hold anywhere on the desktop for 3 seconds and release to bring up the context menu, and select “Screen resolution” option as shown below: 2. A “Screen Resolution” Window will show up. Select the “Make text and other items larger or smaller” option in the window, as shown below: M101H Series User Guide... - Page 63 3. A “Display” window will show up. Under “Change the size of all items” section, change the scaling option to “Larger – 150%” or any other desired display scaling and hit “Apply” to save changes, as shown below: M101H Series User Guide...
- Page 64 Alternatively, instead of changing the display scaling setting, user may choose to change the overall resolution setting to make screen elements bigger. 1. Tap and hold anywhere on the desktop for 3 seconds and release to bring up the context menu, and select “Screen resolution” option as shown below: M101H Series User Guide...
- Page 65 If the new resolution is not desirable, hit “Revert” and select a different resolution to change to, and start again from step 2. 5. The user may now use the device with the new resolution setting. M101H Series User Guide...
-
Page 66: Replacing Hot Swappable Battery
6. If Main battery level can be read, continue to use the tablet computer. To keep battery health and prevent possible issues from battery over- CAUTION discharged, please charge the tablet built-in back-up battery once for every 2 months. M101H Series User Guide... -
Page 67: Using Recovery Wizard To Restore Computer
Using Recovery Wizard to Restore Computer M101H tablet computer has a dedicate recovery partition stored on the hard drive of the tablet to enable quick one-key recovery process. This partition occupies about 11GB of the storage space, and comes built-in to each M101H tablet computer. - Page 68 5. Wait till the recovery process to complete. During the recovery process, a command prompt will show up to indicate the percent of recovery process. 6. After recovery is completed, please press any key to continue, and the tablet computer will restart automatically. M101H Series User Guide...
-
Page 69: Docking Connector Pin Definition
USB- DETECT+ Power DETECT- Power Expansion Port Pin Definition M101H tablet computer supports one optional 19-pin expansion port at the rear side. The pin definition is listed as the following table 19 Pin Expansion Port Pin No. Description Pin No. -
Page 70: Com Port Definition
COM Port Definition M101H tablet computer uses Hottab utility for built-in peripherals control. All the COM port numbers have been defined in the OS image coming with the package. COM Port Device COM 1 RS232 at I/O COM 2 RS232 of Expansion Port (optional) - Page 71 Tap on the dropdown list and choose the correct COM Port Number (refer to the COM Port Definition Table), and click "OK". Double check "Device Manager" to make sure the COM Port number has been re-defined successfully, and then restart the system. M101H Series User Guide...
-
Page 72: Pairing With A Wireless Bluetooth Barcode Scanner With Bluetooth Serial Port Profile
Open Settings. 3. Once the Bluetooth Settings Menu appears, go to “Options” tab, and make sure that in the Discovery section, the computer is set to “Allow Bluetooth devices to find this computer”, as shown below: M101H Series User Guide... - Page 73 4. In the Bluetooth Settings menu, go to “COM Ports” tab. COM port has to be setup for the wireless Bluetooth Barcode Scanner to communicate via the Bluetooth Serial Port Profile. Click on the “Add…” button. M101H Series User Guide...
- Page 74 COM Port that has been assigned for the Bluetooth Serial Port Profile in the previous step. IMPORTANT: Make sure the application stays open while pairing. 8. Now the computer is ready for pairing process to start. M101H Series User Guide...
- Page 75 2. Perform scanning procedures. A Bluetooth notification window pop-up on the right hand side of the desktop. Left click on the mouse to enter Add a device menu. 3. In Add a device window, click Next to connect the Barcode Scanner to the Computer. M101H Series User Guide...
- Page 76 In order to ensure that Bluetooth Device is successfully pared to the Computer, follow the steps below: 5. Locate the Bluetooth icon in the Notification Area. Select Show Bluetooth Devices. You can access this menu in the Control Panel: Control Panel Devices and Printers Bluetooth Devices Windows M101H Series User Guide...
- Page 77 6. Make sure your device is connected to the Computer. M101H Series User Guide...
-
Page 78: Chapter 6: Troubleshooting
• Make sure that both devices are compatible. • The GPS application cannot find my location. Make sure that GPS is powered on in Hottab. • Make sure that GPS receiver and the location M101H Series User Guide... - Page 79 When utilizing the GPS function, we recommend disabling the Barcode Reader in Hottab to reduce interference. • RFID scanner does not seem to work. Make sure under Windows, the RFID hardware is set to COM 3 port. M101H Series User Guide...
- Page 80 Winmate Inc. 9F, No.111-6, Shing-De Rd., San-Chung Dist., Taipei 241, Taiwan, R.O.C Tel: 886-2-8511-0288 Fax: 886-2-8511-0211 Email: sales@winmate.com.tw Official website: http://www.winmate.com.tw...
Need help?
Do you have a question about the M101H and is the answer not in the manual?
Questions and answers