Table of Contents
Advertisement
Quick Links
Advertisement
Table of Contents

Related Manuals for Dahua Forensic NVR0404FD-S


Summary of Contents for Dahua Forensic NVR0404FD-S
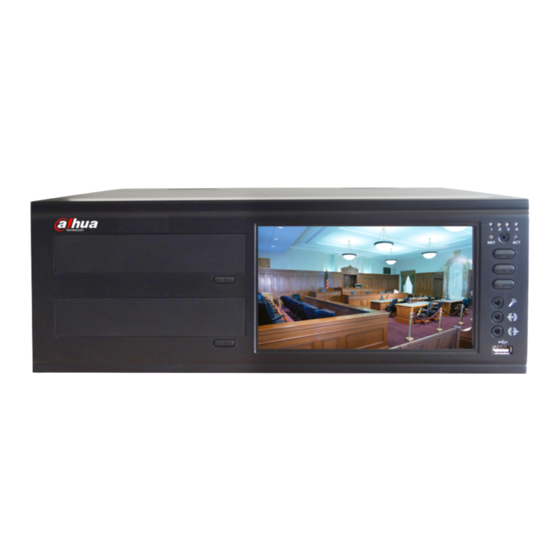
- Page 1 Forensic NVR Quick Start Guide Version 2.2.0...
-
Page 2: Table Of Contents
Table of Contents Hardware Installation and Connection................1 Check Unpacked NVR..................1 About Front Panel and Rear Panel ..............1 After Remove the Chassis .................1 HDD Installation....................1 Front Panel......................2 Rear Panel ......................3 Connection Sample.....................3 Alarm Input and Output Connection..............4 1.8.1 Alarm Input and Output Details..............4 1.8.2 Alarm Input Port...................5 1.8.3 Alarm Output Port..................5 Overview of Navigation and Controls................6... - Page 3 Backup ........................22 CD Copy ......................23 CD Verification....................23 Web Operation........................26 Network Connection..................26 Login........................26 3.2.1 Real-time Monitor ..................28 3.2.2 PTZ ......................30 3.2.3 Color ......................33 3.2.4 Picture Path and Record Path..............33 Appendix Toxic or Hazardous Materials or Elements .............35...
- Page 4 Welcome Thank you for purchasing our NVR! This quick start guide will help you become familiar with our NVR in a very short time. Before installation and operation, please read the following safeguard and warning carefully! Important Safeguard and Warning 1.Electrical safety All installation and operation here should conform to your local electrical safety codes.
-
Page 5: Hardware Installation And Connection
1 Hardware Installation and Connection Note: All the installation and operations here should conform to your local electric safety rules. 1.1 Check Unpacked NVR When you receive the NVR from the forwarding agent, please check whether there is any visible damage. -
Page 6: Front Panel
4. Unfasten the screws of the 6. Place the bracket in line with Use special data cable to rear and side panel of the device. connect the HDD cable and power the four holes of the device and cable. then use screws to fix from the bottom. -
Page 7: Rear Panel
Remote control Remote control indicator light indicator light The light is on when power connection is OK. Power indicator light REC:Start burning. REC/ST Burning Start/stop STOP:Stop burning. Cancel Exit Microphone port. Microphone Line audio input port. Line audio input Line audio output port. Line audio output USB port Connect to mouse, HDD and etc. -
Page 8: Alarm Input And Output Connection
Figure 1-3 1.8 Alarm Input and Output Connection There are two alarm input types for you to select: normal open (NO) and normal close (NC). 1.8.1 Alarm Input and Output Details AB cable connection Figure 1-4 You can refer to the following sheet for alarm input and output information. ALARM 1 to ALARM 4. -
Page 9: Alarm Input Port
1.8.2 Alarm Input Port Please refer to the following sheet for more information. Normal open or Normal close type. Please parallel connect COM end and GND end of the alarm detector (Provide external power to the alarm detector). Please parallel connect the Ground of the NVR and the ground of the alarm detector. Please connect the NC port of the alarm sensor to the NVR alarm input(ALARM) Use the same ground with that of NVR if you use external power to the alarm device. -
Page 10: Overview Of Navigation And Controls
2 Overview of Navigation and Controls Before operation, please make sure: You have properly installed HDD and all the cable connections. The provided input power and the device power are matched. The external power shall be AC100~240V 50+2% Hz. Always use the stable current, if necessary UPS is a best alternative measure. 2.1 Login, Logout &... -
Page 11: Main Menu
Figure 2-2 2.1.2 Main Menu After you logged in, the system main menu is shown as below. See Figure 2-3. There are total seven icons: search, Information, setting, backup, remote device, advanced and shutdown. You can move the cursor to highlight the icon, and then double click mouse to enter the sub-menu. -
Page 12: Auto Resume After Power Failure
Figure 2-5 The other ways is to press power button on the front panel for at least 3 seconds, system will stop all operations. Then you can click the power button in the front panel to turn off the NVR. Please note, before you replace the HDD, do remember shutting down the device and unplug the power cable. -
Page 13: Ptz Control
Figure 2-6 2.3 PTZ Control Before the operation, please go to Main Menu->Setting->Pan/Tilt/Zoom to set PTZ protocol first. In the one-window surveillance mode, right click mouse (click “fn” Button in the front panel or click AUX key in the remote control). Click Pan/Tilt/Zoom, the interface is shown as below. See Figure 2-7. - Page 14 In the middle of the eight direction arrows, there is a 3D intelligent positioning key. See Figure 2-9. Please make sure your protocol supports this function and you need to use mouse to control. Click this key, system goes back to the single screen mode. Drag the mouse in the screen to adjust section size.
- Page 15 Figure 2-11 Note: Preset, tour and pattern all need the value to be the control parameter. You can define it as you require. You need to refer to your speed dome user’s manual for Aux definition. In some cases, it can be used for special process.
- Page 16 Activate Patrol (tour) Figure 2-10, input patrol (tour) number in the No. blank and click patrol button X 3 4 1 H 3 4 1 H 3 4 1 H Pattern Setup In Figure 2-10, click pattern button and then click “begin” button. The interface is shown as in Figure 2-14.
-
Page 17: Pip Setup
Figure 2-16 In Figure 2-16,click Page Switch button, you can go to Figure 2-17.(Please note only SD1 and SD2 protocol can go to the following interface.) The direction button here ti to control the speed dome menu. The displayed button here may vary due to different protocol. -
Page 18: 4-Window Pip Mode
The PIP mode uses one channel as the main window. You can select channel 1/23/4 as the main picture. c) On the PIP interface, click at the top left corner to select a channel you want to display and then click to save. -
Page 19: Real-Time Burning And Cd Playback
c) On the PIP interface, click at the top left corner to select a channel you want to display. You can select to set mixed audio and then click to save. See Figure 2-21. Figure 2-21 Note can only be displayed on the first channel and can only be displayed on the second channel. - Page 20 Figure 2-22 Tips Click the REC/STOP at the front panel; you can go to burning interface. Click REC/STOP for a short time, you can begin or pause burning. If you click REC/STOP for a long time during the burning process, you can stop burning operation. On the left-click mouse menu, select main menu and then click Backup button.
- Page 21 interface, system can auto generate verification information during the burning process. You can use the verification information to check the data has been tampered with or not. For detailed CD verification information, you can view chapter 2.9. Figure 2-24 You can click Mark setup button if you want to mark during the burning process. d) Now you can click Start Sync burning on Figure 2-22 to begin burning.
-
Page 22: Overlay Temperature/Humidity Information
Figure 2-25 Important Real-time burning and CD playback can not be operated at the same time since these two functions are both for CD-ROM. 2.6 Overlay Temperature/Humidity Information After you connect device to temperature and humidity device, you need to set corresponding parameters so that you can overlay temperature humidity information on the monitor video or record file. - Page 23 Now you can set Sniffer mode as COM and protocol is RC or other protocols. Click COM setting button, you can see COM setup interface. See Figure 2-27. Now you can set RS232 information. The COM function is the protocol and the baud rate, data bit, stop bit shall be the same with the temperature humidity device.
-
Page 24: Rs485 Mode
Preview means you can overlay temperature humidity information on local preview window. Monitor means you can overly temperature humidity information on the record file so that you can view it when playback. Connect the temperature humidity device to the device via the RS232. Connect the A/B cable of the temperature humidity device to the A/B cable of the 485 to 232 tool. - Page 25 Figure 2-30 In Figure 2-26, select the PIP channel (channel P) to overlay temperature/humidity information. Click overlay setup button, you can see the following interface. See Figure 2-28. Check the preview or monitor mode and then click Save button. Figure 2-31 Tips In Figure 2-28, click Set button, you can set overlay position.
-
Page 26: Backup
2.7 Backup NVR support USB device backup and network download. Here we introduce USB backup. You can refer to User’s Manual Chapter 5 Web Operation for network download backup operation. a) On the preview interface, right click mouse and then click main menu. b) Click backup button, the interface is shown as below. -
Page 27: Cd Copy
e) system only backup files with a √ before channel name. You can use Fn or cancel button to delete √ after file serial number. Click backup button, you can backup selected files. There is a process bar for you reference. When the system completes backup, you can see a dialogue box prompting successful backup. - Page 28 On preview window, right click mouse and then select real-time burning. Click the burn setup button, you can go to the following interface. See Figure 2-35.Check the verification box at the bottom of the interface. Figure 2-35 After the burning operation, you can check the CD is original or not. On the preview interface, right click mouse and then select main menu.
- Page 29 Figure 2-37...
-
Page 30: Web Operation
3 Web Operation There might be slightly difference in the interface due to different series. 3.1 Network Connection Before web operation, please check the following items: Network connection is right NVR and PC network setup is right. Please refer to network setup(main menu->setting- >network) Use order ping ***.***.***.***(* NVR IP address) to check connection is OK or not. - Page 31 Figure 3-2 After installation, the interface is shown as below. See Figure 3-3. Please input your user name and password. Default factory name is admin and password is admin. Then you can select the login mode: LAN and WAN. Note: For security reasons, please modify your password after you first login. Figure 3-3 After you logged in, you can see the main window.
-
Page 32: Real-Time Monitor
Section3: there are PTZ (chapter 3.2.2), color (chapter3.2.3) button and you can also select picture path and record path. Section 4:real-time monitor window. Please note current preview window is circled by a green rectangle zone. Section 5: Here you can view window switch button. You can also select video priority between fluency or real-time. - Page 33 On the top left corner, you can view device IP, channel number, network monitor bit stream. See Figure 3-7. Figure 3-7 On the top right corer, there are six unction buttons. See Figure 3-8. 3 4 5 Figure 3-8 1: Digital zoom: Click this button and then left drag the mouse in the zone to zoom in. right click mouse system restores original status.
-
Page 34: Ptz
You can click this button to enable audio talk. Click 【▼】 to select bidirectional talk mode. There are four options: DEFAULT,G711a,G711u and PCM. Please note, the audio input port from the device to the client-end is using the first channel audio input port. - Page 35 3D Intelligent Positioning You can click this icon to display or hide the PTZ control platform. Figure 3-11 3.2.2.1 Direction key and 3D positioning key In Figure 7-10, there are eight direction keys. In the middle of the eight direction keys, there is a 3D intelligent positioning key. Click 3D intelligent positioning key, system goes back to the single screen mode.
- Page 36 Figure 3-12 3.2.2.4 Auto Scan In Figure 3-12, move the camera to you desired location and then click left limit button. Then move the camera again and then click right limit button to set a right limit. 3.2.2.5 Pattern In Figure 3-12, you can input pattern value and then click start record button to begin PTZ movement.
-
Page 37: Color
Figure 3-13 3.2.3 Color Click color button in section 3, the interface is shown as Figure 3-14. Here you can select one channel and then adjust its brightness, contrast, hue and saturation. (Current channel border becomes green). Or you can click default button to use system default setup. Figure 3-14 3.2.4 Picture Path and Record Path Click more button in Figure 3-14, you can see an interface is shown as in Figure 3-15. - Page 38 Figure 3-16 Click record path button, you can see an interface is shown as in Figure 3-17. Please click choose button to modify path. Figure 3-17 Click reboot button, system pops up the following dialogue box. See Figure 3-18. Please click OK to reboot. Figure 3-18 If there is local use logged in the system menu, or the Web logged in user has no right to reboot the device system pops up a dialogue box to alert you.
-
Page 39: Appendix Toxic Or Hazardous Materials Or Elements
Appendix Toxic or Hazardous Materials or Elements Toxic or Hazardous Materials or Elements Component Name Cr VI PBDE Sheet ○ ○ ○ ○ ○ ○ Metal(Case) Plastic Parts ○ ○ ○ ○ ○ ○ (Panel) Circuit Board ○ ○ ○ ○...
Need help?
Do you have a question about the Forensic NVR0404FD-S and is the answer not in the manual?
Questions and answers