D-Link VisualStream DSB-C310 Quick Installation Manual
300k pixel usb pc camera
Hide thumbs
Also See for VisualStream DSB-C310:
- Manual (32 pages) ,
- Quick installation manual (9 pages) ,
- Brochure (5 pages)
Table of Contents
Advertisement
Quick Links
Download this manual
See also:
Manual
This product can be used with:
This product can be used with:
This product can be used with:
This product can be used with:
This product can be used with:
Windo
Windo
Window w w w w s XP
Windo
Windo
s XP
s XP
s XP
s XP, Windo
, Windo
, Windo
, Window w w w w s Me
, Windo
Windows 2000, and Windows 98SE
Windows 2000, and Windows 98SE
Windows 2000, and Windows 98SE
Windows 2000, and Windows 98SE
Windows 2000, and Windows 98SE
Before You Begin
You must have at least the following:
Windows XP/Me/2000/98Second Edition
•
One available USB Port
•
CD-ROM Drive
•
Check Your Package Contents
These are the items included with your purchase:
If any of the below items are missing, please contact your reseller.
©2003 D-Link Systems, Inc. All rights reserved. Trademarks or registered trademarks are the property of
their respective holders. Software and specifications subject to change without notice. DSB-C110.07212004
s Me
s Me
s Me, , , , ,
s Me
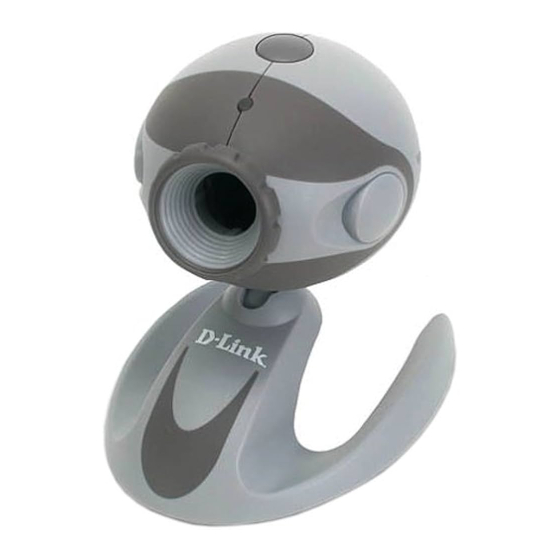
DSB-C310 USB PC Camera
CD-ROM with Manual
Desktop Stand
DSB-C310
DSB-C310
DSB-C310
DSB-C310
DSB-C310
D-Link VisualStream
300K Pixel USB PC Camera
TM
Advertisement
Table of Contents

Related Manuals for D-Link VisualStream DSB-C310


Summary of Contents for D-Link VisualStream DSB-C310
-
Page 1: Before You Begin
If any of the below items are missing, please contact your reseller. DSB-C310 USB PC Camera CD-ROM with Manual Desktop Stand ©2003 D-Link Systems, Inc. All rights reserved. Trademarks or registered trademarks are the property of their respective holders. Software and specifications subject to change without notice. DSB-C110.07212004... - Page 2 Run the Driver CD before you install the DSB-C310 PC Camera. The Driver CD contains an installation program that simplifies your installation process. Turn on your computer Insert D-Link VisualStream DSB-C310 Driver CD in the CD-ROM drive. Click Install Software If the Autorun screen does not automatically start, click on Start >...
- Page 3 Installing the Drivers (continued) Click Next Click Finish Windows begins copying the necessary files onto your computer. If Windows asks you to supply the original Windows CD-ROM, insert the CD and direct Windows to the proper location (Such as D:\WIN98 where “D”...
- Page 4 Connect the DSB-C310 To Your Windows-based Computer With your computer ON, connect the DSB-C310 to an available USB port on your computer or USB hub. Note: You may also use a USB extension cable for easier access. After the camera is connected, you will be prompted to select your Power Frequency Setting.
-
Page 5: Hardware Overview
The Installation is Complete! Once properly installed, you are ready to start immediately capturing images and creating video with the DSB-C310. You can utilize the camera with built in Windows applications such as NetMeeting, AMCAP, or Windows Movie Maker. The camera can be used with most popular instant messaging applications.The DSB-C310 CD-ROM includes Arcsoft’s ™... - Page 6 Notes...
- Page 7 Notes...
- Page 8 Support cal Support You can find software updates and user documentation on the D-Link website. D-Link provides free technical support for customers within the United States and within Canada for the duration of the warranty period on this product.
Need help?
Do you have a question about the VisualStream DSB-C310 and is the answer not in the manual?
Questions and answers