D-Link DSB-C320 Manual
330k pixel pc camera
Hide thumbs
Also See for DSB-C320:
- Quick installation manual (52 pages) ,
- Manual (27 pages) ,
- User manual (13 pages)
Table of Contents
Advertisement
Quick Links
Advertisement
Table of Contents

Related Manuals for D-Link DSB-C320


Summary of Contents for D-Link DSB-C320
- Page 1 D-Link VisualStream ™ 330K Pixel PC Camera Manual Ver. 2.00...
-
Page 2: Table Of Contents
Introduction --------------------------------------------------------------------------------- 3 Getting To Know Your VisualStreamTM PC Camera ---------------------------------- 4 Features and Benefits------------------------------------------------------------------------ 4 How to Use Your D-Link VisualStreamTM Camera ------------------------------- 4 How to Install MSN Messenger ---------------------------------------------------- ----- 5 Using Your PC Camera with MSN Messenger------------------------------------------- 5... -
Page 3: Package Contents
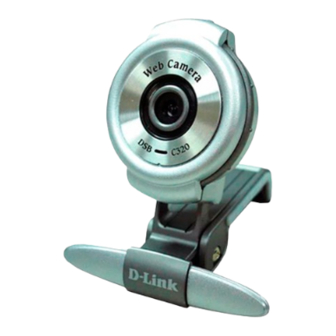
Windows compatible sound card and speakers (full duplex sound card recommended) Introduction Thank you for purchasing the D-Link DSB-C320 PC Camera. The DSB-C320 is a complete audiovisual solution for all of your e-communications. Talk to your family, friends, and colleagues face-to-face over the Internet, create videos, digital photo albums, and more, all the software needed to start creating digital content and enabling video communication is included. -
Page 4: Getting To Know Your Visualstreamtm Pc Camera
Versatile Clip Base Design For Notebook and Desktop PC Arcsoft Software Included How to Use Your D-Link VisualStreamTM Camera Choose the mode of “50Hz” or “60Hz” according to your power source environment or video output signal system to avoid the blurry image. -
Page 5: How To Install Msn Messenger
Amcap Option Video Capture Filter Click Turn the manual focus ring to adjust the image. Press the snapshot button to capture a single frame. How to Install MSN Messenger Please log on to http://messenger.msn.com to download. For Windows 98Second Edition/Me/2000 Users After the installation package is downloaded to your computer, follow the instructions to install MSN Messenger. -
Page 6: How To Install And Use Arcsoft Software
How to Install Arcsoft Software Simply put the provided software CD into your CD drive. The set-up software will automatically start, prompting you through the steps to install the video and photo software. You may enter the selection for the destination folder, the Start menu, Programs group and other set-up options. The set-up process will copy the applications to the destination folder. - Page 7 The program is divided into two main sections: My Captures, and the camera preview area. You can adjust which section is larger by simply clicking and dragging the area in between the two sections. Application Menu FILE Refresh Contents - Refreshes the screen to update any changes to your captured thumbnails. Page Setup - View and modify your printer settings.
- Page 8 Rotate Button Click this button to rotate the selected files 90 degrees. Email Button Click this button to attach the selected files to an email. Print Button Click this button to print the selected images. Each image will print on a separate page. New Folder Button Click this button to create a new folder in the "Folders"...
- Page 9 Full Screen Button Click this button to display your camera over the entire screen. Press ESC to exit full screen mode. Disconnect Button Click this button to disconnect your camera. Camera Preview This area shows you a live stream from your camera Capture Image Click this button to capture a still image from your cam.
- Page 10 section if you'd like to focus more on your cam stream. Capture Settings Button Click here to adjust the resolution for both captured still images and video clips. Simply select the resolution from the respective pull-down. If you’re looking for an easy way to create and share home videos, VideoImpression is perfect for you.
- Page 11 CREATING A VIDEO - OVERVIEW Videos are constructed by combining still images and/or existing movie clips. All components are arranged onto what’s called the “Storyboard.” When you make your final video, all of the components on the Storyboard are combined together and saved as a single video file. In addition to still images and videos, you can also add transitions between each component as well as sound clips on two separate audio tracks.
- Page 12 This first step is where you select the “media” (still images, videos, and sound clips) that you want to use to create your movie. All you need to do is choose the components you want and add them to the Storyboard. When you save—or “produce”—your movie, all the components on the Storyboard will be combined together into a single video file.
- Page 13 1. Single-click the component within the album. 2. Click the Apply button (it’s the arrow beneath the album). Don’t worry too much about adding your files in a particular order. You can click and drag them on the Storyboard at any time to swap positions. Don’t forget that you can add audio to two different audio tracks! You can overlap simultaneous sound clips and adjust their volumes to create the perfect blend.
- Page 14 THE PLAYER Now’s a good time to talk about the Player. The Player is the video screen on the right side of the display. It lets you preview each component on the Storyboard, as well as your entire movie. The Player has standard playback controls. The slider beneath the preview window shows you the progress of the video.
- Page 15 SETTING STILL IMAGE DISPLAY TIME 1. Single-click the desired image on the Storyboard. 2. Use the pull-down to select the duration (in seconds) of the selected still image. During your final movie, the still image will display for the set amount of time before proceeding to the next component.
- Page 16 ADJUSTING AUDIO VOLUME 1. Select the desired video or audio clip on the Storyboard. 2. Drag the volume slider to the desired level. STEP 3 – EFFECTS The third step in the creation process lets you add cool scene transitions between each still image or video component on the Storyboard.
- Page 17 as font, size, style, alignment, and color. You can also add a shadow. To do this, check the Shadow box. Click and drag within the preview to position the shadow behind the text. Use the sliders to adjust the shadow blur and intensity.
- Page 18 STEP 6 – PRODUCE The final step lets you save your movie in a variety of ways. Consult the Help file for details on the specifics of each case. For this guide, we’ll save a movie as a VCD. When you do this, you can pop the CD into most commercial DVD players to see your movie on your TV! 1.
- Page 19 -CREATING A SLIDE SHOW - OVERVIEW Creating a slide show is similar to creating a video, only there are fewer steps involved. Many of the video creation concepts are applied here, so we won’t go into as much detail as a result. If you have to, go back through the previous section again.
- Page 20 The main difference that you’ll notice is the display time for each still image is noted on the thumbnail. Change the display time by double-clicking it and entering a new time (in seconds). You can apply the new display time exclusively to the image you’ve selected, or all of the images in the slide show.
- Page 21 TIPS & TRICKS - Here are a few pointers to help you out: 1. Experiment. Click on every button. Choose every different option. You’ll learn the most and have the most enjoyable experience if you just play around with the software. 2.
-
Page 22: Getting Started
Get Photo - Locate photos on your computer within various folders or ArcSoft albums. Enhance - Quickly touch-up and modify your photos. Create - Add text, frames, special effects, and more to any picture. Project - Make your own calendars or “PhotoBooks.” Print - Print out single or multiple photos in a variety of ways. - Page 23 The photos within the selected folder or album will appear. VIEW SINGLE OR MULTIPLE PHOTOS To the right are the View Mode buttons. Here you can view photos in a number of ways. PHOTO VIEW OPTIONS When viewing a single photo, use the set of tools along the top of the screen to zoom in/out, skip to other photos stored in the same location, and rotate the current picture left or right.
- Page 24 - ENHANCING PHOTOS - When you’re ready to edit a photo, bring it up on the screen and then proceed to the Enhance module. From there, you can perform various types of modifications. ADJUSTING PHOTO ORIENTATION Use the tools along the top of the screen to rotate and flip a photo in a variety of ways. You can also save and delete a photo by clicking on the respective icon.
- Page 25 REMOVING RED EYE You can choose between “Auto Detect” and “Manual.” When using “Auto Detect,” simply move the mouse over the red part of the eye and click. The manual option lets you define the size of the affected area by moving a slider. RESIZING A PHOTO To resize a photo, simply enter in the pixel values that you want.
- Page 26 -CREATIVE OPTIONS - A variety of tools can be found in the Create module that let you touch-up and liven photos with the addition of various frames, borders, edges, and effects. The Help file describes each tool in detail, but we’ll walk you through some of the more engaging procedures here. CLONING Cloning lets you effectively paint over damaged areas of a photo by copying--or “cloning”--another part of the photo over the damaged section.
- Page 27 ADDING CLIP ART An entire library of clip art is included, allowing you to add fun and humorous images over any photo. You can move, resize, and rotate any clip art image. Click and drag a piece of clip art to move it. •...
- Page 28 CREATING A CALENDAR With just a few clicks you can create a yearly, monthly, or 12-month calendar. 1. First, choose the type of calendar you want to create. 2. Set the month (if applicable) and year. 3. Choose your calendar template/design. You can click/drag your photo to move, resize, and rotate it within the calendar.
- Page 29 spacing between the various photos. Keep the “Auto Crop Photos” box checked to have the program automatically crop and size • your photos so that they fit optimally within the print template. Some of your photos may have a low resolution, and may not print very clearly. When •...
- Page 30 Today, megapixel cameras are common and almost everyone can take high-quality pictures. However, these pictures are often very large, and only need to be so when you’re printing them. So if you’re sending pictures through email, you’ll probably want to always use the “Small” option unless you’d like the recipient to print the photo as well.
- Page 31 built-in templates, you can also create your own using your personal collection of digital images. Creating a Funhouse Image The creation procedure is extremely simple. There are five easy steps. Each step is listed vertically along the left side of the program desktop: In this step, you will select the template for your project.
- Page 32 Photo Mask – Click on the respective button to insert an image into the associated mask. All three of these buttons may not be available. If your selected template only has one mask, only the first button will be available. Use the pull-down to select an album.
- Page 33 – These buttons slightly rotate the selected image in the indicated direction. – Use these buttons to move the selected image within the template. Alternately, you can click and drag the image directly on the preview. – By enabling color matching, the program will apply a series of enhancements to make the tone of the inserted image match the tone of the template.
- Page 34 Step 5: Print Preview Once you’ve completed your Funhouse image, you’re ready to print it. Click the Print Preview button on the Main Screen to go to the Print Screen. From this screen, you have complete control over how your image prints. Click and drag the image to move it about the page.
- Page 35 Creating Your Own Templates >From the “My Templates” category on the Get Template Screen, click New.You’ll be taken to the Create Mask Screen. From here, you can open images and create up to three masks. You’ll then be able to insert other photos into each mask to create your Funhouse image. The tools described below can be used to create and modify your masks.
Need help?
Do you have a question about the DSB-C320 and is the answer not in the manual?
Questions and answers