Doran 7000 Instruction Manual
Hide thumbs
Also See for 7000:
- Instruction manual (5 pages) ,
- Instruction manual (43 pages) ,
- Operator's manual (8 pages)

Related Manuals for Doran 7000


Summary of Contents for Doran 7000
- Page 1 Model 7000 Model 7000XL Digital Scale INSTRUCTION MANUAL DORAN SCALES, INC. 1315 PARAMOUNT PKWY BATAVIA, IL. 60510 (800)262-6844 FAX: (630)879-0073 MANUAL REVISION : 1.1 SOFTWARE REVISION : 5.0 MAN123-11 4/8/96 Made in U.S.A.
-
Page 2: Introduction
7000 providing the ultimate in simplicity. The 7000 has a single push button; ZERO ZERO which is used to clear (tare) the scale display. The 7000XL is an upgraded version of the 7000 providing additional operator control with a three button touch panel. This touch panel offers ZERO... -
Page 3: Quick Start User's Guide Model 7000Xl
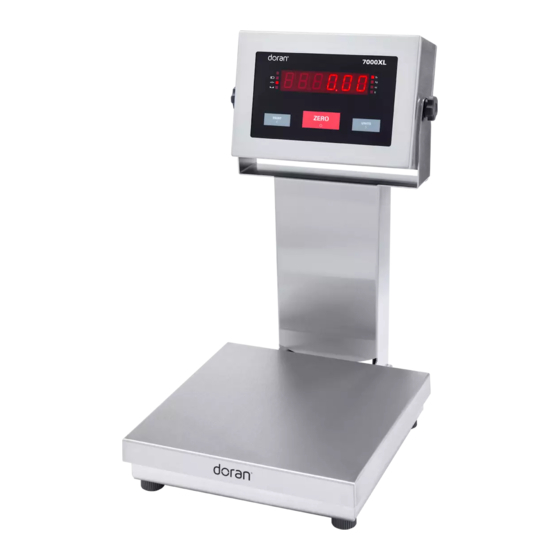
Quick Start User's Guide Model 7000XL Model 7000XL Digital Weight Indicator front panel layout. Basic Weighing Operations: 1) Remove all items from the scale platter. 2) When the motion (MOT) light goes out, press ZERO to zero the scale. The center of zero (ZERO) light should now be lit. -
Page 4: Quick Start User's Guide Model 7000
Quick Start User's Guide Model 7000 Model 7000 Digital Weight Indicator front panel layout. Basic Weighing Operations: 1) Remove all items from the scale platter. 2) When the units indicator light, press ZERO to zero the scale. The weight should now be zero 3) Place an item on scale platter and wait for the units indicator to light 4) Read the weight on the scale display. -
Page 5: Table Of Contents
..Quick Start User's Guide Model 7000 ...... - Page 6 ..Stability Indication Menu (Model 7000 only) ....... .
- Page 7 Section 6. Data Communications ......Introduction to data communications: ........
-
Page 8: Section 1. Unpacking And Installation
Be sure the AC power is not excessively noisy - this can occur if large inductive loads, such as solenoids or motors, are on the same power line. The Model 7000 and Model 7000XL have filtered power supplies to reduce the effects of normal line noise, but they cannot limit severe fluctuations. -
Page 9: Section 2. Scale Operations Guide
Section 2. Scale Operations Guide Figure 1: 7000XL Front panel layout and button locations. Figure 2: 7000 Front panel layout and button locations. -
Page 10: Model 7000Xl
To zero the scale, wait until the scale is stable and press the ZERO button. The scale will zero immediately. Neither the 7000XL or the 7000 will "zero" if the scale is in motion or if it is outside of the 1.9% Legal for Trade zero band (when activated). Refer to Section 4 of this manual for more details. -
Page 11: Section 3. Quick Setup Guide
Section 3. Quick Setup Guide Load Cell: Load cell connections are made through a terminal block located on the main PC. board. This block can be accessed by removing the rear cover. The Calibration switch S1, the auxiliary UNITS switch S2 and the zero offset adjustment are located behind the Calibration Access Cover. -
Page 12: Capacity
Calibration switch S1 to the RUN position. Once the desired capacity has been selected, Install the correct capacity label on the front surface of the Model 7000 or in the label pocket located on the inside surface of Model 7000XL touch panel. -
Page 13: Analog Setup
NOTE: Calibration at 10% of capacity has been provided as a convenience to customers with high capacity scales in remote or inaccessible locations. For maximum accuracy, Doran Scales recommends that all scales be calibrated at full capacity. When location or installation make it difficult to bring full capacity weights to the scale, calibration with as little 10% of capacity is possible. - Page 14 2) Once the correct capacity and filter have been selected, press and release UNITS or S2 until the scale is in the raw counts mode. If the capacity menu appears, scroll through the menu and try again. 3) Remove any unneeded items from the platform. 4) Check the raw "zero"...
-
Page 15: Section 4. Parameter Setup
Section 4. Parameter Setup The Model 7000XL and Model 7000 have twenty two setup and calibration parameters which can be changed (nineteen in the Legal for Trade mode). This flexibility makes these scales versatile weighing instruments capable of meeting almost all common weighing needs. -
Page 16: Stepping Through The Menu Functions
PRINT button). Apply power. Hold the button until the scale begins to scroll through the setup parameters. The button may be released anytime after the review has begun. To access the parameters on the 7000, follow the same procedures, but press the ZERO button. Legal for Trade Restrictions: The Legal for Trade mode disables certain setup options and menus. -
Page 17: Setup Menus Explained (In Order Of Occurrence)
SETUP MENUS EXPLAINED (in order of occurrence) Capacity Setup Menu Capacity Select Menu Allows the selection of scale capacity. 5 pounds 6 pounds 10 pounds 2, 5 15 pounds 20 pounds 30 pounds 50 pounds 60 pounds 100 pounds 2, 5 150 pounds 200 pounds 3, 5... -
Page 18: Calibration Menu
"rg Er." If this occurs, refer to section 5 and repeat the zero and span calibration. NOTE: For maximum accuracy, Doran Scales recommends that all scales be calibrated at full capacity. When location or installation make it difficult to bring full capacity weights to the scale, calibration with as little 10% of capacity is possible. -
Page 19: Digital Filter Setup Menu
1 division change must be seen to enter motion. 3 division change must be seen to enter motion. 5 division change must be seen to enter motion. Stability Indication Menu (Model 7000 only) Stability Indication * Not available on the 7000XL Controls the display of scale motion. -
Page 20: Latching Zero Request Setup Menu
Start Up Zero Setup Menu SU0 * Start Up Zero Controls the start up zero status. Zeros on the first stable reading on power up. Loads the calibration zero for zero reference Latching Zero Request Setup Menu Zero on Demand Enables or disable zero latching. -
Page 21: Output Formats
Dual Print mode. (Current units and kg output) Model 7000 compatibility mode. Output Not Legal for Trade Output for Doran Model SSP printer. 4 - 20 mA output interface. Option type "R." Output Not Legal for Trade Baud Rate Setup Menu Baud Rate Setup Determines baud rate for serial data. -
Page 22: Serial Data Handshaking Setup Menu
Serial Data Handshaking Setup Menu Serial Data Output Handshaking Determines the type of serial data handshaking used. No handshaking is used. Data is sent when ready, receiving device (printer) must be fast enough to keep up with the data. Software handshaking. Data is sent when ready. Transmission can be stopped by sending the scale an "xoff"... -
Page 23: Start Up Units Selection Menu
Start Up Units Selection Menu UnIts Start Up Units Select Mode Configures selection of start up units. Press ZERO to scroll through the units activated in the CSL mode. The selected units will be displayed on the units indicators to the right of the display. Note: If an invalid start up unit is selected for a given capacity, the scale will automatically change the unit setting to a valid unit when exiting the setup menu. -
Page 24: Legal For Trade Setup Menu
Scale Resolution Setup Menu Counts select Standard precision mode (3000d typ.) Precision mode (6000d typ.) NOTE: For maximum accuracy, Doran Scales recommends that all scales be calibrated at full capacity. When location or installation make it difficult to bring full capacity weights to the scale, calibration with as little 10% of capacity is possible. -
Page 25: Section 5. Calibration
Section 5. Calibration Digital Calibration: 1) Place switch S1 in the CALIBRATE mode if it isn't already. The scale should indicate "CAP **" (where ** is a valid capacity) on the display. Press and release "ZERO" until the desired capacity appears on the display. -
Page 26: Adjustment Of Span And Zero
capacity is selected, place the correct weight on the scale (or set the calibrator to the correct value). Press and release "ZERO." The scale will count from "7" to "0." When finished, the scale will display "AVG **." NOTE: If the scale platform is disturbed during the count down, the scale will reset the count when the platform becomes stable. - Page 27 4) Remove the simulator and attach the load cell. Remove the load from the cell while leaving the dead load attached. If "gr OL" is displayed, note the "NEG" annunciator. a) If the "NEG" annunciator is on, the overflow is negative, turn R10 counter clockwise until the overload clears.
-
Page 28: Selection Of Scale Type
Selection of scale type Since the 7000 and the 7000XL share common electronics and software, it is necessary to configure the scale to operate as either a Model 7000 or a Model 7000XL. 1) To setup your scale as a 7000, it is necessary to insert JU20, JU21 and JU22. -
Page 29: Fig. 2. Setup Jumper Locations
21,000 TO 36,000 COUNTS When measured with JU9, JU10 and JU11 removed. If the span lies between 6000 and 7000 counts, or below 3500 counts, insert JU12. If span is greater than 30,000 counts, adjust the no load setting to... -
Page 30: Fig. 3. Scale Type Selection Jumper
Fig. 3. Scale type selection jumper. (Shown in 7000XL position.) Table 4 Scale type selection jumpers. Jumper Model 7000 Model 7000XL JU20 JU21 LEFT TWO PINS RIGHT TWO PINS JU22 LEFT TWO PINS RIGHT TWO PINS... -
Page 31: Section 6. Data Communications
Section 6. Data Communications Introduction to data communications: In both the Model 7000XL and the Model 7000, data is sent to a printer or computer using "asynchronous serial communications." While the name is quite impressive, the actual concept is fairly simple. Data is broken up and sent one piece at a time to a printer or computer. - Page 32 The 7000XL and the 7000 resolve this dilemma by sending a "start bit" at the beginning of each data byte. This bit tells the printer or computer that a new data byte is on the way. When the start bit is received, the bit timer starts running and runs until it has received the correct number of bits.
-
Page 33: Printer Modes
Data output format: In order for the serial data sent from the 7000XL or 7000 to be useful, the data must be organized in such a way as to be easily read. -
Page 34: Fig. 1 F0 Data Output Format For Lb, Oz, And G
Displayed weight data with units. (lb-oz only) Fig. 2 F0 Data output format for lb-oz display Dual print format: The dual print modes provide the 7000 with the ability to print the current scale reading followed by the equivalent value in Kilograms. -
Page 35: Fig 4. Sample Dual Print Printer Output
STX: ASCII character 02h (normally a non printing character) Displayed weight data with units. See fig. 1 and fig.2 for structure. Carriage return & line feed: ASCII characters 13 & 10 STX± 27.30 lb CR+LF STX(± 12.380 kg)CR+LF Carriage return & line feed: Ascii characters 13 &... -
Page 36: Fig 5. Sample Ssp Format Printer Output
This mode is intended for use in applications where a computer is looking for the specific data format produced by the previous versions of the Model 7000. The older 7000 format is no longer Legal for Trade. "SSP" format: The data string produced by the SSP format allows the 7000XL to communicate with the Doran Model SSP Label Printer. -
Page 37: Section 7: Specifications And Interconnect Data
Section 7: Specifications and Interconnect Data Specifications: Model 7000XL Model 7000 Resolution: 6000d in precision mode (5000d for Legal for Trade) Sensitivity: 0.5 µV min. Load Cell Capacity: 0.5 mV/V to 3.5 mV/V Power Supply: 115/230 Vac 50/60 Hz Display: 6 digit LED. -
Page 38: Table 2: P2 Options Connections
PIN # TITLE CTS for Hardware Handshaking RTX for Software Handshaking Remote Switch High Remote Switch Ground RS232 Signal Ground Table 2: P2 Options Connections PIN # TITLE Ground Neutral Table 3: J1 Power Connections P3 PIN # P3B PIN # TITLE Zero Switch High Zero Switch Ground... -
Page 39: Fig. 2: Connector J2; Serial Cable Assembly
WHITE GREEN SHRINK TUBING SHIELD WITH SHRINK TUBING BLACK Fig. 2: Connector J2; Serial cable assembly Serial Cable Assembly DB25 Female connector w/ hardware handshaking Function Wire Color White Signal Black Jumper 4 to 5 Jumper 6 to 8 to 20 DB9 Female Connector w/ Hardware Handshaking White... -
Page 40: Table 6: Serial Cable Assembly With Software Handshaking
Serial Cable Assembly DB25 Female connector w/ Software Handshaking Function Wire Color White Signal Black Jumper 4 to 5 Jumper 6 to 8 to 20 DB9 Female Connector w/ Software Handshaking White Signal Black Jumper 1 to 4 to 6 Jumper 7 to 8 Table 6: Serial Cable assembly with Software Handshaking... -
Page 41: Section 8. Troubleshooting
Section 8. Troubleshooting General problem resolution: Problem: What to Do or Check: Weight reading will not repeat Make sure that there is nothing caught in the or scale does not return to platform under or around the load cell or spider zero when weight is removed. -
Page 42: Resetting The Scale Parameters
Doran Scales authorized dealer. Resetting the scale parameters: If at some point the Model 7000XL or Model 7000, user wishes to return the setup parameters to factory default, follow these steps. Remove power. -
Page 43: Error Messages
Error messages: Error Message What to Do or Check: The scale is in overload. The load on the scale "ovr-Ld" Scale overload platform exceeds the scale capacity by more than 103%. Remove excess weight from scale platform. The scale is in gross overload. The load exceeds "grs-oL"... - Page 44 INSTRUCTION MANUAL ADDENDUM SOFTWARE REVISION : All MAN180.10 9/22/97 Page 32 Table 3 of the 7000XL manual (MAN105), and Page 37 Table 3 of the combined 7000/7000XL manual (MAN132 rev. 1.0) have errors. Please replace these pages with the attached page.
- Page 45 PIN # TITLE CTS for Hardware Handshaking RTX for Software Handshaking Remote Switch High Remote Switch Ground RS232 Signal Ground Table 2: P2 Options Connections PIN # TITLE Ground Neutral Table 3: J1 Power Connections P3 PIN # P3B PIN # TITLE Zero Switch High Zero Switch Ground...
Need help?
Do you have a question about the 7000 and is the answer not in the manual?
Questions and answers