Table of Contents
Advertisement
EN - OPERATING INSTRUCTIONS
DE - BEDIENUNGSANLEITUNG
FR - MODE D'EMPLOI
ES - INSTRUCCIONES DE USO
PT - INSTRUÇÕES DE USO
IT - ISTRUZIONI PER L'USO
NL - GEBRUIKSAANWIJZING
DA - BETJENINGSANVISNINGER
SV - BRUKSANVISNING
NO - BRUKSANVISNING
FI - KÄYTTÖOHJEET
SL - NAVODILA ZA UPORABO
FO611C070000000
FO611C0700000UK
FO611C0700000AU
FO611C070000252
FO611C0700252AU
FO611C0700252UK
page
seite 17
page 32
pág. 47
pág. 62
pag. 77
pag. 92
side. 107
sid. 122
side. 137
sivu. 152
str.
2
167
Advertisement
Table of Contents

Related Manuals for Dometic FO611C070000000


Summary of Contents for Dometic FO611C070000000
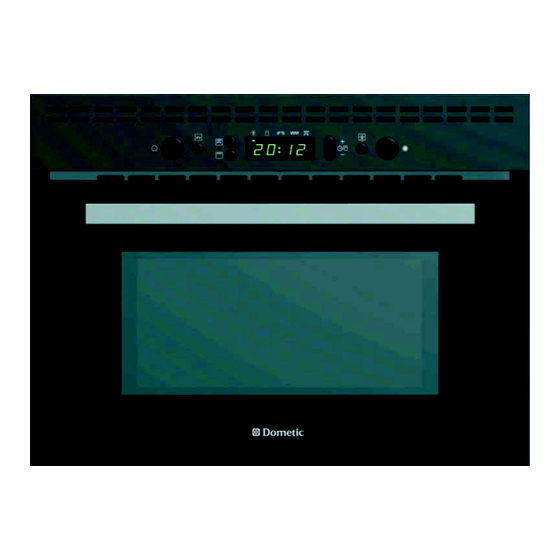
- Page 1 FO611C070000000 FO611C0700000UK FO611C0700000AU FO611C070000252 FO611C0700252AU FO611C0700252UK EN - OPERATING INSTRUCTIONS page DE - BEDIENUNGSANLEITUNG seite 17 FR - MODE D'EMPLOI page 32 ES - INSTRUCCIONES DE USO pág. 47 PT - INSTRUÇÕES DE USO pág. 62 IT - ISTRUZIONI PER L'USO pag.
-
Page 2: Installation
ENGLISH INSTALLATION MOUNTING THE APPLIANCE mounting instruc- OLLOW THE BELOW tions when installing the appliance. The plug must be accessible after installation. FRONT VIEW SIDE VIEW MIN. 417 mm 454 mm MIN. 395 mm 22 mm 5 mm 22 mm 10 mm TOP VIEW 454 mm... -
Page 3: After Connecting
INSTALLATION PRIOR TO CONNECTING if it has a damaged O NOT OPERATE THIS APPLIANCE on the rating plate cor- HECK THAT THE VOLTAGE mains cord or plug, if it is not working proper- responds to the voltage in your recreational ly, or if it has been damaged or dropped. -
Page 4: Important Safety Instructions
IMPORTANT SAFETY INSTRUCTIONS READ CAREFULLY AND KEEP FOR FUTURE REFERENCE in or EGGS O NOT HEAT OR USE FLAMMABLE MATERIALS near the oven. Fumes can create a fire hazard oven for cooking or O NOT USE YOUR MICROWAVE or explosion. reheating whole eggs with or oven for drying tex- without shell since they may... -
Page 5: Important Precautions
IMPORTANT PRECAUTIONS GENERAL LIQUIDS . Overheating the liquid HIS APPLIANCE IS DESIGNED FOR HOUSEHOLD USE ONLY BEVERAGES OR WATER to be used built-in. Do beyond boiling point can occur HIS APPLIANCE IS INTENDED not use it freestanding. without evidence of bubbling. This could result in a sudden for heating food and boil over of the hot liquid. -
Page 6: Start Protection / Key Lock
ACCESSORIES GENERAL TURNTABLE SUPPORT a number of accessories available on under HERE ARE SE THE TURNTABLE SUPPORT the market. Before you buy, ensure they are the Glass turntable. Never put any suitable for microwave use. other utensils on the turntable support. -
Page 7: Pause Or Stop Cooking
PAUSE OR STOP COOKING ’ O PAUSE COOKING F YOU DON T WANT TO CONTINUE COOKING , close the door and HE COOKING CAN BE PAUSED EMOVE THE FOOD check, turn or stir the food press the STOP button. by opening the door. The setting will be maintained for 10 minutes. -
Page 8: Kitchen Timer
KITCHEN TIMER when you need SE THIS FUNCTION a kitchen timer to measure exact time for various purposes such as cooking eggs, pasta or letting the dough rise before to set the time to measure. RESS THE BUTTONS baking etc. repeatedly to set the power to 0 W. -
Page 9: Cook & Reheat With Microwaves
COOK & REHEAT WITH MICROWAVES for normal SE THIS FUNCTION cooking and reheating, such as vegetables, fish, potatoes and meat. to set the time. RESS THE BUTTONS repeatedly to set the power. RESS THE POWER BUTTON RESS THE START BUTTON NCE THE COOKING PROCESS HAS BEEN STARTED The time can easily be increased in 30-second steps by pressing the Start button. -
Page 10: Quick Start
QUICK START for quick HIS FUNCTION IS USED reheating of food with a high water content such as clear soups, coffee or tea. RESS THE TART BUTTON maximum microwave power level HIS FUNCTION AUTOMATICALLY STARTS WITH and the cooking time set to 30 seconds. Each additional press increases the time with 30 seconds. -
Page 11: Frozen Foods
QUICK DEFROST only if the net SE THIS FUNCTION weight is between 100 g - 2 kg. on the LWAYS PLACE THE FOOD glass turntable. RESS THE UICK EFROST BUTTON to set the weight of the food. RESS THE BUTTONS RESS THE TART BUTTON the oven stops and prompts... - Page 12 GRILL to brown the SE THIS FUNCTION surface of foods. RESS THE RILL BUTTON to set the time. RESS THE BUTTONS RESS THE TART BUTTON for long periods when the Grill is in opera- O NOT LEAVE THE OVEN DOOR OPEN tion, as this will cause a drop in temperature.
- Page 13 POWER LEVEL GRILL COMBI OWER UGGESTED USE 350 - 500 W C poultry, lasagne & OOKING vegetables 160 - 350 W C fish & frozen gratins OOKING 160 W meat OOKING only during cooking ROWNING COMBI cook larger SE THIS FUNCTION TO amounts of frozen or fresh Gratin’s (min 3-4 portions).
-
Page 14: Maintenance And Cleaning
MAINTENANCE & CLEANING normally when LEANING IS THE ONLY MAINTENANCE O NOT USE STEAM CLEANING APPLIANCES required. cleaning your microwave oven. in a clean condition AILURE TO MAINTAIN THE OVEN could lead to deterioration of the surface that to a cup of water, plac- ADDING SOME LEMON JUICE could adversely affect the life of the appliance ing this on the turntable and boiling for a few... -
Page 15: Troubleshooting Guide
TROUBLE SHOOTING GUIDE , do not make a service F THE OVEN DOES NOT WORK F THE MAINS CORD NEEDS call until you have made the following checks: it should be REPLACING The Turntable and turntable support is in replaced by the original place. -
Page 16: Data For Test Heating Performance
DATA FOR TEST HEATING PERFORMANCE IEC 60705. N ACCORDANCE WITH has developed a standard for comparative testing of NTERNATIONAL LECTROTECHNICAL OMMISSION heating performance of different microwave ovens. We recommend the following for this oven: MOUNT PPROX TIME OWER LEVEL ONTAINER 12.3.1 750 g 750 W...
Need help?
Do you have a question about the FO611C070000000 and is the answer not in the manual?
Questions and answers