
Subscribe to Our Youtube Channel
Related Manuals for Kuppersbusch EKS 3721.1


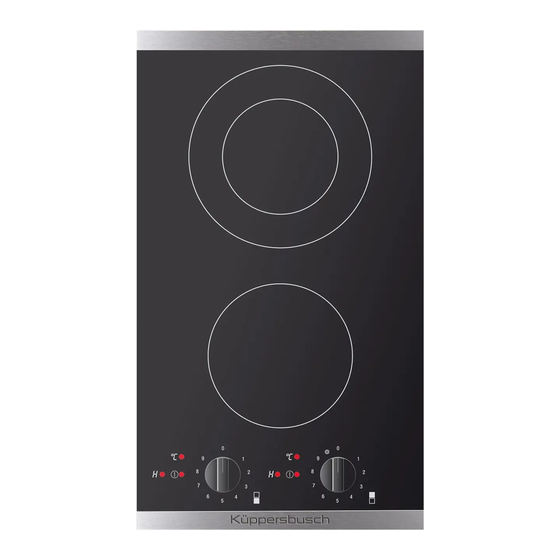
Summary of Contents for Kuppersbusch EKS 3721.1
- Page 1 BEDIENUNGS- UND MONTAGEANWEISUNG GB DIRECTION FOR USE ES MODO DE EMPLEO FR GUIDE D’INSTALLATION ET D’UTILISATION EKS 3721. 1...
- Page 2 Küppersbusch-Kundendienst Garantiebedingungen Zentrale Kundendienst- / Ersatzteilanforderung Zusätzlich zu seinen Gewährleistungsansprüchen aus seinem Kaufvertrag mit dem Händler leisten wir dem Endabnehmer direkt Garantie für Küppersbusch-Hausgeräte. Der Umfang unserer Garantie wird Deutschland: nachstehend geregelt: Küppersbusch Hausgeräte GmbH 1. Mängel am Gerät, die nachweislich auf einem Material- und/oder Küppersbuschstraße 16 Herstellungsfehler beruhen, werden nach Maßgabe der folgenden 45883 Gelsenkirchen...
-
Page 3: Table Of Contents
GB CONTENTS 1 / SAFETY INSTRUCTIONS Connection and operation General information on the hob Concerning persons 2 / OPERATION Switching the power settings on and off Power settings Switching on the second element Residual heat display How to cut power consumption 3 / CLEANING AND CARE Glass ceramic hob Specific soiling... -
Page 4: Safety Instructions
1 / SAFETY INSTRUCTIONS Disposing of the packaging Please ensure the environmentally-friendly disposal packaging that came with your appliance. Recycling the packaging material saves on resources and cuts down on waste. Disposal of old electrical appliances The European Directive 2002/96/EC on Waste Electrical and Electronic Equipment (WEEE), requires that old household electrical appliances must not be disposed of in the normal unsorted municipal waste stream. -
Page 5: General Information On The Hob
1 / SAFETY INSTRUCTIONS General information on the hob • Do not place empty pots and pans on cooking zones which have been switched on. Avoid boiling the pots dry as there is a risk of the pots overheating! • Overheated fats and oils may spontaneously ignite. Always supervise the preparation of food with fats and oils. -
Page 6: Concerning Persons
1 / SAFETY INSTRUCTIONS Concerning persons • This appliance is not intended to be used by persons (including children) with physical, mental or sensory impairments or who by persons (including children) who lack the required experience or know-how, unless such persons are supervised by a person responsible for their safety or have been given instructions on how to use the appliance by a person responsible for their safety. -
Page 7: Power Settings
2 / OPERATION Power settings The heating power of the cooking zones can be set at various power levels. In the chart you will find examples of how to use each setting. Switching on the second element The heated area of the cooking zone with two heating circuits can be adapted to the cookware used. -
Page 8: Residual Heat Display
2 / OPERATION Residual heat display The glass ceramic hob is equipped with a residual heat display (H); a lamp has been allocated to each individual cooking zone. This lamp will light up as soon as the respective cooking zone has heated warn against... -
Page 9: Cleaning And Care
2 / OPERATION • Pressure cookers are particularly low on energy and time required thanks to the pressure and the fact that they are tightly closed. Short cooking times mean that vitamins are preserved. • Always make sure that there is sufficient fluid in your pressure cooker since the cooking zone and the cooker may be damaged as a result of overheating if the pressure cooker boils dry. -
Page 10: Specific Soiling
3 / CLEANING AND CARE Weekly clean 2. Clean the entire hob thoroughly once a week with commercial glass ceramic cleaning agents. Please follow the manufacturer's instructions carefully. When applied, the cleaning agent will coat the hob in a protective film which is resistant to water and dirt. -
Page 11: What To Do If Trouble Occurs
3 / CLEANING AND CARE Changes in the colour of the hob will not affect the function and the stability of the glass ceramic material. These colour changes are not changes in the material but food residues which were not removed and which have burnt into the surface. -
Page 12: Assembly Instructions
4 / WHAT TO DO IF TROUBLE OCCURS Does the hob have tears or cracks? • There is a risk of electric shocks if the glass ceramic hob develops fractures, cracks, tears or damage of any other kind. Immediately switch off the appliance. Disconnect the fuse immediately and call Customer Service. -
Page 13: Electrical Connection
5 / ASSEMBLY INSTRUCTIONS • The clearance between the hob and an extraction hood must be at least as large as that stipulated in the assembly instructions for the cooker hood. • The packaging materials (plastic foil, polystyrene, nails etc.) must be kept out of reach of children as these parts are potentially dangerous. -
Page 14: Installation
5 / ASSEMBLY INSTRUCTIONS Installation Important • If the cooking surface is located above furniture parts (side panels, drawers, etc.), then an intermediate shelf must be inserted at a minimum distance of 20 mm in order to prevent accidental contact with the underside of the cooking surface. The intermediate shelf may only be removed with tools. - Page 15 5 / ASSEMBLY INSTRUCTIONS Dimensions of appliance: 520 x 300 mm Dimensions of hole cut in work surface: 490 x 280 mm Bracket...
- Page 16 5 / ASSEMBLY INSTRUCTIONS • Insert the hob and align it. • From the bottom, insert the brackets with screws in the holes provided for fastening the brackets, align the brackets and screw them tight. • Tighten the screws with a hand screw driver only; do not use a battery-operated screw driver.
- Page 17 Küppersbusch Hausgeräte GmbH Postfach 10 01 32, D-45801 Gelsenkirchen, Küppersbuschstr. 16, D-45883 Gelsenkirchen Telefon: (02 09) 4 01-0, Telefax: (02 09) 4 01-3 03 www.kueppersbusch.de Küppersbusch Ges. m. b. H. Eitnergasse 13, 1230 Wien, Telefon: 01 / 8 66 80-0, Telefax: 01 / 8 66 80 72...
Need help?
Do you have a question about the EKS 3721.1 and is the answer not in the manual?
Questions and answers