Table of Contents
Advertisement
Available languages
Available languages
Quick Links
Advertisement
Table of Contents

Related Manuals for IKEA GRILJERA


Summary of Contents for IKEA GRILJERA
- Page 1 GRILJERA...
- Page 3 Please refer to the last page of this manual for the full list of IKEA appointed Authorized Service Centre and relative national phone numbers. Zie de laatste pagina van deze handleiding voor de volledige lijst van door IKEA aangewezen Geautoriseerde servicecentra en de bijbehorende telefoonnummers.
-
Page 4: Table Of Contents
Product description Installation Control panel Electrical connection Daily use Environmental concerns Cleaning and maintenance IKEA GUARANTEE What to do if ... Safety Information Your safety and that of others are supply before carrying out any very important. installation work. This manual and the appliance... - Page 5 ENGLISH - Immediately call your gas - Use only flexible or rigid metal supplier from a neighbor’s hose for gas connection. phone. Follow the gas supplier’s - Do not touch the appliance with instructions. any wet part of the body and do - If you cannot reach your gas not operate it when barefoot.
- Page 6 ENGLISH but switch off the appliance and interior surfaces of the appliance then cover flame e.g. with a lid - risk of burns. Do not allow the or a fire blanket. appliance to come into contact Danger of fire: do not store items on with cloths or other flammable the cooking surfaces.
- Page 7 ENGLISH cognac, wine), remember that recycling of household electrical alcohol evaporates at high appliances, contact your temperatures. As a result, there is competent local authority, the a risk that vapours released by collection service for household the alcohol may catch fire upon waste or the store where you coming into contact with the purchased the appliance.
-
Page 8: Product Description
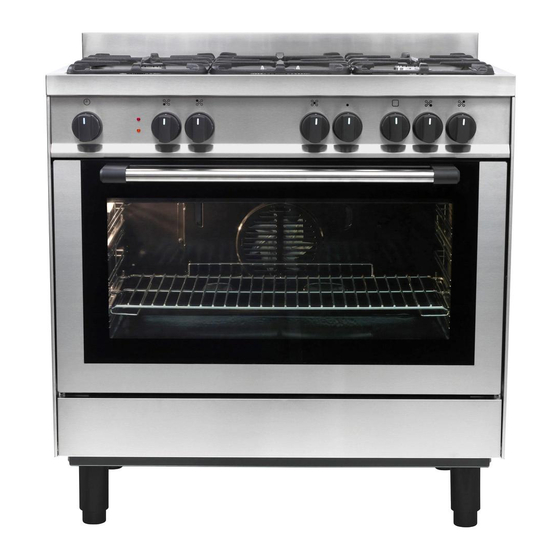
ENGLISH Product description Cooktop Oven Rapid burner Control panel Semirapid burner Ventilation opening Triple ring burner Grill heating element Semirapid burner Rear lamp Auxiliary burner Oven fan Oven door Accessories Wire shelves Drip tray Side grids Wok adaptor Telescopic runner... -
Page 9: Control Panel
ENGLISH Control panel Oven controls Cooking time selector knob Thermostat selector knob Yellow thermostat led light Red oven led light t Function selector knob Cooktop controls Front left burner control knob* Rear left burner control knob* Middle burner control knob* Front right burner control knob* Rear right burner control knob* The oven and cooktop control knobs are not interchangeable. - Page 10 ENGLISH Switching on the oven How to operate the cooktop • Turn the selector knob to the required Using the gas burners function. The red oven light switches on. The following symbols are given near each • Turn the thermostat knob clockwise to knob on the front panel: the required temperature.
-
Page 11: Daily Use
ENGLISH Daily use Oven functions Description of function Oven OFF GRILL WITH FAN To grill large joints of meat (roast beef and other roast meats). The oven door must be kept closed during the cooking cycle. When cooking meat, it is advisable to pour water in the drip tray placed on the first/second level. - Page 12 ENGLISH Oven functions Description of function DEFROST To speed up defrosting of food. Place food on the middle shelf. Leave food in its packaging in order to prevent it from drying out on the outside. Put thermostat knob in 0 position. KEEP WARM For keeping just-cooked food hot and crisp (e.g: meat, fried food or flans).
- Page 13 ENGLISH Advice and tips regarding use If the biscuits will not come away from the baking tray: put the tray back in the Cakes and bread: oven for a while and lift the biscuits up Heat the oven for at least 15 minutes before before they cool.
- Page 14 ENGLISH Forced Air function. This is the quickest function to pre-heat the cavity Remove all trays and shelves before starting the pre-heat cycle. This will save energy and make pre-heating quicker...
- Page 15 ENGLISH Cooking - Baking tables Foods Function Weight Position Cooking by natural Cooking by forced of the convection convection (with fan) oven shelf Temperatures Cooking Temperatures Cooking from the in °C time in in °C time in bottom minutes minutes MEAT Roast veal 220-225...
- Page 16 ENGLISH Foods Function Weight Position Cooking by natural Cooking by forced of the convection convection (with fan) oven shelf Temperatures Cooking Temperatures Cooking from the in °C time in in °C time in bottom minutes minutes CAKES Angel cake 170-190 Fruit cake 190-200 Chocolate...
-
Page 17: Cleaning And Maintenance
ENGLISH Cleaning and maintenance WARNING! Never use steam cleaning equipment. Only clean the oven when it is cool to the touch. Disconnect the appliance from the power supply. Disconnect the appliance from the electrical power supply before carrying out any cleaning operation. - Page 18 ENGLISH Removal of oven shelf carriers IMPORTANT: do not use the oven without • Interior: the oven shelf carriers can be refitting the lamp cover. removed for easier cleaning. To do this, Drawer compartment remove all the shelves and spring off the side carriers (Fig.
-
Page 19: What To Do If
ENGLISH What to do if ... PROBLEM POSSIBLE CAUSE SOLUTION The appliance does not work The main power supply Connect the product to the and the appliance is not power supply electrically connected The oven does not work The main power supply Connect the product to the and the appliance is not power supply... - Page 20 • your full address; • your telephone number. For repairs, contact IKEA Authorized Service Centre. Failure to comply with these instructions can compromise the safety and quality of the product.
-
Page 21: Technical Data
Oven Fan Wattage W Total rating W 2820 Product Fiche compliant to commission delegated regulation (EU) No 65/2014 Supplier’s name or trade mark IKEA Model identification GRILJERA 60316803, GRILJERA 80316802 Energy Efficiency Index Energy Efficiency Class (Lowest Consumption) Energy consumption... - Page 22 ENGLISH Hob source Number of gas burners Energy Efficiency per 1st burner - front left 3,0kW 58,0 Energy Efficiency per 2nd burner - rear left 1,8kW 59,0 Energy Efficiency per 3rd burner - center 3,8kW 52,0 Energy Efficiency per 4th burner - front right 1,0kW not required Energy Efficiency per 5th burner - rear right 1,8kW 59,0...
-
Page 23: Installation
ENGLISH Installation This appliance is in Class 1 (free standing Never drag pots or pans across the bottom appliance). of the oven as this could damage the enamel After unpacking the product, make sure that coating. it has not been damaged during transport Make sure that the electrical cables of other and that the oven door closes properly. - Page 24 ENGLISH Securing the cooker to the wall Insert screw hook G into holes F (fig.3) WARNING! The cooker must be fixed to wall. The accessories for wall fixing are not included because walls made of different materials require different types of fixing accessories. Use fixing systems suitable for the walls of your home and the weight of the appliance.
- Page 25 ENGLISH INJECTORS TABLE CATEGORY II2L3B/P Type of gas Type of Injector Nominal Nominal Reduced used burner marking heat consumption heat pressure mbar capacity capacity min. nom. max. NATURAL power burner 143 (F3) 3,80 421 l/h 1,60 GAS (Meth- rapid 125 (F2) 3,00 332 l/h 0,80...
- Page 26 ENGLISH Gas connection When the appliance is connected to the gas supply, use soapy water to check for gas leaks. WARNING! This operation must be The rubber hose must be connected as shown performed by a qualified technician. in Fig. 3, 4 and 5, in compliance with local For information regarding gas connection applicable regulations instructions, see the injectors table and the...
- Page 27 ENGLISH Gas adjustments Adjustments Always disconnect the appliance from the electricity supply before making any adjustment. All seal must be replaced by the technician following any adjustment or regulation. The adjustment of the reduce rate (simmer) must be undertaken only with burners functioning on natural gas while in the case Fig.
- Page 28 ENGLISH For the indispensable introduction of fresh air in the room, a similar opening of at least 100 directly to the outside must be provided at a height near floor level so as not to be obstructed on the inside or outside of the wall and not to hinder the correct combustion of the burners and the regular extraction of vitiated air, and with a height difference of at least 180...
-
Page 29: Electrical Connection
ENGLISH Electrical connection The electrical connection must be carried out • The power cable must be laid so that no in accordance with the current standards and parts of it ever reach a temperature of laws in force. 75 °C. Before connecting check that: •... -
Page 30: Environmental Concerns
ENGLISH Environmental concerns Disposal of packing material Burner Max. diameter of pan The packing material is 100% recyclable Semirapid 180 mm and is marked with the recycle symbol ( ). The various parts of the packing Auxiliary 140 mm must therefore be disposed of responsibly •... -
Page 31: Ikea Guarantee
• Deliberate or negligent damage, damage IKEA, unless the appliance is named LAGAN in caused by failure to observe operating which case two (2) years of guarantee apply. instructions, incorrect installation or by... - Page 32 However, if an IKEA appointed Service kitchen furniture; Provider or its authorized service partner • ask for clarification on functions of IKEA repairs or replaces the appliance under appliances. the terms of this guarantee, the appointed To ensure that we provide you with the best...
- Page 33 Productbeschrijving Installatie Bedieningspaneel Elektrische aansluiting Dagelijks gebruik Bescherming van het milieu Reiniging en onderhoud IKEA GARANTIE Wat moet u doen als... Veiligheidsinformatie Uw eigen veiligheid en die van handschoenen bij het uitpakken en anderen is zeer belangrijk. installeren. Deze handleiding en het apparaat...
- Page 34 NEDERLANDS of andere brandbare gassen en verlengsnoeren. vloeistoffen in de buurt van dit - Trek niet aan de voedingskabel apparaat. om de stekker uit het stopcontact te Wat te doen als u gas ruikt: halen. - Probeer geen enkel apparaat aan - Als de installatie voltooid is, mogen te zetten.
- Page 35 NEDERLANDS - Huisdieren moeten uit de buurt van begrijpen. Kinderen mogen niet het apparaat worden gehouden. met het apparaat spelen. Zonder - Bij langdurig gebruik is wellicht supervisie mogen kinderen extra ventilatie nodig (een venster het apparaat niet reinigen of openen of de snelheid van de onderhoud voor gebruikers afzuigkap verhogen).
- Page 36 NEDERLANDS ventilatieopeningen nooit. met een pyrolysefunctie). - Gebruik ovenhandschoenen om - Gebruik geen harde schurende schalen en accessoires uit de reinigingsmiddelen of scherpe oven te halen, en let erop dat u metalen schrapers om het glas de verwarmingselementen niet van de ovendeur te reinigen. Deze aanraakt.
- Page 37 NEDERLANDS Productbeschrijving Kookplaat Oven Snelle brander Bedieningspaneel Halfsnelle brander Ventilatieopening Brander met drie ringen Grillelement Halfsnelle brander Ovenlampje achter Hulpbrander Ovenventilator Ovendeur Accessoires Roosters Opvangbak Zijroosters Adapter voor wok Telescopische geleider...
- Page 38 NEDERLANDS Bedieningspaneel Bediening oven Programmeerknop bereidingstijd Thermostaatknop Geel thermostaatlampje Rood lampje oventemp. Functieknop Bediening kookplaat Regelknop brander linksvoor* Regelknop brander linksachter* Regelknop brander midden* Regelknop brander rechtsvoor* Regelknop brander rechtsachter* De bedieningsknoppen van de kookplaat zijn niet onderling verwisselbaar. Na reiniging of onderhoud moeten ze weer op hun oorspronkelijke plaats worden aangebracht...
- Page 39 NEDERLANDS De oven inschakelen De kookplaat gebruiken • Draai de functieknop op de gewenste De gasbranders gebruiken functie. Het rode ovenlampje gaat De volgende symbolen staan naast elke knop branden. op het voorpaneel: • Draai de thermostaatknop naar rechts op de gewenste temperatuur. Het oranje Volledig Kraan dicht thermostaatlampje gaat branden en gaat...
- Page 40 NEDERLANDS Dagelijks gebruik Ovenfuncties Beschrijving functie Oven UIT GRILLEN MET Voor het grillen van grote stukken vlees (rosbief, braadstuk, VENTILATOR rollades). Tijdens het bereiden moet de ovendeur gesloten blijven. Bij de bereiding van vlees wordt aanbevolen wat water in de opvangbak te gieten, die op de eerste of tweede steunhoogte geplaatst kan worden.
- Page 41 NEDERLANDS Ovenfuncties Beschrijving functie CONVECTIE Deze functie is geschikt voor het bereiden van elk soort gerecht op één steunhoogte. De oven voorverwarmen op de gewenste temperatuur en het gerecht in de oven plaatsen zodra wordt aangegeven dat de ingestelde temperatuur is bereikt. Het wordt geadviseerd de tweede steunhoogte te gebruiken voor de bereiding.
- Page 42 NEDERLANDS Advies en tips voor gebruik Als de cake of het brood mooi gebakken is aan de buitenkant maar niet gaar Cake en brood: is binnenin: gebruik de volgende keer Verwarm de oven minstens 15 minuten minder vloeistof, bak op een lagere voor voordat u brood of cakes begint te temperatuur en langer.
- Page 43 NEDERLANDS Is uw braadstuk niet gaar? Snijd het in plakken, schik de plakken op een bakplaat met de vleesjus en laat verder bakken. Grillen Vet het voedsel in met weinig bakvet en kruiden voor u het grilt. Gebruik steeds de opvangbak om jus op te vangen die van het vlees af druipt tijdens het grillen.
- Page 44 NEDERLANDS Tabellen Bereiden - Bakken Gerecht Functie Gewicht Stand van de Bereiden via natuurlijke Bereiden via steunhoogte convectie heteluchtconvectie in de oven (met ventilator) vanaf de Tempera- Bereidingstijd Tempera- Bereidingstijd bodem tuur in °C in minuten tuur in °C in minuten VLEES Gebraden 220-225...
- Page 45 NEDERLANDS Gerecht Functie Gewicht Stand van de Bereiden via natuurlijke Bereiden via steunhoogte convectie heteluchtconvectie in de oven (met ventilator) vanaf de Tempera- Bereidingstijd Tempera- Bereidingstijd bodem tuur in °C in minuten tuur in °C in minuten CAKES Laagjescake 170-190 Fruitcake 190-200 Chocoladetaart...
- Page 46 NEDERLANDS Reiniging en onderhoud WAARSCHUWING! Gebruik nooit stoomreinigers. Maak het apparaat schoon als het afgekoeld is. Koppel het apparaat los van de netvoeding. Koppel het apparaat los van de netvoeding voordat u het reinigt. • Reinig met een doek die bevochtigd is Fig.
- Page 47 NEDERLANDS een vloeibaar reinigingsmiddel. Vervangen van het lampje: • Was de accessoires in de gootsteen, 1. Ontkoppel de stekker van de oven. gebruik hiervoor ovenreiniger. 2. Trek de roosters aan de zijkant eruit zoals beschreven. Verwijder dan de glazen Verwijderen van de dragers van de beschermkap (V) uit de lampfitting, hef ovenroosters deze omhoog met een schroevendraaier...
- Page 48 NEDERLANDS Wat moet u doen als... PROBLEEM MOGELIJKE OORZAAK OPLOSSING Het apparaat werkt niet Het stopcontact en Sluit het product aan op het het apparaat zijn niet stopcontact elektrisch aangesloten De oven werkt niet Het stopcontact en Sluit het product aan op het het apparaat zijn niet stopcontact elektrisch aangesloten...
- Page 49 • uw volledige adres; • uw telefoonnummer. Neem contact op met een erkend servicecentrum van IKEA voor reparaties. Het niet naleven van deze instructies kan nadelige gevolgen hebben voor de veiligheid en de kwaliteit van het apparaat.
-
Page 50: Technische Gegevens
Koelventilator W Ovenlampje W Vermogen ovenventilator W Totaal nominaal vermogen W 2820 Productfiche overeenkomstig richtlijn gedelegeerd door de Commissie (EU) nr. 65/2014. Naam of handelsbenaming leverancier IKEA Modelidentificatie GRILJERA 60316803, GRILJERA 80316802 Energiezuinigheidsindex Energiezuinigheidsklasse (laagste verbruik) Energieverbruik 1,30 Conventionele functie (bij een standaard belasting en boven- + onderverwarming)"... - Page 51 NEDERLANDS Bruikbaar volume Gemeten met eventuele zijroostres en katalytische panelen verwijderd l Bron kookplaat Aantal gasbranders Energiezuinigheid voor 1e brander - linksvoor 3,0 kW 58,0 Energiezuinigheid voor 2e brander - linksachter 1,8 kW 59,0 Energiezuinigheid voor 3e brander - midden 3,8 kW 52,0 Energiezuinigheid voor 4e brander - rechtsvoor 1,0 kW niet vereist...
- Page 52 NEDERLANDS Installatie Dit apparaat is van Klasse 1 (vrijstaand aluminiumfolie. apparaat). Giet nooit water in de binnenkant van een hete Controleer na het uitpakken van het product of oven; hierdoor kan de lak beschadigd raken. het tijdens het transport geen beschadigingen Schuif nooit met pannen of schalen over de heeft opgelopen en of de ovendeur goed sluit.
- Page 53 NEDERLANDS Het kookfornuis aan de wand bevestigen Plaats de schroef haak G in gaten F (Fig. 3). WAARSCHUWING! Het kookfornuis moet aan de wand worden bevestigd. De accessoires voor wandbevestiging zijn niet inbegrepen omdat er voor wanden van verschillende materialen verschillende soorten bevestigingsmiddelen nodig zijn.
- Page 54 NEDERLANDS TABEL VERSTUIVERS CATEGORIE II2L3B/P Type gas Type brander Markering Nominaal Nominaal Beperkt Gasdruk mbar verstuiver vermogen verbruik vermogen warmte warmte min. nom. max. AARDGAS krachtige brander 143 (F3) 3,80 421 l/h 1,60 (methaan) G25 snel 125 (F2) 3,00 332 l/h 0,80 halfsnel 98 (Y)
- Page 55 NEDERLANDS Gasaansluiting WAARSCHUWING! Deze handeling moet door een gekwalificeerd monteur worden uitgevoerd. Zie voor informatie over instructies voor gasaansluiting de tabel met verstuivers en de relevante "norm" voor uw land. De gastoevoerinstallatie moet voldoen aan de lokale regelgeving. Fig. 2 Het apparaat moet worden aangesloten op de Wanneer het apparaat wordt aangesloten gastoevoerleiding of gasfles door middel van...
- Page 56 NEDERLANDS Aanpassingen van gasinstallatie Aanpassingen Koppel het apparaat steeds los van het stopcontact voordat u enige aanpassing doet. Alle afdichtingen moeten worden vervangen door de monteur na enige aanpassing of regeling. De aanpassing van de beperkte werking (sudderen) mag alleen worden uitgevoerd Fig.
- Page 57 NEDERLANDS Min. 180 cm Min. 100 cmq Voor de noodzakelijke toevoer van verse lucht in de ruimte, moet een soortgelijke opening van minstens 100 cm direct naar buiten toe worden voorzien op een hoogte in de buurt van de vloer, zodat er geen obstructie is aan de binnen- of buitenkant van de wand en de goede verbranding van de branders en de regelmatige extractie van bedorven lucht niet...
-
Page 58: Elektrische Aansluiting
NEDERLANDS Elektrische aansluiting De elektrische aansluiting moet worden • De voedingskabel moet worden geleid uitgevoerd overeenkomstig de huidige zodat geen enkel onderdeel ervan ooit normen en geldende wetgeving. een temperatuur van 75°C kan bereiken. Controleer het volgende voor het aansluiten: •... - Page 59 NEDERLANDS Bescherming van het milieu Verwerking van de verpakking Gebruik alleen kookpotten en pannen met een Het verpakkingsmateriaal is 100% vlakke bodem. recyclebaar, zoals aangegeven wordt door het Brander Max. diameter van pan recyclingsymbool ( ). De diverse onderdelen Krachtige brander 240 mm van de verpakking mogen daarom niet bij het gewone huisvuil worden weggegooid,...
- Page 60 NEDERLANDS IKEA GARANTIE Hoe lang is de IKEA garantie geldig? Wat zal IKEA doen om het probleem op te lossen? Deze garantie is vijf (5) jaar geldig vanaf de oorspronkelijke datum van aankoop van De door IKEA aangestelde servicedienst zal...
- Page 61 • Verduidelijking te vragen in verband met echter repareert of vervangt onder de installatie van het IKEA apparaat in de de voorwaarden van deze garantie, daarvoor bestemde IKEA keukenmeubels dan zal de servicedienst of de erkende •...
- Page 62 Het is uw bewijs van aankoop en is ook nodig om de geldigheid van de garantie aan te tonen. Op de kassabon is ook de IKEA naam en het artikelnummer (8 cijfers) van elk door u aangeschaft apparaat vermeld Extra hulp nodig?
- Page 63 BELGIË - BELGIQUE - BELGIEN NEDERLAND Telefoon: 09002354532 en/of 0900 BEL IKEA Telefoon/Numéro de téléphone/Telefon-Nummer: 02620031 1 Tarief: 15 cent/min., starttarief 4.54 cent Tarief/Tarif/Tarif: Lokaal tarief/Prix d’un appel local/Ortstarif en gebruikelijke belkosten Openingstijd: Maandag - Vrijdag 8.00 - 20.00 Openingstijd: Maandag t/m - Vrijdag 8.00 - 20.00...
- Page 64 © Inter IKEA Systems B.V. 2015 18535 AA-1585033-1...
Need help?
Do you have a question about the GRILJERA and is the answer not in the manual?
Questions and answers