Table of Contents
Advertisement
Quick Links
UPLIFT 3-Leg Desk Instructions for
Eco Corner Desktops
Note:
desktops. Before attaching accessories, check
the screw length against the thickness of the
desktop to ensure that the screw is not too long
and don't break through to the top of your desktop.
Any user or installer of desk base must study this manual carefully. If this desk is sold,
please provide the manual to the buyer, installers, or support personnel operating the product.
© UPLIFT Desk • 1-800-349-3839 • info@upliftdesk.com • www.upliftdesk.com
90.014.01.0474
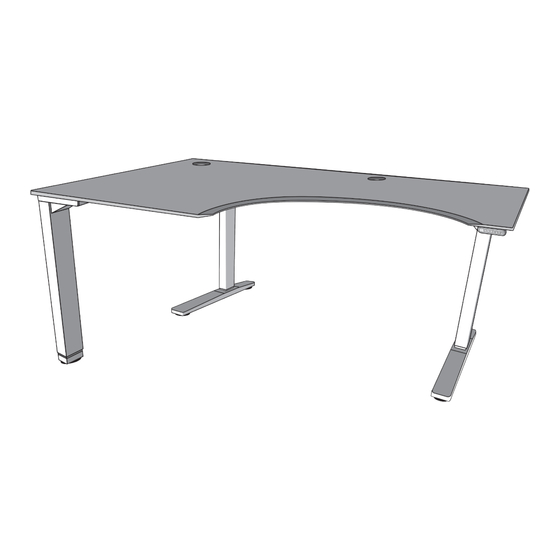
pictured: 3-leg frame; and Eco Corner desktop, left extension
TABLE OF CONTENTS
1
2
3
4
5
6
7
8
Your UPLIFT Eco Corner is thinner than most
SAVE THESE INSTRUCTIONS:
PAGE
2
2
3
4
7
7
9
9
FRM300-EC/R02
Advertisement
Table of Contents

Related Manuals for UPLIFT 3-Leg Desk


Summary of Contents for UPLIFT 3-Leg Desk
-
Page 1: Table Of Contents
Any user or installer of desk base must study this manual carefully. If this desk is sold, please provide the manual to the buyer, installers, or support personnel operating the product. © UPLIFT Desk • 1-800-349-3839 • info@upliftdesk.com • www.upliftdesk.com 90.014.01.0474... -
Page 2: Safety And Warnings
Liability: Under no circumstances does the manufacturer accept warranty claims or liability claims for dam- ages caused from improper use or handling of the desk frame other than that which is described in this operation manual. © UPLIFT Desk • 1-800-349-3839 • info@upliftdesk.com • www.upliftdesk.com... -
Page 3: Parts List
6.0 00 01 .0 09 .0 26 0 . 0 6.0 . 0 01 From the 2-leg frame box: These parts are used for every combination of UPLIFT Desk: Foot Crossbar end Crossbar rail Side bracket Adhesive pad Keypad (qty 2) -
Page 4: Assembly Instructions
Once all of the parts are connected, you can now tighten the twelve (12) Screws from Step B and the eight (8) Machine screws from Step C (20 screws in total). Remove backing from the Adhesive pads (part 8) and position along the brackets and frames as shown. © UPLIFT Desk • 1-800-349-3839 • info@upliftdesk.com • www.upliftdesk.com... - Page 5 (14) of the 10-1/2’’ Machine Screws (part 15). Install as follows: 3 per Side bracket 6 total 1 per Crossbar end 2 total 6 for the Zero Crossbar Bracket © UPLIFT Desk • 1-800-349-3839 • info@upliftdesk.com • www.upliftdesk.com...
- Page 6 DOWN button again until the desk lowers a little bit more, slightly rises and stops. Release the DOWN button. Your desk is now ready to use. To program up to four presets: Use the up/down buttons to find a desired height, then press “M” followed by a number 1 – 4. © UPLIFT Desk • 1-800-349-3839 • info@upliftdesk.com • www.upliftdesk.com...
-
Page 7: Desk Placement
6. PROGRAMMING: SETTING THE LED RETRACTED HEIGHT If you’ve purchased an UPLIFT Desk and the Advanced 1-touch digital keypad, press the DOWN button on the Keypad until the frame reaches its lowest position. Measure the height of the frame from the floor to the underside of the desktop and if the number on the LED display does NOT match your measure- ment, follow these steps: Press and hold the DOWN button again until the LED display reads “RST”... -
Page 8: Troubleshooting
If the Keypad displays “Hot”, let the base cool down for 20 minutes. If the desk seems to be uneven, try the reset instructions above. If that does not work you may need to adjust the levelers at the bottom of the foot. © UPLIFT Desk • 1-800-349-3839 • info@upliftdesk.com • www.upliftdesk.com... -
Page 9: Technical Specifications
Keep all electrical components away from liquids. Copyright Notice: This guide is a component of the UPLIFT Desk™. This guide is a part of the scope of delivery, even if the item is resold. This guide is also available on the UPLIFT Desk website: upliftdesk.com.
Need help?
Do you have a question about the 3-Leg Desk and is the answer not in the manual?
Questions and answers