Table of Contents
Advertisement
Advertisement
Table of Contents

Related Manuals for Electrolux EKM55402X


Summary of Contents for Electrolux EKM55402X
- Page 1 EKM55402X OPERATING AND INSTALLATION INSTRUCTIONS OF FREESTANDING GAS COOKER...
- Page 2 Dear Customer, Our goal is to offer you products with high quality that exceed your expectations. Your appliance is produced in modern facilities carefully and particularly tested for quality. This manual is prepared in order to help you use your appliance that is manufactured by the most recent technology, with confidence and maximum efficiency.
-
Page 3: Table Of Contents
CONTENTS: 1. BRIEF PRESENTATION OF PRODUCT 2. WARNINGS 3. INSTALLATION AND PREPARATIONS FOR USE 3.1 Environment where the appliance to be installed 3.2 Installation of product 3.3 Adjustment of feet 3.4 Gas connection 3.5 Electric connection and safety 3.6 Gas conversion 4. -
Page 4: Brief Presentation Of Product
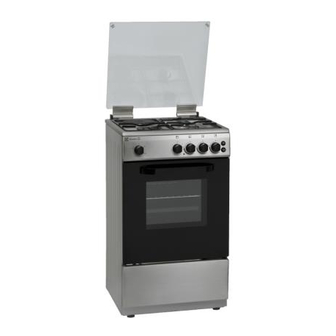
1. BRIEF PRESENTATION OF PRODUCT MODEL DEPTH WIDTH HEIGHT (cm) (cm) (cm) EKM55402X List of Components: 1- Lid 9- Grill Burner 2- Cooktop 10- Oven Lamp 3- Control Panel 11- Electrical Hotplate 4- Oven Door Handle 12- Rapid Burner 5- Adjustable Feet... -
Page 5: Warnings
2. WARNINGS READ THESE INSTRUCTIONS CAREFULLY AND COMPLETELY BEFORE USING YOUR APPLIANCE, AND KEEP IT IN A CONVENIENT PLACE FOR REFERENCE WHEN NECESSARY. THIS MANUAL IS PREPARED FOR MORE THAN ONE MODEL IN COMMON. YOUR APPLIANCE MAY NOT HAVE SOME OF THE FEATURES THAT ARE EXPLAINED IN THIS MANUAL. PAY ATTENTION TO THE EXPRESSIONS THAT HAVE FIGURES, WHILE YOU ARE READING THE OPERATING MANUAL. - Page 6 2. WARNINGS - WARNING: If the surface is cracked, switch off the appliance to avoid the possibility of electric shock. - For hobs incorporating a lid, any spillage should be removed from the lid before opening. And also the hob surface should be allowed to cool before closing the lid.
- Page 7 1. SAFETY WARNINGS - WARNING: Ensure that the appliance is switched off before replacing the lamp to avoid the possibility of electric shock. - CAUTION: Accessible parts may be hot when the cooking or grilling is in use. Young children should be kept away.
- Page 8 1. SAFETY WARNINGS - When you unpack the appliance, make sure that it is not damaged during transportation. In case of any defect; do not use the appliance and contact a qualified service agent immediately. As the materials used for packaging (nylon, staplers, styrofoam...etc) may cause harmful effects to children, they should be collected and removed immediately.
- Page 9 1. SAFETY WARNINGS During cleaning and maintenance - Always turn the appliance off before operations such as cleaning or maintenance. You can do it after plugging the appliance off or turning the main switches off.- Do not remove the control knobs to clean the control panel.
-
Page 10: Installation And Preparations For Use
3. INSTALLATION AND PREPARATIONS FOR USE This modern, functional and practical cooker, that was manufactured with the parts and materials of highest quality, will meet your cooking needs in every aspect. You must surely read this manual so that you don't have any problem in future and to be able to have satisfactory results. The following information are the required rules for right installation and service processes. -
Page 11: Installation Of Product
3. INSTALLATION AND PREPARATIONS FOR USE Cooker hood flue Electrical ventilator Air inlet section Air inlet section min. 100cm min. 100cm Figure 3 Figure 4 Min. 50cm COOKER HOOD Figure 5 3.2 Installation of product There are some factors that must be paid attention to while installing your product. Surely be very careful to while installing your product. -
Page 12: Adjustment Of Feet
3. INSTALLATION AND PREPARATIONS FOR USE 3.3 Adjustment of feet Your product stands on 4 adjustable feet. When the product placed where to be used, check if the product is balanced. If it is not balanced, you can make the adjustment by turning the feet clockwise if required. -
Page 13: Electric Connection And Safety
3. INSTALLATION AND PREPARATIONS FOR USE always use the seals provided in the gas conversion kit. The seals used during connection should also be approved to be used in gas connections. Do not use plumbing seals for gas connections. Remember that this appliance is ready to be connected to gas supply in the country for which it has been produced. -
Page 14: Gas Conversion
3. INSTALLATION AND PREPARATIONS FOR USE • The appliance is adjusted for 230V 50Hz electricity. If the mains electricity is different contact your authorized service Figure 8 • The supply cord should be kept away from hot parts of appliance. Otherwise, the cord may be damaged, causing short circuit. - Page 15 3. INSTALLATION AND PREPARATIONS FOR USE Spanner Injector Figure 10 Figure 9 Oven/Grill Injectors The oven and grill injectors are assembled by a single screw that is placed on the tip of the burner. For grill burners, this screw is already visible(Figure 11). Remove the screw, pull the grill burner to yourself and you will see the injector revealed on the rear surface of the oven cavity (Figure 12).
- Page 16 3. INSTALLATION AND PREPARATIONS FOR USE To determine the minimum position, ignite the burners and leave them on in minimum position. Remove the with the help of a small screwdriver fasten or loosen the bypass screw around 90 angular degrees. When the flame has a length of at least 4mm, the gas is well distributed. Make sure that the flame does not die out when passing from the maximum position to the minimum position.
-
Page 17: Use Of Your Product
4. USE OF YOUR PRODUCT 4.1 Use of gas burners Ignition of the burners To determine which knob controls which burner, check the position symbol above the knob. • Manual Ignition of the Gas Burners If your appliance is not equipped with any ignition aid or in case there is a failure in the electric network, follow the procedures listed below For Hob Burners: To ignite one of the burners, press and turn its knob counter-clockwise so that the knob is in maximum position, approach a match, taper or another manual aid to its upper... -
Page 18: Control Of Hob Burners
4. USE OF YOUR PRODUCT Flame safety device: Oven / Grill Burners Regardless of the model of your appliance, all oven burners are equipped with a gas safety device. For this reason, during ignition, keep the oven knob pressed until you see stable flames. If the flames are cut out after you release the knob, repeat the procedure again. - Page 19 4. USE OF YOUR PRODUCT Your hob has burners of different diameters. The most economic way of using gas is to choose the correct size gas burners for your cooking pan size and to bring the flame to minimum position once the boiling point is reached.
-
Page 20: Use Of Hotplate
4. USE OF YOUR PRODUCT 4.1.2. Use of Hotplate These hotplates are controlled by a 6 position switch. By switching the control knob to one of these positions the hotplate can be operated. Near each hob control knob, there is a small diagram that shows which hotplate is controlled with that knob. - Page 21 4. USE OF YOUR PRODUCT INCORRECT INCORRECT INCORRECT CORRECT circular saucepan base saucepan’s base had not settled small saucepan diameter Figure 21 • Never operate the hob without pans on the hotplate. • The temperature of accessible parts maybe high when the appliance is operating. So it is imperative to keep children and animals out of the reach of the hotplate during and after the operation.
-
Page 22: Control Of Oven Burner
4. USE OF YOUR PRODUCT 4.1.3 Control of the Oven Burner After you ignite the oven burner as explained before, you can adjust the temperature inside the oven as you require, using the numbers on the control panel or knob ring: Bigger numbers mean higher temperatures, while smaller numbers mean lower temperatures. -
Page 23: Control Of Grill Burner
4. USE OF YOUR PRODUCT • If you are cooking more than one tray of similar items, for example cakes or biscuits, swap the trays during cooking or you can remove the top tray when the food is cooked and move the lower tray to the higher shelf to finish cooking •... - Page 24 4. USE OF YOUR PRODUCT Cooking • The grill burner cannot be modulated between maximum and minimum positions and creates a source of heat at a constant rating. When turning the grill burner off, turn the knob in the clockwise direction so that the knob shows "0" position. •...
-
Page 25: Accessories Used In Oven
4. USE OF YOUR PRODUCT 4.2 Accessories used in oven • The product already supplied with accessories. You can also use accessories you purchase from the market, but they must be heat and flame resistant. You can also use glass dishes, cake molds, special oven trays that are appropriate for use in oven. - Page 26 4. USE OF YOUR PRODUCT Oven Accessories * The accessories of your oven may be different due to the model of your product. Wire grid Wire grid is used to grill or to place different cookwares on it. WARNING- Fit the grid correctly into any corresponding rack in the...
-
Page 27: Cleaning And Maintenance
5. CLEANING AND MAINTENANCE 5.1 Cleaning Be sure that all control switches are off and your appliance cooled before cleaning your oven. Plug off the appliance. Check whether they are appropriate and recommended by the manufacturer before using the cleaning materials on your oven. As they may damage the surfaces, do not use caustic creams, abrasive cleaning powders, thick wire wool or hard tools. - Page 28 5. CLEANING AND MAINTENANCE Removal of oven door To remove the oven door; • Open the oven door(1). • Open the saddle bracket up to end position(2). • Close the door till it almost reaches to the full closed position as shown in 3 figure and remove the door by pulling it towards yourself.
-
Page 29: Maintenance
5. CLEANING AND MAINTENANCE Burner Caps: Periodically, enameled pan support, enameled covers, burner heads must be washed with soapy warm water rinsed and dried. After drying them thoroughly, replace them correctly. Enamelled Parts: In order to keep them a new, it is necessary to clean them frequently with mild warm soapy water and then dry with cloth. -
Page 30: Service And Transport
6. SERVICE AND TRANSPORT 6.1 Basic troubleshooting before contacting service If the oven does not operate : • The oven may be plugged off, there has been a black out. If the oven does not heat : • The heat may be not adjusted with oven's heater control switch. If the interior lighting lamp does not light : •... - Page 31 INJECTOR TABLE Gas Category: I 3B/P Destination:PH Class: 1 G30 28-30mbar 7.8 kW 564 g/h 30 mbar RAPID BURNER Diameter of Injector (1/100mm) Nominal Rating (kW) Consumption 218.1 g/h SEMI-RAPID BURNER Diameter of Injector(1/100mm) Nominal Rating (kW) 1.65 Consumption 120 g/h AUXILLARY BURNER Diameter of Injector(1/100mm) Nominal Rating (kW)
- Page 32 GUARANTEE AND SERVICE We, Electrolux, undertake that if within 12 months of the date of the purchase this Electrolux appliance or any part thereof is proved to be defective by reason only of faulty workmanship or materials, we will, at our option repair or replace the same FREE OF CHARGE for labour, materials or carriage on condition that: The appliance has been correctly installed and used only on the electricity supply stated on the rating plate.
Need help?
Do you have a question about the EKM55402X and is the answer not in the manual?
Questions and answers