Table of Contents
Advertisement
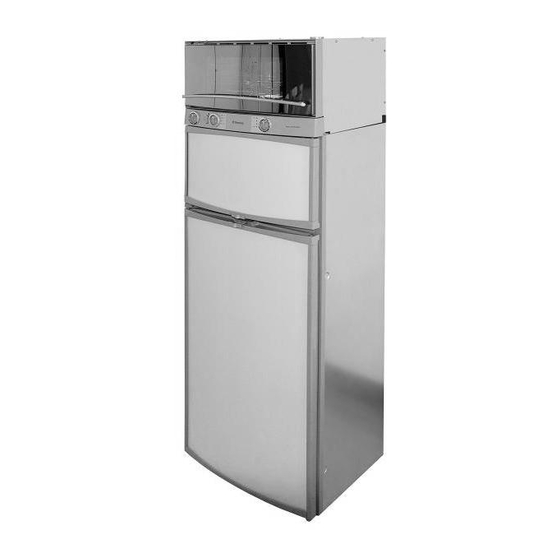
Operating Instructions
ABSORPTION REFRIGERATOR + OVEN
RMT 7650
RMT 7850
RMT 7651
RMT 7851
RMT 7655
RMT 7855
EN
OPERATING INSTRUCTIONS / INSTALLATION INSTRUCTIONS
Type C40 / 110
Please state for future reference :
Model number
.............................................
Product number
.............................................
Serial number
.............................................
for RECREATION VEHICLES
A A B B S S O O R R P P T T I I O O N N R R E E F F R R I I G G E E R R A A T T O O R R
T.B. MB 10/2005
English
Advertisement
Table of Contents

Related Manuals for Dometic RMT 7650


Summary of Contents for Dometic RMT 7650
-
Page 1: Operating Instructions
Operating Instructions ABSORPTION REFRIGERATOR + OVEN for RECREATION VEHICLES RMT 7650 RMT 7850 RMT 7651 RMT 7851 RMT 7655 RMT 7855 OPERATING INSTRUCTIONS / INSTALLATION INSTRUCTIONS A A B B S S O O R R P P T T I I O O N N R R E E F F R R I I G G E E R R A A T T O O R R Please state for future reference : T.B. -
Page 2: Safety Instructions
Please observe the following sections in these instructions: "5.1 Cleaning" and "5.3 Storing food". These operating instructions should be kept in a safe place. If this device is passed on, please include these operating instructions with it. © Dometic GmbH - 2005 - Subject to change without notice - Printed in Germany... -
Page 3: Table Of Contents
TABLE OF CONTENTS INTRODUCTION ..........FOR YOUR SAFETY . -
Page 4: Introduction
INTRODUCTION You have made an excellent choice in selecting the Combined Absorption Refrigerator and Gas Baking Oven from Dometic. We are sure that you will be fully satisfied with your new appliance in all respects. The appliance, which works silently, meets high quality standards and guarantees the efficient utilisation of resources and energy throughout its entire life cycle, during manufacture, in use and when being disposed of. -
Page 5: Coolant
Warranty arrangements are in accordance with EC Directive 44/1999/CE and the normal conditions applicable for the country concerned. For warranty or other servicing, please contact our Dometic Service department. Any damage due to impro- per use is not covered by the warranty. The warranty does not cover any modifica- tions to the appliance or the use of non-original Dometic parts;... -
Page 6: Description Of Model
DESCRIPTION OF MODEL 4 4 . . 0 0 RMT 7651 L e.g. “L” with interior light “0” manual energy selection and manual “RM” Refrigerator Mobil / ignition “Piezo” Mobile Absorber Refrigerator “1” manual energy selection “T” Refrigerator combined with baking oven “5”... -
Page 7: Refrigerator Guide
Energy selector switch (A) has the following settings: AC mains power, DC (12V), Gas (liquid gas), OFF. Appliances with automatic energy selection have the additional setting “AUTO” . RMT 7650 / RMT 7850 AC mains power 12V DC RMT 7651 / RMT 7655 / RMT 7851 / RMT 7855... -
Page 8: Electrical Operation
The refrigerator should only be used while the motor is running, otherwise the on-board-battery would be discharged within a few hours! RMT 7650 / RMT 7850 RMT 7651 / RMT 7655 / RMT 7851 / RMT 7855 1. Set energy selector switch “A” to 12V. -
Page 9: Gas Operation
As a basic rule, operation using gas is prohibited in petrol stations. 1. Open the valve of the gas cylinder. 2. Open the shut-off valve to the gas supply. RMT 7650 3. Set energy selector 4. Press and hold switch “A” to gas. - Page 10 “AUTO”-operation ( AES only ) 5.2.3 RM7XX5 L - models are equipped with an “AUTO”-MATIC function. 1. Set energy selection switch “A” to position “AUTO”. The LED “AUTO” lights “green”. Manual operation is possible at any time. Explanations: Upon switching on, the electronics automatically select one of the three possible energy types: 230V - 12V - liquid gas.
-
Page 11: Frame Heating
5. Briefly set the energy selector switch “A” to position “OFF” and back again to position “AUTO”! To remove air from the gas pipes, repeat this procedure 3-4 times. If these actions do not help, please call an authorised Dometic Service Centre. 5.2.5... -
Page 12: Storing Food
T T I I P P +15°C and +25°C. The unit operates within its optimum performance range. Dometic refrigerators work according to the absorption principle. Due to physical reasons, an absorption system responds slowly to changes made on the thermostat controller, or a loss in cooling through opening the door, or storing food. -
Page 13: Making Ice Cubes
Making ice cubes Ice cubes are best frozen overnight. At night, the refrigerator has less work to do and the unit has more reserves. 1. Fill the ice 2. Place the ice cube cube tray with tray in the freezer drinking water. -
Page 14: Door Locking
Door locking closed open Switching off 1. Set energy selector switch (A) 2. Secure the door open by means of the door to position "0". The appliance stop. The door will be slightly ajar. This is to is now fully switched off. prevent mould from forming inside the appliance. -
Page 15: Interior Light
2. Detach defective light 3. Fit new light bulb bulb. Note: For 12V DC : 1 light bulb 12V, 2W Please contact Dometic Service Centres for replacement light bulbs. 4. Clip the cover back in place. 5.11 Changing the decor panel 1. -
Page 16: Changing The Doorhang
5.12 Changing the doorhang It is not always possible to change the door when the refrigerator is installed. RMT 7X51 RMT 7X50 RMT 7X55 1. Remove rotary knobs and unscrew control panel. Open the freezer door, unscrew the hinge (A) screw and keep it to hand. -
Page 17: Troubleshooting
5.13 Troubleshooting Before calling the authorised Service Department, please check whether: 1. The instructions in the section "Using the refrigerator" have been followed. 2. The refrigerator is not tilted excessiveley. 3. It is possible to operate the refrigerator with an available power source. Failure : The refrigerator does not work in gas operation mode. -
Page 18: Instruction For Oven
6 6 . . 0 0 INSTRUCTIONS BAKING OVEN Operating the oven The use of the oven can lead to increases in warmth or dampness in the atmosphere of the room in which it has been set up. Ensure that the cooking area is always well ventilated. -
Page 19: Switching On The Oven
Turning the oven on In order that the baking oven be ignited, the oven door must first have been completely and securely closed. Before using the oven for the first time, leave it in operation empty (i.e. without any food inside it) but at the highest temperature for a duration of 30 minutes. J = switch on / thermostat (Oven) 6.3.1... -
Page 20: General Remarks
/ gas automatically depth incl. door compartment freezer in 24 hrs compartment (Refrigerator) (Refrigerator) (Refrigerator) RMT 7650(L) 1515x525x596 150 lit. 26 lit. 190W / 170 W ca.3,2 KWh / 380 g 59,0 kg RMT 7850(L) 1515x525x651 175 lit. 31 lit. -
Page 21: Maintenance
We recommend maintenance following an extended shutdown of the vehicle. Product liability Product liability of Dometic GmbH does not include damages which may arise from faulty operation, improper alterations or intervention in the equipment, adverse effects from the environment such as changes in temperature and air humidity, which may impact the equipment itself or the direct vicinity of the equipment or persons in the area. -
Page 22: Installation Guide
8 8 . . 0 0 INSTALLATION GUIDE On installation of the appliance, the technical and administrative regulations of the country in which the vehicle will first be used must be adhered to. Otherwise the refrigerator must be installed as described in these instructions. In Europe, for example, gas appliances, cable laying, installation of gas cylinders, as well as approval and checking for leaks must comply with EN 1949 for liquid gas units in vehicles. -
Page 23: Draught-Free Installation
8.1.2 Rear installation If the refrigerator is mounted at the rear of the vehicle you must ensure the lower grille is not covered by the bumper or rear lights. This would be prevent the air from circulating properly and cause problems in warm weather. Air vent grille not blocked: OK! Another variant of the rear installation is the lateral attachment of the ventilation... - Page 24 Draught-free installation with sealing lips 8.2.1 Proposal: Using the Installation Sealing Kit from Dometic (available from Dometic) In the recess intended for the refrigerator's installation, stop bars (B) are attached below and on each side. These stop bars are subsequently provided with lip seals (C).
-
Page 25: Ventilation And Air Extraction
. This is reached using the Dometic Absorber Ventilation and Air Extraction System L500 that has been tested and approved for this purpose. Dometic ventilation systems include installing frame, vent grille and winter cover. The oven’s ventilation and exhaust extraction is realised with roof mounted flue outlet... -
Page 26: Installation Of The Ventilation System
Installing the ventilation system L 500 To install the ventilation grilles, cut two rectangles (451mm x 341mm) in the outer wall of the vehicle (for position of the cuts, see point 6.3). Truma- roof flue outlet 1. Seal the mounting frame, making it waterproof. L 500 2. -
Page 27: Installation Recess
(no hollow space underneath). Ensure that the refrigerator is installed level in the recess. Recess measurements: Model Height H Width B Depth T RMT 7650 1685 mm 530 mm 510 mm RMT 7651 1685 mm 530 mm 510 mm... -
Page 28: Connections Gas/Electrical Installation
Connections for gas / electrical installation Terminal block 12V DC oven (already connected with permanent 12V supply) Terminal block 12V DC heating element Gas valve connection gas supply Terminal block 12V DC conn. power module and oven input Connection D+ Gas installation The rules in point 6.1 must be adhered to. - Page 29 The gas connection to the appliance is effected by means of a suitable coupling tube fitting L8, DIN 2353-ST, complying with EN 1949 (e. g. Ermeto). The gas connection may only be carried out by a qualified personnel. Following proper installation, a testing for leakage and a flame test must be car- ried out by *qualified personnel in compliance with EN 1949 .
-
Page 30: Electrical Installation
If the connection cable is damaged it must be replaced by the Customer Service at Dometic, or by respectively qualified personnel, in order to prevent any hazards. Battery connection 8.9.2... - Page 31 From the manual energy mode to the automatic energy mode For all MES appliances there is an additional possibility for retrofitting to an RMT 7xx5 device with AES functions. Please consult your nearest Dometic Customer Service or your specialist dealer.
-
Page 32: Wiring Diagram
8.9.6 Wiring diagram Wiring diagram for RM 7X50 L resistor (replaced by a bridge terminal block heating for 24V power supply) element DC switch frame heating lighting DC Ground thermo couple Reed contacts (sensor switching) Ground mains connection Ground battery igniter heating element AC Connections: Colours:... - Page 33 Wiring diagram for RMT 7X51 L permanently connection DC ionisation Burner electrode Control Device ignition plug ignition unit Ground gas burner terminal block heating element DC Valve Switch Frame Heating Reed contacts (sensor switching) heating element DC temp. sensor heating element AC lighting DC mains Power Module...
- Page 34 Wiring diagram for RMT 7655 L permanently connection DC ionisation Burner electrode Control Device ignition plug ignition unit Ground gas burner terminal block heating element DC Switch Valve Frame Heating Reed contacts (sensor switching) heating element DC temp. sensor heating element AC lighting DC mains Power Module...
- Page 36 Dometic GmbH In der Steinwiese 16 D-57074 Siegen www.dometic.de/caravan www.dometic.com...