
Subscribe to Our Youtube Channel
Related Manuals for AJA ioExpress


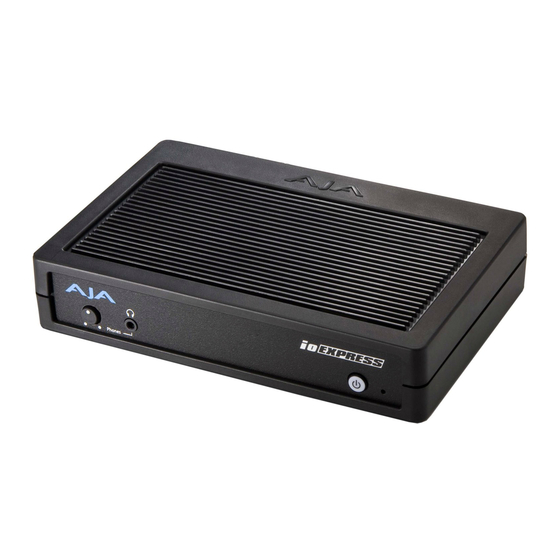
Summary of Contents for AJA ioExpress
- Page 1 Published: 12/28/12 Installation and Operation Guide B e c a u s e m a t t e r s .
-
Page 2: Notice
All other trademarks are the property of their respective holders. Notice Copyright © 2012 AJA Video, Inc. All rights reserved. All information in this manual is subject to change without notice. No part of the document may be reproduced or transmitted in any form, or by any means, electronic or mechanical, including photocopying or recording, without the express written permission of AJA Inc. -
Page 3: Limited Warranty
If a product proves to be defective during this warranty period, AJA Video, at its option, will either repair the defective product without charge for parts and labor, or will provide a replacement in exchange for the defective product. -
Page 5: Table Of Contents
Using Multiple AJA Products ........ - Page 6 Info Screen ..................44 Who is Controlling Io Express? .
-
Page 7: Chapter 1: Introduction
Chapter 1: Introduction Edge Shot Photo Here Overview Io Express is the perfect cross-platform, Mac or PC, interface for anyone who needs an inexpensive monitoring and mastering solution when working with Apple ProRes Formats, XDCAM HD, DVCPRO HD, and more. Portable and simple to use, Io Express is ideal for file- based workflows. -
Page 8: Accepted Inputs
PC with the appropriate QuickTime Windows decoder. Using Multiple AJA Starting with KONA, Io HD, and Io Express v7.5, more than one AJA product can be used with your host computer. Using the AJA Control Panel, you can choose which installed Products product an application uses for input/output. -
Page 9: About Primary & Secondary Video Formats
Convert Mode Convert Mode allows selection of a conversion mode for down conversion between High- definition and Standard-definition formats. The choices offered depend on the AJA capture device present and the Primary and Secondary format chosen. Io Express supports down conversion plus SD-to-SD aspect ratio conversions. See the following tables for conversion options. -
Page 10: Playback Formats
For analog audio output monitoring, Io Express provides two-channel unbalanced audio (RCA jacks). Software for Mac • AJA Io Express Control Panel for source selection and controlling Io Express within the overall MacOS environment, Input Pass through, and more). • AJA QuickTime™ drivers for tightly integrated hardware/software operation. -
Page 11: Software For Windows
Io Express Installation and Operation Guide — What’s In The Box? on CD, including the AJA Control Panel, drivers for the card itself, and all files necessary for third- party application support (software application not included). Software for AJA Software for Windows brings high quality HD and SD video and audio to a Windows workstation with Io Express. -
Page 12: System Requirements
Here, we provide minimum and recommended requirements. Always consult the release notes for the AJA software version you are running (included with installer) For the latest appropriate match for your software and hardware, visit: http://www.aja.com/en/support/io/mac/io-express/... - Page 13 100 ft. when using 22 or 24AWG HDMI cable, or up to 50 ft. using 28 or 30AWG HDMI cable. The HDMI output supports standard HDMI cables only. The AJA Control Panel allows selection and adjustment of some HDMI parameters. Analog 2-Channel Unbalanced Audio Output Io Express provides two analog output connectors, one for each channel.
-
Page 14: In This Manual
Windows Software, then getting it up and running. Important configuration information is also provided on video settings and use of genlock/external reference. Chapter 3 discusses operational aspects of Io Express when used with the AJA Control Panel and third-party applications. -
Page 15: Chapter 2: Installation
4. Install AJA Io Express software on your Mac or PC from the AJA website download or, if internet connection is not available, the supplied AJA CD-ROM 5. Cable the system audio and video sources, VTR, audio monitor, and video monitor. -
Page 16: Connecting To Your Computer
Ensure that the third-party editing software you are using has been installed before proceeding to the installation of Io Express software. It is always a good idea to verify you have the most up-to-date release of your AJA software by checking the AJA support site. Io Express Connections... -
Page 17: Cabling The System
Io Express Installation and Operation Guide — Cabling the System Cabling the System Typical System This figure shows typical system interconnections for a system with digital A/V sources. Your system may differ depending on VTRs, audio monitoring, and video monitoring. 1. -
Page 18: Installing Io Express Software
These applications must be installed and have been run at least once prior to installing AJA Io Express software. Next, go to the AJA website to download the latest Io Express software. If you don’t have an appropriate internet connection, use the CD-ROM supplied with the Io Express system to install necessary software drivers and the AJA Control Panel. -
Page 19: Mac Pro Software Installation
Io Express Installation and Operation Guide — Cabling the System System software updates may occasionally become available to AJA Io Express owners on our website (www.aja.com). We recommend checking occasionally for both software updates and additional product information. Note: If your workstation has previously had another video capture or multimedia card installed, ensure you remove the card and/or uninstall any related software before installing Io Express. - Page 20 Note: Files ending in the “.pkg” and “.mpkg” suffix are OS X installer files. These launch the OS X installer and tell it where and what to install on your system. 3. Double-click the package to log on and begin software installation. 4.
- Page 21 Io Express Installation and Operation Guide — Cabling the System System Check Installer Screen 9. Read and agree to the Software License Agreement. Io Express Software License Agreement Screen 10.The next screen shows all the available drives on the Mac Pro. Click on the drive that contains your system files (Apple default is “Macintosh HD”).
- Page 22 11.At the next screen, select the Easy Setups that you want to use (or all of them) and then click the Continue button to place the software on the drive you previously selected. Installer Screen, Select Easy Setups to be Installed 12.A system prompt will pop up with a reminder that OS X must be restarted after installation.
-
Page 23: Windows Software Installation
Io Express Installation and Operation Guide — Cabling the System Windows Software Locate the AJA Windows Software download file or CD packaged with your system and follow the procedure below to install the required software on the host system. There are two versions Installation of AJA Windows Software installation—for 32-bit workstations and 64-bit Vista workstations. - Page 24 Installation Type If you don’t have all the AJA Windows Software supported Adobe Production Studio products installed on your workstation, you may choose to perform a Custom installation (default) and select only the software necessary for your applications.
- Page 25 Io Express Installation and Operation Guide — Cabling the System The following screens depict the more elaborate Custom installation. Shown below are the top- level directory of options. Click (+/-) to expand or contract. Top-level Installation Item Selection You may deselect any Item for installation by using the pulldown to make it unavailable. Custom Selections Pulldown Menu...
- Page 26 Use second level options to choose the specific drivers and plugins you would like installed. Custom Selection Second-level Options Disabled selections are marked with a red X. Before clicking Next to install, you can verify your disk space availability by clicking the Disk Usage button. Workstation Disk Usage Display To return to the installation click OK.
- Page 27 Click Next to begin the installation. Installation Progress Screen. When the installer has completed copying the AJA Windows Software to disk, you will see a standard Windows Logo test warning. Click on the “Continue Anyway” button to finish the installation.
-
Page 28: Re-Installation & Repair
Io Express due to excellent freerun accuracy. To connect genlock, use a black burst generator output looped through the system. On the Io Express house sync is connected to “LTC/Ref In”. Note: Be sure to set the Reference/LTC connection to Reference in the AJA Control Panel. -
Page 29: Chapter 3: Operation
Chapter 3: Operation Using Io Express with Professional Video /Audio Software After you install the Io Express software and any AJA plug-ins to support your choice of 3rd- party software, you’re then ready to begin capturing and playing back video and audio. - Page 30 Icon objects on the block diagram screen (input/output icons, frame buffer, etc.—also called “widgets”—indicate their status by color (explained later) and can be clicked for context-sensitive information and choices. (These same choices can also be made from the AJA Control Panel screens.) Framebuffer...
- Page 31 The framebuffer has a format (called the “Primary Format” and color space that it follows, as defined in the AJA Control Panel or via external application software. It is important to realize that inside the computer workstation, a number of applications can use the Io Express (as you switch from window to window) and it may not always be obvious which currently controls it.
- Page 32 Presets: add or delete saved preset configurations (handy for setting up the Io XT for certain workflows and then saving it as a canned configuration for easy later recall) enables installation of AJA card firmware. Firmware: Info: displays status information and firmware version # of the Io Express and how it is installed in the host computer.
-
Page 33: Control Screen
Io Express Installation and Operation Guide — Using the AJA Control Panel Control Screen The Io Express can be controlled by various software applications running on a host computer. The Control Screen is where you select how the Io Express directs video used by application software. - Page 34 Control Screen, Default Io Express Output Pulldown Menu Choices available and their meaning are: Input Passthrough: this selection directs Io Express to route video from its selected input through the card for output. When this selection is in effect, all Primary selections are available for selection in controlling the output.
-
Page 35: Format Screen
Io Express Installation and Operation Guide — Using the AJA Control Panel Playback Timing (greyed-out when in Input Passthrough) Genlock (Freerun, Ref In, Input 1, or Input 2)—Selects how Io Express will synchronize program video: Freerun: in this mode, Io Express generates video without an external reference source... - Page 36 Format Screen Settings Video Format—This pull-down menu shows the currently selected format. This pull-down appears in both the Primary Format area of the Formats screen and the Secondary Format area (if present). If you select an alternate value in the Primary Format using the pull-down, it will change the format used by Io Express’s framebuffer.
-
Page 37: Input Select Screen
Io Express Installation and Operation Guide — Using the AJA Control Panel Input Select Screen On the Input Select screen, you can view the currently selected video and audio input sources and map audio sources to the channels supported by your capture application (more on this later). - Page 38 Audio Input—This pulldown menu allows you to choose where the audio comes from. Io Express supports up to 8 channels of embedded digital audio, so you can choose from the 16 channels that can be embedded in SDI, and pick which to bring in (from the group 1-8 or 9-16).
-
Page 39: Sdi Out Screen
Io Express Installation and Operation Guide — Using the AJA Control Panel SDI Out Screen The SDI Out screen shows the current setting for both the SDI and HDMI outputs. If an input/ output has no video, it will be indicated on the block diagram (“No Video”). -
Page 40: Hdmi Screen
HDMI Screen The Io Express’s HDMI input and output are shown and configured at this screen. The HDMI input pane shows if an HDMI input source has been detected and locked on, showing the format found. HDMI Screen HDMI Screen Settings HDMI Output—Pulldowns are provided for configuring the video output range, color space and number of embedded audio channels (2 or the maximum 8) for the HDMI output. -
Page 41: Analog Out Screen
Io Express Installation and Operation Guide — Using the AJA Control Panel Analog Out Screen Io Express provides a high-quality analog component or composite output, generally used for monitoring. This screen shows the current settings for that analog output, and allows you to re- configure it when desired. -
Page 42: Video Setup Screen
Video Setup Screen Io Express provides a high-quality analog component or composite output, generally used for monitoring. This screen shows the current settings for black level setup for the analog video output, and allows you to re-configure it when desired. Video Setup Screen QuickTime Video Output Filter—The QuickTime Video Output Display Filter is designed to help manage the comprehensive list of video outputs that may be available to applications. -
Page 43: Audio Setup Screen
Io Express Installation and Operation Guide — Using the AJA Control Panel Audio Setup Screen The Audio Setup This screen shows the current settings for that analog audio output, and allows you to re-configure it when desired. Audio Setup Screen Audio Setup Screen Settings Lock Audio Gain To Unity—When set, the Io Express will ignore the third-party application’s... -
Page 44: Conversion Screen
This screen allows you to select codec options such as whether a pause stops on a full frame or a single field (jitter compensation) and 24 to 30 fps padding patterns. AJA Control Panel Conversion Screen 3-2 Pulldown—the value selected in this pulldown is used whenever, due to format selection, you’ve chosen to do 24 frames-per-second to 30 conversion where extra fields... - Page 45 Io Express Installation and Operation Guide — Using the AJA Control Panel Video Out, Pause On—these two choices determine what happens when your editing application is paused in stop mode: Full Frame: both fields are displayed resulting in some jitter while paused.
-
Page 46: Timecode Screen
Timecode Screen The timecode is used for both monitoring the RP-188 timecode embedded in the digital data stream and for selecting a timecode offset (if required) for the attached VTR (connected to the RS-422 port)—and sent during assemble-edit mode. Note: SMPTE 12M-2 is the updated name and specification for what was RP-188. Timecode Screen Timecode Screen Settings RP-188 Timecode <n>—in RP-188 timecode (SMPTE 12M-2) there can be multiple timecode... - Page 47 Io Express Installation and Operation Guide — Using the AJA Control Panel Io Express Control Panel, Timecode Pulldown Menu Use QuickTime Timecode—when checked, this directs Io Express to output timecode from the QuickTime timecode track in playback. When not checked, Io Express uses the Output Timecode Offset value plus the number of frames into the movie.
- Page 48 After configuring the AJA Control Panel screens, you can then save all your settings as a snapshot for later recall—called a preset. In this way, you can organize presets for all your typical tasks, eliminating time-robbing manual re-configuration each time. To save a preset, simply go to the Presets screen and click “Save Preset”.
-
Page 49: Firmware Screen
Io Express Installation and Operation Guide — Using the AJA Control Panel Firmware Screen Use the Firmware screen to access the firmware install screen. Click install to erase current firmware and load the firmware version contained in your current driver installation. Note the Installation message shown below. -
Page 50: Info Screen
Info Screen This screen shows the Io Express software files that have been installed on your system. This information may be needed if you talk to an AJA Customer Service representative to determine if files are missing or need updating. -
Page 51: Who Is Controlling Io Express
Panel in-use message will report the change by displaying the new application in control. If no in-use message is displayed, the AJA Control Panel is in control of Io Express. If no QuickTime applications are running, the board’s state is determined by the AJA Control Panel’s settings. -
Page 52: Using 8-Bit Versus 10-Bit Video
Using 8-bit Versus 10-bit Video While both 8- and 10-bit uncompressed video are capable of providing excellent quality broadcast video, 10-bit represents a significantly higher quality and is preferable in many situations. Because 10-bit video has four times the numerical precision of 8-bit, it has a signal-to-noise ratio 12 dB higher than 8-bit video. -
Page 53: Chapter 4: Troubleshooting
Chapter 4: Troubleshooting If You Run Into Problems One useful way to find the source of problems is to isolate your system to the smallest size where the problem still occurs and then note all the symptoms. This serves to eliminate areas not involved in the problem and makes finding the problem easier. -
Page 54: Updating Software
If the problem is a 3rd-party software operational issue, Mac system issue, then call Apple Customer Support or the 3rd-party software manufacturer for help. If the problem is an AJA Video Io Express issue, then contact AJA Video Customer Support. “Contacting Support” on page ii. -
Page 55: Appendix A: Specifications
Appendix A: Specifications Formats • 525i 29.97 • 625i 25 • 720P 50, 59.94, 60 • 1080i 25, 29.97, 30 • 1080PsF 23.98, 24 • 1080p 23.98, 24, 25, 29.97, 30 Video Input • SD/HD SDI, SMPTE-259/292/296/424, 8- or 10-bit •... -
Page 56: Audio Input Digital
Audio Input Digital • 8-channel, 24-bit SMPTE-259 SDI embedded audio, 48kHz sample rate, Synchronous • 8-channel, 24-bit HDMI embedded audio, 48kHz sample rate, Synchronous Audio Output Digital • 8-channel, 24-bit SMPTE-259 SDI embedded audio, 48kHz sample rate, Synchronous • 8-channel, 24-bit HDMI embedded audio, 48kHz sample rate, Synchronous Audio Output Analog •... -
Page 57: Appendix B: Safety & Compliance
Appendix B: Safety & Compliance Federal Communications Commission (FCC) Compliance Notices Class A Interference This equipment has been tested and found to comply with the limits for a Class A digital device, pursuant to Part 15, Subpart B of the FCC Rules. These limits are designed to provide Statement reasonable protection against harmful interference in a commericial installation. -
Page 58: Regulatory Compliance
European Union and European Free Trade Association (EFTA) Regulatory Compliance This equipment may be operated in the countries that comprise the member countries of the European Union and the European Free Trade Association. These countries, listed in the following paragraph, are referred to as The European Community throughout this document: AUSTRIA, BELGIUM, BULGARIA, CYPRUS, CZECH REPUBLIC, DENMARK, ESTONIA, FINLAND, FRANCE, GERMANY, GREECE, HUNGARY, IRELAND, ITALY, LATVIA, LITHUANIA, LUXEMBOURG,... -
Page 59: Korean Compliance Statement
Io Express Installation and Operation Guide — Korean Compliance Korean Compliance Statement Taiwan Compliance Statement This is a Class A product based on the standard of the Bureau of Standards, Metrology and Inspection (BSMI) CNS 13438, Class A. Japanese Compliance Statement This is a Class A product based on the standard of the VCCI Council (VCCI V-3/2008.04). - Page 60 Before operating your AJA unit, read the instructions in this document Warning! Read and follow all warning notices and instructions marked on the product or included in the documentation. Avertissement ! Lisez et conformez-vous à tous les avis et instructions d'avertissement indiqués sur le produit ou dans la documentation.
- Page 61 Io Express Installation and Operation Guide — Before operating your AJA Warning! Do not install near any heat sources such as radiators, heat registers, stoves, or other apparatus (including amplifiers) that produce heat. Avertissement ! N'installez pas l'appareil près d'une source de chaleur telle que des radiateurs, des bouches d'air de chauffage, des fourneaux ou d'autres appareils (amplificateurs compris) qui produisent de la chaleur.
- Page 62 Achtung! Dies ist ein Gerät der Klasse A. Bei Einsatz des Geräts in Wohngebieten kann es Störungen des Radio- und Fernsehempfangs verursachen. In diesem Fall muss der Benutzer alle notwendigen Maßnahmen ergreifen, die möglicherweise nötig sind, um die Störungen auf eigene Rechnung zu beheben. ¡Precaución! Este es un producto clase A.
- Page 63 Io Express Installation and Operation Guide — Before operating your AJA Warning! Do not defeat the safety purpose of the polarized or grounding-type plug. A polarized plug has two blades with one wider than the other. A grounding type plug has two blades and a third grounding prong. The wide blade or the third prong are provided for your safety.
- Page 64 Betrieb vorgenommen. ¡Advertencia! No abra el chasis. El interior no contiene piezas reparables por el usuario. El abrir el chasis anulará la garantía a menos que se lo haga en un centro de servicio AJA o en un local autorizado.
-
Page 65: Index
Info Screen Connector Descriptions Input Pass through Connectors Input Screen Control Panel Basics Input Screen Settings Control Panel, AJA Software Input/Output Control Panel, KONA 2 Installation Overview Control Panel, Tabbed Screens Installation Software CD-Rom 36, 37 Control Screen... - Page 66 Timecode Offset Problems, what to do Timecode Screen problems, what to do if you encounter Timecode Screen Settings Timing adjustment, Control Panel Troubleshooting QuickTime™ Drivers, AJA KONA 2 troubleshooting typical system interconnections Rec 601 Rec 709 unpack Updating Software Ref In...
- Page 67 Io Express Installation and Operation Guide — Index Y/R-Y/B-Y Yellow YPbPr YUV-RGB Conversion...
Need help?
Do you have a question about the ioExpress and is the answer not in the manual?
Questions and answers