
Subscribe to Our Youtube Channel
Related Manuals for RayTek Thermalert GP series


Summary of Contents for RayTek Thermalert GP series
- Page 1 Thermalert ® GP Series Operator’s Manual ® Raytek Infrared Temperature Measurement 58823-9 Rev C 11/2002 1.800.561.8187 information@itm.com www. .com...
- Page 2 FAX: 86-10/6437-0285 Raytek Japan, Inc. Phone: 81-6-4390-5015 FAX: 81-6-4390-5016 Internet Address: http://www.raytek.com Raytek and Thermalert are registered trademarks of Raytek Corp. All other brands or products are trademarks of their respective owners. © 2001 Raytek Corporation 1.800.561.8187 information@itm.com www. .com...
- Page 3 In the event of failure of a product covered by this warranty, Raytek will repair the instrument when it is returned to an authorized Service Facility within two years of the original purchase, provided the warrantor’s...
- Page 4 1.800.561.8187 information@itm.com www. .com...
-
Page 5: Table Of Contents
@ @ f @ @ f @ @ f @ @ f @ @ f @ @ f @ @ f @ @ f @ @ f @ @ f Thermalert GP Series Operator’s Manual Table of Contents 1.800.561.8187 information@itm.com www. .com... -
Page 6: Section Page
@ @ f @ @ f @ @ f @ @ f @ @ f @ @ f @ @ f @ @ f @ @ f @ @ f Table of Contents Thermalert GP Series Operator’s Manual 1.800.561.8187 information@itm.com www. .com... - Page 7 @ @ f @ @ f @ @ f @ @ f @ @ f @ @ f @ @ f @ @ f @ @ f @ @ f Thermalert GP Series Operator’s Manual Table of Contents 1.800.561.8187 information@itm.com www. .com...
- Page 8 APPENDIX F TRACEABILITY OF INSTRUMENT CALIBRATION @ @ @ h @ @ @ h APPENDIX G CE CONFORMITY FOR EUROPEAN COMMUNITY @ @ @ h @ @ @ h Table of Contents Thermalert GP Series Operator’s Manual 1.800.561.8187 information@itm.com www. .com...
-
Page 9: Description
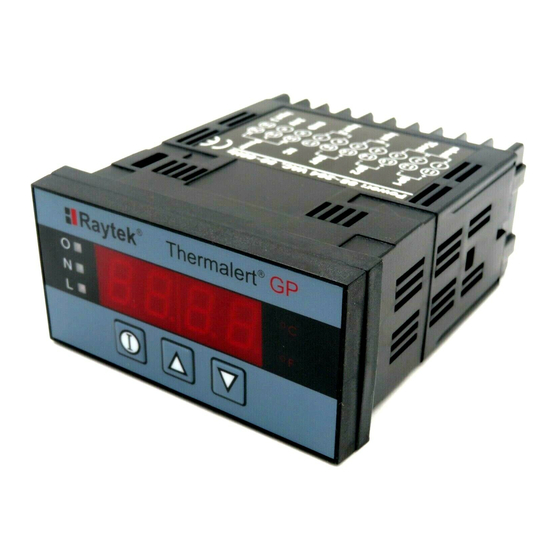
0-5V and 4-20mA devices, which allows it to be used as a panel meter for many applications. Other settings allow the GP to act as a temperature monitor for Raytek fixed infrared sensors (refer to Appendix B) and for other temperature gathering devices. The GP Monitor also accepts various types of thermocouple inputs. -
Page 10: Thermalert Gp Monitor
Head Type H004: 0V input setting = low scale, 5V input setting = high scale Head Type H005: 4mA input setting = low scale, 20mA inpute setting = high scale Head Type H006: scale = input thermocouple range Thermalert GP Series Operator’s Manual 1.800.561.8187 information@itm.com www. .com... -
Page 11: Electrical
Environmental Rating: NEMA-12 (IEC 529, IP 54) front panel only Ambient Operating Temperature Range: 0 to 50°C (32 to 122°F) Relative Humidity: 0-95%, non-condensing (with Gpm head at <30°C (86°F Storage Temperature: -30 to 65°C (-22 to 150°F) Thermalert GP Series Operator’s Manual 1.800.561.8187 information@itm.com www. .com... -
Page 12: Mounting Instructions
3. Attach the fixing clamps as shown in Figure 2 to both sides of the monitor. Make sure the tab is secure in the hole on both sides. Gasket Rear Cover Hole Fixing Clamp Fixing Clamp Screw Figure 2: Mounting the Monitor Thermalert GP Series Operator’s Manual 1.800.561.8187 information@itm.com www. .com... -
Page 13: Electrical Installation
The terminal block layout is shown in Figure 3. (Terminal definitions are on the following page.) Power mA out TC out Input 1 Input 2 SHD 24V Input3 Figure 3: Terminal Block Layout Thermalert GP Series Operator’s Manual 1.800.561.8187 information@itm.com www. .com... -
Page 14: Connecting Input Devices
The External Reset Input is used to restart the “clock” for the PeakHold/ ValleyHold/Averaging functions but not to reset the values to 0. The reset can be activated by installing a switch between terminals 15 and 16. Thermalert GP Series Operator’s Manual 1.800.561.8187 information@itm.com www. -
Page 15: Power Connections
You can connect 110-220VAC, 50-60Hz, to the monitor. It can automatically sense whether you connect 110 or 220 VAC. Use Table 3 as a guide. Table 3: Power Connections TERMINAL FUNCTION NUMBER Ground Neutral Thermalert GP Series Operator’s Manual 1.800.561.8187 information@itm.com www. .com... -
Page 16: Output Connections
(Setpoint 1 or 2) To Alarm or Controlling Device To GP Monitor Terminal 12 or 14 (Digital Ground) Two relays are necessary to take advantage of both setpoints. Figure 4: Relay Accessory Wiring Thermalert GP Series Operator’s Manual 1.800.561.8187 information@itm.com www. .com... -
Page 17: Operation
(Celsius). The “F” indicates if the temperature measurement is in degrees F (Fahrenheit). For 0-5 volt and 4-20 mA devices that do not measure tempera- tures, C and F can both be turned off. Thermalert GP Series Operator’s Manual 1.800.561.8187 information@itm.com www. -
Page 18: Display/Key Pad
0 - 998 seconds Infinite reset by hardware 999 = infinite hold Averaging 0 - 60 seconds Ambient Temperature -18 to 1200°C Compensation (t-amb) (0 to 2200°F) Offset -50 to 50°C (-99 to 99°F) Thermalert GP Series Operator’s Manual 1.800.561.8187 information@itm.com www. .com... -
Page 19: Device Selection
Head types are as follows: • H001 = Raytek GPR/GPS Heads • H002 = Raytek GPM Head • H003 = Raytek CI3 Head • H004 = 0 - 5V inputs •... - Page 20 For H005, press the button again to be able to adjust the 4mA equiva- lent value (using the up and down arrows). Press once more to adjust the 20mA equivalent value. Thermalert GP Series Operator’s Manual 1.800.561.8187 information@itm.com www. .com...
- Page 21 • TC4 = N-type thermocouple input • TC5 = R-type thermocouple input • TC6 = S-type thermocouple input • TC7 = T-type thermocouple input 3. Press the button until the temperature or user-defined value displays. Thermalert GP Series Operator’s Manual 1.800.561.8187 information@itm.com www. .com...
-
Page 22: Emissivity
2. Press the buttons to change the number on the display to the appropriate emissivity. Note: Appendix C lists common emissivities for metals and non-metals. 3. Press the button until the temperature displays. Thermalert GP Series Operator’s Manual 1.800.561.8187 information@itm.com www. .com... -
Page 23: Setpoints 1 And
If a number “0” displays, the Normally Low setpoint will change state when the target temperature or value is lower than the setpoint alarm value. Thermalert GP Series Operator’s Manual 1.800.561.8187 information@itm.com www. - Page 24 “3”. Figure 10 (below and continued on next page) shows examples of how the setpoints change state when triggered. GP Monitor Display= b 0 Trigger Signal Low, Output Normally Low Signal SP1=90 DB=5 Figure 10: Output Examples Thermalert GP Series Operator’s Manual 1.800.561.8187 information@itm.com www. .com...
- Page 25 Signal SP1=90 DB=5 GP Monitor Display= b 2 Trigger Signal Low, Output Normally High Signal SP1=90 DB=5 GP Monitor Display= b 3 Trigger Signal High, Output Normally High Signal SP1=90 DB=5 Thermalert GP Series Operator’s Manual 1.800.561.8187 information@itm.com www. .com...
- Page 26 To return to the temperature/value display, press the button until the temperature/value display appears. Note: The deadband is the temperature/value band (±) about a setpoint, wherein an alarm output or relay cannot change state. Thermalert GP Series Operator’s Manual 1.800.561.8187 information@itm.com www. .com...
-
Page 27: 4-20Ma Analog Output
20mA display (Figure 13). Thermalert GP Figure 13: 20mA Analog Output Display 5. Press the buttons to adjust the temperature value. 6. Press the button until the temperature mode is displayed. Thermalert GP Series Operator’s Manual 1.800.561.8187 information@itm.com www. .com... -
Page 28: Degrees C And F
˚F lit on monitor To disable C/ F indicators (only for H004 & H005) Not available Note: Thermocouple output is available for H004 and H005 only if either °C or °F is activated. Thermalert GP Series Operator’s Manual 1.800.561.8187 information@itm.com www. .com... -
Page 29: Peak Hold, Valley Hold, And Average
3. Set the display by using the buttons. Note that “000” turns off Peak Hold. 4. Press the button again and the Valley Hold display (Figure 16) appears. Thermalert GP Series Operator’s Manual 1.800.561.8187 information@itm.com www. .com... - Page 30 Averaging display (Figure 17) appears. Thermalert GP Figure 17: Averaging Display 8. Press the button once more and the display shows the current Averaging value in seconds. Thermalert GP Series Operator’s Manual 1.800.561.8187 information@itm.com www. .com...
-
Page 31: Ambient Temperature Compensation (T-Ambient)
3. You can activate or deactivate Ambient Temperature Compensation by using the up and down buttons. A number “1” means it is active; a num- ber “0” means it is inactive. Thermalert GP Figure 18: Ambient Temperature Compensation Display Thermalert GP Series Operator’s Manual 1.800.561.8187 information@itm.com www. .com... -
Page 32: Display And Analog Output Offsets
Figure 19: Offset Indicator Display 3. To adjust the display and output offset, press the button once more. 4. Set the display by using the buttons. 5. Press the button until the temperature mode displays. Thermalert GP Series Operator’s Manual 1.800.561.8187 information@itm.com www. .com... -
Page 33: Thermocouple Output
Notes: Thermocouple output is available for H004 and H005 inputs only if either °C or °F is activated. The 4-20mA analog output is disabled when the thermocouple output is active. Thermalert GP Series Operator’s Manual 1.800.561.8187 information@itm.com www. .com... -
Page 34: Lockout Mode
If you need to reset the Thermalert GP monitor to its factory default settings, you can do so by pressing and holding the button and then pressing the button 3 times. Thermalert GP Series Operator’s Manual 1.800.561.8187 information@itm.com www. .com... -
Page 35: Maintenance
Erroneous Temperature Lens dirty Clean lens (see Section 5.3) Erroneous Temperature Wrong emissivity Correct emissivity setting Erroneous Temperature Wrong signal Correct peak/valley setting Relays "chatter" Deadband too narrow Correct deadband setting Thermalert GP Series Operator’s Manual 1.800.561.8187 information@itm.com www. .com... -
Page 36: Fail-Safe Operation
>50°C (120°F) or <0°C(°F) input range Note: With either input type H003 or H004 the under instrument input range will display low scale for the input device, and the output will be 4mA. Thermalert GP Series Operator’s Manual 1.800.561.8187 information@itm.com www. -
Page 37: Quick Reference
Figure A-3 shows how to cycle through the monitor’s advanced sensor adjustments when the appropriate sensing head is attached to it. For a detailed explanation of each function, refer to the appropriate section in the manual. Thermalert GP Series Operator’s Manual 1.800.561.8187 information@itm.com www. - Page 38 Figure A-1: Head and Input Setup Thermalert GP Series Operator’s Manual 1.800.561.8187 information@itm.com www. .com...
- Page 39 4/20mA outputs disabled if Thermocouple output enabled Emissivity Not Adjustable for H003, H004, H005, H006 Figure A-2: Normal Functions Thermalert GP Series Operator’s Manual 1.800.561.8187 information@itm.com www. .com...
- Page 40 Figure A-3: Advanced Functions Thermalert GP Series Operator’s Manual 1.800.561.8187 information@itm.com www. .com...
-
Page 41: Appendix Braytek Infrared Sensing Heads
APPENDIX B RAYTEK INFRARED SENSING HEADS This section describes how to connect Raytek infrared sensing heads to the Thermalert GP monitor. Raytek sensing heads include the Thermalert GPR and GPS (laser) sensor (Head Type H001), the Thermalert GPM (Head Type H002), the Thermalert CI3 (Head Type H003), and the Thermalert TX, which uses the 4-20 mA connection (Head Type H005). -
Page 42: Connecting Sensor Heads And Input Devices
For wiring connections for sensing heads or other input devices with 0 to 5 volt and 4 to 20 mA outputs to the monitor, refer to Section 2.3.2. WARNING Incorrect wiring can damage the monitor, sensor, and/or input device and void the warranty. Thermalert GP Series Operator’s Manual 1.800.561.8187 information@itm.com www. .com... -
Page 43: Power Connections
POWER CONNECTIONS Please refer to Section 2.3.3 for power connection information. OUTPUT CONNECTIONS Please refer to Section 2.3.4 for output connection information and Section 2.3.5 for information on solid state relay wiring. Thermalert GP Series Operator’s Manual 1.800.561.8187 information@itm.com www. .com... -
Page 44: The Gpr And Gps Sensing Heads
(1.65) (0.315) (4.92) (1.18) (1.5) (0.51) 1.5 inch mm (inches) 20 UN-2A Figure B-1: GP Regular Head Thermalert GP Series Operator’s Manual 1.800.561.8187 information@itm.com www. .com... -
Page 45: Gps Laser Sighting Head
(1.65) (0.315) (5.91) (1.18) (1.5) (0.51) 1.5 inch mm (inches) 20 UN-2A Figure B-2: GPS Laser Sighting Head Note: The laser automatically turns off after approximately 10 minutes of use. Thermalert GP Series Operator’s Manual 1.800.561.8187 information@itm.com www. .com... - Page 46 Sensor head cable (4m/13ft length) 1. Cap 2. Plastic compression fitting 3. Rubber washer 4. Metal washer 5. Cable shield 6. Wires 7. Sensor head cable Figure B-4: Laser Switching Box Wiring Diagram Thermalert GP Series Operator’s Manual 1.800.561.8187 information@itm.com www. .com...
-
Page 47: Adjustable Mounting Bracket Accessory
56 REF φ 6 R 31 (3.063) (2.25) (.28) (.25) (1.25) φ 37.5 (1.5) (4.063) (4.75) (3.75) (4.063) mm (inches) (3.69) (4.8) Figure B-6: Adjustable Mounting Bracket Thermalert GP Series Operator’s Manual 1.800.561.8187 information@itm.com www. .com... -
Page 48: Gpr & Gps Head With Air/Water-Cooled Housing
Figure B-7: GPR Head with Air/Water-cooled Housing 1/8" NPT NIPPLE (2 PLCS) (0.87) (2.1) 1.5 inch 20 UN-2A THREAD (2.48) (0.9) mm (inches) (5.91) Figure B-8: GPS Head with Air/Water-cooled Housing Thermalert GP Series Operator’s Manual 1.800.561.8187 information@itm.com www. .com... -
Page 49: Gpr/Gps Air Purge Collar
φ 1/8" (2.5) 27 NPT 1.5 inch 20 UN-2A (.875) 1.5 inch 20 UN-2B φ (1.5) mm (inches) Figure B-9: GPR/GPS Air Purge Collar Accessory Thermalert GP Series Operator’s Manual 1.800.561.8187 information@itm.com www. .com... -
Page 50: Gpr/Gps Right Angle Mirror
5%. For example, for an object with an emissivity of 0.95 use 0.9; for an object with 0.8 use 0.76; for 0.65 use 0.62. This correction accounts for energy losses in the mirror. Thermalert GP Series Operator’s Manual 1.800.561.8187 information@itm.com www. -
Page 51: Gpr Sighting Viewer Tool
Be sure to remove the Sighting Viewer Tool when align- ment is complete. φ 45 (1.8) 1.5 inch 20 UN-2B mm (inches) (2.65) Figure B-11: GPR Sighting Viewer Tool Thermalert GP Series Operator’s Manual 1.800.561.8187 information@itm.com www. .com... -
Page 52: Gpr And Gps Head Specifications
DISTANCE: SENSOR TO OBJECT (in) 1.7" @ 60" GPR STANDARD FOCUS 35:1 44mm @ 1520mm 1520 2000 2500 1000 3000 DISTANCE: SENSOR TO OBJECT (mm) Figure B-12: GPR Standard Focus Optical Chart Thermalert GP Series Operator’s Manual 1.800.561.8187 information@itm.com www. .com... - Page 53 DISTANCE: SENSOR TO OBJECT (in) 1.2" @ 60" GPS STANDARD FOCUS 50:1 30mm @ 1520mm 1520 2000 2500 1000 3000 DISTANCE: SENSOR TO OBJECT (mm) Figure B-14: GPS Standard Focus Optical Chart Thermalert GP Series Operator’s Manual 1.800.561.8187 information@itm.com www. .com...
-
Page 54: Thermal
±0.5% of reading or ± 1°C (2°F), whichever is greater, @ 23°C ± 5°C (73 ± 9°F) ambient Response Time: 300 ms (95% response, 4/20mA output) Temperature Coefficient: 0.15°C per °C (0.15°F per °F) Thermalert GP Series Operator’s Manual 1.800.561.8187 information@itm.com www. .com... -
Page 55: Physical
Storage Temperature: -30 to 65°C (-22 to 150°F) Relative Humidity: 10-95%, non-condensing Vibration: MIL-STD-810D (IEC 68-2-6): 3G’s, 11 to 200Hz, any axis Mechanical Shock: MIL-STD-810D (IEC 68-2-27): 50G’s, 11msec duration, any axis Thermalert GP Series Operator’s Manual 1.800.561.8187 information@itm.com www. .com... -
Page 56: Gpr And Gps Accessories
A full range of options for various applications and industrial environments are available. Options are those items that are factory installed and must be ordered with base model units. These include the following: • NIST certification • Air/water-cooled housing Thermalert GP Series Operator’s Manual 1.800.561.8187 information@itm.com www. .com... -
Page 57: Gp Miniature Head Information
φ 5 (.2) Figure B-16: The GPM Sensing Head 16 (.63) 13 (.5) 3.4 (.13) 3.4 (.13) (.51) 31 (1.2) (.8) 2 (.08) mm (inches) (1.05) (.75) Figure B-17: Fixed Mounting Bracket Thermalert GP Series Operator’s Manual 1.800.561.8187 information@itm.com www. .com... -
Page 58: Adjustable Mounting Bracket
(Section B.6.5). Ambient temperature max. 50°C Ambient temperature up to 200°C To terminals Sensing head Hose T-Fitting Cable Air hose Air cooling (max. 35°C) Figure B-19: Air Cooling System Thermalert GP Series Operator’s Manual 1.800.561.8187 information@itm.com www. .com... - Page 59 Note: The “Hose Length” is the length of hose exposed to high ambient temperature and not the overall length of the hose. [°C] Hose Length meters feet Figure B-20: Maximum Ambient Temperature Depending on Air Flow and Hose Length Thermalert GP Series Operator’s Manual 1.800.561.8187 information@itm.com www. .com...
-
Page 60: Gpm Air Purge Jacket
(Do not overtighten.) Slip the cable (6) through the backside (4) of the jacket. Close the Air Purge Jacket (3, 4) and reconnect the wires to the electronics box. Figure B-22: Air Purge Jacket Installation Thermalert GP Series Operator’s Manual 1.800.561.8187 information@itm.com www. -
Page 61: Gpm Right Angle Mirror
5%. For example, for an object with an emissivity of 0.95 use 0.9; for an object with 0.8 use 0.76; for 0.65 use 0.62. This correction accounts for energy losses in the mirror. Thermalert GP Series Operator’s Manual 1.800.561.8187 information@itm.com www. -
Page 62: Gpm Head Specifications
2:1 and 10:1 optical resolution models. DISTANCE: SENSOR TO OBJECT (in) D : S = 10 : 1* 26.5 * FAR FIELD DISTANCE: SENSOR TO OBJECT (mm) Figure B-24: GPM Sensor Heads Optical Chart Thermalert GP Series Operator’s Manual 1.800.561.8187 information@itm.com www. .com... -
Page 63: Thermal
GPM head: 0 to 85°C (32 to 185°F) Temperature Range: with air cooling: -18 to 200°C (0 to 392°F) Storage Temperature: -18 to 85°C (0 to 185°F) Relative Humidity: 10-95%, non-condensing Thermalert GP Series Operator’s Manual 1.800.561.8187 information@itm.com www. .com... -
Page 64: Gp Miniature Head Accessories
Options are those items that are factory installed and must be ordered with base model units. These include the following: • Longer cables–3 m (10 ft), 8 m (26 ft), and 15 m (50 ft) • NIST Certification Thermalert GP Series Operator’s Manual 1.800.561.8187 information@itm.com www. -
Page 65: Installation Of Sensing Heads
The GPM optical head is designed to operate in ambient temperatures of 0 to 85°C (32 to 185°F). With the air cooling accessory, it can operate in ambient temperatures up to 200°C (392°F). Thermalert GP Series Operator’s Manual 1.800.561.8187 information@itm.com www. -
Page 66: Distance And Spot Size
Figure B-25 illustrates proper sensor placement (applies to all models). Best Good Incorrect Sensor Target greater than spot size Target equal to spot size Target smaller than spot size Figure B-25: Proper Sensor Placement Thermalert GP Series Operator’s Manual 1.800.561.8187 information@itm.com www. .com... -
Page 67: Atmospheric Quality
• For additional protection, use conduit for the AC power lines and any external connections. Solid conduit is better than flexible conduit in high noise environments. • Do not run AC power for other equipment in the same conduit. Thermalert GP Series Operator’s Manual 1.800.561.8187 information@itm.com www. -
Page 68: Gpr/Gps Mechanical Installation
Section B.2 and B.5.2. The cable can be lengthened if good connectors are used. WARNING Incorrect wiring can damage the monitor and/or sensor and void the warranty. Thermalert GP Series Operator’s Manual 1.800.561.8187 information@itm.com www. .com... -
Page 69: Gpm Mechanical Installation
Section B.2. This cable cannot be lengthened, but it can be shortened. WARNING Incorrect wiring can damage the monitor and/or sensor and void the warranty. Thermalert GP Series Operator’s Manual 1.800.561.8187 information@itm.com www. .com... -
Page 70: Aiming The Sensing Head
1. Slightly loosen the mounting bracket’s nuts. 2. Point the sensor toward the target. 3. Move it around until the target’s temperature displays on the monitor. 4. Secure the mounting bracket. Thermalert GP Series Operator’s Manual 1.800.561.8187 information@itm.com www. .com... -
Page 71: Cleaning The Sensing Head Lens
If silicones (used in hand creams) get on the lens, gently wipe the surface with Hexane. Allow to air dry. WARNING Do not use ammonia or cleaners with ammonia on the lens, this may result in permanent damage to the lens’ surface. Thermalert GP Series Operator’s Manual 1.800.561.8187 information@itm.com www. .com... - Page 72 Thermalert GP Series Operator’s Manual 1.800.561.8187 information@itm.com www. .com...
-
Page 73: Appendix Cemissivity
0.95 reading of the masked area. This value should then be used whenever that object or material is to be measured in the future. Thermalert GP Series Operator’s Manual 1.800.561.8187 information@itm.com www. -
Page 74: Typical Emissivity Values For Metals
0.05-0.1 Oxidized 0.4-0.8 Haynes Alloy 0.3-0.8 Inconel Oxidized 0.7-0.95 Sandblasted 0.3-0.6 Iron Oxidized 0.5-0.9 Unoxidized 0.05-0.2 Rusted 0.5-0.7 Iron, Cast Oxidized 0.6-0.95 Unoxidized Iron, Wrought Dull Lead Rough Molybdenum Oxidized 0.2-0.6 Thermalert GP Series Operator’s Manual 1.800.561.8187 information@itm.com www. .com... - Page 75 Material Emissivity Nickel Oxidized 0.2-0.5 Electrolytic 0.05-0.15 Platinum Black Steel Cold-Rolled 0.7-0.9 Ground Sheet 0.4-0.6 Polished Sheet Oxidized 0.7-0.9 Stainless 0.1-0.8 Titanium Oxidized 0.5-0.6 Thermalert GP Series Operator’s Manual 1.800.561.8187 information@itm.com www. .com...
-
Page 76: Typical Emissivity Values For Non-Metals
Gravel 0.95 Gypsum 0.8-0.95 0.98 Limestone 0.98 Paint (non-al.) 0.9-0.95 Paper (any color) 0.95 Plastic (opaque, over 20 mils) 0.95 Rubber 0.95 Sand Snow Soil 0.9-0.98 Water 0.93 Wood, Natural 0.9-0.95 Thermalert GP Series Operator’s Manual 1.800.561.8187 information@itm.com www. .com... -
Page 77: Mounting Bracket Accessory
2. Insert the Tab on the side of each fixing clamp (one per side) into the hole on the side of the monitor housing and hold them. (You might need to loosen the fixing clamp screws first.) Thermalert GP Series Operator’s Manual 1.800.561.8187 information@itm.com www. - Page 78 5. Use 3 appropriately sized screws or bolts to fasten the bracket onto your work surface. This completes the monitor bracket accessory installation. Thermalert GP Series Operator’s Manual 1.800.561.8187 information@itm.com www. .com...
-
Page 79: Cutout Template And Cosmetic Frame
6 4 m ( 2 1 / 2 i n ) 1 1 0 ( 4 1 1 / 3 2 i (inches) Figure E-1: 1/8 DIN Cutout Template and Cosmetic Frame Thermalert GP Series Operator’s Manual 1.800.561.8187 information@itm.com www. .com... - Page 80 Thermalert GP Series Operator’s Manual 1.800.561.8187 information@itm.com www. .com...
-
Page 81: Traceability Of Instrument Calibration
Certified RTD Standard Instrumentation & NIST Instrumentation Calibrated Radiation Transfer Standard Instrument Calibration Source Measured Calibration Source (Blackbody) Source (Blackbody) Emissivity < 1 Emissivity Emissivity Calibrated Product Figure F-1: NIST Traceability Thermalert GP Series Operator’s Manual 1.800.561.8187 information@itm.com www. .com... - Page 82 Thermalert GP Series Operator’s Manual 1.800.561.8187 information@itm.com www. .com...
-
Page 83: Appendix Gce Conformity For European Community
APPENDIX G CE CONFORMITY FOR THE EUROPEAN COMMUNITY This instrument conforms to the following standards: • EN50081-1 Emission Standard • EN50082-1 Immunity Standard Thermalert GP Series Operator’s Manual 1.800.561.8187 information@itm.com www. .com... - Page 84 Thermalert GP Series Operator’s Manual 1.800.561.8187 information@itm.com www. .com...
Need help?
Do you have a question about the Thermalert GP series and is the answer not in the manual?
Questions and answers