Table of Contents
Advertisement
INSTALLATION AND OPERATION MANUAL
MANUAL DE INSTALACIÓN Y FUNCIONAMIENTO
INSTALLATIONS- UND BETRIEBSHANDBUCH
MANUEL D'INSTALLATION ET DE
FUNCTIONNEMENT
MANUALE D'INSTALLAZIONE E D'USO
Do not perform installation work, without referring to our installation manual.
No realice la instalación de este equipo, sin antes consultar este manual de instalación.
Bei der Installation unbedingt die Hinweise in der Installationsanleitung beachten.
Consulter notre manuel avant de réaliser une quelconque installation.
Realizzare l'installazione, seguendo quanto indicato in questo manuale.
Nao inicie os trabalhos de montagem, sem consultar o nosso manual de montagem.
Udfor ikke installationsarbejder uden forst at donsultere vores vejledning.
Voer geen enkele handeling uit om de apparatuur alvorens deze hadleiding te hebben
doorgelezen.
Utför inte nagra installationsarbeten utan att först läsa var installationsmanual
Ìçí Þóåôå óôçí åãêáôÜóôáóç, ÷ùñßò ðñéí íá Ý÷åôå óõìâïõëåõèåß áõôo ôï åã÷åéñßäéï åãêáôÜóôáóçò
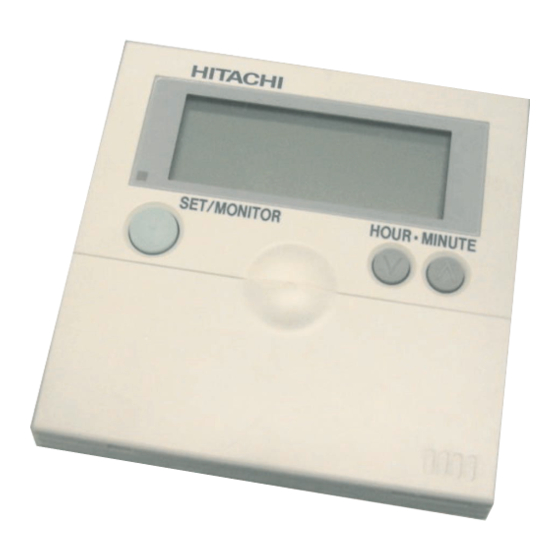
PSC-5T
CONTROL TIMER (7-DAY TIMER)
MANUAL DE INSTALAÇÄO E DE
FUNCIONAMENTO
BRUGER- OG MONTERINGSVEJLEDNING
INSTALLATIE- EN BEDIENINGSHANDLEIDING
HANDBOK FÖR INSTALLATION OCH ANVÄNDING
ÅÃ×ÅÉÑÉÄÉÏÅÃÊÁÔÁÓÔÁÓÇÓÊÁÉËÅÉÔÏÕÑÃÉÁÓ
Advertisement
Table of Contents

Summary of Contents for Hitachi PSC-5T
- Page 1 PSC-5T CONTROL TIMER (7-DAY TIMER) INSTALLATION AND OPERATION MANUAL MANUAL DE INSTALAÇÄO E DE MANUAL DE INSTALACIÓN Y FUNCIONAMIENTO FUNCIONAMENTO INSTALLATIONS- UND BETRIEBSHANDBUCH BRUGER- OG MONTERINGSVEJLEDNING MANUEL D’INSTALLATION ET DE INSTALLATIE- EN BEDIENINGSHANDLEIDING FUNCTIONNEMENT HANDBOK FÖR INSTALLATION OCH ANVÄNDING ÅÃ×ÅÉÑÉÄÉÏÅÃÊÁÔÁÓÔÁÓÇÓÊÁÉËÅÉÔÏÕÑÃÉÁÓ...
- Page 3 DANGER – Immediate hazard which WILL result in severe injury or death. PELIGRO – Riesgos inmediatos que PRODUCIRÁN lesiones personales graves e incluso la muerte. GEFAHR – Unmittelbare Gefahrenquellen, die zu schweren Verletzungen oder zum Tod führen. DANGER – Dangers instantanés de blessures corporelles sévères ou de mort. PERICOLO –...
-
Page 5: Safety Summary
If poured, it will cause a serious electrical shock. WARNING: DO NOT perform installation work and electrical wiring connection by yourself. Contact your distributor or dealer of HITACHI and ask them for installation work and electrical wiring by service person. CAUTION: - DO NOT install the indoor unit, outdoor unit, Timer and cable at such places as;... -
Page 6: Installation Work
INSTALLATION WORK 2.3. INSTALLATION SPACE In case of installing the Timers in vertical line, keep a distance more than 50mm between the Timers vertically. If the distance is insufficient, the front cover of the Timer can not open wide enough. More than 50mm 2.4. - Page 7 INSTALLATION WORK Lead the cable through the groove. Twist Pair Cable Attach the stopper to the Cable cable at the Band (Field- inside of the Supplied) draw-out hole. Accessory Cable Band (Field-Supplied) Cable NOTE: In case of connecting the accessory cable to the connector, remove the protection case. Connector Terminal Board...
- Page 8 INSTALLATION WORK When Using Switch Box Attach the holding bracket onto the Prepare a field-supplied JIS Box switch box. (JIS C 8336-1988). The following 5 types are available. 1. Switch Box for 1 Controller Fix the holding bracket (Without Cover) with the “↑...
-
Page 9: Electrical Wiring
(Max. 100m) Field-Supplied 3. In case of using Timer with PSC-5S (Central Station) Up to 8 units of central Station (PSC-5S) and Timer (PSC-5T) can be connected to the H-LINK system One Timer control one Central Station and plural PSC-5T... -
Page 10: Setting Of Dip Switch
SETTING OF DIP SWITCH SETTING OF DIP SWITCH Set the two dip switches on the PCB as follows. (The factory-settings for dip switches of DSW1 and DSW2 are all OFF.) Dip Switch Setting Contents DSW Setting Pin No. Remarks of Setting Setting is required only when the For Address central station (PSC-5S) is used... -
Page 11: Switch Names And Functions
“•” mark is turned on. Depressing again it is turned off and the selected day is cancelled Change Switch of SELECT Setting Model: PSC-5T By depressing the “∆ SELECT ∇” switch the 1, Order No:60299957 2 or 3 of ON TIME and OFF TIME is selected. -
Page 12: Operation Procedure
OPERATION PROCEDURE OPERATION PROCEDURE SETTING PRESENT DAY AND PRESENT TIME (<Example> present Day: Friday, Present Time: 5:15 PM). During the setting mode, the setting of the present time is not available when depressing the “PRESENT” switch more than 3 seconds. ATTENTION: 1. - Page 13 OPERATION PROCEDURE CHANGING WEEKLY SCHEDULE PATTERN (A OR B) There are 2 (two) patterns (A or B) set for the weekly schedule. Each pattern can be set with 3 (three) times ON/OFF settings for each weekly day. <Function> To select the pattern for setting and operating the schedule. The schedule of A or B pattern can be set for each week and changed for a season.
- Page 14 OPERATION PROCEDURE 3. Select the weekly day to set ON/OFF control by depressing the “DAY” switch. By depressing the “DAY” switch, the flickering “ ” mark moves in order of “Sun → Mon → ... → Sat”. Depressing the “DAY” switch after “Sat”, all the “...
- Page 15 OPERATION PROCEDURE SETTING RUNNING DAY <Function> To set the day for actual operation of the running schedule set before. (Though the ON time and OFF time are set, the schedule operation is not available unless the running day is set.) <Example>...
- Page 16 Timer. Check to ensure that the “Installation & Operation Manual of Central wiring connection and the setting of dip Station” for details. switches are correct. In the case that the RUN indicator is still flickered after checking, contact your distributor or dealer of HITACHI.

Need help?
Do you have a question about the PSC-5T and is the answer not in the manual?
Questions and answers