Table of Contents
Advertisement
Advertisement
Table of Contents

Related Manuals for dji Goggles


Summary of Contents for dji Goggles
- Page 1 DJI GOGGLES V1.0 User Guide 2017.05...
-
Page 2: Using This Manual
User Manual for more details. If you have any questions or problems during the installation, maintenance or use of this product, please contact DJI or a DJI authorized dealer. Video Tutorials Please watch the tutorial videos in the link below, which demonstrate how to use the DJI Goggles safely: http://www.dji.com/dji-goggles/info#video... -
Page 3: Table Of Contents
Usage Operating Control Connection Main Screen Controlling the Aircraft Video Play Charging the Goggles Upgrading Firmware DJI Assistant 2 DJI GO 4 App Cleaning and Maintenance Cleaning the Goggles Maintenance of Lenses Specifications © 2017 DJI All Rights Reserved. -
Page 4: Product Profile
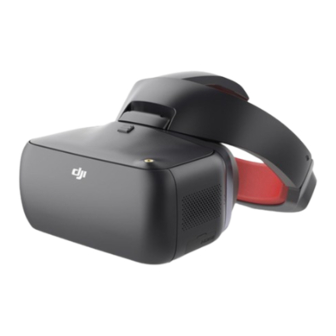
DJI Goggles are equipped with high-performance displays and an ultra-low latency video downlink for use with DJI aircraft, giving you a real-time aerial FPV (First Person View) experience. Goggles can also be used to play HD videos, bringing you an immersive high-definition viewing experience. -
Page 5: Installation And Wearing
Installation and Wearing 1. Insert the Headband into the slot above the Goggles body until you hear a click. Now check that it has been securely fastened. Click Press the Headband Buckle and move it in the opposite direction to release the Headband. -
Page 6: Usage
Usage Operating Control [1] Power Button Press the power button once, then press it again and hold to turn the Goggles on/off. Battery level indicators will display the current battery level. Battery Level High [2] Battery Level Indicators When the battery is powered off, press the power button once to light up the battery level indicators to display the current battery level. -
Page 7: Connection
, press the link button with an appropriate tool to start linking. [8] Linking Status Indicator Indicates the linking status of the Goggles and the aircraft. The indicator will be solid red while linking and will go solid green when linked. Connection Goggles support a wide range of DJI aircraft and different uses. - Page 8 2. Put on the Goggles and power on. 3. Press the link button on Goggles or use the touch panel to enter “Tools > Settings > Linking Settings”, select “Quick Linking” and confirm. The Goggles linking status indicator will go solid red on standby for linking.
- Page 9 Coach Mode is suitable for dual operator aircraft control. In this mode, the pilot using the remote controller can focus on flight, while the Goggles operator with a slave remote controller can view the environment in real-time FPV for more intuitive control.
- Page 10 Multiuser Mode is suitable for dual (or more) aircraft operator control. In this mode, the Goggles operators with a slave remote controller can view the environment in real-time FPV for more intuitive control. Please note that only the Goggles will display live view and that the primary Goggles only support head tracking.
-
Page 11: Main Screen
Modes, and Live view. not supported. * For the Inspire 2, if the Goggles are connected with the remote controller via the USB cable, only live view and somatic control of the focus is supported. ** Please note that the Phantom 4 Pro+/Advanced+ remote controller must have the latest firmware update. - Page 12 1080p60. If you change the video recording mode of the aircraft, the live view of Goggles will preferentially synchronize with the matching format (1080p30 HD or 720p60 smooth mode). Otherwise, it will adjust Live View Mode to 720p30.
-
Page 13: Controlling The Aircraft
1. TapFly a) Use the touch panel to enter “Intelligent Flight Mode > TapFly”. b) Move your head to control the cursor in the Goggles and then tap the touch panel to confirm the target direction and wait for the icon to appear. -
Page 14: Video Play
When the forward speed of the aircraft is more than 3 m/s, you can select to enter a fixed wing cruise option. Press the function button or tap the touch panel on the Goggles to enter Fixed Wing Mode. -
Page 15: Charging The Goggles
DJI Goggles User Manual Local Storage Remove the Micro SD card from the aircraft and insert it into the Micro SD Card slot on the Goggles and then select “Local Storage”. Aircraft Storage Select “Aircraft Storage” to preview images stored on the aircraft. When you are browsing photos/ videos, you can swipe up/down to download or delete them. -
Page 16: Upgrading Firmware
5. DJI Assistant 2 will download and upgrade the firmware automatically. 6. Restart the Goggles after the firmware upgrade is complete. Use DJI Assistant 2 to upgrade the aircraft and remote controller of the Mavic Pro and the Goggles simultaneously (only supports connection topology for Standard Mode). -
Page 17: Maintenance Of Lenses
Run water over the facial pad, then wipe it with a soft, dry cloth until it is completely dry. Align the protruding part of the facial pad with the holes on the Goggles body, then press them together so they are securely attached. - Page 18 This content is subject to change. Download the latest version from www.dji.com/dji-goggles If you have any questions about this document, please contact DJI by sending an email to DocSupport@dji.com. DJI is a trademark of DJI. Copyright © 2017 DJI All Rights Reserved.
Need help?
Do you have a question about the Goggles and is the answer not in the manual?
Questions and answers