Webb WEER36 Operators Manual & Parts Lists
Electric lawnmower
Hide thumbs
Also See for WEER36:
- Original instructions manual (36 pages) ,
- Original instructions manual (29 pages)
Table of Contents

Related Manuals for Webb WEER36


Summary of Contents for Webb WEER36
- Page 1 1600W Electric 36cm Lawnmower WEER36 1938123001 1800W Electric 40cm Lawnmower WEER40 1938124001 Operator’s Manual & Parts List Please read & understand this manual, paying particular attention to the safety instructions, before use. 01 Nov 2016...
-
Page 3: Specification
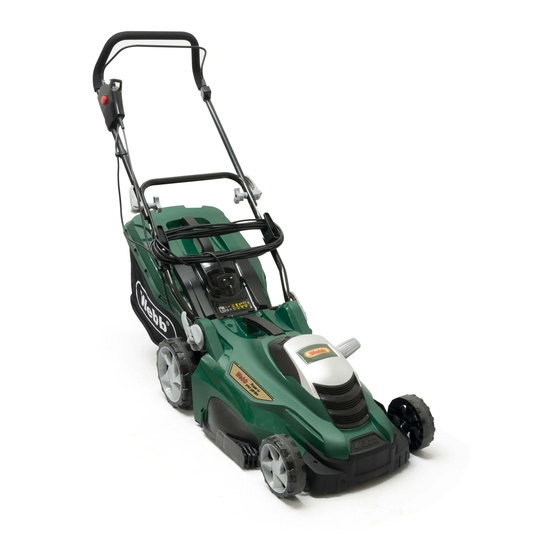
SAFETY INSTRUCTIONS ASSEMBLY OPERATION MAINTENANCE STORAGE TROUBLE SHOOTING PARTS DIAGRAM & LIST WARRANTY DECLARATION OF CONFORMITY SPECIFICATION Model WEER36 WEER40 Product No. 1938123001 1938124001 Motor – Rated Power 1600W 1800W Motor – Rated Voltage 230-240V ~50Hz 230-240V ~50Hz No Load Speed... - Page 4 INSTRUCTION MANUAL COMPONENTS Handle Rear Wheel OPC Lever Front Wheel Cable Clips Electric Cable Retainer Quick Release Handle Safety Button Grassbox Full Indicator Single Height Adjuster Grassbox Lower Handle Quick Release Carefully remove the machine from its packaging and check that you have all the components. If parts are missing or damaged, please contact us: Telephone: 01793 333212 (Mon to Fri 8.00am to 5.30pm excl.
-
Page 5: Safety Instructions
SAFETY INSTRUCTIONS - SAVE THESE INSTRUCTIONS FOR FUTURE USE WARNING Read this instruction manual carefully before operating this lawn mower. Make sure that you are familiar with the controls and properly operate the machine. Following these instructions can reduce the risk of fire, electric shock and personal injury. IF NOT USED PROPERLY THIS LAWN MOWER CAN BE DANGEROUS! This lawn mower can cause serious injury to the operator and others, the warning and safety instructions must be followed to ensure reasonable safety and efficiency in using this lawn mower. - Page 6 INSTRUCTION MANUAL SYMBOLS Beware of flying objects. Keep all bystanders, Read the instruction handbook especially children & pets, at least 15m away before operating this machine. from the operating area. Class II, double insulation Do not expose to rain or damp condition Keep hands and feet clear of the The cutting blade will continue to rotate after cutting deck when the machine is...
-
Page 7: Electrical Safety
PREPARATION § Always wear appropriate footwear, such as work boots, and trousers when operating the mower. Do not operate the equipment when barefoot or wearing open sandals. Always wear safety goggles or safety glasses with side shields when operating the mower. §... - Page 8 INSTRUCTION MANUAL § Make sure the power cable is positioned so that it cannot be damaged by the cutting means and will not be stepped on, tripped over or otherwise subjected to damage or stress. § Never pick up or carry the product by the electric cable. §...
-
Page 9: General Mowing Tips
GENERAL MOWING TIPS When cutting long grass, reduce walking speed to allow for more effective cutting and a proper § discharge of the clippings. It is recommended that you cut longer grass in stages. Start at a higher cutting height and go over the same area a second time with a lower cutting height. Do not cut wet grass;... -
Page 10: Assembly / Pre-Operation
INSTRUCTION MANUAL ASSEMBLY ASSEMBLY/PRE-OPERATION Read these instructions in its entirety before you attempt to assemble and operate your new lawnmower. REMOVE LAWN MOWER FROM CARTON Roll the lawn mower out of the carton and check thoroughly for additional loose parts. Please ensure that you have all the below necessary parts, before commencing with the assembly. -
Page 11: Handle Assembly
HANDLE ASSEMBLY Rotate the lower handle up away from the lawnmower deck, ensuring the electrical cables are § not trapped or crimped. (See fig. 2) Ensure the Electric Cables run down the outside of the handle assembly. § With the handles in line with the Lower Quick Release Handle, secure, by folding the Quick §... - Page 12 INSTRUCTION MANUAL cables should not be in contact with any moving component on the machine. GRASSBOX COLLECTOR Ensure the lower mesh collector is fully clear open and away from the collector top. § Lift the Grass Flap. § Secure the Grassbox to the machine, ensuring the hooks are firmly housed onto the machine §...
-
Page 13: Operation
OPERATION STARTING THE MACHINE Ensure the machine is within the working grassed area. Feed the cable through the cable restraint. (See fig. 8) Plug the machine into the electric supply, ensuring it meets the recommended requirements. Press the Safety Button (A) and pull the OPC Lever (B) towards the main handle. The mower will start and blade immediately rotate. -
Page 14: Adjust The Cutting Height
INSTRUCTION MANUAL ADJUST THE CUTTING HEIGHT Raise the wheels for a low cut and lower the wheels for a high cut, adjust the cutting height to suit your requirements. Medium position is best for most lawns. The single height adjustment lever is located on the left of the machine. Push the lever towards the wheel and rotate up or down the five settings, depending on your needs. -
Page 15: Mowing Tips
MOWING TIPS Under certain conditions, such as very tall grass, it may be necessary to raise the height of cut to reduce pushing effort, prevent overloading of the motor and leaving clumps of grass clippings. It may also be necessary to reduce ground speed and/or push the lawn mower over the area a second time. -
Page 16: Blade Maintenance
INSTRUCTION MANUAL MAINTENANCE IMPORTANT - Regular, careful maintenance is essential for keeping the safety level and original performance of the machine unchanged over time. 1. Keep all nuts, bolts and screws tight to be sure the equipment is in safe working condition. Regular maintenance is essential for safety and performance. - Page 17 REMOVE AND REPLACE THE BLADE. Block the rotation of the blade, using a good sixed piece of wood, which the blade cannot cut. Hold the blade using gardening gloves (not provided) and spanner wrench (not provided) rotating the spanner anti-clockwise. Remove the bolt, washer and blade.
- Page 18 INSTRUCTION MANUAL GRASSBOX COLLECTOR CLEANING Pores in the grassbox can become filled with dirt and dust, during use and will collect less grass. To prevent this, regularly hose the catcher off with water and let dry before using. Keep the top of the motor housing vents clear and clean of grass clippings & dust. This will assist motor air flow and extend the machine life.
-
Page 19: Troubleshooting
TROUBLE SHOOTING ISSUE CORRECTION 1. Check the mains connection cable, plug fuse and circuit breaker. 2. Start on short grass or on an area which has already been Motor does not run mown. 3. Unplug the mower. Clean the discharge chute/housing, the blade must rotate freely. - Page 20 PARTS DIAGRAM – WEER36 (1938123001)
- Page 21 PARTS LIST – WEER36 (1938123001) Item Item Part No. Description Part No. Description WE125-4080063 Switch Box Assembly WE125-103050259 Rear Axle WE125-103080036 Top Handle WE124-301070916 Grass Flap WE125-301062831 Switch Box Small Cover WE125-301070924 Rear Wheel WE125-103990876 Operator Handle WE125-104010258 Washer WE125-301070717...
- Page 22 PARTS DIAGRAM – WEER40 (1938124001)
- Page 23 PARTS LIST – WEER40 (1938124001) Item Item Part No. Description Part No. Description WE126-4080061 Switch Box Assembly WE126-301070903 Grass Flap WE125-103080036 Upper Handle WE126-301062836 Rear Wheel WE125-301062831 Switch Box Small Cover WE125-104010258 Washer WE125-103990876 Operator Handle WE125-104050024 Split Washer WE125-301070717 Left Permanent Seat WE126-301062835 Rear Wheel Trim...
- Page 24 INSTRUCTION MANUAL NOTES...
- Page 25 NOTES...
-
Page 26: Ec Declaration Of Conformity
EC DECLARATION OF CONFORMITY We Handy Distribution Ltd - SN3 5HY (Importer) declare that the product: Designation: 36cm 1600W Electric Rotary Lawnmower Model(s): WEER36 Product Number: 1938123001 Type/Serial No. As per rating label on machine Complies with the following directives:... - Page 27 EC DECLARATION OF CONFORMITY We Handy Distribution Ltd - SN3 5HY (Importer) declare that the product: Designation: 40cm 1800W Electric Rotary Lawnmower Model(s): WEER40 Product Number: 1938124001 Type/Serial No. As per rating label on machine Complies with the following directives: Machinery Directive 2006/42/EC The conformity assessment procedure followed was in accordance with EN 60335-1 :2012+A11 :2014, EN 60335-2-77 :2010, EN 62233 :2008...
- Page 28 INSTRUCTION MANUAL NOTES...
- Page 29 NOTES...
- Page 30 INSTRUCTION MANUAL This Service Book is provided with your Webb, to help you look after your purchase to our recommendations and enable you to take advantage of the 2 year conditional manufacturer domestic warranty*. * Commercial/Professional & Hire users receive a 90 day warranty Present this service book to your authorised Webb repair dealer, whenever a service or a warranty appraisal is required.
- Page 31 SERVICE BOOK 1. Users Statement of Warranty Each new machine is warranted against defective material or assembly of material under normal usage. The warranty applies to the original purchaser, is not transferable and covers faulty parts and the labour involved in replacing and repairing those parts, which are of original manufacture.
- Page 32 It is the owner’s responsibility to ensure that their Webb machine is maintained at specifi c intervals. Any approved Webb service dealer can undertake a service, which are specialised in our products and will be aware of your particular machine and any technical updates which will save valuable time &...
- Page 33 SERVICE BOOK Your servicing Webb approved dealer will stamp & date the below relevant sections, when the correct service actions have been completed. PLEASE ENSURE THE SERVICE BOOK IS AVAILABLE FOR THE DEALER, DURING SERVICE WORK. 1st Service This must be stamped by an approved service dealer to qualify for a free second year warranty.
-
Page 34: Service Record
Service Record INSTRUCTION MANUAL 48 Months 60 Months Date Date 72 Months 84 Months Date Date 96 Months 108 Months Date Date 120 Months 132 Months Date Date... - Page 35 & services we provide, including information that we believe is relevant to your and/or your machine. We value your trust by giving us this information about yourself and we are committed to protecting your privacy. From time to time Webb, its associated companies, authorised dealers or third parties working on our behalf may wish to contact you regarding our products, services, offers, technical improvements or just opinions, which may be used for marketing, research or analysis purposes.
- Page 36 Webb Lawnmowers Murdock Road Dorcan Swindon Wiltshire SN3 5HY...
Need help?
Do you have a question about the WEER36 and is the answer not in the manual?
Questions and answers
The ‘catch’ won’t slot in on both sides re the handle
The catch may not slot in on both sides of the handle for the Webb WEER36 if the quick release handle is either too tight or too loose. To fix this:
- If it's too tight to lift and secure, rotate the quick release handle anti-clockwise to loosen.
- If it's too loose to secure, rotate it clockwise to tighten.
This adjustment ensures proper alignment and secure fitment.
This answer is automatically generated
Do you have a different height bracket for the 36cm 1600w mower, I find 1 is a bit to low and 2 is a bit to high ideally I would like the lowest setting to be at 1 1/2
We have web 1938185001 petrol lawn mower with electric start. Please can you tell me the battery code as I have lost mine. If you sell spare ones please tell me the price incl delivery to ex173sz Thanks