
Related Manuals for MBM 408A


Summary of Contents for MBM 408A
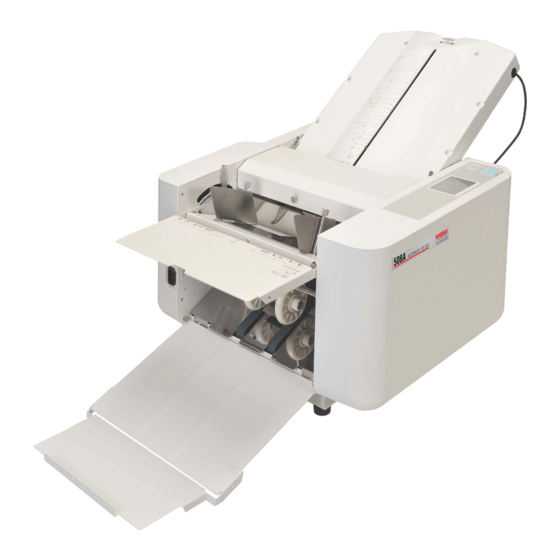
- Page 1 OPERATION MANUAL MBM 408A AUTOMATIC FOLDER 1-800-223-2508 www.mbmcorp.com Rev. 1.01...
- Page 2 https://www.supplychimp.com...
-
Page 3: Safety Instructions
https://www.supplychimp.com Safety Instructions Definition of Symbols and Notes In this manual following names and signs stand for possible dangers. Danger This Symbol stands for immediate danger threatening the life and health of persons. Disregarding these instructions may cause severe damage to health and even serious injuries. Caution This symbol stands for an endangering situation that may occur. - Page 4 https://www.supplychimp.com Caution Do not let hairs, a necktie, or necklace hang above the drive of the machine. Doing so may cause an injury. Do not put the machine on an unstable place such as a shaky stand and a slant floor. Doing so may cause the machine to drop or fall down, causing an injury.
- Page 5 https://www.supplychimp.com Introduction Please read this Operation Manual carefully before using this machine. Store the Operation Manual in a safe place so that it can be easily retrieved and referred to whenever required. Since the specifications of this product are subject to change for the purpose of further improvement, the descriptions in the Operation Manual may be different from unit to unit even for the same model.
-
Page 6: Table Of Contents
https://www.supplychimp.com Content 1. Precautions on Installation 1-1 Installation location ....................8 1-2 Precautions in moving in ..................8 1-3 Check the content and quantity of accessories ..........9 2. Part Name 2-1 Appearance ....................... 10 2.2 Control panel ..................... 11 3. - Page 7 https://www.supplychimp.com 5-7 Memorization/deletion of fold position of non-standard fold and non-standard-size paper 5-7-1 Memorization of fold position ..............28 5-7-2 Calling up fold pattern memory ..............29 5-7-3 Deletion of entire fold pattern memory ............. 30 5-8 Counter setting 5-8-1 Addition mode ..................
-
Page 8: Precautions On Installation
https://www.supplychimp.com Precautions on Installation 1-1 : Installation location Install this product where the following conditions can be fulfilled. • Do not install it in a place exposed to direct sunlight. • Avoid a location near a window. • Do not install it in a dusty place or a place of high humidity. •... -
Page 9: Check The Content And Quantity Of Accessories
https://www.supplychimp.com 1-3 : Check the content and quantity of accessories Check accessories immediately upon unpacking. Should there be anything short, contact your distributor. Also, fill out the warranty documents. Accessories Illustration Folding Table 1 Folding Table 2 Power cable Auxiliary paper guide One(1) each (right and left) Operation Manual... -
Page 10: Part Name
https://www.supplychimp.com 2. Part Name 2-1 : Appearance ⑤ ① ② ⑥ ③ ⑦ ⑧ ④ ⑨ ⑮ ⑩ ⑭ ⑪ ⑯ ⑰ ⑫ ⑬ Name Function Name Function Auxiliary table For supporting larger paper Paper feed table For loading paper Inlet For connecting the power Paper guide... -
Page 11: Control Panel
https://www.supplychimp.com 2-2 : Control panel Number Name Function Color LCD Touch panel To enter operation command and display “TEST” key To perform test folding (two sheet without count) “ START/STOP ” key To start and stop the machine 3. Matters That Require Particular Attention 3-1 : Definition of terms 3-1-1 : Explanation of mark !... -
Page 12: Characteristics And Intended Purpose Of Use
https://www.supplychimp.com 3-2 : Characteristics and intended purpose of use ▪ Easy-to-read LCD color touch panel. ▪ High-speed paper folding. ▪ Automatic paper size detection, fold position setting, paper feed table adjustment (up-down), and paper ejection roller movement. ▪ For non-standard-paper or non-standard-fold, simply input paper length and fold type to automatically calculate fold position –... -
Page 13: Preparation
https://www.supplychimp.com 4. Preparation 1. Install fold table 1 and 2 at the machine. 2 .Insert the plug into the connector. - Page 14 https://www.supplychimp.com Pull out and extend the paper ejection table. Then, lift up and set flat the auxiliary table. Insert the power cable into the outlet. (The shape of plug may differ from the one shown in the illustration.) Caution! Be sure to unwind folded power cable before use.
-
Page 15: How To Use
https://www.supplychimp.com 5. How to Use 5-1 : Standard Folding of Standard-size Paper [1] Raise the paper feed table lever. [2] Set the paper guide for the appropriate paper size. [3] Neatly stack the paper on the feed table with the printed side facing up. - Page 16 https://www.supplychimp.com [7] Test folding Press the “TEST” key, and one sheet will be folded. (The counter display will remain to display [0]. Check the folding result with the folded paper. Hint! <Causes of folding misalignment> ▪ Stains on the roller ▪...
-
Page 17: To Manually Input Paper Length
https://www.supplychimp.com 5-2 : To manually input paper length [1] Measure the length of paper in the direction of feeding paper. [2] Press the “Non-standard Fold” key [3] Press the “Input Paper Length” key. [4] Input the length of paper using numerical keys and press the “Enter”... - Page 18 https://www.supplychimp.com [5] Select the desired fold type from among the six fold type keys. [6] Press the “TEST” key to perform test folding. If test folding is satisfactory, proceed to step [7]. If it is not satisfactory, adjust folding misalignment. = >...
-
Page 19: Non-Standard Folding
https://www.supplychimp.com 5-3 : Non-standard Fold ▪ Automatic settings cannot be used for non-standard fold. Individual setting of paper size and specifications is required. ▪ It can be set for both standard-size paper and non-standard paper based on the following procedure. [1] Using the standard-size or non-standard-size paper you want to fold, create a sample by folding the paper manually. - Page 20 https://www.supplychimp.com [5] Input the length of “a” using numerical keys and press the “Enter” key. [6] Input the length of “b” using numerical keys and press the “Enter” button. [7] Press the “TEST” key to perform test folding. If test folding is satisfactory, proceed to step [8]. If it is not satisfactory, adjust folding misalignment.
-
Page 21: Cross Folding
https://www.supplychimp.com 5-4 : Cross Folding • Cross-folding is to further perform double parallel fold or letter fold on a sheet of paper folded already by single fold. • This is good for folding A3 size stock which is already folded by double parallel fold but still will not fit into a standard size envelope. -
Page 22: Adjustment
https://www.supplychimp.com 5-5 : Adjustment 5-5-1 : Slant adjustment If the folding position is slanted because the paper is cut at a slant or for other reasons, it can be adjusted using the slant adjustment knob. Turn the slant adjustment knob to the right direction 1, if the lower side of the folded paper slants to the right. -
Page 23: Fine Adjustment Of Fold Position
https://www.supplychimp.com 5-5-2 : Fine adjustment of fold position If by test folds any folding misalignment is found after standard folding or non-standard folding is set, fine adjustment of the fold position should be made according to the following procedure. [1] In case of “a” Press the “+/-“... - Page 24 https://www.supplychimp.com Fine Adjustment for Table 1 Direction to turn the Fold type Plane (A) Table 1 fine adjustment knob Single Table 1 is not used folding Long Gate folding Short Long Letter folding Short Long Zigzag folding Short Long Double parallel folding Short...
-
Page 25: Fine Adjustment For Table 2
https://www.supplychimp.com Fine Adjustment for Table 2 Direction to turn the Table 2 fine adjustment Fold type Plane (B) knob Long Single folding Short Long Gate folding Short Long Letter folding Short Long Zigzag folding Short Long Double parallel folding Short Long Fold-out folding... -
Page 26: Memorization/Deletion Of Fold Position Of Standard-Size Paper
https://www.supplychimp.com 5-6 : Memorization/deletion of fold position of STANDARD-SIZE-PAPER In the case of standard folding of standard-size paper, after the fold position is finely adjusted, the fold position can be memorized. 5-6-1 : Memorization of finely-adjusted fold position Complete adjustment in advance so that desired folding is performed. [1] Press the “Gear”... -
Page 27: Deletion Of Individual Memory Of Fine Adjustment
https://www.supplychimp.com 5-6-2 : Individual deletion of individual memory of fine adjustment [1] Press the “Gear” key. [2] Press the “Fold Pos. Adj. Delete ” key. [3] Pressing the “Delete” key the finely-adjusted values will be deleted. -
Page 28: Memorization/Deletion Of Fold Position Of Non-Standard Fold And Non-Standard-Size Paper
https://www.supplychimp.com 5-7 : Memorization/deletion of fold position of NON-STANDARD-FOLD and NON-STANDARD-SIZED PAPER 5-7-1 : Memorization of fold position Complete in advance so that desired fold is performed. [1] Press the “Gear” key. [2] Press the “Fold Pattern Memory” key. [3] Press the memory number window you want to memorize, and the present data will be memorized in the user memory. -
Page 29: Calling Up Fold Pattern Memory
https://www.supplychimp.com 5-7-2 : Calling up fold pattern memory [1] Press the “Memory Fold” key . [2] Using “▲” and “▼”keys, select the memorized fold pattern and press the “OK” key. Select desired memory number 01 thru 12 and press the window. -
Page 30: Deletion Of Entire Fold Pattern Memory
https://www.supplychimp.com 5-7-3 : Deletion of fold pattern memory [1] Press the “Gear” key. [2] Press the “Fold Pattern Memory” key. [3] Press the memory number window you want to memorize, and the present data will be memorized in the user memory. Using “▲”... -
Page 31: Counter Setting
https://www.supplychimp.com 5-8 : Counter setting 5-8-1 : Addition mode [1] Press the “Num Key” key [2] Press the “clear” key to clear the counter, and press the “Enter” key. [3] When the Addition mode is selected, count only will be displayed on the counter display. -
Page 32: Subtraction Mode
https://www.supplychimp.com 5-8-2 : Subtraction mode [1] Press the “Num Key” key [2] Using numerical keys, input the number of sheets you want to fold in the counter and press the “Enter” key. [3] While the Subtraction mode is activated, count and “SUB”... -
Page 33: Interval Mode
https://www.supplychimp.com 5-8-3 : Interval mode [1] Press the “Num Key” key [2] Press the “Interval” key on the counter input screen, and the interval setting screen will be displayed. [3] Press the “Set up sheets” key. Input desired sheets quantity and press Enter. By the same procedure, set up “Set Interval Second”... -
Page 34: Speed Adjustment
https://www.supplychimp.com 5-9 : Speed adjustment [1] Using “ – “ and “ + “ keys, set the speed (5 levels) [2] Keep pressing the “speed” area for three seconds, the machine enters SPECIAL mode. SP1: The machine operates in a silent manner. This mode is not suitable for sheets of thick paper. -
Page 35: Double Feed Detection Function
https://www.supplychimp.com 5-10 : Double feed detection function 5-10-1 : What is double feed detection? Machine detects when two or more sheets are fed through together and the double-fed paper will be ejected on the folding table 1 which is located inside of rear cover without being folded. ... -
Page 36: Use Of Double Feed Detection
https://www.supplychimp.com 5-10-3 : Use of double feed detection Notes: Make sure the double feed detection is activated. It responds to all the fold types except cross folding. [1] Perform test folding before starting actual operation. By the process of test fold, the machine memorizes paper thickness, print pattern, paper length. -
Page 37: Maintenance Service, Inspection, Expendables
https://www.supplychimp.com 6. Maintenance Service, Inspection, Expendables 6-1 : Important points for maintenance service and inspection 6-2 : Usual maintenance service Machine body ▪ If paper dust or dirt accumulates on the folding rollers, mechanical troubles may occur to the folding function. Therefore, place the machine cover over the machine when it is not in use. ▪... -
Page 38: Removal And Installation, And Cleaning Of Folder Roller
https://www.supplychimp.com 6-4 : Removal and installation, and cleaning of folder roller Two rollers can be removed and installed without using any tool. Thus, cleaning of the rollers and paper ejection photo sensor can be done easily. As the other two rollers cannot be removed, they should be cleaned while manually revolving them little by little . -
Page 39: Cleaning Of The Paper Feed, Double Feed Detection, Paper Ejection Photo Sensors
https://www.supplychimp.com 6-5 : Cleaning of the paper feed, double feed detection, paper ejection photo sensors [ Cleaning the paper ejection photo sensor ] Diagram showing that the folder roller is removed (Refer to the figure on page 46.) If only one sheet of paper is being fed, remove the paper dust on the part of the paper ejection photo sensor indicated by the arrow, using a soft cotton swab. -
Page 40: Removal And Installation Of Paper Separator, Paper Feed Rubber Roller, Brake Rubber
https://www.supplychimp.com 6-6 : Removal and installation of paper separator, paper feed rubber roller, brake rubber When replacing the paper feed rubber roller and paper separator, remove them in the following manner. Press paper feed roller shaft to the right and spring loaded shaft will be removed without tools. -
Page 41: Trouble Shooting And Correction
https://www.supplychimp.com 7. Trouble shooting and correction 7-1 : Error display 7-1-1 : Error display screen When an error occurs, location of trouble and error code will be shown in the display. Remove the cause of error first and then press “OK” key and the specific error display will be cleared. -
Page 42: List Of Error Codes
https://www.supplychimp.com 7-1-2 : List of Error Codes Error Symptom Countermeasures. Code The paper feed table lever is lowered. Raise the paper feed table lever. E-01 Feed Table is not being set to feed. E-02 There is no paper, or the paper is not activating Reset the paper or add some sheets of paper. -
Page 43: Troubleshooting
https://www.supplychimp.com 7-2 : Troubleshooting Problem Possible Cause Countermeasure Reference Folding Fine adjustment is not made. Correct the misalignment using 5.5 Adjustment misalignment the fine adjustment knob. occurs. The processing speed was changed Do not change the speed during during operation. specified folding operation. - Page 44 https://www.supplychimp.com Problem Possible Cause Countermeasure Reference The power is not The power cable plug is not Insert the power cable plug applied even when connected to the outlet. firmly into the outlet. the power switch is 2.1 Appearance The circuit breaker is actuated. Remove the cause (such as turned on.
-
Page 45: Relocation Or Disposal
https://www.supplychimp.com 8. Relocation or Disposal 8-1 : Relocation 8-1-1 : Removal of the machine from its present location ▪ Turn off the power switch. ▪ Remove the power plug from the wall outlet. ▪ Lower the auxiliary table. ▪ Raise the paper ejection table and put it on the paper feed table, and hang it on the pin. 8-1-2 : Transport ▪... -
Page 46: Specifications
9. Specifications Model: 408A 3.5” x 5.0” to 11” x 17” Paper Size 3.5” X 5.0” size is for SINGLE fold only. 5” x 7.2” size cannot be folded into GATE. 46.5g/ m ~160g/ m (160g/ m depends on paper size and quality.) - Page 47 https://www.supplychimp.com MEMO...
- Page 48 MBM Corporation...
Need help?
Do you have a question about the 408A and is the answer not in the manual?
Questions and answers