Advertisement
Quick Links
Advertisement

Related Manuals for Omega OF694IX


Summary of Contents for Omega OF694IX
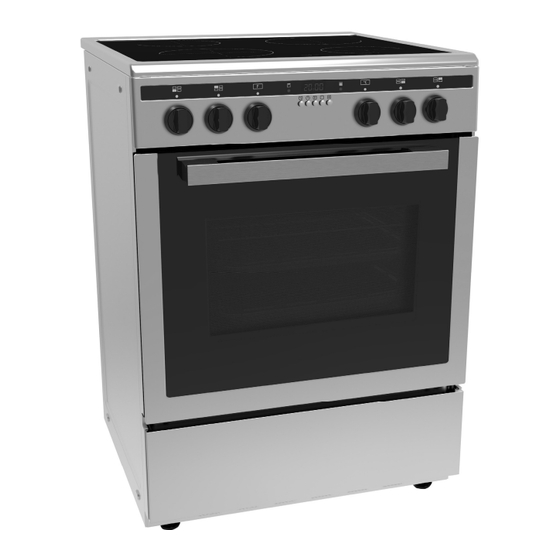
- Page 1 Freestanding Electric Oven and Induction Cooktop Instructions for installation and use OF694IX 1 ...
- Page 2 2 ...
- Page 3 Important Safety Warning You should find all the instructions you require to ensure a safe installation, use and maintenance. Always keep this owner manual close to hand since you may need to refer to it in the future. Young children should be supervised to ensure that they do play with the appliance.
- Page 4 The user must not replace the supply cable of this appliance. Always call an after- sales servicing centre authorised by the seller in the case of cable damage or replacement. This appliance must be used for the purpose for which it was expressly designed. Any other use is considered to be improper and consequently dangerous.
- Page 5 Installation The following instructions should be read by a qualified technician to ensure that the appliance is installed regulated and technically serviced correctly in compliance with current regulations. The hob should never be installed in proximity of a door access. People opening and closing the door could come into contact with pots or pans cooking on the hob.
- Page 6 The feet are packed inside the oven cavity. Fix by angling the cooker slightly and screwing into the 4 corners of the base panel. Adjust the cooker to the appropriate height, then fit the cooker into place. The cooker should be level and stable when installed, otherwise adjust the height of the appropriate foot.
- Page 7 Electrical connection WARNING -THIS APPLIANCE MUST BE EARTHED. Power supply voltage and frequency: 220-240V /380-415 3N, 50/60Hz. The electric cooker without a power supply cable. The cooker is designed to operate on an electricity supply which conforms to the electrical data shown on the Rating label. For New Zealand: If this cooking range is to be connected to a new or upgraded electrical installation, then it must be connected by a supply cord fitted with: - An appropriate rated plug that is compatible with the socket-outlet fitted to the...
- Page 8 PLEASE READ THE PRECAUTIONS BELOW BEFORE USING YOUR APPLIANCE. 1. Turn controls to the off position when you have finished cooking and when not in use. 2. Stand back when opening an oven door to allow any build-up of steam or heat to disperse.
- Page 9 23. In the event of a chip pan fire or any other pan fire TURN OFF THE COOKER APPLIANCE AT THE WALL SWITCH AND COVER THE PAN WITH A FIRE BLANKET, this will smother the flames and extinguish the fire. LEAVE THE PAN TO COOL FOR AT LEAST 60 MINUTES BEFORE MOVING IT.
- Page 10 Oven Functions Oven Lamp: Enables the user to observe the progress of cooking without opening the door. The Oven lamp will be activated for all cooking functions. Defrost: The rear fan will run blowing air over the food inside the oven. No heat is generated.
- Page 11 Oven Control The Thermostat Control knob can only be rotated clockwise from the OFF position. Set the appliance to Manual Mode, or set a timer function. Turn oven Function Control knob to select the cooking function required. Then turn oven temperature control clockwise to the required oven temperature setting.
- Page 12 Operating the oven in Manual Mode With the oven function and cooking temperature set, press the End of Cooking button Cooking Duration button together. This will start the oven running. Once the food has been cooked, turn all control knobs to off. ...
- Page 13 Automatic cooking Automatic cooking is when both the start and end cooking times are set. Note: This does not allow for a pre-heat time. Note: Take care that the delayed start will not affect the quality of the food inside the oven.
- Page 14 Induction Cooktop Note: The control knob decals are printed on the bezels at the base of each control knob. The cooktop inductive cooking zones are each controlled by a control knob on the front panel (either side of the oven control knobs).
- Page 15 Deep-frying safety requirements: Use a deep pan, large enough to completely cover the appropriate heating area. Never fill the pan more than one-third full of oil. Never leave oil unattended during the heating or cooking period. Never try to fry too much food at a time, especially frozen food.
- Page 16 Cleaning the appliance Before each cleaning disconnect the cooker from the electricity. To assure the long life of the appliance, it shall be thoroughly cleaned frequently. Wait until the oven has cooled before removing the wire shelves wash them separately in warm soapy water and dry thoroughly. Wash the interior of the oven with hot soapy water and wipe down with a damp cloth.
- Page 17 Troubleshooting If the oven does not operate: The oven may be off at your switched outlet. The timer may not be set to the manual function or have the timer set to function. If the interior lighting lamp does not light: ...
- Page 18 Oven Lamp Replacement Switch off and disconnect the power from the oven. Ensure that the internal parts have cooled down before touching them. Remove the lamp cover by turning it counter clockwise note it may be stiff remove the bulb by turning it counter clockwise. Insert the new bulb, which should be 300 C resistant (E14, AC220V-240V, 25W).
- Page 19 Voltage and Frequency of Power Supply: Refer to rating label HOTPLATE RATING 160mm induction x 2 (RR, LF) 1500W each 180mm induction x 2 (RF, LR) 2000W each OVEN RATING Top element 950W Bottom element 1100W Grilling element 2000W Rear turbo element 2000W Fan motor Lamp...
-
Page 20: Wiring Diagram
Wiring diagram 20 ...
Need help?
Do you have a question about the OF694IX and is the answer not in the manual?
Questions and answers