Beurer LB 88 Instructions For Use Manual
Hide thumbs
Also See for LB 88:
- Instructions for use manual (88 pages) ,
- User manual ,
- Instructions for use manual (86 pages)
Advertisement
Table of Contents
D Luftbefeuchter
Gebrauchsanweisung ............2 – 12
G Humidifier
Instructions for use ............. 13 – 23
F Humidificateur d´air
Mode d'emploi ..................... 24 – 34
E Humidificador
Instrucciones de uso ...........35 – 45
I Umidifficatore dell´aria
Istruzioni per l'uso ............... 46 – 55
Beurer GmbH
Tel.: +49 (0)731 / 39 89-144
www.beurer.com
Söflinger Str. 218
•
Fax: +49 (0)731 / 39 89-255
•
Mail: kd@beurer.de
•
LB 88
T Hava nemlendirici
Kullanım Kılavuzu ................56 – 65
r Увлажнитель воздуха
Инструкция по
применению ........................66 – 76
Q Nawilżacz powietrza
Instrukcja użytkowania .......77 – 87
89077 Ulm, Germany
•
Advertisement
Table of Contents

Related Manuals for Beurer LB 88


Summary of Contents for Beurer LB 88
- Page 1 LB 88 D Luftbefeuchter T Hava nemlendirici Gebrauchsanweisung ....2 – 12 Kullanım Kılavuzu ....56 – 65 G Humidifier r Увлажнитель воздуха Instructions for use ..... 13 – 23 Инструкция по применению ......66 – 76 F Humidificateur d´air Mode d’emploi ..... 24 – 34 Q Nawilżacz powietrza...
- Page 2 Please read these instructions for use carefully and keep them for later use, be sure to make them accessible to other users and observe the information they contain. With kind regards Your Beurer team Included in delivery • Base unit for air humidifier • Water tank for air humidifier •...
-
Page 3: Signs And Symbols
1. Signs and symbols The following symbols appear in the instructions for use and on the type plate: WARNING Warning notice indicating a risk of injury or damage to health. IMPORTANT Safety note indicating possible damage to the device /accessory or material damage, e.g. through escaping water. Note Note on important information. The device is double protected and corresponds to protection class 2. 2. Getting to know your instrument Humans spend a large proportion of their time indoors. For ideal ambient air, a humidity level of between 40% and 60% is recommended. This value is often not reached, particularly in winter, when cold, dry air enters living spaces that are being aired and is then warmed up. This dry ambient air draws in moisture, drying out mucous membranes and skin, but also furniture. Ambient air that is too dry has a number of negative effects: •... -
Page 4: Safety Notes
4. Safety notes Read these instructions for use carefully. Non-observance of the following information may result in personal injury or material damage. Store these instructions for use and make them accessible to other users. Make sure you include these instructions for use when handing over the device to third parties. WARNING Keep packaging material away from children! There is a choking hazard. Electric shock WARNING As with every electrical device, use this air humidifier carefully and cautiously, in order to avoid hazards due to electric shock. • Therefore, observe the following instructions for use: – O nly use this device with the voltage specified on the device – Never use the device if it or its accessories show visible signs of damage... - Page 5 Handling IMPORTANT The device must be switched off and disconnected from the mains every time after use and before cleaning. • The device is only intended for the purpose described in these instructions for use. The manufacturer is not liable for damage resulting from improper or careless use. • This device is not intended for use by people (including children) with restricted physical, sensory or mental skills or a lack of experience and/or a lack of knowledge, unless they are supervised by a person who has responsibility for their safety or they receive instructions from this person on how to use the device. • Children should be supervised around the device to ensure they do not play with it. • Ensure that the mains cable does not pose a trip hazard. • Do not insert any objects into openings on the device. • Do not place any objects on the device. • Do not expose the device to high temperatures.
-
Page 6: Unit Description
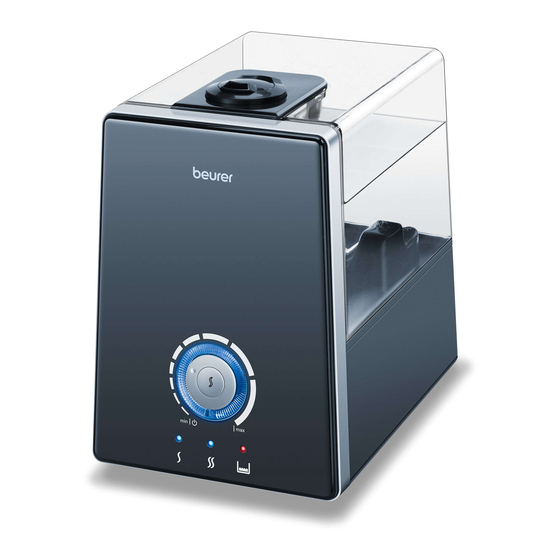
5. Unit description Control dial Illuminated operating loop for dis- playing the operation Button for activating the water evaporation LED display water evaporation level 1 LED display water evaporation level 2 (if 4+5, level 3 lights up) Water level indicator Recessed grip (when removing the mist outlet) Water tank Base unit for air humidifier 10. -
Page 7: Operation
IMPORTANT • Do not add any essential oils or fragrances to the water. If other additives are used, the plastic material and the ultrasound membrane may become discoloured and damaged. • U se fresh drinking water in the device. Positioning the device • Place the air humidifier on a firm, level and water-resistant surface. • Position the air humidifier in the vicinity of a heating pad to improve evaporation output, particularly in large rooms (do not exceed a max. temperature of 50 °C). Always ensure that the air inlet and air outlet remain clear and that the air flows freely. 7. Operation IMPORTANT Check the humidity of your ambient air regularly. Intensive continuous operation can cause the am- bient air to become excessively humid. The relative air humidity should not exceed 60%. Switching on the device • Insert the plug into the mains socket. - Page 8 • Only use a mild flushing agent or vinegar/vinegar-based cleaner to perform cleaning or disinfec- tion work. Cleaning the ultrasound membrane with a brush, rinsing the base NOTE Empty the water from the base unit via the side rim. • Clean the ultrasound membrane with the cleaning brush provided. Should dirty residue remain in the base unit, pour some clean, fresh water into the base unit and empty it out via the side edge. Clean the water evaporation pan NOTE • The evaporation pan is hot during operation. Allow the device to cool sufficiently before cleaning it. 1) Hold the air outlet in one hand and turn it gently 2) Hold the air outlet firmly and remove it.
- Page 9 5) Should dirty residue remain in the evaporation 6) Rinse the anti-lime pad in clear water. pan, pour some clean, fresh water into the base unit and empty it out via the side edge. 7) Reinsert the anti-lime pad and position the air outlet back on the base unit. Rinsing the water tank, replacing the water • Clean the water tank regularly, at least once a week if using daily.
-
Page 10: Replacement Parts
Descaling the water tank • Fill the water tank halfway with water. • Add a small quantity of descaler. • Tightly close the water tank using the screwed plug. • Shake the water tank by rocking it back and forth several times. • Empty the descaling solution completely. • Rinse the base unit twice with clean, fresh water. Storage If you do not plan to use the device for a relatively long period of time, we recommend that you thoroughly empty, clean and dry the device and store it in the original packing in a dry environment, ensuring it is not... -
Page 11: What If There Are Problems
10. What if there are problems? Problem Cause Solution The operating loop The mains cable is not plugged in. Connect the plug. does not light up. The control dial is at its minimum Turn the control dial clockwise towards the ma- position. -
Page 12: Replacement Items
12. Replacement items Name Material REF. 10 anti-lime pads Dacron 163.141 10 aroma pads. Dacron 163.142...
Need help?
Do you have a question about the LB 88 and is the answer not in the manual?
Questions and answers