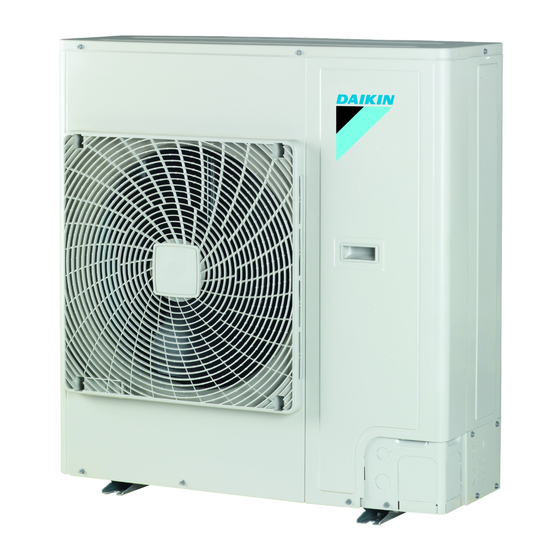
Daikin AZQS100B8V1B Installation Manual
Split system air conditioners
Hide thumbs
Also See for AZQS100B8V1B:
- Installer's reference manual (44 pages) ,
- Installer's reference manual (28 pages) ,
- Installer's reference manual (28 pages)

Related Manuals for Daikin AZQS100B8V1B


Summary of Contents for Daikin AZQS100B8V1B
-
Page 1: Installation Manual
Installation manual Split system air conditioners AZQS100B8V1B AZQS125B8V1B AZQS140B8V1B AZQS100B7Y1B Installation manual AZQS125B7Y1B English Split system air conditioners AZQS140B7Y1B... - Page 2 (mm) — ≥100 A, B, C — ≥100 ≥100 ≥100 B, E — ≥100 ≥1000 ≤500 A, B, C, E — ≥150 ≥150 ≥150 ≥1000 ≤500 — ≥500 D, E — ≥1000 ≤500 ≥500 B, D <H >H ≥100 ≥500 >H <H ≥100...
- Page 3 2P308775-5E...
-
Page 4: Table Of Contents
To connect the refrigerant piping to the outdoor unit .. Daikin website (publicly accessible). 4.2.2 To determine if oil traps are required ......▪ The full set of latest technical data is available on the Daikin Checking the refrigerant piping ..........extranet (authentication required). 4.3.1 Checking refrigerant piping: Setup...... -
Page 5: Installation
4 Installation 4.1.2 To install the outdoor unit Model Cooling Heating AZQS –5~46°C –15~15.5°C Installation Mounting the outdoor unit 4× M12 4.1.1 To provide the installation structure Prepare 4 sets of anchor bolts, nuts and washers (field supply) as follows: 4.1.3 To provide drainage 4×... -
Page 6: To Prevent The Outdoor Unit From Falling Over
4 Installation 4× Ø6 mm 4× Ø6 mm 2 Remove the burrs, and paint the edges and areas around the edges using repair paint to prevent rusting. 4 Do the following: ▪ Connect the liquid pipe (a) to the liquid stop valve. 4.1.4 To prevent the outdoor unit from falling ▪... -
Page 7: To Determine If Oil Traps Are Required
4 Installation 1 Charge the system with nitrogen gas up to a gauge pressure of NOTICE at least 200 kPa (2 bar). It is recommended to pressurize to Make sure to open the stop valves after installing the 3000 kPa (30 bar) in order to detect small leaks. refrigerant piping and performing vacuum drying. -
Page 8: To Determine The Complete Recharge Amount
4 Installation 4.4.2 To determine the complete recharge NOTICE amount In Europe, the greenhouse gas emissions of the total refrigerant charge in the system (expressed as tonnes L1 (m) Model -equivalent) is used to determine the maintenance intervals. Follow the applicable legislation. 5~10 10~20 20~30... -
Page 9: To Connect The Electrical Wiring On The Outdoor Unit
4 Installation Component AZQS_V1 AZQS_Y1 Recommended field fuse 32 A 40 A 16 A 20 A 25 A Earth leakage circuit breaker Must comply with applicable legislation MCA=Minimum circuit ampacity. Stated values are maximum values (see electrical data of combination with indoor units for exact values). 3 Fix the cables (power supply and interconnection cable) with a 4.5.3 To connect the electrical wiring on the... -
Page 10: To Check The Insulation Resistance Of The Compressor
5 Commissioning Interconnection cable The insulation resistance of the compressor is OK. Liquid pipe Liquid pipe insulation Finishing tape There are NO damaged components or squeezed pipes on the inside of the indoor and outdoor units. 2 Install the service cover. There are NO refrigerant leaks. - Page 11 5 Commissioning Error code Possible cause The stop valves are closed. ▪ There is a voltage imbalance. ▪ There is a missing phase in case of three-phase power supply units. Note: Operation will be impossible. Turn OFF the power, recheck the wiring, and switch two of the three electrical wires.
-
Page 12: Technical Data
6 Technical data Technical data A subset of the latest technical data is available on the regional Daikin website (publicly accessible). The full set of latest technical data is available on the Daikin extranet (authentication required). Service space: Outdoor unit Suction side In the illustrations below, the service space at the suction side is based on 35°C DB and cooling operation. -
Page 13: Wiring Diagram: Outdoor Unit
6 Technical data Wiring diagram: Outdoor unit The wiring diagram is delivered with the unit, located at the inside of ▪ K2R (A1P): Magnetic relay (E1H the service cover. option) (AZQS_Y1) Notes for AZQS_V1: ▪ K2R (A2P): Magnetic relay K10R, K13R~K15R Magnetic relay Symbols (see legend). - Page 14 6 Technical data Colours: Black Blue Brown Green Orange White Yellow Installation manual AZQS100~140B8V1B + AZQS100~140B7Y1B Split system air conditioners 4P385528-1C – 2016.10...
- Page 16 4P385528-1 C 00000003 4P385528-1C 2016.10...
Need help?
Do you have a question about the AZQS100B8V1B and is the answer not in the manual?
Questions and answers