Table of Contents
Advertisement
Available languages
Available languages
Advertisement
Table of Contents

Related Manuals for dji crystalsky CS785


Summary of Contents for dji crystalsky CS785
- Page 1 CRYSTALSKY CS785/CS785U/CS550 User Guide 使用说明 使用說明 ユーザーガイド 사용자 가이드 Bedienungsanleitung Guía de usuario Guide de l'utilisateur Guida dell'utente Gebruiksaanwijzing Manual do utilizador Руководство пользователя V1.0 2017.04...
- Page 2 Contents User Guide 使用说明 使用說明 ユーザーガイド 사용자 가이드 Bedienungsanleitung Guía de usuario Guide de l’utilisateur Guida dell’utente Gebruikershandleiding Manual do utilizador Руководство пользователя Compliance Information...
- Page 3 DJI product, or damage to other objects in the vicinity. This document and all other collateral documents are subject to change at the sole discretion of DJI.
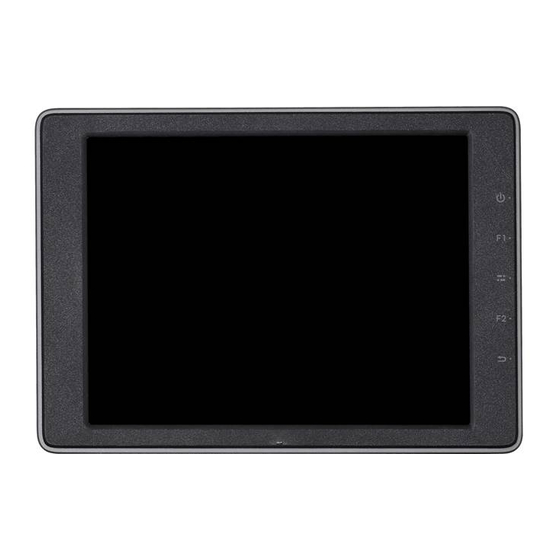
- Page 4 Intelligent Battery Charging Hub (WCH2) ×1 CrystalSky User Guide ×1 Intelligent Battery Safety Guidelines ×1 Mounting Bracket (Optional) ×1 Hood (Optional) ×1 * Optional parts can be purchased separately at the official DJI Online Store. Overview CrystalSky Monitor 1. HDMI Port Output HDMI video signal.
-
Page 5: Charging The Battery
Intelligent Battery. The built-in battery can keep the monitor standby for a short period without the Intelligent Battery, so you can start the monitor fast once get the Intelligent Battery mounted. *Use the CrystalSky CS785 for installation illustration. -
Page 6: Mounting The Monitor
USB port. When using without the Mounting Bracket, connect the Monitor to the remote controller via a Micro USB cable. Connect to a PC to upgrade the firmware with DJI Assistant 2. DO NOT use the Type-C USB 2.0 HS port and Micro USB ports as the Micro... -
Page 7: Specifications
DJI GO/GO 4 App Press the Power Button until the Monitor powers on, then enter the DJI GO/GO 4 app. Use the built-in DJI GO/DJI GO 4 app to control the gimbal, camera and other features of your flight system. The app also comes with a map, a store, and a user center, for configuring your aircraft and sharing your content. - Page 8 * To comply with local regulations, the operation frequencies of both 5.2GHz and 5.8GHz are not available in some countries. This content is subject to change. Download the latest version from http://www.dji.com/crystalsky INSPIRE and DJI are trademarks of DJI. Copyright © 2017 DJI All Rights Reserved.
- Page 9 系 列( 不 含 Osmo Mobile),INSPIRE 系 列, PHANTOM 4 系列,Phantom 3 系列(Phantom 3 Professional, Phantom 3 Advanced)和 MATRICE 系列。内置 DJI GO App / DJI GO 4 App 提 供飞行与拍摄控制、 监控、 剪辑和回放等功能, 通过触摸显示屏即可轻松操控。 盒内物品 CrystalSky 显示屏 ×1 智能电池 ×2(CS785/CS785U)或 ×1(CS550) 智能电池充电管家(WCH2)×1 CrystalSky 使用说明...
- Page 10 存 拓 展, 最 大 支 持 128 GB Micro SD 卡。 4. Micro USB 接口 可通过 Micro USB 线连接遥 控器使用,或连接 PC 通过 DJI Assistant 2 进 行 参 数 配 置。 还 可 通 过 USB OTG 线对飞行器进行升级。 5. 耳机插孔...
- Page 11 安装电池到充电管家中,再将充电器接头 B 插入充电管家的电源接口,最 后连接充电器到交流电源(100-240V,50/60Hz)。充电过程中,充电管家 会优先选择电量较高的电池进行充电。电池充满时会有声音提示,拔下电池 或关闭蜂鸣器开关可停止声音提示。 充电管家绿灯闪烁表示正在充电,绿灯常亮表示充电完毕。 使用 Inspire 2,Phantom 4 充电器或 Inspire 2 车载充电器时,切勿与 智能飞行电池同时充电。 可以使用充电管家的 USB 供电接口为充电要求为 5V/2A 的移动设备 • 充电。 • 参考充电管家使用说明,了解更多充电管家内容。 安装电池 安装电池到电池插槽,向右推电池直到听到“咔”一声。 低 高 短按一次电量按键,可查看电池电量。 • 先按下电池移除按键,才能移出电池。 • 安装智能电池之后,智能电池可为内置电池充电,这可能会减少智能 电池使用的总时长。在未安装智能电池时,内置电池可为显示屏短 时待机供电,以便在及时安装外部智能电池之后能够快速启动屏幕。 * 安装连线均以 CrystalSky CS785 为例。...
- Page 12 安装显示屏 安装支架 A 部件到 安装部件 B 到遥控器 打开 B 部件的锁扣, 并安装到 A 中 显示屏 锁好扣子 使用硬币调节 俯仰角度松紧度 使用时,切勿阻挡内置 GNSS 模块。 连接显示屏 使用安装支架时,将支架上的连接线接到遥控器的 USB 接口。 如果没有安装支架,则使用遥控器 Micro USB 连接线,连接显示屏的 Micro USB 接口至遥控器的 USB 接口。连接该接口到 PC 可用于固件升级。 请 勿 同 时 使 用 Type-C USB2.0 HS 接 口 和 Micro USB 接 口, 一 旦 Type-C USB2.0 HS 接口正在使用,Micro USB 口将不起作用。...
- Page 13 DJI GO/GO 4 App 长按侧边电源按键,开启设备,进入 DJI GO/GO 4 App 界面。 点击 DJI GO/GO 4 App 来操作飞行器上的云台和相机,控制拍照、录影以 及设置飞行参数,直接分享所拍摄的照片与视频。 快捷设置 HDMI Wi-Fi 11:30 11月8日 星期三 DJI GO DJI GO 4.0 连接你的DJI设备 尽情创造 系统升级 应用程序 设置 产品规格 显示屏 CS785/CS785U CS550 型号 约 425 g 约 228 g 重量...
- Page 14 Phantom 4 车载充电器 (C4S90-4) Phantom 3 Professional 标配充电器 (ADE019) Phantom 3 车载充电器 (C4S90) 138 g 重量 5℃ 至 40℃ 工作环境温度 71 分钟(单个) 充电时间 * 部分国家不支持 5.2GHz 和 5.8GHz 频段,以遵从当地法规。 内容如有更新,恕不另行通知。 您可以在 DJI 官方网站查询最新版本 http://www.dji.com/crystalsky INSPIRE 和 DJI 是大疆创新的商标。 Copyright © 2017 大疆创新 版权所有...
- Page 15 系列(不含 Osmo Mobile)、INSPIRE 系列、 PHANTOM 4 系列、Phantom 3 系列(Phantom 3 Professional、Phantom 3 Advanced)和 MATRICE 系列。內建 DJI GO 應用程式 / DJI GO 4 應 用程式,提供飛行與拍攝控制、監控、剪輯和播放等功能,透過觸摸顯示幕 即可輕鬆操控。 包裝內容物 CrystalSky 顯示幕 × 1 智能電池 × 2 (CS785/CS785U) 或 × 1 (CS550) 智能電池充電管家 (WCH2) × 1 CrystalSky 使用說明...
- Page 16 支援 USB 隨身碟等外接裝置。 3. Micro SD 卡插槽 為 CrystalSky 提供額外的儲存 空間擴充,最高支援 128 GB Micro SD 卡。 4. Micro USB 連接埠 可透過 Micro USB 線連接遙控 器使用,或連接 PC 通過 DJI Assistant 2 進行參數設定。 還可透過 USB OTG 線對航拍 機進行升級。 5. 耳機插孔 高亮度版本 CS785/ 超高亮度版本...
- Page 17 安裝電池到充電管家中,再將充電器接頭 B 插入充電管家的電源連接埠, 最後連接充電器到交流電源 (100-240V,50/60Hz)。充電過程中,充電管家 會優先選擇電量較高的電池進行充電。電池充飽時會有聲音提示,拔下電池 或關閉蜂鳴器開關可停止聲音提示。 充電管家綠燈閃爍表示正在充電,綠燈常亮表示充電完畢。 使用 Inspire 2、Phantom 4 充電器或 Inspire 2 車用充電器時,切勿 與智能飛行電池同時充電。 可以使用充電管家的 USB 供電連接埠為充電要求為 5V/2A 的行動裝 • 置充電。 • 參考充電管家使用說明,瞭解更多充電管家內容。 安裝電池 安裝電池到電池插槽,向右推電池直到聽到「卡嗒」一聲。 低 高 短按一次電量按鈕,可查看電池電量。 • 先按下電池移除按鈕,才能取出電池。 • 安裝智能電池之後,智能電池可為內置電池充電,這可能會減少智能 電池使用的總時長。在未安裝智能電池時,內置電池可為顯示器短 時待機供電,以便在及時安裝外部智能電池之後能夠快速啟動畫面。 * 安裝連線均以 CrystalSky CS785 為例。...
- Page 18 安裝顯示幕 將支架 A 零組件 打開 B 零組件的鎖 安裝部件 B 到遙控器 扣,並安裝到 A 中 安裝到顯示幕 鎖好鎖扣 使用硬幣調整俯仰軸鬆緊度 使用時,切勿阻擋內建 GNSS 模組。 連接顯示幕 使用安裝支架時,將支架上的連接線接到遙控器的 USB 連接埠。 如果沒有安裝支架,則使用遙控器 Micro USB 傳輸線,將顯示幕的 Micro USB 連接埠連接至遙控器的 USB 連接埠。將該連接埠連接到 PC 可進行韌 體升級。 請勿同時使用 Type-C USB2.0 HS 連接埠和 Micro USB 連接埠,一旦 Type-C USB2.0 HS 連接埠正在使用,...
- Page 19 DJI GO/GO 4 應用程式 長按側邊電源按鈕,開啟裝置,進入 DJI GO/GO 4 應用程式介面。 點擊 DJI GO/GO 4 應用程式,來操作航拍機上的雲台和相機,控制拍照、 錄影以及設定飛行參數,直接分享所拍攝的照片與影片。 Quick setting HDMI Wi-Fi 11:30 WED, 8 NOV DJI GO DJI GO 4.0 Connect your DJI device Go Create System Update Applications Settings 產品規格 顯示幕...
- Page 20 Phantom 3 Professional 標配充電器 (ADE019) Phantom 3 車用充電器 (C4S90) 138 g 重量 5℃ 至 40℃ 操作溫度 71 分鐘 (單個) 充電時間 * 為遵循當地法規, 5.2GHz 及 5.8GHz 兩通信頻率在部分國家無法使用。 內容如有更新,恕不另行通知。 您可以在 DJI 官方網站查詢最新版本: http://www.dji.com/crystalsky INSPIRE 和 DJI 是大疆創新的商標。 Copyright © 2017 大疆創新 版權所有...
- Page 21 変更されることがあります。最新の製品情報については、http://www.dji.com にア クセスして、本製品に対応する製品ページをクリックしてご覧ください。 本製品を使用することにより、本書の免責事項および警告をよく読み、記載され ている条件を理解し、順守することに同意したとみなされます。本製品の使用中 の行動とこれに伴う結果には、ユーザーが全面的に責任を負うことに同意するも のとします。適用されるすべての法、規則および規制を順守して本製品を使用す るとともに、DJI がこれまでに提供し、今後提供する資料の全条件、安全上の注意、 使用方法、方針およびガイドラインに従うことに同意するものとします。本製品 の使用により直接または間接的に発生する損害、傷害に対して、DJI は一切責任 を負いません。ユーザーは、この文書の規定をはじめとする(ただしこれに限定 しない)、安全で合法的な使用方法を順守するものとします。 DJI は、SZ DJI TECHNOLOGY CO., LTD.(略して「DJI」)およびその関連会社 の商標です。本書に記載されている製品、ブランドなどの名称は、その所有者で ある各社の商標または登録商標です。 警告 1. 充電ハブは DJI 指定の充電器専用です。この充電ハブを他のバッテリー充電器 に使用しないでください。 2. 充電ハブは DJI 指定のインテリジェントバッテリー専用です。この充電ハブを 他のバッテリーに使用しないでください。 3. 必ずバッテリー解除ボタンを押してから、バッテリーを取り外してください。 4. 電源アダプターの金属端子に触れないでください。 5. 金属端子の汚れが目立つ場合は、乾いたきれいな布で拭いてください。 はじめに...
- Page 22 インテリジェントバッテリー 2 個(CS785 / CS785U)または 1 個(CS550) インテリジェントバッテリー充電ハブ(WCH2)1 個 CrystalSky ユーザーガイド 1 冊 インテリジェントバッテリーに関する安全ガイドライン 1 冊 取り付けブラケット(オプション)1 個 フード(オプション)1 個 * オプション部品は、別途 DJI の公式オンラインストアで購入できます。 概観 CrystalSky モニター 1. HDMI ポート HDMI ビデオ信号を出力します。 2. USB ポート U ディスクなどの拡張機器に 対応。 3. Micro SD カードのスロット...
- Page 23 充電中はステータス LED が緑色に点滅し、充電が完了すると緑色の点灯に変わり ます。 Inspire 2 充電器、Phantom 4 充電器、Inspire 2 カーチャージャーを使用す る際、インテリジェント・フライト・バッテリーとインテリジェントバッ テリーを一緒に充電しないでください。 USB 電源ポートを使用して、5V/2A のモバイルデバイスを充電すること • ができます。 詳細は、『充電ハブ(WCH2)ユーザーガイド』を参照してください。 • バッテリーの取り付け バッテリースロットにバッテリーを置き、カチッと音がするまで奥にスライドさ せます。 少 多 バッテリーレベルボタンを 1 回押して、バッテリー残量を確認します。 バッテリー解除ボタンを押してから、バッテリーを取り外してください。 • 取り付け後、インテリジェントバッテリーは内蔵バッテリーを充電できま • す。しかし、インテリジェントバッテリーの稼働時間は短くなります。イ ンテリジェントバッテリーを取り付けていない状態でも、内蔵バッテリー がモニターの待ち受け画面をしばらくの間表示します。そのため、インテ リジェントバッテリーを取り付ければ、モニターは素早く起動します。 * 取り付け図では CrystalSky CS785 を使用しています。...
- Page 24 ーに取り付けます パーツ A に取り付けます 取り付けブラケットを ロ 硬貨などを使ってピッチ軸の ックします 締め付け具合を調整します 使用中、内蔵 GNSS を塞がないでください。 モニターの接続 取り付けブラケットを使用する際は、取り付けブラ ケットのコネクターを送信機の USB ポートに接続し ます。 取り付けブラケットなしで使用する際は、Micro USB ケーブルでモニターを送信 機に接続します。DJI Assistant 2 によりファームウェアを更新するには PC に接続 します。 Type-C USB 2.0 HS ポートと Micro USB ポートを同時に使用しないでくだ さい。その場合 Micro USB ポートが機能しません。...
- Page 25 DJI GO / GO 4 アプリ モニターの電源がオンになるまで電源ボタンを押し、DJI GO / GO 4 アプリに進 みます。 内蔵の DJI GO / DJI GO 4 アプリを使用して、フライトシステムのジンバル、カ メラ、その他の機能を制御します。このアプリには地図、ストア、ユーザーセン ターも備わっており、機体を設定したりコンテンツを共有したりできます。 Quick setting HDMI Wi-Fi 11:30 WED, 8 NOV DJI GO DJI GO 4.0 Connect your DJI device...
- Page 26 Phantom 3 Professional 充電器(ADE019) Phantom 3 車載充電器(C4S90) 重量 138g 動作環境温度 41º F ∼ 104º F(5℃∼ 40℃) 充電時間 71 分(シングル) * 現地の法律や規制に準拠するため、5.2GHz および 5.8GHz の動作周波数は国によっては ご利用できません。 本内容は変更されることがあります。 最新版は下記よりダウンロードしてください。 http://www.dji.com/crystalsky INSPIRE および DJI は DJI の商標です。 Copyright © 2017 DJI All Rights Reserved.
- Page 27 인하십시오. 본 문서의 지침 및 경고 사항을 읽고 따르지 않으면 자신 또는 다른 사람이 심각한 부상을 입거나 DJI 제품 또는 근처에 있는 다른 물체가 손상될 수 있습니다. 이 문서 및 기타 모든 부수 문서는 DJI의 단독 재량에 따라 변경될 수 있습니다. 최신 제품 정보를 확인하려면 http:// www.dji.com 을...
- Page 28 공간을 제공하며 최대 카드 크기는 128GB 입니다 . 4. Micro USB 포트 Micro USB 케이블을 사용하여 사용 중인 조종기에 연결하거나 , 또는 PC 에 연결하여 DJI ASSISTANT 2 를 통해 매개 변수를 구성합니다 . 기체 펌웨어를 업데이트하려면 USB OTG 케이블을 사용하십시오 .
- Page 29 트 배터리의 사용 시간이 줄어들 수 있습니다 . 인텔리전트 배터리 없이도 내장 배터리 를 사용해 모니터를 잠시 대기시키는 것이 가능합니다 . 덕분에 인텔리전트 배터리를 새로 교체할 경우 , 더욱 신속하게 모니터를 사용할 수 있습니다 . * 설치 그림은 CrystalSky CS785 를 기준으로 합니다 .
- Page 30 조종기 USB 포트에 연결합니다 . 마운팅 브라켓 없이 사용할 경우에는 모니터를 Micro USB 케이블을 통해 조종기에 연결합니다 . DJI Assistant 2 를 사용하여 펌웨어를 업데이트하려면 PC 에 연결합니다 . Type-C USB 2.0 HS 포트 및 Micro USB 포트를 동시에 사용하지 마십시오 . 동시에 사...
- Page 31 모니터가 켜질 때까지 전원 버튼을 누르고 DJI GO/GO 4 앱을 실행합니다 . 내장된 DJI GO/DJI GO 4 앱을 사용하여 짐벌 , 카메라 및 기타 비행 시스템 기능을 제어할 수 있 습니다 . 또한 앱에 포함된 지도 , 스토어 , 사용자 센터를 통해 자신의 기체를 구성하고 콘텐츠를...
- Page 32 * 현지 규정에 따라 , 일부 국가에서는 5.2GHz 와 5.8GHz 작동 주파수를 지원하지 않을 수 있습니다 . 이 문서의 내용은 언제든지 변경될 수 있습니다 . 최신 버전은 다음 웹사이트에서 다운로드하십시오 . http://www.dji.com/crystalsky INSPIRE 및 DJI 는 DJI 의 상표입니다 . Copyright © 2017 DJI All Rights Reserved.
- Page 33 Produkts in Zusammenhang stehen. Der Anwender richtet sich nach der sicheren, rechtskonformen Praxis, die zum Teil in dem vorliegenden Dokument festgelegt ist. DJI ist eine Marke der SZ DJI TECHNOLOGY CO., LTD. (kurz DJI) und seiner verbundenen Unternehmen. Namen von Produkten, Marken, usw., die in diesem Dokument enthalten sind, sind Warenzeichen oder eingetragene Warenzeichen der jeweiligen Besitzer.
- Page 34 Intelligent Battery Akkuladestation (WCH2) × 1 CrystalSky Bedienungsanleitung × 1 Sicherheitsrichtlinien zur Intelligent Battery × 1 Befestigungsklammer (optional) × 1 Schutz (optional) × 1 * Optionales Zubehör kann separat im offiziellen DJI Online-Store erworben werden. Übersicht CrystalSky-Monitor 1. HDMI-Anschluss HDMI-Videoausgang 2.
-
Page 35: Akku Laden
Dies reduziert jedoch die Betriebsdauer der Intelligent Battery. Die integrierte Batterie ist in der Lage den Monitor für eine gewisse Zeit im Standby mit Strom zu versorgen, bis eine neue geladene Intelligent Battery eingelegt wird. *Der CrystalSky CS785 wird zur Veranschaulichung abgebildet. -
Page 36: Montage Des Monitors
Wenn Sie die Montageklammer nicht verwenden, verbinden Sie den Monitor über das Micro-USB-Kabel mit der Fernbedienung. Verbinden Sie das Gerät mit einem PC, um die Firmware über DJI Assistant 2 zu aktualisieren. Verwenden Sie den Type-C-USB-2.0-HS-Anschluss und den Micro-USB- Anschluss NICHT gleichzeitig, da der Micro-USB-Anschluss in diesem Fall... -
Page 37: Technische Daten
Drücken Sie die Einschalttaste, bis der Monitor aktiviert wird, und starten Sie dann die DJI GO/GO 4 App. Mit der integrierten DJI GO/DJI GO 4 App können Sie den Gimbal, die Kamera und andere Funktionen des Flugsystems steuern. Zusätzlich enthält die App eine Landkarte, einen Shop und ein Anwender-Center, in dem Sie Ihr Fluggerät... - Page 38 71 min (einzeln) * Durch lokale Reglementierungen ist die 5,2 und 5,8 GHz Betriebsfrequenz nicht in allen Ländern verfügbar. Änderungen vorbehalten. Die aktuelle Fassung finden Sie unter http://www.dji.com/crystalsky INSPIRE und DJI sind Marken von DJI. Copyright © 2017 DJI Alle Rechte vorbehalten.
-
Page 39: Renuncia De Responsabilidad
Advertencia 1. El Puerto de carga sólo es compatible con el cargador de batería especificada de DJI. NO intente usar el Puerto de carga con ningún otro cargador de baterías. 2. El Puerto de carga sólo es compatible con la Batería Inteligente especificada de DJI. -
Page 40: Descripción General
Directrices de seguridad de la Batería Inteligente ×1 Soporte de montaje (opcional) ×1 Cubierta (opcional) ×1 * Las piezas opcionales se pueden adquirir por separado en la tienda en línea oficial de DJI. Descripción general Monitor CrystalSky 1. Puerto HDMI Señal de salida de vídeo HDMI. -
Page 41: Montaje De La Batería
Batería Inteligente, para que pueda iniciar el monitor con rapidez una vez haya acoplado la Batería Inteligente. *Para ilustrar la instalación se utiliza el CrystalSky CS785. -
Page 42: Montaje Del Monitor
Cuando lo utilice sin el soporte de montaje, conecte el monitor al control remoto mediante un cable Micro USB. Conecte a un PC para actualizar el firmware con DJI Assistant 2. NO utilice los puertos USB2.0 HS Type-C y Micro USB simultáneamente, ya... -
Page 43: Especificaciones
Pulse el botón de encendido hasta que el monitor se encienda; seguidamente, abra la aplicación DJI GO/GO 4. Use la aplicación integrada DJI GO/DJI GO 4 para controlar el estabilizador, la cámara y el resto de funciones del sistema de vuelo. La aplicación también incluye un mapa, una tienda y un centro de usuarios que permite configurar la aeronave y compartir contenidos con otros usuarios. - Page 44 * Para cumplir las regulaciones locales, las frecuencias de operación de 5.2GHz y 5.8GHz no están disponibles en algunos países o regiones. Contenido sujeto a cambios. Descargue la última versión en http://www.dji.com/crystalsky INSPIRE y DJI son marcas registradas de DJI. Copyright © 2017 DJI Todos los derechos reservados.
-
Page 45: Contenu De L'emballage
(sans s'y limiter). DJI est une marque commerciale de SZ DJI TECHNOLOGY CO., LTD. (abrégée en « DJI ») et de ses sociétés affiliées. Les noms de produits, de marques, etc., apparaissant dans le présent document sont des marques commerciales ou des marques déposées de leurs détenteurs respectifs. -
Page 46: Vue D'ensemble
Consignes de sécurité relatives à la Batterie Intelligente ×1 Support de fixation (en option) ×1 Pare-soleil (en option) ×1 * Les accessoires peuvent être achetés séparément sur la boutique en ligne officielle DJI. Vue d'ensemble Écran CrystalSky 1. Port HDMI Signal de sortie vidéo HDMI. -
Page 47: Recharge De La Batterie
à la Batterie Intelligente. Cela permet d'allumer le moniteur rapidement une fois que vous changez de Batterie Intelligente. *Utilisez l'écran CrystalSky CS785 indiqué dans l'illustration d'installation. -
Page 48: Montage De L'écran
Si vous n'utilisez pas le support de fixation, connectez l'écran à la radiocommande à l'aide d'un câble Micro USB. Connectez-vous à un ordinateur pour mettre à jour le firmware avec DJI Assistant 2. N'utilisez PAS les ports USB 2.0 Type-C haut débit et Micro USB... -
Page 49: Caractéristiques Techniques
Contrôlez la nacelle, la caméra et les autres fonctions de votre système de vol à l'aide de l'application DJI GO/DJI GO 4 intégrée. L'application inclut également les fonctions Map, Store et User Center pour configurer votre appareil et partager vos contenus. - Page 50 * Afin de se conformer aux réglementations locales, les fréquences de fonctionnement 5,2GHz et 5,8GHz ne sont pas disponibles dans certains pays. Contenu sujet à modifications. Téléchargez la dernière version à l'adresse http://www.dji.com/crystalsky INSPIRE et DJI sont des marques commerciales de DJI. Copyright © 2017 DJI Tous droits réservés.
-
Page 51: Contenuto Della Confezione
DJI o causare danni a oggetti che si trovano in prossimità. Il presente documento e tutti i documenti complementari sono soggetti a modifiche a esclusiva discrezione di DJI. - Page 52 Linee guida sulla sicurezza della batteria intelligente Una staffa di montaggio (opzionale) Un coperchio (opzionale) * I componenti disponibili in opzione possono essere acquistati separatamente presso lo store on-line ufficiale DJI. Quadro d'insieme Monitor CrystalSky 1. Porta HDMI Segnale video dell'uscita HDMI.
-
Page 53: Carica Della Batteria
La batteria integrata può mantenere il monitor nella modalità di stand-by per un breve periodo senza la batteria intelligente, consentendo così di avviare il monitor velocemente una volta montata la batteria intelligente. *Utilizzare CrystalSky CS785 per spiegare l'installazione. -
Page 54: Montaggio Del Monitor
Se non si utilizza la staffa di montaggio, collegare il monitor al dispositivo di controllo remoto utilizzando un cavo micro-USB. Collegare a un PC per aggiornare il firmware con DJI Assistant 2. NON utilizzare contemporaneamente la porta USB 2.0 HS di tipo-C e la... -
Page 55: Caratteristiche Tecniche
Premere il tasto di accensione fino a quando il monitor non si accende, quindi avviare l'app DJI GO/GO 4. È possibile utilizzare l'app integrata DJI GO/DJI GO 4 per controllare il gimbal, la telecamera e altre funzioni del sistema di volo. L'app è inoltre dotata di una mappa, un negozio e un centro utente a disposizione per la configurazione del proprio velivolo e la condivisione del contenuto. - Page 56 * Per conformarsi alle normative locali, le frequenze di funzionamento di 5,2 Ghz e 5,8 Ghz non sono disponibili in alcuni paesi. Il presente contenuto è soggetto a modifiche. Scaricare l'ultima versione da http://www.dji.com/crystalsky INSPIRE e DJI sono marchi registrati DJI. Copyright © 2017 DJI Tutti i diritti riservati.
- Page 57 Het niet lezen en opvolgen van de instructies en waarschuwingen in dit document kan leiden tot ernstig letsel bij jezelf of anderen, tot schade aan je DJI-product of schade aan andere objecten in de omgeving. Dit document en alle overige documentatie zijn onderhevig aan veranderingen naar goeddunken van DJI.
- Page 58 Intelligent Battery Charging Hub (WCH2) ×1 Gebruikershandleiding CrystalSky x1 Veiligheidsrichtlijnen Intelligent Battery x1 Montagesteun (optie) ×1 Dop (optie) ×1 * Optionele onderdelen kunnen afzonderlijk worden aangeschaft in de officiële DJI Online Store. CrystalSky Monitor 1. HDMI-poort HDMI-video-uitgangssignaal. 2. USB-poort Ondersteund uitbreidings- apparaat, bijv.
-
Page 59: Accu Opladen
Battery. De ingebouwde accu kan de monitor zonder hulp van de Intelligent Battery gedurende een korte tijd in de stand-by-modus houden, zodat u de monitor snel kunt starten zodra de Intelligent Battery is geplaatst. * Gebruik de CrystalSky CS785 zoals afgebeeld. - Page 60 Als je de montagesteun niet gebruikt, sluit dan de monitor aan op de afstandsbediening met een micro-USB-kabel. Verbind met een pc om de firmware te upgraden met DJI Assistant 2. Gebruik de Type-C USB 2.0 HS-poort en micro-USB-poort NIET tegelijkertijd.
- Page 61 DJI GO-/GO 4-app Druk op de aan/uit-knop totdat de monitor inschakelt, start vervolgens de DJI GO-/ GO 4-app. Gebruik de geïntegreerde DJI GO-/DJI GO 4-app om de gimbal, camera en andere functies van jouw flight system te bedienen. De app omvat ook een kaart, een online store en een gebruikerscentrum om je drone te configureren en je content te delen.
- Page 62 * Om aan lokale wetgeving te voldoen, is het gebruik van zowel de 5,2 GHz als de 5,8 GHz frequentie in een aantal landen niet beschikbaar. Deze inhoud is aan verandering onderhevig. Download de nieuwste versie op http://www.dji.com/crystalsky INSPIRE en DJI zijn handelsmerken van DJI. Copyright © 2017 DJI Alle rechten voorbehouden.
-
Page 63: Isenção De Responsabilidade
A não leitura e o incumprimento das instruções e avisos contidos neste documento podem resultar em lesões graves para si ou terceiros, em danos no produto da DJI ou em danos noutros objetos que se encontrem nas proximidades. Este e todos os outros documentos de garantia estão sujeitos à... -
Page 64: Visão Geral
Guia do usuário do CrystalSky ×1 Diretrizes de segurança da Intelligent Battery ×1 Suporte de montagem (opcional) ×1 Tampa (opcional) ×1 * As peças opcionais podem ser adquiridas separadamente na loja on-line oficial DJI. Visão geral Monitor CrystalSky 1. Entrada HDMI Saída de sinal de vídeo HDMI. -
Page 65: Carga Da Bateria
Intelligent Battery, para que você possa iniciar o monitor rapidamente tão logo a Intelligent Battery seja montada. *O CrystalSky CS785 é usado para fins ilustrativos. - Page 66 Quando utilizar sem o Suporte de Montagem, conecte o monitor ao controle remoto através de um cabo Micro USB. Conecte a um PC para atualizar o firmware com o DJI Assistant 2. NÃO use a porta USB 2.0 HS Tipo-C e as portas Micro USB...
- Page 67 Aplicativo DJI GO/GO 4 Pressione o botão liga/desliga até o Monitor ligar; depois, ligue o aplicativo DJI GO/GO 4. Use o aplicativo integrado DJI GO/DJI GO 4 para controlar o estabilizador, a câmera e outros recursos do seu dispositivo de voo. O aplicativo também inclui um mapa, uma loja e uma central de usuário para você...
- Page 68 * Para cumprir com as regulamentações locais, as frequências de operação de 5,2 GHz e 5,8 GHz não estão disponíveis em alguns países. Este conteúdo está sujeito a alterações. Transfira a versão mais recente disponível em http://www.dji.com/crystalsky INSPIRE e DJI são marcas registradas da DJI. Copyright © 2017 Todos os direitos reservados.
-
Page 69: Отказ От Ответственности
использованием продукта. Пренебрежение содержимым данного документа и несоблюдение мер безопасности может привести к серьезным травмам, повреждению продукта DJI и другого имущества. Компания DJI вправе вносить изменения в содержание данного и сопутствующих документов. Для получения обновленной информации по продукту посетите веб-сайт http://www.dji.com и... - Page 70 Руководство пользователя CrystalSky ×1 Инструкции по технике безопасности для аккумулятора Intelligent Battery ×1 Кронштейн (дополнительно) ×1 Бленда объектива (дополнительно) ×1 * Дополнительные компоненты можно приобрести отдельно в официальном интернет-магазине DJI. Обзор Монитор CrystalSky 1. Порт HDMI Передача видеосигнала HDMI 2. Порт USB Совместимое...
-
Page 71: Зарядка Аккумулятора
встроенную батарею, что может сократить время работы Intelligent Battery. Встроенная батарея способна поддерживать работу монитора в режиме ожидания в течение короткого времени без аккумулятора Intelligent Battery, что позволит быстро приступить к работе сразу после подключения Intelligent Battery. *На иллюстрации процесса установки показан монитор CrystalSky CS785. -
Page 72: Установка Монитора
При использовании без кронштейна подключите монитор к пульту управления с помощью кабеля Micro USB. Подключитесь к ПК для обновления прошивки с помощью приложения DJI Assistant 2. НЕ используйте порты тип-C USB 2.0 HS и Micro USB одновременно, т. к. в таком случае порт Micro USB не будет работать. -
Page 73: Технические Характеристики
Приложение DJI GO/GO 4 Нажмите кнопку питания для включения монитора, затем войдите в приложение DJI GO/GO 4. Встроенное приложение DJI GO/DJI GO 4 позволяет управлять стабилизатором, камерой и другими функциями дрона. В приложении также есть разделы «Карта», «Интернет-магазин» и «Пользовательский центр», которые дают... - Page 74 * В целях соблюдения местных законов обе рабочие частоты - 5,2 ГГц и 5,8 ГГц недоступны для использования в некоторых странах. Компания вправе вносить изменения в содержание данного документа. Актуальную редакцию документа можно загрузить с веб-сайта: http://www.dji.com/crystalsky INSPIRE и DJI являются товарными знаками компании DJI. © 2017 DJI Все права защищены.
- Page 75 CAN ICES-3 (B)/NMB-3(B) EU Compliance Statement SZ DJI TECHNOLOGY CO., LTD. hereby declares that this device is in compliance with the essential requirements and other relevant provisions of the RED Directive. A copy of the EU Declaration of Conformity is available online at www.dji.com/euro-compliance Declaración de cumplimiento UE: SZ DJI TECHNOLOGY CO., LTD.
- Page 76 Existe uma cópia da Declaração de conformidade da UE disponível online em www.dji.com/euro- compliance Declaración de cumplimiento UE: SZ DJI TECHNOLOGY CO., LTD. por la presente declara que este dispositivo cumple los requisitos básicos y el resto de provisiones relevantes de la Directiva RED.
- Page 77 To prevent possible hearing damage, do not listen at high volume levels for long periods. 为防止可能出现的听力损伤,请勿长时间用高音量听音乐。 為防止可能出現的聽力損傷,請勿長時間用高音量聽音樂。 聴覚障害を起こさないよう、長時間大音量で使用しないでくだ さい。 오랫동안 높은 음량으로 청취하면 청각이 손상될 수 있으니 항상 주의하 시기 바랍니다 . Um mögliche Hörschäden zu vermeiden, vermeiden Sie hohe Lautstärken über längere Zeiträume.
- Page 78 Servicio de asistencia de DJI Service client DJI Assistenza DJI DJI-ondersteuning Suporte DJI Техническая поддержка DJI http://www.dji.com/support If you have any questions about this document, please contact DJI by sending a message to DocSupport@dji.com. Printed in China. 如果您对说明书有任何疑问或建议,请通过以下电子邮箱联系 我们:DocSupport@dji.com。 中 国 印 制...
Need help?
Do you have a question about the crystalsky CS785 and is the answer not in the manual?
Questions and answers