Table of Contents
Advertisement
Quick Links
Advertisement
Table of Contents

Related Manuals for Bruce Goldsmith Design ADAM


Summary of Contents for Bruce Goldsmith Design ADAM
- Page 1 Version 2.2, November 2016 Version 2.2, November 2016...
- Page 2 Version 2.2, November 2016...
-
Page 3: Table Of Contents
Contents Welcome 1 – Introduction (with specifications table) 2 – Preparation 3 – Pre-flight Inspection 4 – Flight Characteristics 5 – Recovery Techniques 6 – Storage and Servicing 7 – Closing Words Risers Line layout and lengths Service booklet Version 2.2, November 2016... -
Page 4: Welcome
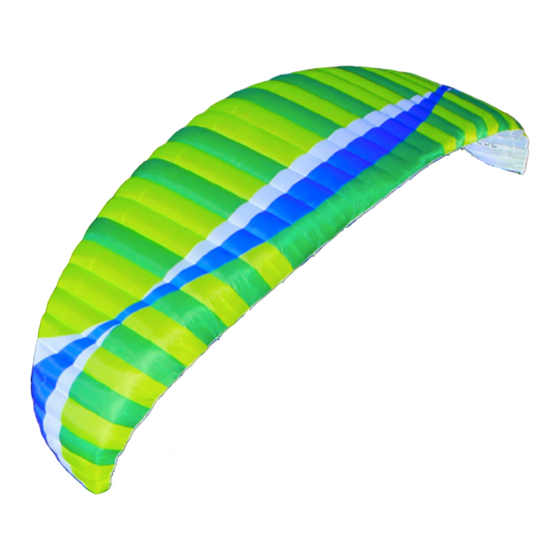
ADAM Owner’s Manual PARAGLIDER EN / LTF A Welcome to Bruce Goldsmith Design BGD is a world leader in the design and production of paragliders. For many years Bruce Goldsmith and his team have been developing products with world-beating performance for pilots who want the best. We apply our competitive knowledge to design top quality products that combine the highest performance with the safe handling our customers value and respect. BGD pilots appreciate our quality and reliability. BGD´s world-class status is based on the skills and expertise we have developed in combining aerodynamic design with cloth and materials technology. All BGD products are developed and made with the same skill and attention to good design that are synonymous with the ultimate performance and precision required by paragliders. Congratulations on your purchase of the BGD ADAM The ADAM is a paraglider, designed to a high standard of safety and stability, but it will only retain these characteristics if it is properly looked after. Please read this manual carefully from the first to the last chapter to ensure you get the best out of your ADAM. This manual has been prepared to give you information and advice about your paraglider. If you ever need any replacement parts or further information, please do not hesitate to contact your nearest BGD dealer or contact BGD directly. Version 2.2, November 2016... -
Page 5: Introduction (With Specifications Table)
Introduction Introduction The ADAM is an entry-level paraglider suitable for beginner pilots Exceptional stability and passive safety combined with speed and good performance make this a wing which is real pleasure to fly. The use of this glider is limited to non aerobatic manoeuvres. This paraglider must not: • be flown with more than the maximum certified total load • have its trim speed adjusted by changing the length of risers or lines • exceed 60 degrees of bank angle • be flown in rain or snow • be towed with a tow line tension in excess of 100 kg. • It is your dealer´s responsibility to test fly the paraglider before you receive it. The test flight record of this is on the last page of this manual. Please be sure that this has been completed by your dealer, to prove that he has done this. Failure to test fly a new paraglider may invalidate any warranty. Any modification, e.g. change of line lengths or changes to the speed system causes a loss of airworthiness and certification. We recommend that you contact your dealer or BGD directly before performing any kind of change. Version 2.2, November 2016... -
Page 6: Specifications
Introduction Specifications Linear scaling factor 0.94 1.05 1.10 Projected area 18.56 21.00 23.15 25.41 Flat area 22.09 25.00 27.56 30.25 Glider weight Total line length Height 6.30 6.67 7.00 7.80 Number of main lines 3/4/3 3/4/3 3/4/3 3/4/3 A/B/C Cells Flat aspect ratio 4.465 4.465 4.465 4.465 Projected aspect ratio 3.22 3.22 3.22 3.22 Root chord 2.82 3.00... -
Page 7: Preparation
2 Preparation 2 Preparation 1. Select a suitable takeoff area determined by wind and terrain, clear of any obstacles that may catch in the lines or damage the canopy. 2. If your paraglider has been correctly packed, you should take it to the top of the takeoff area, and allow the rolled canopy to unroll itself down the hill (if on a slope). This should leave the paraglider with the bottom surface facing upwards, the openings at the downwind end of the takeoff area, and the harness at the trailing edge at the upwind side. 3. Unroll the canopy to each side so that the leading edge openings form a semicircular shape, with the trailing edge drawn together as the centre of the arch. The harness should be drawn away from the canopy until the suspension lines are just tight. Version 2.2, November 2016... -
Page 8: Pre-Flight Inspection
3 Pre-flight Inspection 3 Pre-flight Inspection The ADAM is designed to be as simple as possible to inspect and maintain but a thorough pre-flight procedure is mandatory on all aircraft. The following pre-flight inspection procedure should be carried out before each flight. 1. W hilst opening out the paraglider check the outside of the canopy for any tears where your paraglider may have been caught on a sharp object or even have been damaged whilst in its bag. 2. Check that the lines are not twisted or knotted. Divide the suspension lines into six groups, each group coming from one riser. By starting from the harness and running towards the canopy remove any tangles or twists in the lines. Partially inflating the canopy in the wind will help to sort out the lines. 3. It is particularly important that the brakes are clear and free to move. Check the knot which attaches the brake handles to the brake lines. Several knots should be used here or they may get entangled in the brake pulleys. Both brakes should be the same length and this can be checked by an assistant holding the upper end of the brake lines together whilst the pilot holds the brake handles. The brake lines should be just slack with the wing inflated when the brakes are not applied. After checking the brake lines lay them on the ground. 4. Always check the buckles and attachments on the harness. Ensure the two main attachment maillons/ karabiners from the harness to the main risers, and the six shackles which attach the risers to the lines, are tightly done up 5. Before the pilot attaches himself to the harness he should be wearing a good crash helmet, and boots which provide ankle support. Put on the harness ensuring all the buckles are secure and properly adjusted for comfort. Your paraglider is now ready for flight. Version 2.2, November 2016... -
Page 9: Flight Characteristics
4 Flight Characteristics Flight Characteristics This manual is not intended as an instruction book on how to fly the ADAM. You should be a qualified pilot or under suitable supervision, but the following comments describe how to get the best from your ADAM. Weight range Each size of the ADAM is certified for a certain weight range. The weight refers to the ‘overall takeoff weight’. This means the weight of the pilot, the glider, the harness and all other equipment carried with you in flight. We recommend to fly the ADAM in the middle of the weight range. If you fly the ADAM on the lower half of the weight range, the turning agility decreases and the glider will be more damped. In strong turbulence the wing tends to deform and to collapse slightly more than with a higher wing loading. If you mainly fly in weak conditions you should consider flying the ADAM on the lower side of the weight range. If you fly the ADAM in the upper half of the weight range, the agility and the stability in turbulence will increase. Also the speed will increase slightly. The self damping will decrease in turns, as well as after collapses, so if you fly in bumpy conditions and you want a dynamic flight characteristic you should go for the top of the weight range. Active Piloting Even though the ADAM is designed as an easy glider, ‘active piloting’ is a tool that will help you fly with greater safety and enjoyment. Active piloting is flying in empathy with your paraglider. This means not only guiding the glider through the air but also being aware of feedback from the wing, especially in thermals and turbulence. If the air is smooth the feedback can be minimal but in turbulence feedback is continuous and needs to be constantly assessed by the pilot through the brakes and the harness. Such reactions are instinctive in good pilots. Maintaining contact Version 2.2, November 2016... - Page 10 4 Flight Characteristics with the glider through pressure on the brakes is essential and allows the pilot to feel the loss of internal pressure, which often precedes a collapse. The ADAM is highly resistant to collapse without any pilot action at all, but learning how to fly actively will increase this safety margin even further. Harness The ADAM is tested with a ‘GH’ (without diagonal bracing) type harness. The GH category includes weight shift harnesses as well as ABS style (semi stable) harnesses. Takeoff The ADAM is easy to inflate in light or stronger winds and will quickly rise overhead to the flying position. The best inflation technique is to hold one A riser in each hand. The ‘big ear’ risers could be also held for the best inflation.. Nil Wind Inflation is best done by taking both of the A risers in each hand. The A risers are marked with red cloth to make them easier to find. In nil or very light wind, stand with all the A lines taut behind you, then take one or two steps back (do not walk all the way back to the canopy) and begin your launch run pulling gently and smoothly on the A risers. As soon as the canopy starts to rise off the ground stop pulling so hard on the A risers but pull all the risers evenly through the harness. Maintaining gentle pressure on the A risers always helps in very calm conditions. Have your hands ready to slow up the canopy with the brakes if it starts to accelerate past you. Reverse Launch In winds over 10 km/h it is probably better to do a reverse launch and inflate the canopy whilst facing it using the A risers, without the ‘Baby A risers’ to prevent the glider from inflating the wingtips first. The ADAM has little tendency to overshoot but releasing pressure on the A risers when the canopy is at about 45° will help to avoid overshooting. The stronger the wind and the greater the pressure on the A risers, the more quickly the canopy will rise.
- Page 11 4 Flight Characteristics Turning The ADAM does not require a strong-handed approach to manoeuvering. For a fast turn smoothly apply the brake on the side to which the turn is intended. The speed with which the brake is applied is very important. If a brake is applied fairly quickly the canopy will do a faster banking turn, but care must be taken not to bank too severely. To attain a more efficient turn at minimum sink, apply some brake to the outside wing to slow the turn and prevent excessive banking. The ADAM flies very well like this, but care must be taken not to over-apply the brakes as a spin could result, even the ADAM has a very low spin tendency. The ADAM will turn far more efficiently if the pilot weight-shifts into the turn in the harness. Remember that violent brake application is dangerous and should always be avoided. Straight Flight The ADAM will fly smoothly in a straight line without any input from the pilot. With a pilot weight of 70 kg on the medium size without the accelerator the flying speed will be approximately 38 km/h. . Thermalling To attain the best climb rate the ADAM should be thermalled using a mild turn, as described above, keeping the wing´s banking to a minimum. In strong thermals a tighter banking turn can be used to stay closer to the thermal´s core. Remember that weight-shifting in the harness will make the turn more efficient and reduce the amount of brake required. Care must be taken not to apply so much brake as to stall. This is however very easy to avoid as the brake pressure increases greatly as you approach the stall point. Only fly near the stall point if you have enough height to recover (100m). Wing Tip Area Reduction (Big Ears) The ‘baby A riser’ allows the ADAM to be ‘big eared’ simply and easily. The big ear facility does not allow you to fly in stronger winds, but is a facility which allows the pilot to descend quickly without substantially reducing the forward Version 2.2, November 2016...
- Page 12 4 Flight Characteristics speed of the canopy (as is the case with B lining). To engage big ears the pilot will need to lean forward in the harness and grasp the big ears risers (one in each hand) at the maillon, keeping hold of both brake handles if possible. Pull the risers out and down at least 30 cm so as to collapse the tips of the glider. It is very important that the other A lines are not affected when you do this as it could cause the leading edge to collapse. Steering is possible by weight-shifting with big ears in. If the big ears do not come out quickly on their own, a pump on the brakes will speed things up. Before using the big ears facility in earnest it is essential to practice beforehand with plenty of ground clearance in case a leading edge collapse occurs. Always keep hold of both brakes in order to retain control. Putting your hands through the brake handles so they remain on your wrists is a good method of doing this. B-Line Stall This is a fast descent method and is a useful emergency procedure. With both hands through the brake handles, the pilot takes hold of the top of the B risers, one in each hand, and pulls them down by around 50 cm. This will stall the canopy and forward speed will drop to zero. Make sure you have plenty of ground clearance because the descent rate can be over 10 m/sec. To increase the descent rate pull harder on the B riser. When you release the B riser the canopy will automatically start flying again, normally within two seconds. Sometimes the canopy will turn gently when it exits from the B line stall. It is normally better to release the B riser fairly quickly rather than slowly as this may result in the canopy entering deep stall. Always release the riser symmetrically as an asymmetric release from a B line stall may result in the glider entering a spin. This manoeuvre is useful when losing a lot of height quickly is necessary, perhaps when escaping from a thunderstorm. It should not be performed with less than 100 m of ground clearance (see also Chapter 5). Spiral Dive A normal turn can be converted into a strong spiral dive by continuing to apply one brake. The bank angle and speed of the turn will increase as the downward spiral is continued. Be careful to enter the spiral gradually as too quick a Version 2.2, November 2016...
- Page 13 4 Flight Characteristics brake application can cause a spin or enter an over-the-nose spiral. BGD gliders are designed and tested to recover from normal spirals with a descent rate inferior to 16 m/s, automatically without pilot input. If the pilot increases the descent rate of the spiral to over 16 m/s or initiates what is known as an over-the-nose spiral, the glider may require pilot input to recover. In this case all the pilot needs to do is to apply some outside brake and steer the glider out of the turn. The over-the-nose spiral is a special type of spiral dive where the glider points almost directly at the ground. Making a sudden brake application during the spiral entry so that the glider yaws around enters this, and the nose of the glider ends up pointing at the ground, after this the glider picks up speed very quickly. This technique is very similar to SAT entry technique, and like the SAT it is an aerobatic manoeuvre, which is outside the normal safe flight envelope. Please do not practice these manoeuvres as they can be dangerous. Care should be taken when exiting from any spiral dive. To pull out of a steep spiral dive release the applied brake gradually, or apply opposite brake gradually. A sharp release of the brake can cause the glider to surge and dive as the wing converts speed to lift. Always be ready to damp out any potential dive with the brakes. Also be ready to encounter turbulence when you exit from a spiral because you may fly though your own wake turbulence, which can cause a collapse.. CAUTION: SPIRAL DIVES CAN CAUSE LOSS OF ORIENTATION (black out) AND SOME TIME IS NEEDED TO EXIT THIS MANOEUVRE. THIS MANOEUVRE MUST BE EXITED IN TIME AND WITH SUFFICIENT HEIGHT! Speed System The ADAM is sold with accelerator risers and a speed stirrup as standard but can be flown without the speed stirrup attached. Launching and general flying is normally done without using the accelerator. The accelerator bar should be used when higher speed is important. A 70 kg pilot on the ADAM – medium size should be able to reach a speed of 50 km/h using the accelerator system. Glide angle is not as good in this format, so it is not necessarily the best way to race in thermic conditions and the canopy is slightly more susceptible to deflations. Using the stirrup can require some effort and the pilot´s balance in the harness can be affected. It may be necessary to make some adjustments to Version 2.2, November 2016...
- Page 14 4 Flight Characteristics the harness. We recommend that only fly in conditions where you can penetrate with the risers level so that you have the extra airspeed should you need it. To fly at maximum speed the stirrup should be applied gradually until the upper pulley on the A riser butts against the pulley at the riser base. The accelerator system is designed to give maximum speed when the pullies of the accelerator touch each other. Please do not go beyond this point by using excessive force to attempt to make the glider go faster as this may result in the glider collapsing.. IMPORTANT: • Do practice using the speed system in normal flying. • Be careful flying fast in rough or turbulent conditions as deflations are more likely to occur at speed. The speed increase is achieved by reducing the angle of attack, so the canopy has slightly more collapse tendency. • Remember that your glide deteriorates at higher speeds. Best glides are achieved when the risers are level and the brakes are off. Check the component parts regularly for wear and tear, and ensure that the system always works smoothly. Landing Landing the ADAM is very straightforward. Flare in the normal way from an altitude of around 2 m when landing in light winds. It may sometimes help to take wraps on the brakes to make the flare more effective. Strong wind landings require a different technique. If you use the brakes to flare in a strong wind the ADAM tends to Version 2.2, November 2016...
- Page 15 4 Flight Characteristics convert this to height. This can be real problem.The best method is to take hold of the C risers at the maillons just before landing, and collapse the canopy using these when you have landed. The glider will collapse very quickly using this method. The glider can also be steered using the rear risers but be careful not to cause a premature stall. After landing the B risers can also be used to collapse the canopy, although it is more difficult to control the collapsed canopy on the ground using this method. Version 2.2, November 2016...
-
Page 16: Recovery Techniques
5 Recovery Techniques Recovery Techniques Stalls Stalls are dangerous and should not be practiced in the course of normal flying. Stalls are caused through flying too slowly. Airspeed is lost as brake pressure increases and as the canopy approaches the stall point it will start to descend vertically and finally begin to collapse. Should this occur it is important that the pilot releases the brakes at the correct moment. The brakes should never be released when the wing has fallen behind the pilot; the brakes should be released fairly slowly, to prevent the forward dive of the canopy from being too strong. If you do release the brakes quickly you should brake the canopy strongly during the surge forward, to stop the dive. All pilots who fly the ADAM are advised never to attempt this manoeuvre unless under SIV instruction. This manual is not intended to give instruction in this or any other area. Deep Stall (or Parachutal Stall) The ADAM has been designed so that it will not easily remain in a deep stall. However, if it is incorrectly rigged or its flying characteristics have been adversely affected by some other cause, it is possible that it could enter this situation. In the interests of safety all pilots should be aware of this problem, and know how to recover from it. The most common way to enter deep stall is from a flying too slowly, from a B-line stall or even from big ears. When in deep stall the pilot will notice the following: • Very low airspeed • Almost-vertical descent (like a round canopy), typically around 5m/s. • The paraglider appears quite well inflated but does not have full internal pressure. It looks and feels a bit limp. Version 2.2, November 2016... - Page 17 5 Recovery Techniques Recovery from deep stall is quite simple: The normal method is to simply initiate a mild turn. As the canopy starts to turn it will automatically change to normal flight, but it is very important not to turn too fast as this could induce a spin. The second method is to pull gently on the A risers. This helps the airflow to re-attach to the leading edge, but be careful not to pull down too hard as this will induce a front collapse. If the deep stall is particularly stubborn and the previous methods do not work then a full stall will solve the problem. To do this apply both brakes again fairly quickly, as if to do a strong stall, then immediately release both brakes and damp out the surge forward in the normal way. The canopy will swing behind you then automatically reinflate and surge forward in front of you before returning to normal flight. It is the surge forward that exits the canopy from deep stall. Spins Spins are dangerous and should not be practiced in the course of normal flying. Spins occur when the pilot tries to turn too fast. In a spin the pilot, lines and canopy basically stay vertical and rotate around a vertical axis. The ADAM will resist spinning, but if a spin is inadvertently induced the pilot should release the brake pressure but always be ready to damp out any dive as the glider exits the spin. If the pilot does not damp the dive on exiting the spin the glider may have an asymmetric deflation. Symmetric Front Collapse It is possible that turbulence can cause the front of the wing to symmetrically collapse, though active piloting can largely prevent this from occurring accidentally. A pilot can reproduce the effect by taking hold of both the A risers and pulling down sharply on them. The ADAM will automatically recover on its own from this situation in around 3 seconds. During this recovery period it is advisable not to apply the brakes as this could stall the wing. Version 2.2, November 2016...
- Page 18 5 Recovery Techniques Asymmetric Front Collapse The ADAM is very resistant to deflations; however if the canopy collapses on one side due to turbulence, the pilot should first of all control the direction of flight by countering on the opposite brake. Most normal collapses will immediately reinflate on their own and you will hardly have time to react before the wing reinflates automatically. The act of controlling the direction will tend to reinflate the wing. However, with more persistent collapses it may be necessary to pump the brake on the collapsed wing using a long, strong, smooth and firm action. Normally one or two pumps of around 80 cm will be sufficient. Each pump should be applied in about one second and smoothly released. In severe cases it can be more effective to pump both brakes together to get the canopy to reinflate. Be careful not to stall the wing completely if this technique is used. Releasing a trapped tip (cravat) On the ADAM it should be very difficult to trap the tip so that it will not come out quickly. However, following a very severe deflation any canopy could become tied up in its own lines. If this occurs then first of all use the standard method of recovery from a tip deflation as described in Asymmetric Front Collapse above. If the canopy will still not recover then pull the rear risers to help the canopy to reinflate. Pulling the stabilo line is also a good way to remove cravats, but remember to control your flight direction as your number-one priority.If you are very low then it is much more important to steer the canopy into a safe landing place or even throw your reserve. NOTE: Test pilots have tested the ADAM well beyond the normal flight envelope, but such tests are carried out in a very precise manner by trained test pilots with a back-up parachute, and over water. Stalls and spins on any paragliders are dangerous manoeuvres and are not recommended. FOR MORE INFORMATION AND FURTHER READING ABOUT RECOVERY TECHNIQUES WE HIGHLY RECOMMEND THE ‘SIV BIBLE’ WRITTEN BY BRUCE GOLDSMITH, AVAILABLE AS AN I-BOOK IN DIFFERENT LANGUAGES. Version 2.2, November 2016...
-
Page 19: Storage And Servicing
6 Storage and Servicing Storage and Servicing Packing The ADAM can be packed in a traditional roll-up method, or concertina folded. Concertina folding will help extend the life of the glider. 1. Select a suitable flat area that is out of the wind if possible. 2. Arrange the canopy with the underside facing upwards and the harness at the trailing edge. Lay all the lines on the canopy. At this stage you may wish to remove your harness. Now different techniques can be used depending on the kind of inner bag you use: Stuffsack 3. Roll up the canopy in sections from each tip inwards. 4. Then starting from the harness at the trailing edge, roll up the canopy squeezing out all the air at the same time. The rolled canopy will now fit neatly into its bag. Concertina bag. 3. Lay the glider bunched by the lines on top of the concertina bag with the leading edge in position. Version 2.2, November 2016... - Page 20 6 Storage and Servicing 4. Concertina the leading edge together with all the plastics lying side by side. Avoid dragging the leading edge over the ground during this procedure. 5. Lay the glider on its side and put the straps around the leading edge. 6. Now squeeze the rest of the air out of the canopy and close the zip. 7. Finally fold the bag in three making sure the leading edge remains unfolded. Storage & Care If you have to pack away your canopy wet, do not leave it for more than a few hours in that condition. As soon as possible dry it out, but do not use direct heat sources as it is inflammable! Always store the canopy in a dry, warm place. Ideally this should be in the temperature range of 5 to 13 degrees centigrade. Never let your canopy freeze, particularly if it is damp. The ADAM is made from high quality nylon, which is treated against weakening from ultraviolet radiation. However, UV exposure will still weaken the fabric, and prolonged exposure to harsh sunlight can severely compromise the safety of your canopy. Therefore once you have finished flying, put your wing away. Do not leave it laying in strong sunshine unnecessarily. If you are concerned about any aspect of the integrity of your paraglider please contact your nearest BGD dealer or talk to BGD directly. Do not treat your canopy with chemical cleaners or solvents. If you must wash the fabric, use warm water and a little soap. If your canopy gets wet in sea water, wash it with warm water and carefully dry it. Version 2.2, November 2016...
- Page 21 6 Storage and Servicing Small tears in the top or bottom surface (not normally the ribs) of a canopy can be repaired with a patch of self- adhesive ripstop nylon. Tears no longer than 100 mm can be repaired in this way providing they are not in a high- stress area. If you have any doubt about the airworthiness of your canopy please contact your dealer or BGD directly. Servicing / Inspection It is important to have your glider regularly serviced. Your BGD ADAM should have a thorough check / inspection every 24 months or every 150 flight hours, whichever occurs first. This check must be made by the manufacturer, importer, distributor or other authorised persons. The checking must be proven by a stamp on the certification sticker on the glider as well in the service book. Please print out the service pages from this manual, fill in the number of flights and hours flown in the Certificate of Service.and send together with your glider when it goes for inspection or servicing. The manufacturer will only accept responsibility for paraglider lines and repairs which we have produced and fitted or repaired ourselves. Version 2.2, November 2016...
-
Page 22: Closing Words
7 Closing words Closing Words Your ADAM is an advanced, stable glider that promises you many hours of safe and enjoyable flying, provided you treat it with care and always keep a respect for the potential dangers of aviation. Please always remember that flying can be dangerous and your safety depends on your own. With careful treatment you should have with the ADAM for many years a high flying capability. The ADAM has been tested internationally under current airworthiness standards, and these represent the current knowledge concerning the safety of a glider. However, since there are still many unknown issues, for example the effective lifespan of the current generation of gliders and how strong the material aging can be accepted without affecting the airworthiness. We are sure that there are natural forces that can threaten your safety seriously, regardless of the quality of construction or the condition of your glider. Your security is ultimately your responsibility. We strongly recommend that you fly carefully, adjust to the weather conditions and are constantly dealing with the safe side. Flying in a club, or a school with experienced pilots is highly recommended We recommend that you fly with a standard harness with a back protection and a reserve parachute. Always use good equipment and an approved helmet.. See you in the sky! Bruce Goldsmith Design GmbH Hügelweg 12, 9400 Wolfsberg, Austria Tel: +43 (0) 4352 35676 e-mail: sales@flybgd.com www.flybgd.com Version 2.2, November 2016... -
Page 23: Risers
Risers Risers Version 2.2, November 2016... -
Page 24: Line Layout And Lengths
Line layout and lengths Line layout and lengths Version 2.2, November 2016... - Page 25 Line layout and lengths Size S Check table Single lines 5687 5622 5687 5798 6516 1634 5639 5573 5659 5767 6270 1387 5624 5559 5647 5751 6168 1286 5650 5589 5660 5758 6011 1445 5630 5571 5649 5739 5894 1328 5585 5527 5621 5704 5921 1354...
- Page 26 Line layout and lengths Size M Check table Single lines 6030 5961 6060 6187 6887 1749 5980 5909 6008 6134 6615 1477 5964 5895 5998 6121 6507 1370 5992 5927 6035 6151 6348 1523 5972 5911 6012 6117 6254 1429 5926 5869 5971 6072 6323 1497...
- Page 27 Line layout and lengths Size ML Check table Single lines 6355 6283 6356 6480 7246 1836 6303 6229 6325 6446 6962 1552 6288 6215 6314 6429 6848 1438 6318 6250 6329 6438 6674 1608 6297 6231 6340 6444 6550 1027 1483 6248 6183 6288 6386 6589...
- Page 28 Line layout and lengths Size L Check table Single lines 6681 6605 6681 6812 7637 1923 6628 6550 6651 6777 7341 1626 6613 6536 6639 6760 7221 1507 6644 6573 6656 6770 7040 1684 6623 6554 6668 6777 6910 1076 1554 6573 6504 6615 6717 6952...
-
Page 29: Service Booklet
SERVICE BOOKLET Test Flight Record Model Size Serial Number Colour Date of test flight Company signature and stamp Version 2.2, November 2016... - Page 30 Service Record Service No 1: Date : Stamp - Signature : No flights : Type of service : Service No 2: Date : Stamp - Signature : No flights : Type of service : Service No 3: Date : Stamp - Signature : No flights Type of service : Version 2.2, November 2016...
- Page 31 Owner Record Pilot No 1 First name Family name Street City Post code Country Telephone Email: Version 2.2, November 2016...
- Page 32 Owner Record Pilot No 2 First name Family name Street City Post code Country Telephone Email: Version 2.2, November 2016...
Need help?
Do you have a question about the ADAM and is the answer not in the manual?
Questions and answers