Table of Contents
Advertisement
Quick Links
Download this manual
See also:
User Manual
Advertisement
Table of Contents

Related Manuals for Casio EX-Z500


Summary of Contents for Casio EX-Z500
- Page 1 (without price) EX-Z500 AUG. 2005 Precaution Make sure to read “Discharging” on page 19, before start of disassembling. Be fully care not to get electric shocked. INDEX Ver.3 : Jan. 2006...
-
Page 2: Table Of Contents
CONTENTS SPECIFICATIONS ............................1 BLOCK DIAGRAM ............................5 TEST MODE ..............................6 PROGRAM VERSION UPGRADING ......................7 1. To update the firmware version ..................... 7 2. How to restore the firmware ......................8 3. To install the firmware ........................9 ADJ TOOL .............................. -
Page 3: Specifications
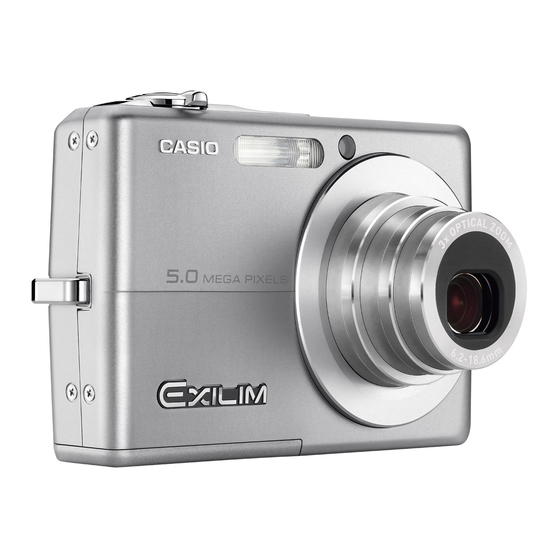
SPECIFICATIONS Image Files Format Snapshots: JPEG (Exif Ver.2.2); DCF (Design rule for Camera File system) 1.0 standard; DPOF compliant Movies: AVI (Motion JPEG) Audio: Recording Media 8.7MB built-in memory SD Memory Card MultiMediaCard Image Size Snapshots: 2560 x 1920 pixels 2560 x 1712 (3:2) pixels 2304 x 1728 pixels 2048 x 1536 pixels... - Page 4 Delete Single-file, all files (with protection) Effective Pixels 5.0 million Imaging Element 1/2.5-inch square pixel color CCD (Total pixels: 5.25 million) Lens/Focal Distance Lenses: F2.7 (W) to 5.2 (T); f=6.2 (W) to 18.6mm (T) (equivalent to approximately 38 (W) to 114mm (T) for 35mm film) 6 lenses in 5 groups, with aspherical lens Zoom 3X optical zoom;...
-
Page 5: Power Requirements
Power Requirements Power Requirements Rechargeable lithium ion battery (NP-40) x 1 Approximate Battery Life: The values below indicate the amount of time under the conditions defined below, until power automatically turns off due to battery failure. They do not guarantee that you will be able to achieve this level of operation. Low temperatures shorten battery life. Operation Apporoximate Battery Life Number of Shots (CIPA Standard)*... - Page 6 Rechargeable Lithium Ion Battery (NP-40) Rated Voltage 3.7 V Rated Capacitance 1300 mAh Operating Temperature 0°C to 40°C (32°F to 104°F) Range Dimensions 38.5(W) x 38.0(H) x 9.3(D) mm (1.53˝(W) x 1.50˝(H) x 0.37˝(D)) Weight Approximately 34 g (1.2 oz) USB Cradle (CA-29) Input/Output Terminals Camera connector;...
-
Page 7: Block Diagram
BLOCK DIAGRAM — 5 —... -
Page 8: Test Mode
TEST MODE Note: Never perform the menu items unless otherwise instructed. Doing so may cause destruction of the data inside, which will make the camera unusable. To boot the test mode 1. While firmly pressing down both [BS] and [UPPER], turn the power on. [BS] button [UPPER] button 2. -
Page 9: Program Version Upgrading
PROGRAM VERSION UPGRADING 1. To update the firmware version 1. Prepare the memory card which contains the firmware for EX-Z500 in the root directory. EX-Z500.bin 2. Insert the above memory card into the camera, and set a fully charged battery in the camera. -
Page 10: How To Restore The Firmware
2. How to restore the firmware 1. Prepare the firmware restoration program and change its name as follows; rom806_gm11.lbn titan.bin NOTE: This software and procedure automatically restores the firmware even if the firmware belongs to a wrong model code. Make sure to use the correct software for the correct model. 2. -
Page 11: To Install The Firmware
1. Copy the following software to the root directly of the SD card. Restoration software: rom806_gm11.lbn Firmware: EX-Z500.bin 2. Change the name as follows; “rom806_gm11.lbn” to “titan.bin” 3. Insert the SD card into the camera. 4. Insert the battery while holding the [shutter release] button depressed. -
Page 12: Adj Tool
ADJ TOOL Introduction Make sure to perform the adjustment by the USB ADJ Tool “adj03SSAW.exe” when replacing the lens unit or the PCB. Here the necessary software, driver and setting are explained to use “adj03SSAW.exe”. Note that the tool, drivers etc. are available only for Windows. 1. - Page 13 7) Check “Designate the place to search”, designate the place which contains “inf” file in the driver by pressing “Reference” button, and then press “Next” button. 8) When “Universal USB Driver (VMEM manufacturer’s name)” appears upon message “Searching for the driver file for the following devices”, press “Next” button. 9) The file copy starts.
-
Page 14: How To Use Adj Tool When Replacing Lens Unit
3 Boot "adj03ssaw" . 4 Select the model name and click "Load FW " Key. • EX-Z500 5 Click "ADJ ALL READ", and display the data on the "adj03ssaw". 6 Find the No.1163, "LCD VCOM DC". 7 Write down this value(data). -
Page 15: How To Use Adj Tool When Replacing Main Pcb
2 Connect the camera to the PC by the USB cable. 3 Boot "adj03ssaw". 4 Select the model name and click "Load FW " Key. • EX-Z500 5 Click "ADJ ALL READ", and display the data on the "adj03ssaw". 6 Save the data. 7 Replace the MAIN PCB. -
Page 16: Vcom Dc Adjustment
VCOM DC ADJUSTMENT Purpose Readjust the VCOM value to minimize the flicker of the LCD after replacing the LCD or the main PCB. Necessary tools 1. Camera (Charge its battery fully) 2. Photo diode (S2281-01) : See Fig 1. 3. Photo sensor amp (C2719) : See Fig 2. 4. - Page 17 Procedure 1. Camera setting Figure (a) a) Turn the power on while pressing “BS” and “UPPER”. 1: VERSION INFO After pressing “DOWN” key twice, press “BS” and “MENU”. 2: USB TCC TEST Select "2:USB TCC TEST", and press "SET" button. 3: ROM UPDATE 4: LAST MEMORY Select "1:USB TCC ON", and press "RIGHT"...
- Page 18 3. Measurement a) Connect S2281-01 to the camera’s LCD monitor (see below). AC Waveforms appear on the monitor screen of the oscilloscope. * Change the Rf range of C2719 in case the range does not match. Photo diode Oscilloscope INPUT OUTPUT S2281-01 Photo sensor amp...
-
Page 19: Current Consumption
CURRENT CONSUMPTION (1) Current consumption (DC in = 3.80 ± 0.1 [V]) • Make sure that current consumption is less than 180 mA in PLAY mode. • Make sure that current consumption is less than 280 mA in REC mode. •... -
Page 20: Fuse On The Main Pcb
FUSE ON THE MAIN PCB FU100 ..... This fuse may be broken, if the lens works normally but the LCD does not display when the power switch is turned on. FU101 ..... This fuse may be btoken in the following cases. 1. -
Page 21: Disassembly
DISASSEMBLY 1. Remove the battery. 2. Remove the 5 screws and then the rear panel. Screw (S1) Screws (S1) Screws (S1) Discharging Condenser is the device to store electric energy. Hundreds of high voltage is required when strobo emits light. It has a lot of risk to get electric shocked if you touch the condenser when it stores electric energy. Be sure to discharge the condenser, before start of disassembling. - Page 22 3. Remove one screw and then the strap. 4. Remove the key unit. * Key unit is fixed by the two sided tape. Strap Screw (S3) Key unit 5. Remove 5 screws and then the front panel. Screw (S1) Screws (S1) Screws (S1) 6.
- Page 23 (Caution while fixing the clamp board(R)) Confirm the hook is in the way it supposed to be. Confirm that the clamp board is fitted in completely. Confirm that the clamp board is fitted in the C-CASE completely. Confirm if it is in the proper position.
- Page 24 12. Remove 2 screws and then the battery case unit. Screws (S1) 13. Detaching the battery cover from the battery case. 1 Position the shaft in the center of the groove. Shaft 2 Remove the shaft. * Remove with the non slip tweezers. 3 Remove the battery cover.
- Page 25 14. Remove the connector and then the strobo block. 15. Release the hook and remove the strobo unit. Strobo unit 16. Remove the screw. 17. Remove 3 lead wires by unsoldering. Black Screw (S6) 18. Remove the screw and then the Jack plate. Jack plate Screw (S6) —...
- Page 26 19. Remove the battery frame. (Battery frame detail view) Hooks 20. Remove F-spencer. 21. Remove the screw and then the battery terminal. * F-spencer is fixed by two sided tape. F-spencer Screw (S4) 22. Remove 2 connectors. — 24 —...
- Page 27 23. Unsolder 2 lead wires to remove the lens block. Black 24. Release 3 hooks and then remove the lens unit. — 25 —...
- Page 28 25. Remove the speaker. 26. Remove 2 lead wires by unsoldering. 27. Peel off the LCD from the MAIN PCB. * LCD is fixed by two sided tape. White Blue 28. Remove the connector and then LCD. (Note while assembling the clamp board(R)) Fix the clamp board while tuning the position on the MAIN PCB.
-
Page 29: Exploded View
EXPLODED VIEW — 27 —... -
Page 30: Parts List
EX-Z500 Item Parts Code Parts Name Spec Price Remark Silver Black Gold Blue Code 10211003 LCD UNIT TK-RJK507967*001 10210283 PCB ASSY/KEY HKW1538-010010-I 10210280 FRAME/KEY RJK507865-001V01 10212626 PLATE/KEY RJK508128-001V01 10210307 TAPE/KEY RJK507877-005V01 10210314 TAPE/SD RJK507881-001V01 10211002 PCB ASSY/MAIN TK-RJK507970*001 10210312 CONNECTOR... - Page 31 Item Parts Code Parts Name Spec Price Remark Silver Black Gold Blue Code 10212621 TAPE RJK508149-001V01 10212622 TAPE RJK508149-002V01 10219340 TAPE RJK508149-003V01 10225880 TAPE RJK508149-004V01 10225881 TAPE RJK508149-005V01 10212625 FRAME RJK508136-001V01 10210276 COVER/BATTERY RJK507857-001V01 10210290 COVER/BATTERY RJK507857-002V01 10219339 COVER/BATTERY RJK507857-003V01 10225878 COVER/BATTERY RJK507857-004V01 10225879 COVER/BATTERY...
-
Page 32: Printed Circuit Board
PRINTED CIRCUIT BOARD MAIN PCB (TOP VIEW) FU101 FU100 — 30 —... - Page 33 MAIN PCB (BOTTOM VIEW) — 31 —...
-
Page 34: Schematic Diagrams
SCHEMATIC DIAGRAMS MAIN PCB (1/3) CCD-BUS CCD-BUS CCD-BUS USB/SD-BUS PW/KEY-BUS PW/KEY-BUS 8BIT-BUS 5/25 R465,R471,R475,R481 KEY-BUS C401 4/25 R462( 6.3V B10u EVCC3.3 VCC1-1 2012 EVCC3.3 1005 C466 B0.1u 1005 C469 B0.1u MOTOR-BUS <CRDLSW> CDSHD CDTI P147/CDHD P130/TXD0 P37/ATGPLS0 P16/TB06/TA11 P120/INTP0 AVSS 0603 PSCK R459... - Page 35 MAIN PCB (2/3) VCC15 VEE7.5 L200 1608 L201 1608 GLF1608T100M GLF1608T100M VCC15C VEE7.5C C200 C205 B4.7u B10u 2012 2012 CGND CGND AUDIO-BUS P201 VCC3.3-1 6/9 L203 G-short P202 G-short VCC3.3-1 C207 P203 L203 B0.1u C701 6.3V 10uF 1005 1005 VCC15C 2012 G-short CGND...
- Page 36 MAIN PCB (3/3) PW/KEY-BUS 5/12 D100 5/12 FU100 VCC1-1 VCC1-1 EVCC3.3 VCC1-0 STROBE FU101 5/25 R101 2.5A VCC1-1 D100 FHC10252ABPA &RSX101VA-30TR ADPIN FU100 VCC1-2 MOTOR 0.8A VCC5-2 STROBE &FCC10801ABPA R116 AF_LED Q100 DTC123JM PWCTL5 Q101 VCC5-1 R115 CHGVCC IC106 L101 XC9215A33CMR NR4018T6R8M L105...
- Page 37 • addition of CHECK/CORRECTION OF THE LANGUAGE MENU. (P18) Ver.2 : Nov. 2005 • Replacement of the PARTS LIST (P28, 29) Ver.3 : Jan. 2006 • The program for EX-Z500 has been changed. (P8, P9) CASIO COMPUTER CO.,LTD. Overseas Service Division 6-2, Hon-machi 1-Chome...
Need help?
Do you have a question about the EX-Z500 and is the answer not in the manual?
Questions and answers