Table of Contents
Advertisement
Available languages
Available languages
Advertisement
Chapters
Table of Contents

Related Manuals for Amplicomms bigtel 1480


Summary of Contents for Amplicomms bigtel 1480
- Page 1 BigTel 1480 User Guide Handleiding Manual de instrucciones...
- Page 2 Helpline 0844 800 6503 (See page 52 for costs and hours of operation)
-
Page 3: Table Of Contents
Contents Getting started ........4 Check box contents . - Page 4 Find handset ........29 Internal call .
- Page 5 Answering machine ........40 Switching the answering machine on/off ....40 Setting the answer mode .
-
Page 6: Getting Started
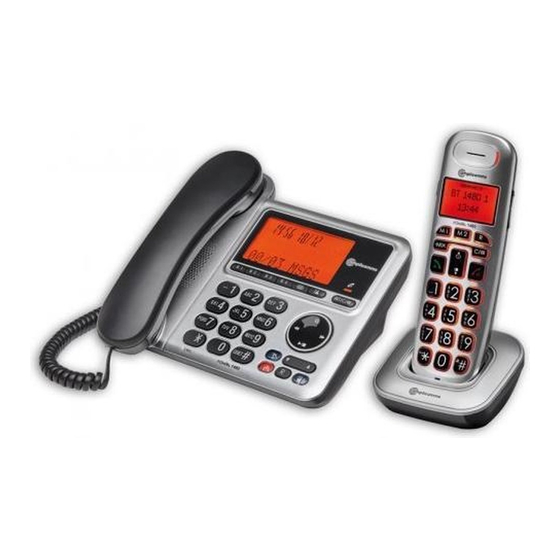
Important: Please make sure you’ve read the safety informa- tion on page 52 before you set up your phone system. Check box contents If you have purchased a BigTel 1480 pack you should have: • 1 corded phone (base) •... -
Page 7: Set Up Your Phone System
Set up your phone system Location Place the base unit (corded phone) near a mains socket and a telephone wall jack to ensure that the connection cables are long enough. Keep the unit approx. 1 m away from other electronic devices to prevent interference. The corded phone uses radio signals to connect with the cordless handset. - Page 8 Telephone line jack Coiled cord jack Important: Use only the power adaptors, telephone line cord and batteries supplied with your BigTel 1480, otherwise your phone may not work. Do not block access to the wall power supply with furniture or other items.
-
Page 9: Connect The Cordless Handset
Connect the cordless handset 1. Open the battery compartment and insert the rechargeable batteries. Observe the correct polarity. 2. Slide the battery compartment cover towards the centre of the handset until it clicks into place. For a full charge, the handset must be left in the charger for at least 16 hours (check the charger’s power supply!). -
Page 10: Wall Mount Installation
Wall mount installation To mount the base unit (corded phone) on the wall you need 2 dowels and 2 suitable screws, preferably fillister-head screws, dia. 4 mm. Fasten the screws 83 mm apart one below the other in a vertical line so that the screw heads are about 3 mm from the wall. - Page 11 4. Rotate the wall mount bracket and lock it into wall mount position. Route the telephone line cord and power adaptor cord through the slot on the bottom of the telephone base. Bundle the telephone line cord and the power adaptor cord with twist ties.
- Page 12 7. Place the receiver in the telephone base. Helpline 0844 800 6503 (See page 52 for costs and hours of operation)
-
Page 13: Controls
Controls Cordless handset Helpline 0844 800 6503 (See page 52 for costs and hours of operation) - Page 14 1 Earpiece 2 Boost key - To increase the volume in the handset. Press briefly during a call to switch the amplification on - pressing again swit- ches the amplification off again. If the amplifier function is activated, "Boost on" appears on the display and the incoming call light (6) lights up.
- Page 15 10 Phonebook/Up - Press to review the phonebook when in idle. - Press to scroll up while in menus or lists. - Press to move the cursor to the left while entering names or numbers. 11 End call/Cancel - Press to hang up during a call. - Press to cancel an operation/return to idle mode while in a menu.
-
Page 16: Corded Phone
Corded phone 1 Call log (missed calls) - Opens the missed calls list. 2 Menu - Press to enter the menu. 3 Direct call keys M1, M2, M3, M4 - In predial mode, input a number, long press to store the number. - Page 17 5 Alphanumeric keypad - Press to enter numbers or characters/*/#. - Press and hold key “0“ to enter a dialling pause. - Press and hold hash key to switch the ringer on/off. 6 Microphone 7 Answering machine on/off - Press to turn the built-in answering machine on/off. Lit when the answering system is turned on.
- Page 18 13 Play/Stop - Press to start or stop message playback. 14 Skip - Press to skip to the next message during message playback. - In idle mode, long press to record a memo. 15 Delete - Press to delete the current message or announcement. 16 Repeat - Press once to repeat the current message.
-
Page 19: Display Icons (Corded Phone)
Display icons (corded phone) New entry in the call log. Indicate the sequence number of the calls list record. You are in a call. The speakerphone is in use. Ringer off. The phonebook is open. Multiple call from the same phone number. Indicate the time format (when set to 12h). -
Page 20: Navigating The Menu
Navigating the menu This chapter describes how to use the menu to access features on both telephones. Open main menu (cordless handset) 1. Press 2. Use to select the desired menu item and press 3. Press to cancel an operation, back up to the previous menu, or exit that menu. - Page 21 Settings Handset settings Select base Display Contrast Handset name Language Auto answer Memory keys Register handset Deregister Handset reset Base settings Ringer Ringtone Ringer volume Dial mode Tone/Pulse System PIN Base reset Date/Time/Alarm Date/Time Time format Date format Enter time Enter date Alarm Alarm On/Off...
-
Page 22: Open Main Menu (Corded Phone)
TAM language Deutsch/English Française Answer delay 2/4/6/8 rings Recording time 30/60/120 s / Unlimited Call screening Remote access Enable/Disable Open main menu (corded phone) 1. Press 2. Use to select the desired menu item and press 3. Press to cancel an operation, back up to the previous menu, or exit that menu. - Page 23 LANGUAGE SETTINGS RING SETUP EXT. RING MELODY VOLUME INT. RING MELODY VOLUME DELETE HS DIAL MODE TONE/PULSE FLASH TIME SHORT/MEDIUM/LONG KEY TONE CHANGE PIN BS DEFAULT PAGE ALL HS REGISTRATION ANS. MACHINE MSG PLAYBACK DELETE ALL MEMO TAM ON/OFF TAM SETTINGS ANSWER MODE ANS &...
-
Page 24: First Use
First use In delivery state the display language is set to GERMAN. 1. In the corded phone’s display you will see DATUM EINST. 2. Use the arrow keys to to adjust the year, the month, the day, the hours and the minutes and press after each setting to skip to the next setting. -
Page 25: Making And Receiving Calls
Making and receiving calls Making a call, answering a call, ending a call To make a call on the corded phone Enter the telephone number and lift the receiver or press - or - Lift the receiver or press . When you hear a dial tone, enter the telephone number. -
Page 26: Amplification
Amplification Use this feature to enhance the loudness of a caller’s voice on the cordless or corded handset earpiece. Whilst in a call press on the corded phone or the BOOST key on the side of the cordless handset. To deactivate, press the same key again. -
Page 27: Temporary Ringer Silence
Temporary ringer silence When the telephone is ringing, you can temporarily silence the ringer on the cordless handset or the corded phone without disconnecting the call. The next call rings normally at the preset volume. On the cordless handset Press On the corded phone Press Redial... -
Page 28: Caller List
Caller list General note: This function is only available if your telephone service provider has activated the CLIP (Calling Line Identification Presentation) service attribute. Please contact your service provider for more information. Corded phone: All incoming calls are saved in the calls log. New entries are indicated with a in the display. - Page 29 Saving an entry from the caller list to the phone book (handset) 1. In idle state press the menu key 2. Select Call log and press 3. Select the desired entry with 4. Press , select Store number and press 5.
-
Page 30: Chain Dialling
Deleting entries (corded phone) 1. In idle state press the menu key 2. Select CALL LOG and press 3. Select MISSED, RECEIVED or DIALED and press 4. Select the desired entry with 5. Press , select DELETE? or DELETE ALL? and press 6. -
Page 31: Find Handset
On the corded phone 1. Lift the receiver or press to join the call. 2. Replace the receiver or press to exit the call. Find handset You can locate a missing handset or alert a handset user that they are wanted by causing the handset to beep from the corded phone. -
Page 32: Phone Book
Phone book The Phonebook stores up to 100 entries (cordless handset) or 50 entries (corded phone). You can find a Phonebook entry by entering the first letter of the stored name using the numeric keys. If necessary, use the arrow keys to select the desired entry. -
Page 33: Using The Phone Book (Cordless Handset)
Using the phone book (cordless handset) Open the phone book ( ) and select the desired entry. Make a call Press Edit an entry 1. Press , select Edit and press 2. Edit the name if necessary and press 3. Edit the telephone number if necessary and press 4. -
Page 34: Using The Phone Book (Corded Phone)
Set speed dial 1. Press , select Speed dial and press 2. Press the key, you want to assign the entry to, and press To dial with speed dialing, press and hold down the relevant key for approx. 3 s. Using the phone book (corded phone) Open the phone book ( ->... -
Page 35: Direct Dialling (Corded Phone)
Direct dialling (corded phone) The corded phone has four direct dial keys (M1, M2, M3, M4) for numbers you wish to call with the press of one button. Stored direct dial numbers can not be deleted explicitly; if a new number is stored on a direct dial key, the previous one is overwritten. -
Page 36: Settings (Cordless Handset)
Settings (cordless handset) Ringtones 1. In idle state press the menu key 2. Select Sound and press 3. Select Ringer and press - External: select the desired melody and press - Internal: select the desired melody and press - Ringer volume: select the volume and press - Silent: select Off, if the ringer should be switched off com- pletely or select Beep, if you want to hear a short beep ins- tead of the ring tone, and press... -
Page 37: Set Alarm
4. Select Date/time and press - Time format: select the time format and press - Date format: select the date format and press - Enter time: enter the time and press - Enter date: enter the date and press Set alarm 1. -
Page 38: Base Settings
- Auto answer: with this function activated, an incoming call is accepted directly when you take the handset from the base station - you do not need to press any key. - Memory Keys: Select one of the direct dial keys from the list (M1 / M2), press and enter the number to be sto- red on this key. -
Page 39: Settings (Corded Phone)
Settings (corded phone) Set date and time Entries in the caller list and messages on the answering machine display the date and time of a call. 1. In idle state press the menu key 2. Select DATE & TIME and press 3. -
Page 40: Deregister A Handset
Select MELODY and press . Select a melody and press Deregister a handset 1. In idle state press the menu key 2. Select SETTINGS and press 3. Select DELETE HS and press 4. Enter the PIN (in delivery state 0000) and press 5. -
Page 41: Key Tone
Key tone 1. In idle state press the menu key 2. Select SETTINGS and press 3. Select KEY TONE and press 4. Select ON or OFF and press Changing the system PIN In delivery state, the system PIN is set to "0000". 1. -
Page 42: Answering Machine
Answering machine Your BigTel 1480 has a built-in digital answering machine. The total capacity is about 15 minutes. You can operate the answering machine at the corded phone or from each registered handset. With a touch-tone telephone, you also have a PIN-protected remote access to the answering machine. -
Page 43: Setting The Answer Mode
Setting the answer mode Select whether you want to operate the answering machine in the recording or announcement only mode. On the corded phone 1. In idle state press the menu key 2. Select ANS. MACHINE and press 3. Select TAM SETTINGS and press 4. -
Page 44: Hear Messages
On the cordless handset 1. In idle state press the menu key 2. Select Answer machine and press 3. Select Answer settings and press 4. Select TAM language and press 5. Select a language for the default outgoing messages and press Hear messages On the corded phone... -
Page 45: Record Personal Announcement
On the cordless handset New messages are indicated on the display. The caller`s telephone number, if transmitted, is stored in the call log. Date and time are displayed for each message. 1. In idle state press the menu key 2. Select Answer machine and press 3. -
Page 46: Playback/Delete Personal Announcement
7. Speak your announcement after the tone and press when done. 8. Your announcement will be played back for review and is from now on the new announcement. You can delete the an- nouncement during playback with On the cordless handset 1. -
Page 47: Call Screening On The Handset
On the cordless handset 1. In idle state press the menu key 2. Select Answer machine and press 3. Select Outgoing message and press 4. Select Play message and press 5. Select Answer/Record or Answer only and press 6. You will hear the current announcement. 7. -
Page 48: Activate/Deactivate Call Screening On The Corded Phone
Activate/deactivate call screening on the corded phone If the call screening is activated, you can listen to the incoming messages after the answering machine has taken the call. On the corded phone 1. In idle state press the menu key 2. -
Page 49: Delete Messages
Delete messages You can only delete old (reviewed) messages. On the corded phone 1. In idle state press the menu key 2. Select ANS. MACHINE and press 3. Select DELETE ALL and press 4. To confirm press On the cordless handset 1. -
Page 50: Number Of Rings
5. Your memo will be played back for review. You can delete the memo during play with Number of rings You can set the number of rings (2, 4, 6 or 8) before the answering machine records a call. On the corded phone 1. -
Page 51: Setting The Compression Rate (Corded Phone)
Setting the compression rate (corded phone) Three different compression rates (HIGH, MID and LOW) are provided for you to select different quality levels of recor- ding incoming message. The lower the compression rate, the higher the recording quality level attained, but the shorter the total recording time available. - Page 52 Activate / deactivate remote access (corded phone) 1. In idle state press the menu key 2. Select ANS. MACHINE and press 3. Select TAM SETTINGS and press 4. Select REMOTE ACC. and press 5. Select whether the remote access should be enabled or dis- abled and press Remote access PIN (corded phone) 1.
- Page 53 Using remote access To access your answering machine from a remote touch-tone phone, you must enter the remote access PIN. 1. Dial your telephone number. 2. When switched off, the answering machine takes the call after approx. 16 ring signals in "Answer only" mode. Press the star key during the announcement to initiate the remote access and enter the four-digit remote access PIN of your telephone.
-
Page 54: Appendix
Appendix Help and support If you need help and you’re in the UK, please first check and see if your problem can be solved using the troubleshooting guide below. If not, please call us on 0844 800 6503 (using a UK land- line, at time of going to print: calls cost 6p for connection charge and then 5p a minute. - Page 55 • Unplug this product from the wall outlet and refer servicing to your supplier under the following conditions: • When the power supply cord or plug is damaged or frayed. • If the product does not operate normally by following the operating instructions.
-
Page 56: Intended Use
Power supply/Power failure Important: Use only the power adaptors supplied with your BigTel 1480. In case of a power failure you can only use the desktop telephone to make and receive calls. Functions like hands-free, Boost etc, which depend on an external power supply will not work. -
Page 57: Energy Efficient Power Adapter
Energy efficient power adapter The included mains adaptor meets the ecodesign requirements of the European Union (Directive 2005/32/EC). Thus, its power consumption is considerably lower, both in operating and in idle mode, compared with the previous design. Medical equipment Do not use your phone: •... -
Page 58: Disposal
Disposal In order to dispose of your device, take it to a collec- tion point provided by your local public waste author- ities (e.g. recycling centre). According to laws on the disposal of electronic and electrical devices, owners are obliged to dispose of old electronic and electrical devices in a separate waste container. -
Page 59: Technical Details
Technical details Standard DECT Power supply (corded phone) Input: 100-240V 50/60Hz Output: 6VDC 450mA Power supply (charger base) Input: 100-240V 50/60Hz Output: 6VDC 450mA Range Outdoors approx. 300m, Indoors approx. 50m Standby Up to 100hrs Maximum Talk Time Up to 10hrs Maximum earpiece volume +26 dB Rechargeable batteries... -
Page 60: Maintenance
• Never use cleaning agents or solvents. Guarantee AMPLICOMMS equipment is produced and tested according to the latest production methods. The use of carefully chosen ma- terials and highly developed technologies ensures trouble free functioning and a long service life. The terms of the warranty do... -
Page 61: Declaration Of Conformity
If your equipment shows signs of a defect during the warranty period, please return it to the sales outlet where you purchased the AMPLICOMMS equipment together with the purchase re- ceipt. All claims under the warranty terms in accordance with this agreement must be asserted exclusively with regard to your sales outlet. - Page 63 Inhoudsopgave Inbedrijfstelling ........64 Inhoud van de verpakking controleren .
- Page 64 De handset bellen (oproepsignaal/paging) ....90 Intern gesprek ........91 Telefoonboek .
- Page 65 Antwoordapparaat........104 Antwoordapparaat aan-/uitschakelen ....104 Begroeting instellen .
-
Page 66: Inbedrijfstelling
Inbedrijfstelling Belangrijk: Lees voordat u de telefoon in werking stelt de veiligheidsaanwijzingen vanaf blz 117. Inhoud van de verpakking controleren In de verpakking van de BigTel 1480 zit het volgende: • 1 tafeltoestel (basisstation) • 1 hoorn • 1 hoornaansluitsnoer •... -
Page 67: Het Telefoonsysteem Opstellen
Het telefoonsysteem opstellen Installatieplek Plaats het tafeltoestel in de buurt van een stopcontact en van de telefooncontactdoos, zodat de lengte van de telefoonkabel vol- doende is. Bewaar een afstand van ongeveer 1 meter tot andere elektronische apparaten, om een wederzijdse interferentie te voorkomen. - Page 68 Aansluiting Aansluiting telefoon hoornsnoer Belangrijk: Gebruik alleen de met de BigTel 1480 meegele- verde adapters, telefoonkabel en batterijen. Zo niet, dan is een correcte werking van de telefoon niet gegarandeerd. De toegang tot de adapter mag niet worden belemmerd door...
-
Page 69: De Handset In Bedrijf Stellen
De handset in bedrijf stellen 1. Open het batterijvak en leg er de batterijen in. Let op de polariteit. 2. Schuif het deksel terug op het batterijvak en zorg ervoor dat het vastklikt. Om de handset volledig op te laden, moet hij minstens 16 uur in het laadstation blijven staan (controleer of de spanning naar het laadstation ingeschakeld is!). -
Page 70: Het Tafeltoestel Op Een Wand Monteren
Het tafeltoestel op een wand monteren Om het tafeltoestel op een wand te monteren, hebt u 2 pluggen en 2 gepaste schroeven nodig, bij voorkeur met bolcilinderkop en met een diameter van 4 mm. Breng de schroeven op een on- derlinge afstand van 83 mm loodrecht onder elkaar aan en laat de kop ongeveer 3 mm uit de wand steken. - Page 71 4. Klap de wandhouder naar onderen en vergrendel hem. Leg de telefoonkabel en de adapterkabel door de gleuf aan de onderkant van de telefoon. Bind de telefoonkabel en de ad- apterkabel indien nodig samen met behulp van een kabel- klem. 5.
- Page 72 7. Hang de hoorn op de hoornhouder.
-
Page 73: Bedieningselementen
Bedieningselementen Handset... - Page 74 1 Hoorn 2 Versterkertoets - Voor het verhogen van het volume in de hoorn. Druk tijdens een gesprek eenmaal op de toets om de volumeversterking in te schakelen, en druk opnieuw op de knop om hem uit te schakelen. Wanneer de versterking ingeschakeld is, verschijnt "Boost AAN"...
- Page 75 10 Telefoonboek/Omhoog - In ruststand: telefoonboek openen. - In menu/lijsten: omhoog bladeren. - Bij invoeren van namen/nummers: cursor naar links verschuiven. 11 Opleggen/annuleren - Tijdens een gesprek: opleggen. - In het menu: selectie annuleren/terugkeren naar ruststand. - In ruststand: ingedrukt houden om handset uit te schakelen.
-
Page 76: Tafeltoestel
Tafeltoestel 1 Oproeplijst (gemist) - Opent de lijst van gemiste oproepen. 2 Menutoets - In ruststand: menu openen. 3 Snelkiestoetsen M1/M2/ M3/M4 - Bij het invoeren van telefoonnummers: Na het invoeren van het telefoonnummer lang ingedrukt houden om het nummer op te slaan. - In ruststand: Drukken om dat telefoonnummer dat onder die toets opgeslagen is, te bellen. - Page 77 4 Luidspreker 5 Toetsenblok - Invoeren van cijfers of letters - Toets 0 bij het invoeren van telefoonnummers: ingedrukt houden voor het toevoegen van een kiespauze. - Hekjes-toets in ruststand: Ingedrukt houden om de beltoon in/uit te schakelen. 6 Microfoon 7 Antwoordapparaat aan/uit - Indrukken om het antwoordapparaat aan/uit te schakelen.
- Page 78 12 Versterker-knop - Tijdens een gesprek: verhoging van volume in de hoorn. 13 Starten/stoppen-toets - Het afspelen van het antwoordapparaat starten/stoppen. 14 Verder-toets - Verdergaan naar volgende bericht bij het afspelen van het antwoordapparaat. - In ruststand: lang ingedrukt houden om een memo op te nemen.
-
Page 79: Symbolen In De Display (Tafeltoestel)
Symbolen in de display (tafeltoestel) Nieuw nummer in oproeplijst. Lopend nummer van een item van de oproeplijst. U voert een gesprek. De handsfree-modus is ingeschakeld. Beltoon uitgeschakeld. Het telefoonboek is geopend. Meerdere oproepen vanuit hetzelfde telefoonnum- mer. Weergave bij 12-uurformaat. Symbolen in de display (handset) Batterij bijna leeg: batterij moet worden geladen. -
Page 80: Door Het Menu Navigeren
Door het menu navigeren In dit hoofdstuk leest u hoe u de functies van de beide telefoons via het menu kunt inschakelen. Hoofdmenu openen (handset) 1. Druk op 2. Selecteer met het gewenste menupunt en druk op 3. Druk op om de actie te annuleren, terug naar het vorige menupunt te gaan of het menu te verlaten. - Page 81 Instell. Handset instelling Kies basis Display Contrast Handset naam Taal Autom. opnemen Pratende Geheugen Registr.handset Afmelden handset Handset reset Basis instell. Beltonen Beltoon Beltoon volume Kiesmodus Toon/Puls Systeem PIN Syteem reset Datum/Tijd/Alarm Datum/Tijd Tijd notatie Datum notatie Voer tijd in Voer datum in Alarm Alarm Aan/Uit...
-
Page 82: Hoofdmenu Openen (Tafeltoestel)
Antwoordapparat Bericht beluis Bericht wissen Beantwort aan/uit Memo opnemen Uitgaaende bericht Bericht opnemen Antw./opnemen Alleen antworten Bericht beluis Antw./opnemen Alleen antworten Beantwort Instell. Antwoordmodus Antw./opnemen Alleen antworten Beantwort taal Deutsch/English/ Française Belvertraging 2/4/6/8 Belt. Opnametijd 30/60/120 s / Onbeperkt Call screening Toeg op afstnd Aan/Uit Hoofdmenu openen (tafeltoestel) -
Page 83: Menuoverzicht (Tafeltoestel)
Menuoverzicht (tafeltoestel) TELEF .BOEK BEKIJKEN TOEVOEGEN BEWERKEN WISSEN ALLES WISSEN TB STATUS BELLERLIJST GEMIST ONTVANGEN GEBELD DATUM & TIJD TIJDFORMAAT KLOK INSTEL TAAL INSTELLINGEN BELINSTEL EXTERN. BEL MELODIE VOLUME INTERN. BEL MELODIE VOLUME VERWIJDER HS BELMODUS TOON/PULS FLASHTIJD KORT/NORMAAL/LANG TOETSTOON PIN WIJZIG. - Page 84 ANT.APPAR WEERG.BDSCHP ALLES WISSEN MEMO ANTW AAN/UIT ANTAPP .INST ANTW. MODUS ANTW & OPN ALLN ANTW. UITG BS INST ANTW & OPN ALLN ANTW. ANTW VERTR 2/4/6/8 BELTONEN ANTW. TAAL DEUTSCH FRANÇAIS ENGLISH BS FILTER EXT TOEGANG COMPRESSIE LAAG/NORMAAL/ HOOG PIN WIJZIG.
-
Page 85: Eerste Inbedrijfname
Eerste inbedrijfname Fabrieksmatig is de menutaal ingesteld op DUITS. 1. In de display van het tafeltoestel verschijnt DATUM EINST. 2. Voer met de pijltoetsen achtereenvolgens het jaar, de maand, de dag, het uur en de minuten in en druk na elke instelling op om verder te gaan. -
Page 86: Telefoneren
Telefoneren Bellen, gesprek aannemen en gesprek beëindigen Via tafeltoestel bellen Voer het telefoonnummer in en hef de hoorn op, of druk op - ofwel - Hef de hoorn op of druk op . Wacht op de kiestoon en voer het telefoonnummer in. Gesprek aannemen via tafeltoestel Hef de hoorn op of druk op Gesprek beëindigen via tafeltoestel... -
Page 87: Handsfree Bellen
Handsfree bellen Druk tijdens een gesprek op de toets op het tafeltoestel op de handset. Om de handsfree-modus uit te schakelen, drukt u opnieuw op de toets. Geluidsversterking Deze functie verbetert de klank en verhoogt het volume in de hoorn. Druk tijdens een gesprek op het tafeltoestel op de toets of op de handset op de laterale BOOST-knop. -
Page 88: Beltoon Uitschakelen
Beltoon uitschakelen U kunt de beltoon van een binnenkomende oproep uitschakelen, zodat dat de verbinding verbroken wordt. U kunt het gesprek gewoon aannemen zolang de beller niet heeft opgelegd. Bij de volgende binnenkomende oproep rinkelt de telefoon opnieuw normaal. Via de handset Druk op Via het tafeltoestel Druk op... -
Page 89: Oproeplijst
Oproeplijst Algemene opmerking: Deze functie is alleen beschikbaar wanneer uw telefoonmaatschappij de service CLIP (Calling Line Identification Presentation: belleridentificatie) ingeschakeld heeft. Raadpleeg voor meer informatie uw telefoonmaatschappij. Tafeltoestel: De telefoonnummers van binnenkomende oproepen worden opgeslagen in de oproeplijst. Bij nieuwe oproepen verschijnt in de display. - Page 90 Een telefoonnummer uit de oproeplijst opslaan in het telefoonboek (handset) 1. Druk in ruststand op de menutoets 2. Selecteer Bellijst en druk op 3. Selecteer met het gewenste nummer. 4. Selecteer Nummer opslaan en druk op 5. Voer een naam in en druk op 6.
-
Page 91: Opeenvolgende Nummers Kiezen
4. Druk op , selecteer Wissen of Alles wissen en druk op 5. Beantwoord de controlevraag met Nummers wissen (tafeltoestel) 1. Druk in ruststand op de menutoets 2. Selecteer BELLERLIJST en druk op 3. Selecteer GEMIST, ONTVANGEN of GEBELD en druk op 4. -
Page 92: Deelnemen Aan Een Lopend Gesprek/Conferentie
Deelnemen aan een lopend gesprek/Conferentie U kunt deelnemen aan een extern gesprek dan vanuit een andere apparaat gevoerd wordt, bv. tussen het tafeltoestel en één of twee handsets. Via de handset 1. Druk op om deel te nemen aan het lopende gesprek. 2. -
Page 93: Intern Gesprek
Intern gesprek U kunt een intern gesprek voeren tussen twee telefoons. Deze gesprekken zijn gratis. 1. Druk op (handset) of op (tafeltoestel). Als slechts 2 toestellen beschikbaar zijn, dan rinkelt onmiddellijk het andere toestel. Wanneer meerdere handsets aangemeld zijn, selecteert u de gewenste handset en drukt u 2. -
Page 94: Een Contact Opslagen In Het Telefoonboek (Handset)
Een contact opslagen in het telefoonboek (handset) 1. Druk in ruststand op de toets 2. Druk op 3. Selecteer Nieuw en druk op 4. Voer een naam in en druk op 5. Voer het telefoonnummer in en druk op 6. Selecteer een van de nummergroepen waaraan u het nieuwe nummer wilt toevoegen, en druk op Een contact opslagen in het telefoonboek (tafeltoest.) 1. - Page 95 Wissen 1. Druk op , selecteer Wissen of Alles wissen en druk op 2. Beantwoord de controlevraag met Geheugencapaciteit tonen 1. Druk op , selecteer Capacit. en druk op 2. U ziet het aantal contacten, bv. "1/100". Dit betekent dat één van de 100 geheugenplaatsen bezet is.
-
Page 96: Nummer Uit Telefoonboek Gebruiken (Tafeltoest.)
Nummer uit telefoonboek gebruiken (tafeltoest.) Open het telefoonboek ( -> TELEF.BOEK -> Bellen 1. Selecteer BEKIJKEN en druk op 2. Selecteer het gewenste nummer en druk op 3. Hef de hoorn op of druk op Bewerken 1. Selecteer BEWERKEN en druk op 2. -
Page 97: Snelkiezen (Tafeltoestel)
Snelkiezen (tafeltoestel) Het tafeltoestel beschikt over 4 snelkiestoetsen (M1, M2, M3, M4) om telefoonnummers op te slaan die u vervolgens met slechts één druk op de knop kunt bellen. De opgeslagen nummers kunnen niet direct gewist worden, maar als u een nieuw nummer op de sneltoets opslaat, dan wordt het oude nummer overschreven. -
Page 98: Instellingen (Handset)
Instellingen (handset) Beltonen 1. Druk in ruststand op de menutoets 2. Selecteer Geluid en druk op 3. Selecteer Beltonen en druk op - Externe oproepen: Stel de gewenste beltoon in en druk op - Interne oproepen: Stel de gewenste beltoon in en druk op - Beltoon volume: Selecteer het volume en druk op - Stil: Selecteer Uit om de beltoon volledig uit te schakelen, of selecteer Pieptoon, wanneer u slechts een korte... -
Page 99: Datum/Tijd Instellen
Datum/tijd instellen Voor de nummers in de oproeplijst en de berichten van het antwoordapparaat is het belangrijk om de tijd en datum correct in te stellen. 1. Druk in ruststand op de menutoets 2. Selecteer Instell. en druk op 3. Selecteer Datum Tijd/Alarm en druk op 4. -
Page 100: Handset Instellen
Handset instellen 1. Druk in ruststand op de menutoets 2. Selecteer Instell. en druk op 3. Selecteer Handset instelling en druk op - Kies basis: Als uw handset op meerdere basisstation aangemeld is, kunt u met de actieve basis selecteren. - Display: Selecteer Contrast en stel het gewenste contrast in - of - selecteer Handset naam en wijzig indien gewenst de naam... -
Page 101: Basisstation Instellen
Basisstation instellen 1. Druk in ruststand op de menutoets 2. Selecteer Instell. en druk op 3. Selecteer Basis instell. en druk op - Beltonen: Selecteer Beltoon en stel de gewenst melodie in - of - selecteer Beltoon volume en stel het volume in. - Kiesmodus: Selecteer Toon of Puls. -
Page 102: Instellingen (Tafeltoestel)
Instellingen (tafeltoestel) Datum/tijd instellen Bij de nummers in de oproeplijst en de berichten van het antwoordapparaat worden de datum en tijd aangegeven. 1. Druk in ruststand op de menutoets 2. Selecteer DATUM & TIJD en druk op 3. Selecteer KLOK INSTEL en druk op 4. -
Page 103: Handset Afmelden
Selecteer MELODIE en druk op . Selecteer een melodie en druk op Handset afmelden 1. Druk in ruststand op de menutoets 2. Selecteer INSTELLINGEN en druk op 3. Selecteer VERWIJDER HS en druk op 4. Voer de huidige pincode in (fabrieksmatig ingesteld op (0000) en druk op 5. -
Page 104: Flashtijd Instellen
Flashtijd instellen Voor het gebruik van bepaalde functies van het telefoonnet is een zogenaamd flash-signaal met een bepaalde lengte vereist. Raadpleeg uw telefoonmaatschappij voor meer informatie over beschikbare functies van uw telefoonnet en over de benodigde flashtijd. 1. Druk in ruststand op de menutoets 2. -
Page 105: De Fabrieksinstellingen Opnieuw Instellen
De fabrieksinstellingen opnieuw instellen 1. Druk in ruststand op de menutoets 2. Selecteer INSTELLINGEN en druk op 3. Selecteer STD.INSTELL. en druk op 4. Beantwoord de controlevraag met Extra handsets registreren U kunt tot 4 handsets koppelen aan het tafeltoestel. Nieuw gekochte handsets (BigTel 1201, als accessoire beschikbaar) moeten op het tafeltoestel worden geregistreerd voordat ze in gebruik worden genomen. -
Page 106: Antwoordapparaat
Antwoordapparaat Uw BigTel 1480 beschikt over een ingebouwd digitaal antwoordapparaat. De totale opnamecapaciteit bedraagt ongeveer 15 minuten. U kunt het antwoordapparaat bediening via het tafeltoestel of via elke geregistreerde handset. In geval van een MFV-compatibele telefoon hebt u bovendien van op afstand toegang tot het antwoordapparaat, en dit met pincodebeveiliging. -
Page 107: Begroeting Instellen
Via de handset 1. Druk in ruststand op de menutoets 2. Selecteer Antwoordapparat en druk op 3. Selecteer Beantwort aan/uit en druk op 4. Selecteer Aan of Uit en druk op Begroeting instellen Selecteer of u het antwoordapparaat in de modus Opname of in de modus Alleen begroeting wilt gebruiken. -
Page 108: Berichten Beluisteren
Tafeltoestel 1. Druk in ruststand op de menutoets 2. Selecteer ANT.APPAR en druk op 3. Selecteer ANTAPP .INST en druk op 4. Selecteer ANTW. TAAL en druk op 5. Selecteer een taal en druk op Handset 1. Druk in ruststand op de menutoets 2. - Page 109 - teruggaan naar het begin van het huidige bericht met Druk tweemaal op om naar het vorige bericht te springen; - het huidige bericht wissen met - het afspelen stoppen of herstarten met Via de handset Nieuwe berichten worden met een melding in de display aangeduid.
-
Page 110: Eigen Begroeting Opnemen
Eigen begroeting opnemen Uw eigen begroeting mag tot 90 seconden lang zijn. Begroetingen die korter dan 2 seconden zijn, worden niet opgeslagen. Via het tafeltoestel 1. Druk in ruststand op de menutoets 2. Selecteer ANT.APPAR en druk op 3. Selecteer ANTAPP .INST en druk op 4. -
Page 111: Begroeting Beluisteren/Wissen
Begroeting beluisteren/wissen Via het tafeltoestel 1. Druk in ruststand op de menutoets 2. Selecteer ANT.APPAR en druk op 3. Selecteer ANTAPP .INST en druk op 4. Selecteer UITG BS INST en druk op 5. Selecteer ANTW & OPN of ALLN ANTW. en druk op 6. -
Page 112: Meeluisteren Op De Handset
Meeluisteren op de handset Het meeluisteren gebeurt via de luidspreker van de handset. 1. In de display verschijnt Screening?. 2. Druk op Het gesprek wordt daarbij niet aangenomen. 3. Om het meeluisteren te stoppen, drukt u op Opmerking: U kunt binnenkomende berichten meeluisteren via het basisstation wanneer u deze functie hebt geactiveerd in het menu (s. -
Page 113: Een Oproep Overnemen
Een oproep overnemen Als het antwoordapparaat reeds een gesprek aangenomen heeft en u hoort het bericht van de beller, dan kunt u het gesprek overnemen. Via het tafeltoestel Hef de hoorn op of druk op Via de handset Druk op Berichten wissen U kunt uitsluitende oude (beluisterde) berichten wissen. -
Page 114: Memo Opnemen
Memo opnemen Een memo is een ter plekke opgenomen bericht dat u bv. kunt achterlaten voor andere personen die dit antwoordapparaat gebruiken. Memo's worden als nieuwe berichten aangegeven en behandeld en kunnen net als nieuwe berichten afgespeeld en gewist worden. Via het tafeltoestel 1. -
Page 115: Opnametijd Instellen
5. Selecteer een waarde uit de lijst en druk op Via de handset 1. Druk in ruststand op de menutoets 2. Selecteer Antwoordapparat en druk op 3. Selecteer Beantwort Instell. en druk op 4. Selecteer Belvertraging en druk op 5. Selecteer een waarde uit de lijst en druk op Opnametijd instellen U kunt instellen hoe lang een bericht maximaal mag zijn (30 sec, 60 sec, 120 sec of "Onbeperkt"). -
Page 116: Antwoordapparaat Resetten (Alleen Tafeltoestel)
Antwoordapparaat resetten (alleen tafeltoestel) U kunt het antwoordapparaat terug instellen op de fabrieksinstellingen. Dit wist alle persoonlijke begroetingen en instellingen. Binnengekomen berichten blijven behouden. 1. Druk in ruststand op de menutoets 2. Selecteer ANT.APPAR en druk op 3. Selecteer ANTAPP .INST en druk op 4. - Page 117 6. Voer de nieuwe pincode in en druk op 7. Voer de nieuwe pincode opnieuw in en druk op Beluisteren op afstand in-/uitschakelen (handset) 1. Druk in ruststand op de menutoets 2. Selecteer Antwoordapparat en druk op 3. Selecteer Toeg op afstnd en druk op 4.
- Page 118 Wanneer het antwoordapparaat ingeschakeld is, dan schakelt het na het ingestelde aantal rinkeltonen de begroeting in. Met de sterretjestoets start u tijdens de begroeting het beluisteren op afstand op. Voer nu de viercijferige pincode van uw telefoon in. Nadat u de pincode hebt ingevoerd, staan de volgende opties ter beschikking.
-
Page 119: Bijlage
In geval van een storing Bij technische problemen kunt u contact opnemen met onze service-hotline. Het telefoonnummer kunt u vinden op onze website www.amplicomms.com Bij garantieclaims kunt u contact opnemen met uw vakhandel. De garantie is 2 jaar vanaf de datum van aankoop geldig. - Page 120 • Overbelast nooit het stopcontact of het verlengsnoer, want dit kan brand of stroomstoot veroorzaken. • Haal het netsnoer uit het stopcontact en neemt contact op met uw leveranciers als een van de volgende situaties optreedt: • wanneer het netsnoer of de netstekker beschadigd of gerafeld is;...
-
Page 121: Rechtmatig Gebruik
• Let bij het inleggen van de batterijen op de juiste polariteit. • Dompel batterijen nooit onder in water en werp ze niet in vuur. • Er bestaat gevaar op explosie wanneer een verkeerd type batterij wordt gebruikt. • Voer verbruikte accu's/batterijen af volgens de plaatselijke voorschriften. -
Page 122: Stroomvoorziening/Stroomuitval
Stroomvoorziening/Stroomuitval Belangrijk: Gebruik alleen de met de BigTel 1480 meegele- verde adapter. Bij een stroomuitval kan enkel nog via het tafeltoestel worden gebeld. Functies die op stroom werken, zoals handsfree bellen, volumeversterking etc., kunnen dan niet meer worden gebruikt. Energiezuinige adapter... -
Page 123: Gescheiden Inzameling
Gescheiden inzameling Als u het apparaat wilt afdanken, brengt u het naar een inzamelingspunt (bijvoorbeeld KCA−depot). Volgens de wet op elektrische en elektronische apparaten zijn eigenaars van oude apparaten verplicht om oude elektrische en elektronische apparaten naar een gescheiden afvalinzameling te brengen. -
Page 124: Technische Gegevens
Technische gegevens Standaard DECT Stroomvoorziening (tafeltoestel) Opgenomen vermogen: 100-240V 50/60Hz Uitgaand vermogen: 6 VDC 450 mA Stroomvoorziening (laadstation) Opgenomen vermogen: 100-240V 50/60Hz Uitgaand vermogen: 6 VDC 450 mA Reikwijdte In de open lucht: ca. 300 m, Binnen: ca. 50 m Stand-by Max. -
Page 125: Onderhoudsinstructies
• Reinig de behuizing met een zacht en pluisvrij doek. • Gebruik geen schoonmaakmiddelen of oplosmiddelen. Garantie AMPLICOMMS-apparaten worden met hulp van de meest moderne productieprocessen vervaardigd en getest. Specifiek geselecteerde materialen en geavanceerde technologieën zorgen voor een storingsvrije werking en lange levensduur. -
Page 126: Conformiteitsverklaring
AMPLICOMMS-toestel gekocht heb en toon hen uw ontvangstbewijs. Alle garantieclaims moeten bij uw vakhandel worden ingediend. Twee jaar na de aankoop en overhandiging van onze producten kunnen geen garantieclaims meer worden ingediend. Conformiteitsverklaring Dit toestel voldoet aan de voorschriften van de Europese... - Page 127 Contenido Puesta en funcionamiento ......128 Comprobación del contenido del embalaje ... . . 128 Instalación del teléfono .
- Page 128 Listín telefónico ........155 Crear una nueva entrada en el listín telefónico (terminal inalámbrico) .
- Page 129 Contestador automático ......167 Encender/apagar contestador automático ....168 Establecer modo de aviso .
-
Page 130: Puesta En Funcionamiento
Importante: Asegúrese de leer la información de seguridad a partir de la página 181 antes de la puesta en funcionamiento de su teléfono. Comprobación del contenido del embalaje El volumen de suministro de un BigTel 1480 incluye lo siguiente: • 1 unidad de sobremesa (estación base) •... -
Page 131: Instalación Del Teléfono
Instalación del teléfono Lugar de colocación Coloque la unidad de sobremesa cerca de una toma de corriente y de teléfono, de modo que alcance la longitud del cable de conexión. Mantenga una distancia de aprox. 1 m respecto a los demás equipos electrónicos para evitar interferencias. - Page 132 Importante: Utilice únicamente las fuentes de alimentación, el cable de conexión del teléfono y las baterías que se sumi- nistran con su BigTel 1480. En caso contrario, no se podrá garantizar el funcionamiento correcto del teléfono. No obs- taculice el acceso al enchufe de conexión eléctrica con mue-...
-
Page 133: Puesta En Funcionamiento Del Terminal Inalámbrico
Puesta en funcionamiento del terminal inalámbrico 1. Abra la tapa del compartimento de batería y coloque las baterías. Preste atención a la polaridad correcta. 2. Vuelva a cerrar la tapa del compartimento de la batería hasta que encastre de forma audible. El terminal inalámbrico deberá... -
Page 134: Montaje En La Pared
Montaje en la pared Para el montaje en la pared de la unidad de sobremesa, se necesitan 2 tacos y 2 tornillos adecuados, preferiblemente de cabeza alomada con 4 mm de diámetro. Los tornillos deben disponerse verticalmente a una distancia de 83 mm uno debajo del otro, de modo que las cabezas sobresalgan unos 3 mm de la pared. - Page 135 4. Abra el soporte de pared hacia abajo y bloquéelo en esta posición. Tienda el cable del teléfono y el cable del adaptador de corriente a través de la ranura de la parte inferior del teléfono. En caso necesario, sujete el cable del teléfono y el cable del adaptador de corriente con cintas de cable o un producto similar.
- Page 136 7. Cuelgue el auricular del soporte.
-
Page 137: Elementos De Mando
Elementos de mando Terminal inalámbrico... - Page 138 1 Auricular 2 Tecla de amplificación - Para aumentar el volumen del auricular. Al presionar brevemente durante una llamada se activa la amplificación, si se vuelve a pulsar se desactiva. Cuando se activa la función de amplificación aparece „Ampl.act. “ en la pantalla y el indicador de llamada (6) se enciende.
- Page 139 - Al introducir nombres o números: Borrar símbolos, por ejemplo, al crear una entrada en la agenda telefónica. 10 Listín telefónico / Subir - En reposo: abrir listín telefónico - En el menú / en las listas: desplazarse hacia arriba. - Al introducir nombres o números: desplazar cursor a la izquierda.
-
Page 140: Unidad De Sobremesa
Unidad de sobremesa 1 Lista de llamadas (perdidas) - Abre la lista de las llamadas perdidas. 2 Tecla de menú - En reposo: abrir menú. 3 Teclas de marcación directa M1, M2, M3, M4 - En modo de marcación: Después de introducir el número mantener presionado para guardar el número de teléfono. - Page 141 5 Teclado de marcación - Introducir cifras o letras. - Tecla 0 al introducir número de llamada: Presionar la tecla de forma prolongada para insertar una pausa de marcación. - Tecla de almohadilla en modo de reposo: Presionar la tecla de forma prolongada para para encender/apagar el tono de llamada.
- Page 142 - Durante una conversación / escuchar el buzón de voz: Disminuir el volumen. 12 Tecla de amplificación - Durante una llamada: Aumentar el volumen del auricular. 13 Tecla de inicio/parada - Iniciar o detener la reproducción del contestador automático. 14 Tecla de avanzar - Pasar al siguiente mensaje mientras escucha el contestador automático.
-
Page 143: Símbolos De La Pantalla (Unidad De Sobremesa)
- Se ilumina cuando otro dispositivo (terminal inalámbrico) está ocupando la línea. Símbolos de la pantalla ( unidad de sobremesa Nueva entrada en la lista de llamadas. Número actual de la entrada en la lista de llamadas. Lleva a cabo una llamada telefónica. Manos libres conectado. -
Page 144: Navegación Por Los Menús
Navegación por los menús En este capítulo se describe cómo acceder a las funciones de ambos teléfonos a través de los menús. Abrir menú principal (terminal inalámbrico) 1. Pulse 2. Seleccione la opción de menú deseada con y pulse 3. Pulse para interrumpir la acción, volver a la opción de menú... - Page 145 Config. Config. teléfono Selecc. base Pantalla Contraste Nombre teléfono Idioma Respuesta automática Teclas memoria Registrar teléfono Eliminar Restablec teléfono Config. base Timbre Tono llamada Volumen timbre Modo marcación Tone/Pulso PIN sistema Restablec base Fecha/hora/alarm Fecha/hora Formato hora Formato Fecha Introduc. hora Introduc.
-
Page 146: Abrir Menú Principal (Unidad De Sobremesa)
Contest automático Reproduc. mensajes Borrar mensajes Act./des. contest. Grabar mens. pers. Mensaje saliente Grabar mensaje Responder/grabar Solo respuesta Reproduc. mensaje Responder/grabar Solo respuesta Config. contest. Modo respuesta Responder/grabar Solo respuesta Idioma contest. Deutsch/English/ Française Retardo respuesta 2/4/6/8 señales Tiempo grabac. 30/60/120 s / Ilimitado Emisión llamada... -
Page 147: Estructura Del Menú (Unidad De Sobremesa)
Estructura del menú (unidad de sobremesa) DIRECTORIO AGREGAR EDITAR ELIMINAR BORRAR TODOS ESTADO DIR REG. LLAM. PERDIDAS RECIBIDAS REALIZADAS FECHA Y HORA FORMATO HORA AJUST. RELOJ IDIOMA AJUSTES CONF TIMBRE TIMBRE EXT MELODÍA VOLUMEN TIMBRE INT MELODÍA VOLUMEN ELIMINAR TLF MODO MARC. - Page 148 CONTES AUTOM REP MENSAJE BORRAR TODOS RECORDATORIO CONT ACT/DES AJUSTES CON. MODO CONT CONT / GRAB SÓLO CONT CONF MEN SAL CONT / GRAB SÓLO CONT DEMORA RESP 2/4/6/8 TIMBRES IDIOMA CONT DEUTSCH FRANÇAIS ENGLISH REVISAR BASE ACC. REMOTO COMPRESIÓN BAJA/MEDIA/ALTA MODIFIC PIN CONTEST PRED...
-
Page 149: Primera Puesta En Funcionamiento
Primera puesta en funcionamiento El idioma ajustado de fábrica para los menús es ALEMÁN. 1. En la pantalla de la unidad de sobremesa aparece DATUM EINST. 2. Establezca con las teclas de flecha el año, mes, día, hora y minutos, y pulse después de cada ajuste para pasar a la siguiente configuración en Configuración del idioma en la unidad de sobremesa 1. -
Page 150: Telefonear
Telefonear Realizar, responder y terminar una llamada Llamar desde la unidad de sobremesa Marque el número de teléfono y descuelgue el auricular o pulse O bien, descuelgue el auricular o pulse . Espere a oír el tono de línea para marcar el número de teléfono. Responder una llamada desde la unidad de sobremesa Descuelgue el auricular, o bien pulse Finalizar una llamada desde la unidad de sobremesa... -
Page 151: Amplificación
Amplificación Esta función mejora la reproducción de sonido y sube el volumen del auricular. Durante la llamada, pulse la tecla en la unidad de sobremesa o la tecla de amplificación BOOST situada en el lateral en el terminal inalámbrico. Vuelva a pulsar la tecla para desactivar la función. Ajustar el volumen En el terminal inalámbrico Durante la llamada, pulse los botones de volumen situados a... -
Page 152: Desconexión Del Timbre
Desconexión del timbre Es posible apagar el timbre de una llamada entrante sin perder la conexión. Podrá responder a la llamada si la persona que llama no ha colgado. En la próxima llamada, el teléfono volverá a sonar de la forma habitual. En el terminal inalámbrico Pulse En la unidad de sobremesa... -
Page 153: Registro De Llamadas
Registro de llamadas Información general: Esta función solo está disponible si su proveedor de red ha habilitado la función de identificación de llamadas CLIP (muestra al receptor de la llamada el número de teléfono de la persona que llama). Puede consultar a su proveedor de red para más información. - Page 154 4. Seleccione el registro deseado con 5. Descuelgue el auricular o pulse para marcar el número. Guardar el número de teléfono del registro de llamadas en el listín telefónico (terminal inalámbrico) 1. En el modo de reposo pulse la tecla de menú 2.
-
Page 155: Marcación En Cadena
Eliminar entradas (terminal inalámbrico) 1. En el modo de reposo pulse la tecla de menú 2. Seleccione Registro llamadas y pulse 3. Seleccione el registro deseado con 4. Pulse , seleccione Borrar o Borrar todo y pulse 5. Confirme la pregunta de seguridad con Eliminar entradas (unidad de sobremesa) 1. -
Page 156: Participar En Una Conversación En Curso
Participar en una conversación en curso Puede participar con la unidad de sobremesa o con hasta 4 terminales inalámbricos en una llamada externa que se ha establecido desde otro dispositivo. Desde el terminal inalámbrico 1. Pulse para participar en una conversación. 2. -
Page 157: Llamada Interna
Llamada interna Puede realizar llamadas internas entre dos teléfonos. Estas llamadas no generarán ningún gasto. 1. Pulse (terminal inalámbrico) o (unidad de sobremesa). Si solo hay dos dispositivos disponibles, sonará el otro inmediatamente. En caso de estar registrados varios terminales inalámbricos, seleccione el dispositivo correspondiente y pulse 2. -
Page 158: Crear Una Nueva Entrada En El Listín Telefónico (Terminal Inalámbrico)
Crear una nueva entrada en el listín telefónico (terminal inalámbrico) 1. En el modo de reposo, pulse la tecla 2. Pulse 3. Seleccione Nueva entrada y pulse 4. Introduzca el nombre y pulse 5. Introduzca el número de teléfono y pulse 6. - Page 159 Revisar entradas 1. Pulse , seleccione Ver y pulse 2. Revise con los detalles de la entrada. Borrar 1. Pulse , seleccione Borrar o Borrar todo y pulse 2. Confirme la pregunta de seguridad con Mostrar capacidad 1. Pulse , seleccione Capacidad y pulse 2.
-
Page 160: Utilizar Las Entradas Del Listín Telefónico (Unidad De Sobremesa)
Utilizar las entradas del listín telefónico (unidad de sobremesa) Abra el listín telefónico ( -> DIRECTORIO -> Llamar 1. Seleccione VER y pulse 2. Seleccione la entrada deseada y pulse 3. Descuelgue el auricular o pulse Modificar 1. Seleccione EDITAR y pulse 2. -
Page 161: Marcación Directa (Unidad De Sobremesa)
Marcación directa (unidad de sobremesa) La unidad de sobremesa tiene 4 teclas de marcación directa (M1, M2, M3, M4) para aquellos números en donde solo necesita una única presión para llamarlos. Los números de marcación directa guardados no pueden eliminarse de forma explícita; si guarda un nuevo número en una tecla de marcación directa el número anterior será... -
Page 162: Configuración (Terminal Inalámbrico)
Configuración (terminal inalámbrico) Tonos de llamada 1. En el modo de reposo, pulse la tecla de menú 2. Seleccione Sonidos y pulse 3. Seleccione Timbre y pulse - Externo: Seleccione la melodía deseada y pulse - Interno: Seleccione la melodía deseada y pulse - Volumen timbre: Seleccione el volumen y pulse - Silencio: Seleccione Desactiv. -
Page 163: Ajustar Hora/Fecha
Ajustar hora/fecha Para las entradas de la lista de llamadas al igual que para los mensajes en el contestador automático es importante que la hora y la fecha se introduzca correctamente. 1. En el modo de reposo, pulse la tecla de menú 2. -
Page 164: Ajustar Terminal Inalámbrico
Ajustar terminal inalámbrico 1. En el modo de reposo, pulse la tecla de menú 2. Seleccione Config. y pulse 3. Seleccione Config. teléfono y pulse - Selecc. base: Si su terminal inalámbrico está asociado a varias estaciones base puede utilizar la base activa seleccionando - Pantalla: Seleccione Contraste y establezca el contraste deseado... -
Page 165: Ajustar Estación Base
Ajustar estación base 1. En el modo de reposo, pulse la tecla de menú 2. Seleccione Config. y pulse 3. Seleccione Config. base y pulse - Timbre: Seleccione Tono llamada y seleccione la melodía deseada - o - seleccione Volumen timbre y ajuste el volumen. - Modo marcación: Seleccione Tono o Pulso. -
Page 166: Configuración (Unidad De Sobremesa)
Configuración (unidad de sobremesa) Ajustar la hora/fecha Las entradas del registro de llamadas, así como los mensajes del contestador automático muestran la hora y la fecha de la llamada. 1. En el modo de reposo pulse la tecla de menú 2. -
Page 167: Dar De Baja Terminal Inalámbrico
- o - Seleccione MELODÍA y pulse . Elija una melodía y pulse Dar de baja terminal inalámbrico 1. En el modo de reposo pulse la tecla de menú 2. Seleccione AJUSTES y pulse 3. Seleccione ELIMINAR TLF y pulse 4. -
Page 168: Ajustar El Tiempo De Flash
Ajustar el tiempo de flash Para utilizar los servicios de la red se requiere una señal, conocida como flash, con una cierta longitud. Consulte a su proveedor de red sobre las prestaciones de red disponibles y el tiempo de flash necesario. 1. -
Page 169: Registrar Otro Terminal Inalámbrico
(ver manual de instrucciones del terminal inalámbrico). Contestador automático Su BigTel 1480 tiene incorporado un contestador automático digital. La capacidad total es de unos 15 minutos. Puede utilizar el contestador automático desde la unidad de sobremesa o desde cualquier teléfono inalámbrico registrado. -
Page 170: Encender/Apagar Contestador Automático
Encender/apagar contestador automático En la unidad de sobremesa Pulse la tecla O bien: 1. En el modo de reposo pulse la tecla de menú 2. Seleccione CONTES AUTOM y pulse 3. Seleccione CONT ACT/DES y pulse 4. Seleccione ENCENDIDO o APAGADO y pulse En el terminal inalámbrico 1. -
Page 171: Establecer Idioma De Aviso
Establecer idioma de aviso Seleccione el idioma para el aviso estándar. En el estado de entrega viene pre-configurado el idioma alemán. Si el idioma deseado no está disponible (Alemán, Inglés, Francés), seleccione el idioma que desee y grabe su propio aviso de voz, p. -
Page 172: Escuchar Mensajes
Escuchar mensajes En la unidad de sobremesa Los mensajes nuevos se indican mediante la tecla parpadeante . El número de la persona que llama, si se transmite, se registra en la lista de llamadas. Para cada mensaje se muestra la fecha y la hora en la pantalla. En caso de nuevos mensajes la pantalla muestra, por ejemplo, 02/05 MENS, lo que significa que tiene 2 mensajes de un total de 5. - Page 173 En el terminal inalámbrico Los mensajes nuevos se muestran a través de una advertencia en la pantalla. El número de la persona que llama, si se transmite, se registra en la lista de llamadas. Para cada mensaje se muestra la fecha y la hora en la pantalla.
-
Page 174: Grabar Un Mensaje Personal
Grabar un mensaje personal El mensaje grabado puede tener una duración de 90 segundos como máximo. Los mensajes que duren menos de 2 segundos no se guardarán. En la unidad de sobremesa 1. En el modo de reposo pulse la tecla de menú 2. -
Page 175: Borrar/Escuchar Aviso De Voz
Borrar/escuchar aviso de voz En la unidad de sobremesa 1. En el modo de reposo pulse la tecla de menú 2. Seleccione CONTES AUTOM y pulse 3. Seleccione AJUSTES CON. y pulse 4. Seleccione CONF MEN SAL y pulse 5. Seleccione CONT / GRAB o SÓLO CONT y pulse 6. -
Page 176: Escuchar En El Terminal Inalámbrico
Escuchar en el terminal inalámbrico La escucha se realiza a través del altavoz del teléfono. 1. Aparece ¿Emisión? en pantalla. 2. Pulse De esta manera no se accede a la conversación. 3. Para detener la escucha pulse Nota: Puede escuchar mensajes entrantes en la estación base si tiene dicha función activada en el menú... -
Page 177: Responder Una Llamada
Responder una llamada Si el contestador automático acaba de contestar una llamada y se está grabando el mensaje en ese momento, podrá aceptar la llamada. En la unidad de sobremesa Descuelgue el auricular o pulse En el terminal inalámbrico Pulse Borrar mensajes Únicamente se pueden borrar mensajes antiguos. -
Page 178: Ajustar Retardo Para Conexión Del Contestador
En la unidad de sobremesa 1. En el modo de reposo pulse la tecla de menú 2. Seleccione CONTES AUTOM y pulse 3. Seleccione RECORDATORIO y pulse 4. Pronuncie la nota de voz después de la señal y pulse para finalizar. 5. -
Page 179: Ajustar El Tiempo De Grabación
Ajustar el tiempo de grabación Se puede ajustar el tiempo máximo que puede durar un mensaje (30 s, 60 s, 120 s o ilimitado). En el terminal inalámbrico 1. En el modo de reposo, pulse la tecla de menú 2. Seleccione Contest. automático y pulse 3. -
Page 180: Restablecer Contestador Automático
Restablecer contestador automático (sólo unidad de sobremesa) Puede restablecer el contestador automático a la configuración inicial de fábrica. De esta manera se eliminan todos los avisos de voz personales y ajustes. Los mensajes existentes se conservan. 1. En el modo de reposo pulse la tecla de menú 2. - Page 181 5. Introduzca el PIN actual de comprobación remota y presione 6. Introduzca el nuevo PIN de comprobación remota y presione 7. Vuelva a introducir el nuevo PIN de comprobación remota y presione Apagar/encender comprobación remota y cambiar PIN de comprobación remota (terminal inalámbrico) 1.
- Page 182 Después de introducir el PIN correctamente le aparecerán las siguientes opciones. - o - Si el contestador automático está encendido éste se comunicará con el aviso de voz después de la cantidad de tonos de llamada introducidos. Con la tecla asterisco inicia durante el aviso de voz la comprobación remota.
-
Page 183: Apéndice
En caso de problemas técnicos puede contactar con nuestro servicio de atención telefónica. Encontrará el número de teléfono en nuestra página web www.amplicomms.com En caso de reclamaciones de garantía, póngase en contacto con su distribuidor. El período de garantía corresponde a 2 años a partir de la fecha de compra. - Page 184 • No sobrecargue tomar de corriente y cables de extensión ya que podría provocar un incendio o una descarga eléctrica. • Desconecte el cable de alimentación de la toma de corriente y diríjase a su proveedor en caso de que se den las siguientes condiciones: •...
-
Page 185: Uso Previsto
Bien protegido de humo, polvo, vibraciones, sustancias químicas, humedad, calor y luz solar directa. Asegúrese de que el enchufe de conexión eléctrica permanezca siempre accesible. Fuente de alimentación/Caída de corriente Importante: Utilice únicamente las fuentes de alimentación que se suministran con el BigTel 1480. -
Page 186: Fuente De Alimentación Que Ahorra Energía
En caso de caída de corriente sólo se puede telefonear con el teléfono alámbrico. Las aplicaciones que dependen de corriente eléctrica directa como el manos libres, la amplificación, etc. no podrán ser utilizadas. Fuente de alimentación que ahorra energía Las fuentes de alimentación suministradas con el dispositivo cumplen con los requisitos de diseño ecológico de la UE para productos que utilizan energía (Directiva 2005/32/CE). -
Page 187: Eliminación
Eliminación Para desechar su aparato, llévelo al punto de recogida de un organismo de eliminación local (por ejemplo, un centro de reciclaje). Según la ley sobre aparatos eléctricos y electrónicos, los propietarios de aparatos usados están obligados por ley a realizar una clasificación de residuos separada para los aparatos eléctricos y electrónicos usados. -
Page 188: Datos Técnicos
Datos técnicos Estándar DECT Fuente de alimentación (unidad de sobremesa) Entrada: 100-240 V 50/60 Hz Salida: 6 V CC 450 mA Fuente de alimentación (estación de carga) Entrada: 100-240 V 50/60 Hz Salida: 6 V CC 450 mA Alcance En el exterior: aprox. 300 m, En el interior: aprox. -
Page 189: Garantía
Garantía Los dispositivos AMPLICOMMS se fabrican utilizando los últimos procesos de producción y prueba. El uso de materiales cuidadosamente seleccionados y la aplicación de avanzadas tecnologías aseguran un funcionamiento sin problemas y una larga vida. La garantía no será aplicable si la causa de una avería en el dispositivo se debe al operador de red o a la posible instalación... -
Page 190: Declaración De Conformidad
La conformidad con la directiva mencionada anteriormente se confirma mediante el símbolo CE que aparece en el dispositivo. Para acceder a la declaración de conformidad completa, utilice la descarga gratuita de nuestro sitio web www.amplicomms.com. - Page 192 4 250711 996925 Audioline GmbH, D-41460 Neuss 12/2016 – Edition 1.0...
Need help?
Do you have a question about the bigtel 1480 and is the answer not in the manual?
Questions and answers