Table of Contents
Advertisement
Quick Links
IMPORTANT: PLEASE READ THESE INSTRUCTIONS CAREFULLY TO ENSURE THE SAFE AND
GENERAL INFORMATION
These instructions accompanying the product are the original instructions. This document is part of the product, keep it
for the life of the product passing it on to any subsequent holder of the product. Read all these instructions before
assembling, operating or maintaining this product.
This manual has been compiled by Draper Tools describing the purpose for which the product has been designed, and
contains all the necessary information to ensure its correct and safe use. By following all the general safety instructions
contained in this manual, it will ensure both product and operator safety, together with longer life of the product itself.
All photographs and drawings in this manual are supplied by Draper Tools to help illustrate the operation of the product.
Whilst every effort has been made to ensure the accuracy of information contained in this manual, the Draper Tools
policy of continuous improvement determines the right to make modifications without prior warning.
Diesel Space Heaters
EFFECTIVE USE OF THIS PRODUCT.
Stock Nos.32287
32286
53926
32285
32284
53925
INSTRUCTIONS FOR
Part Nos.DSH450
DSH750
DSH751
DSH1250
DSH1750
DSH2150
Advertisement
Table of Contents

Subscribe to Our Youtube Channel
Related Manuals for Draper 32287


Summary of Contents for Draper 32287
-
Page 1: General Information
All photographs and drawings in this manual are supplied by Draper Tools to help illustrate the operation of the product. -
Page 2: Title Page
Commercial copying, redistribution, hiring or lending is prohibited. No part of this publication may be stored in a retrieval system or transmitted in any other form or means without written permission from Draper Tools Limited. In all cases this copyright notice must remain intact. -
Page 3: Table Of Contents
CONTENTS 2.1 CONTENTS PAGE CONTENT PAGE TITLE PAGE INTRODUCTION ....................2 REVISION HISTORY....................2 UNDERSTANDING THIS MANUAL ...............2 COPYRIGHT NOTICE....................2 CONTENTS CONTENTS ......................3 GUARANTEE GUARANTEE ......................4 INTRODUCTION SCOPE ........................5 SPECIFICATION ......................5 HANDLING & STORAGE ..................5 HEALTH & SAFETY INFORMATION GENERAL HEATER SAFETY WARNINGS ...............6-7 CONNECTION TO THE POWER SUPPLY..............8 TECHNICAL DESCRIPTION IDENTIFICATION ....................9... -
Page 4: Guarantee 3.1 Guarantee
This guarantee applies in lieu of any other guarantee expressed or implied and variations of its terms are not authorised. Your Draper guarantee is not effective unless you can produce upon request a dated receipt or invoice to verify your proof of purchase within the guarantee period. -
Page 5: Introduction
Internal shut off temp..80°C ±10°C....... 80°C ±10°C ....... 80°C ±10°C Reset Temp......70°C ±10°C....... 70°C ±10°C ....... 70°C ±10°C Weight ........27.2kg ......24.4kg........ 32kg Dimensions ..... 1050x445x540mm.....890x405x510mm .... 1030x430x550mm Stock no ........32286........53926 ....... 32287 Part no ........DSH750 ......DSH751 ......DSH450 Motor: Rated voltage ....230V~....... 230V~ .......230V~ Rated frequency ... -
Page 6: Health & Safety Information
HEALTH & SAFETY INFORMATION 5.1 GENERAL HEATER SAFETY WARNINGS WARNING: Read all safety warnings and all instructions. Failure to follow the warnings and instructions may result in electric shock, fire and/or serious injury. Save all warnings and instructions for future reference. 1) Work area safety a) Keep work area clean and well lit. - Page 7 HEALTH & SAFETY INFORMATION WARNING: Before using this heater please - Never use this heater in living or sleeping read this OPERATING INSTRUCTION very areas. carefully. This USER’S MANUAL has been WARNING: Risk of Electric Shock! designed to instruct you as to the proper Use only the electrical power (voltage and manner in which to assemble, maintain, frequency) specified on the model plate of...
-
Page 8: Connection To The Power Supply
HEALTH & SAFETY INFORMATION 5.2 CONNECTION TO THE POWER SUPPLY CAUTION: Risk of electric shock. Do not open. This appliance is supplied with a moulded 3 pin mains plug for your safety. The value of the fuse fitted is marked on the pin face of the plug. Should the fuse need replacing, ensure the substitute is of the correct rating, approved to BS1362 and ASTA or BS Kite marked. -
Page 9: Technical Description
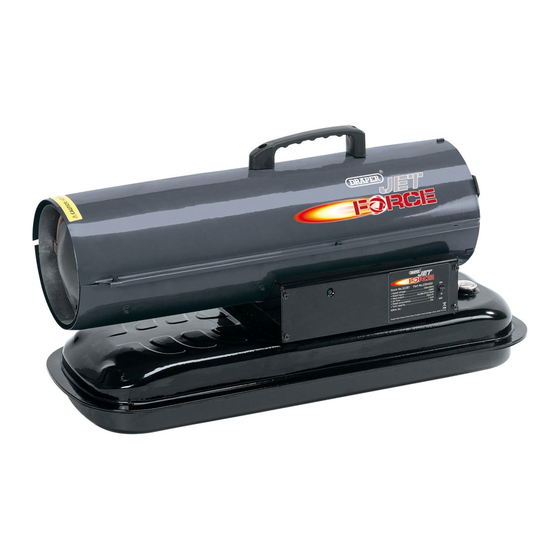
Digital Temp. display†. Thermostat control†. Handle (rear). Indicator lamp. Fan guard. Fuel cap. Fuel tank. Fuel Gauge Drain plug. † NOT fitted to 32287. Leg frame. Bracket. Fixing kit. Axle. Wheels. Wheel fixing kit. Handle fixing kit. Wheel and frame Kit not... -
Page 10: Unpacking & Checking
Lay the contents out and check them against the parts list provided. If any part is damaged or missing; please contact the Draper Helpline (the telephone number appears on the Title page) and do not attempt to use the product. -
Page 11: Preparing The Heater
PREPARING THE HEATER 8.1 HANDLE FITMENT (32286 & 32287) - FIG. 1 FIG.1 i. Align the holes in the upper housing with the two mounting holes on the handle. ii. Screw the handle securely with the screws provided. 8.2 HANDLE & WHEEL FITMENT (32285 & 53926) - FIGS. -
Page 12: Fuels
PREPARING THE HEATER 8.4 FUELS Use only standard Diesel or Kerosene heater oil according to EN 267. WARNING: Never use petrol, oil, used oils, naphtha, paint thinners, alcohol or other highly flammable fuels. Using incorrect fuel may cause danger of explosion and death. IMPORTANT: Be sure fuel tank is clean. -
Page 13: Operating The Heater
OPERATING THE HEATER 9.1 TO START HEATER - FIG. 4 i. Fill fuel tank with appropriate fuel. ii. Fit fuel cap. iii. Plug power cable into mains supply. Extension Cable Wire Size Requirements: 6 to 10 feet (1.8 to 3 metres) long, use 1.0mm gauge cable. 11 to 100 feet (3.4 to 30.53 metres) long, use 1.3mm gauge cable. -
Page 14: Storing, Transporting Or Shipping
OPERATING THE HEATER 9.6 STORING, TRANSPORTING OR SHIPPING CAUTION: Fuel tank MUST be empty before shipping or transportation. 9.7 DRAINING THE FUEL TANK: Underneath the fuel tank is the drain plug , place a suitable size container under drain plug, remove drain plug to drain all fuel. Be sure all fuel is removed. To assist the removal of fuel - remove the fuel cap If any debris is noted in old fuel, add 1 or 2 litres of clean fuel into tank, wash around and drain again. -
Page 15: Maintenance
10. MAINTENANCE WARNING: Never service heater while it is plugged in or while hot! USE ORIGINAL EQUIPMENT REPLACEMENT PARTS. Use of third-party or other alternate components will void warranty Upper Shell and may cause unsafe operating conditions. Fan Guard 10.1 FUEL TANK Flush every 200 hours of operation or as needed. -
Page 16: Clean Photocell
10. MAINTENANCE 10.5 CLEAN PHOTOCELL - FIGS. 6 - 9 Clean photocell annually or as needed. Remove upper shell (See Air Intake Filter, page 15). Remove fan (See Fan Blades). Photo Cell Photo Cell Circuit Wire Wire Remove photocell from its mounting bracket. Board Clean photocell lens with cotton swab. -
Page 17: Burner Head
10. MAINTENANCE 10.7 BURNER HEAD - FIGS. 11 - 12 FIG.11 Burner Head Open upper shell (See left instructions). Remove fan blade (See Fan Blades). Remove fuel and air line hoses from burner head. Ignitor Wire Remove ignitor wire from spark plug. Remove spark plug from nozzle rod using a No.2 cross-slot screwdriver. -
Page 18: Photocell
10. MAINTENANCE 10.9 PHOTOCELL - FIG. 14 CLEAN PHOTOCELL ANNUALLY OR AS NEEDED (For 32286 and 32267 only). Remove upper shell (See Air Intake Filter, page 15). Remove fan (See Fan Blades). Remove photocell from its mounting bracket. Clean photocell lens with cotton swab. TO REPLACE: Remove side Cover near power switch. -
Page 19: Disposal
11. DISPOSAL 11.1 DISPOSAL - At the end of the machine’s working life, or when it can no longer be repaired, ensure that it is disposed of according to national regulations. - Contact your local authority for details of collection schemes in your area. In all circumstances: •... - Page 20 - Sales Desk: (023) 8049 4333 - General Enquiries: (023) 8026 6355 - Service/Warranty Repair Agent For aftersales servicing or warranty repairs, please contact the Draper Tools Helpline for details of an agent in your local area. YOUR DRAPER STOCKIST PJKC0616...
Need help?
Do you have a question about the 32287 and is the answer not in the manual?
Questions and answers