Table of Contents
Advertisement
Advertisement
Table of Contents
Troubleshooting

Related Manuals for Accutome ACCUPEN


Summary of Contents for Accutome ACCUPEN
- Page 1 ® AccuPen Handheld Tonometer User’s Guide 24-3002 Rev. E...
- Page 2 CAUTION: Changes or modifications not expressly approved by Accutome Ultrasound, Inc. could void the FCC compliance and negate your authority to operate the product. Authorized Representative in Europe (for regulatory affairs only):...
- Page 3 Manufactured in the USA by: Accutome, Inc. 3222 Phoenixville Pike Malvern, Pennsylvania 19355...
-
Page 4: Table Of Contents
Introduction - - - - - - - - - - - - - - - - - 1 AccuPen Overview - - - - - - - - - - - - - - - - 1 Features - - - - - - - - - - - - - - - - - - - - 2... - Page 5 Accutome AccuPen User Guide Battery Disposal - - - - - - - - - - - - - - - - 21 Instructions for Disposal - - - - - - - - - - - - 21 Disposal in Europe - - - - - - - - - - - - - - - 22 Disposal in US.
- Page 6 Recommended separation distances between portable and mobile RF communications equipment and the AccuPen - - - - - - - - - - - - - - - - - - - - - - - - - - 31 Table 10...
- Page 7 List of Figures Figure 1 AccuPen® Tonometer - - - - - - - - - - - - - - - - - - - - - - - 1 Figure 2 AccuPen® Unpacked - - - - - - - - - - - - - - - - - - - - - - - 10...
-
Page 8: Introduction
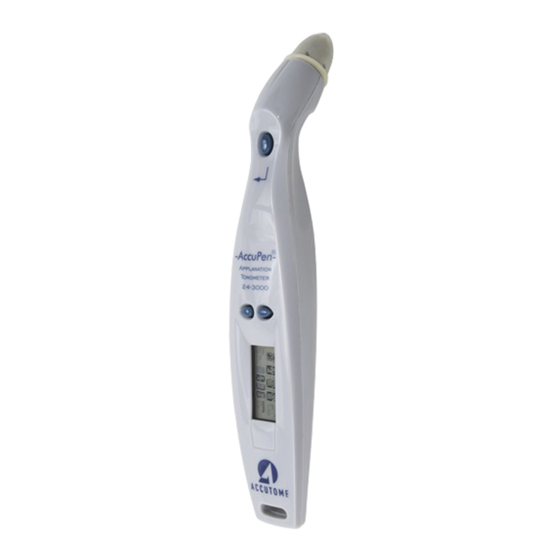
Figure 1: AccuPen® Tonometer Features The AccuPen is designed for easy access to all screens and functions. The unsurpassed ease of use of the control buttons, and the straightforward Graphical User Interface guide you through every operation. -
Page 9: Measurements
Thickness) and provides Adjusted IOP based on manually entered corneal thickness measurements The body of the AccuPen is angled from the probe tip and both the body and the tip have sighting lines that allow easy visualization of... -
Page 10: About This Manual
Specifications Provides AccuPen physical and operational specifications Section 6 Warranty and Describes AccuPen Repairs warranty information and repair procedures. Having read this manual you will be able to set up the AccuPen, take measurements, and enter and calculate Adjusted IOP. -
Page 11: Safety
AccuPen Safety Precautions of a general nature Safety Issues to Consider When Using the AccuPen The AccuPen is non-invasive. The strain gauge sensor probe tip, covered with a single-use latex disposable, touches the surface of the anesthetized cornea during the scanning process. -
Page 12: Symbol Definitions For The Accupen
Accutome AccuPen User Guide Symbol Statements, graphics and symbols listed below are used Definitions for on components of the AccuPen. Descriptions and meanings are listed to the right of the symbols. AccuPen "Attention! Consult Instruction Manual." Type B Medical Device 3.6 Volts... -
Page 13: Safety Precautions
Safety Safety Precautions Safety There are several areas in the use of the AccuPen that Precautions require special attention, as they may pose a safety threat. The AccuPen has an enclosure rated Degree of Protection of IP32. The enclosure provides protection for objects larger than 2.5 mm and dripping water. -
Page 14: Cleaning
Accutome AccuPen User Guide Cleaning Keep the surfaces of the AccuPen free of dust and dirt and store the instrument in a dry and cool place so as not to adversely affect any electronic parts. No specific cleaning interval is recommended. -
Page 15: Avoiding Equipment Damage
Avoiding Equipment Damage No peripheral equipment may be connected to the AccuPen. The AccuPen provides no explosion protection from static discharge or arcing components. Do not operate the instrument in the presence of explosive gases such as flammable mixtures of anesthetic and air, or nitrous... -
Page 16: Getting Started
Getting Started Overview The AccuPen is designed to be used in multiple medical settings and can be rested on a surface, such as a counter or desk. The AccuPen requires no assembly. Unpacking Upon receiving the AccuPen: Instructions Remove the AccuPen® Tonometer case from the protective shipping materials. -
Page 17: Battery Specification And Installation
See Section 6 of this manual for contact information. Battery The power source for the AccuPen is 3.6 V Lithium Specification battery. The battery is included with the AccuPen and must be installed before use. -
Page 18: Battery Installation
To install the battery in the AccuPen: Locate the battery compartment (as shown in Fig- ure 3) on the bottom of the AccuPen and open the compartment by unscrewing the battery door screw. The battery door is hinged to the bottom of the handle and should not be removed from the product. -
Page 19: Instructions For Use
Do not over tighten the screw. Figure 3: Battery Insertion Instructions for Use CAUTION: DO NOT AUTOCLAVE ® THE AccuPen TONOMETER. Initial AccuPen Tonometer Setup The followiing steps outline the basic setup of the AccuPen. -
Page 20: Calibration
Getting Started Calibration If the battery is not installed in the AccuPen, install the battery as described in “Battery Installation” on page 11 and 12 of this manual. To return to the Measurement screen, press and hold the Action Control Button for 2 to 3 seconds until the Measurement screen appears. -
Page 21: Figure 5 Calibration Probe Horizontal Position
Accutome AccuPen User Guide Figure 5: Calibration Probe Horizontal Position Wait for beep and then hold AccuPen, so that the probe is straight up in a vertical position and press Main button as shown in Figure 6. "PROB UP" will be displated on the LCD. -
Page 22: Basic Operation
If “No Calc” is displayed on LCD the calibration process was not performed correctly. Basic The basic operation of the AccuPen consists of the Operation following steps: Power on the AccuPen instrument. Take up to nine measurements. -
Page 23: How To Start A New Patient
How to Start a New Patient To start a new Patient: Hold the Up and Down control buttons on the AccuPen simultaneously for two to three seconds. A single beep from the instrument will indicate that all IOP measurements, averages, CCT entries and Calculations are set to zero. -
Page 24: How To Take A Measurement
Gently tap the sensor tip on the patient's eye. The AccuPen will automatically proceed to the next empty measurement if it is available. The AccuPen will emit a high pitched chirp (beep) when you have automatically acquired a measure- ment. -
Page 25: How To Calculate Adjusted Iop
Accutome AccuPen User Guide You can review the measurements taken by press- ing the Up and Down control buttons. You can delete any measurement taken by touch- ing and holding either the Up or Down control but- ton for several seconds (until the unit emits a high pitched chirp). -
Page 26: Table 1 Iop Correction Values
Getting Started Basic Operation Table 1 below provides the IOP correction values. Table 1: IOP Correction Values Corneal Thickness (micrometers) Correction Values (mm Hg) Correction Values according to corneal thickness of 545 micrometers These correction values are modified from the work of Doughty and Zamen. This chart was reproduced from the Review of Ophthalmology, July 2002 Leon Herndon, MD, Duke University, Glaucoma Service, Pages 88, 89, 90. -
Page 27: Maintenance, Storage And Troubleshooting
Maintenance, Storage and Troubleshooting General Maintenance that should be performed on the AccuPen Maintenance consists of activities such as keeping surfaces free of dust and dirt and storing in a dry and cool place so as to not adversely effect electronic parts. -
Page 28: Maintenance And Cleaning
Clean the AccuPen Tonometer by wiping everything except the tip with a clean, lint-free, non-abrasive cloth and alcohol. Clean the AccuPen Tonometer tip by wiping the tip with alcohol and allowing it to air dry. Do not drop the device. Avoid any shock or excessive vibration as this may damage the unit. -
Page 29: Disposal In Europe
Thus, in each country the manufacturers, importers and users are responsible for the proper disposal or recycling. In accordance with these directives the AccuPen® Lithium Cells do not contain dangerous substances. The reaction products are inorganic and do not represent environmental hazards, once the decomposition or neutralization process has terminated. -
Page 30: Storage
Storage When not in use, the AccuPen® Tonometer and all accessories should be replaced in the storage case. If the AccuPen® Tonometer is not to be used for an extended period of time, remove the battery from the device. Troubleshoot- Refer to Table 2 for information in identifying and correcting problems that can occur with the AccuPen. -
Page 31: Table 2 Accupen Troubleshooting Information
Maintenance, Storage and Troubleshooting Troubleshooting Table 2: AccuPen Troubleshooting Information Symptom Probable Cause Correction A. “LOW BATT” A. Battery is low A. Replace battery displayed (See Section 3.) B.1. Improper tech- B.1. Review measurement B. Multiple vari- able readings nique technique B.2. - Page 32 Accutome AccuPen User Guide D.3. Battery is low D.4. Replace battery (See Section 3.) D.4. Mechanical or D.5. Arrange for repair electronic damage through Accutome Technical Service Group (See Section E. Out of calibration E. Recalibrate unit E. “NO CALC”...
-
Page 33: Specifications
AccuPen. Physical Table 3 below lists the physical specifications of the Specifications AccuPen instrument and associated peripherals. Table 3: AccuPen Physical Specifications Main Unit Dimensions 18.4 cm X 3.2 cm X 3.2 cm (7.25" X 1.25" X 1.25") -
Page 34: Environmental Specifications
Accutome AccuPen User Guide Environmental Table 4 below lists the AccuPen system operating and Specifications storage values for temperature and humidity. Table 4: Environmental Specifications Temperature Operating +10° C to +40° C (50° F to 104° F) Storage -20° C to +60° C (-4° F to 140° F) -
Page 35: Emc Compliance Information
Table 6: Guidance and manufacturer’s declaration - electromagnetic emissions The AccuPen is intended for use in the electromagnetic environment specified below. The customer or the user of the AccuPen should assure that it is used in such an environment. Emissions test... -
Page 36: Table 7 Guidance And Manufacturer's Declaration - Electromagnetic Emissions
Table 7: Guidance and manufacturer’s declaration - electromagnetic immunity The AccuPen is intended for use in the electromagnetic environment specified below. The cus- tomer or the user of the AccuPen should assure that it is used in such an environment. Immunity Test IEC 60601... -
Page 37: Table 8 Guidance And Manufacturer's Declaration - Electromagnetic Immunity
Table 8: Guidance and manufacturer’s declaration - electromagnetic immunity The AccuPen is intended for use in the electromagnetic environment specified below. The cus- tomer or the user of the AccuPen should assure that it is used in such an environment. Immunity Test IEC 60601... -
Page 38: Table 9 Recommended Separation Distances Between Portable And Mobile Rf Communications Equipment
RF communications equipment and the AccuPen The AccuPen is intended for use in an electromagnetic environment in which radiated RF disturbances are controlled. The customer or the user of the AccuPen can help prevent electromagnetic interference by maintaining a minimum distance between portable and mobile RF communications equipment (transmitters) and the AccuPen as recommended below, according to the maximum output power of the communications equipment. -
Page 39: Warranty & Repairs
Warranty & Repairs Warranty Accutome, Inc. warrants its new equipment to be free from defects in workmanship or materials. Any product that is proven to be defective will be repaired or replaced at our discretion, free of charge, up to one year from the date of purchase by the initial user of the equipment from Accutome, Inc. -
Page 40: Product Returns
Follow the instructions given below to return products to Returns Accutome Inc. Service and Repair Before returning instruments for service or repair, contact the Accutome Technical Service Group for a Return Goods Authorization (RGA) number. Toll Free (in USA): 1-800-979-2020 Tech Service:... -
Page 41: Replacement Parts
Table 6 below lists items that are available from Parts Accutome, Inc. or from your local sales representative. Please be sure to use the Accutome part number for the item when placing an order. Table 10: Accutome Replacement Parts Description Accutome Part No.
Need help?
Do you have a question about the ACCUPEN and is the answer not in the manual?
Questions and answers