
Related Manuals for FujiFilm Fujinon HK3.1x14.5-F


Summary of Contents for FujiFilm Fujinon HK3.1x14.5-F
- Page 1 HK3.1x14.5‐F/M/FA HK4.7x18‐F/M/FA HK7.5x24‐F/M/FA HK5.3x75‐F/M/FA BB00038783-100 LP63x-F/M/FA 2809...
- Page 3 日本語版/JAPANESE V. この取扱説明書は「日本語版」「英語版」「技術資料」から構成されています。 日本語版 English version 技術資料 Technical Drawings...
- Page 4 MEMO...
- Page 5 目 次 ・ 目 次 ......................................1 ・ 安全にお使いいただくために ..............................2 ・ レンズの概要 .....................................3 ・ 取付方法......................................3 (1) カメラへの取り付け..............................3 (2) ゼラチンフィルタ取付リングについて ........................4 (3) デジタルカメラ用マウントとフィルムカメラ用マウントについて..............4 (4) デジタルカメラ用マウントとフィルムカメラ用マウントの交換 ..............5 ・ フランジバックの調整................................6 ・ 操作方法......................................7 ・ 保守 ・ 点検..................................... 8 ・ 仕 様 ......................................9 ・ 各部の名称............................... 技術資料参照 ・...
- Page 6 安全にお使いいただくために 安全にお使いいただくために ここでは、製品を安全に正しくご使用いただくために、重要な注意事項を説明しています。必ずご使用前に読み、記 載内容に従って正しくご使用ください。 △ △ 文章中の 警告や 注意は次のことを表しています。 △ 警告 誤った取り扱いをしたときに、人が死亡または重傷を負う可能性が想定される内容を 示します。 △ 注意 誤った取り扱いをしたときに、人が傷害を負ったり、物的損害の発生が想定される内 容を示します。 △ 警 告 ◆ 取り付け・締め付けは確実に行ってください。高所使用時の落下は重大な事故の原因となります。 ◆ 太陽や高輝度の光源をレンズを通して見ないでください。目にけがをする原因となります。 △ 注 意 ◆ 運搬中の落下は、けがの原因となります。落とさないように注意してください。 ◆ 分解・改造を行わないでください。製品の機能を損ねたり、感電の原因となります。 一般的な注意 ◆ レンズおよびその付属品は精密機械です。決して強い衝撃を与えないでください。 レンズマウントのフランジ面より後方にレンズ部分が突き出ているレンズの場合、取り付け・取り外しの際、レンズ部 分に衝撃を与えないよう十分に注意してください。 ◆ レンズを寒いところから急に、気温と湿気が高いところに持ち込むと、レンズが曇ることがあります。上記のような環 境へレンズを持ち込むときは、前もってレンズを使用環境温度へ適合させるなどの曇り対策を講じてください。 ◆ カメラを操作するときは、レンズの前部に衝撃を与えないよう十分に注意してください。 ◆...
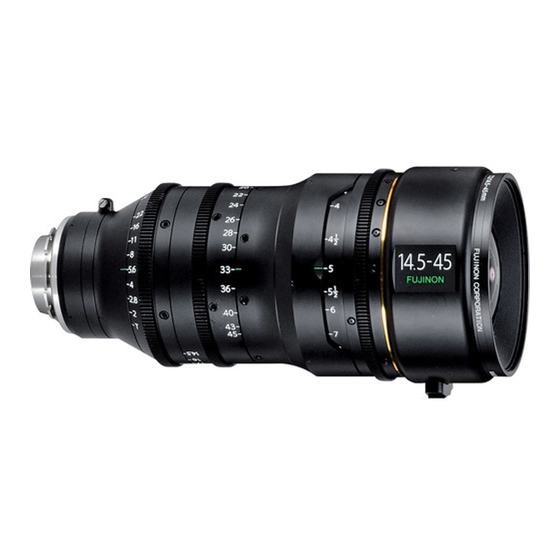
- Page 7 レンズの概要 このレンズは35mm PLマウントカメラ用に開発されたズームレンズです。 取 付 方 法 (1) カメラへの取り付け 注1. レンズをカメラに取り付ける前に、必ずカメラの電源を OFF にしてください。 注2. 取り付けの後、レンズおよびカメラのマウントを保護するために、レンズ固定脚にレンズ支持装置を取り付けて ください。 警 告 取り付け・締め付けは確実に行ってください。高所使用時の落下は重大な事故の原因となります。 レンズのマウント面 カメラのマウント面 ピン(カメラによって位置が異なる) 切り欠き(7ヵ所) カメラ レンズ固定脚 マウントクランプリング レンズサポータ取付ねじ(3/8-16UNC) a. 後レンズキャップを外します。 b. カメラのマウントクランプリングを、反時計方向一杯に回します。 c. カメラのマウント面にあるピンが、レンズのマウント面にある切り欠きに確実に入るように位置を合わせてから、 レンズとカメラのマウント面を合わせます。 (マウント面にあるピンの位置は、カメラによっては図と異なる場合があります。) d. マウントクランプリングを時計方向一杯に回します。 注. レンズを最初にカメラに取り付けたとき、または異なるカメラに取り付けたときには、必ずフランジバックの 調整(5ページ参照)を行ってください。 支持枠使用時の取付状態...
- Page 8 取 付 方 法 (2) ゼラチンフィルタ取付リングについて このレンズには、ゼラチンフィルタ取付リングがマウントに取り付けられています。 ゼラチンフィルタを使用する場合は、以下の手順で取り付けてください。 ①マウントの上下にある切り欠き部に指を掛けて、ゼラチンフィルタ取付リングを取り出します。 ②取り出したゼラチンフィルタ取付リングに、ゼラチンフィルタを貼り付けます。 ③ゼラチンフィルタを貼りつけたゼラチンフィルタ取付リングを、元の位置に挿入します。 このとき、リングが斜めに挿入されないように注意してください。 後面図 切り欠き (上下2ヵ所) REAR VIEW SLITS (2 PLACES, AT TOP AND BOTTOM) マウント部 切り欠き マウントリング ゼラチンフィルタ取付リング MOUNT RING GELATIN FILTER MOUNTING RING (3) デジタルカメラ用マウントとフィルムカメラ用マウントについて このレンズは、デジタルカメラに取り付けて使用するように、工場出荷時に調整されています。 デジタルカメラ(補正プリズム付き)とフィルムカメラ(補正プリズムなし)では、フランジバック(取付基準面から結 像面までの距離)が異なります。したがって、レンズをこのままの状態でフィルムカメラに取り付けますと、レンズ 本来の光学性能が発揮されません。 このレンズをフィルムカメラに取り付けて使用するには、別売りのフィルムカメラ用マウントの使用をお勧めしま...
- Page 9 (4) デジタルカメラ用マウントとフィルムカメラ用マウントの交換 デジタルカメラ用マウントとフィルムカメラ用マウントの交換は、以下の手順で行います。 a. マウントをレンズ本体に固定している、8本のマウント固定用 後面図 ねじを取り外します。 REAR VIEW (このとき、2本のすりわり付きねじはゆるめないでください。) すりわり付きねじ マウント固定用ねじ(8ヵ所) b. レンズ本体からマウントを取り外します。 側面図 SIDE VIEW マウント レンズ本体 マウント MOUNT c. レンズ本体の2ヵ所の位置決めピンを、取り付けるマウントの位置決め用穴に入れ、取り外した8本の マウント固定用ねじを取り付けます。確実に固定してください。 側面図 マウント前面図 SIDE VIEW FRONT VIEW OF MOUNT 位置決めピン(2ヵ所) マウント 位置決め用穴 LOCATING PINS (2 PLACES) MOUNT LOCATING HOLES d.
- Page 10 フランジバックの調整 フランジバックとは、レンズの取付基準面(フランジ)から結像面までの距離をいいます。 取付カメラの違いや外気温度など諸条件の違いにより、フランジバックがずれることがあります。 この場合は、下記の要領で調整を行ってください。 ■ 被写体および絞りの条件 1. 被写体: 巻末に添付してあります “ジーメンススター”を、切り取ってご使用ください 2. 被写体距離: 約 3 m 3. 絞 り: 開放またはできるだけ開放に近い位置 ■ 調 整 フォーカス、アイリスの操作方法については、「操作方法」の項(7ページ)を参照してください。 a. 付属の工具を使用して、F.f 固定ねじを反時計方向に回してゆるめます。 b. ズームを操作してワイド端にします。 c. F.f 固定つまみを使用してF.f 調整リングを回し、約3m離れた距離に置いたジーメンススターに焦点を合わせ ます。白黒の放射縞模様が最もはっきり見える位置が最適な焦点位置です。 d. ズームを操作してテレ端にします。 e. フォーカスを操作して、ジーメンススターに焦点を合わせます。 f. ズームをワイド端に戻して、手順 ‘c’ で合わせた最適な焦点位置が保たれているか確認します。 g.
- Page 11 操 作 方 法 ■ アイリス操作 アイリスリングを回して操作します。 リングを、カメラ側から見て時計方向に回すと、絞りはクローズ側になり、反時計方向に回すと、オープン側にな ります。 ■ フォーカス操作 フォーカスレバーを使用して、または直接フォーカスリングを回して操作します。リングを、カメラ側から見て時計 方向に回すと、焦点は至近側に合い、反時計方向に回すと無限遠側に合います。 注1. フォローフォーカスシステムを使用する場合は、フォーカスレバーを外してください。 ■ ズーム操作 ズームレバーを使用して、または直接ズームリングを回して操作します。リングを、カメラ側から見て時計方向に 回すと、映像はワイド側になり、反時計方向に回すと、テレ側になります。 - 7 -...
- Page 12 保 守 ・ 点 検 ■ レンズの清掃 市販のレンズクリーナおよびレンズクリーニングペーパーを用意します。 a. 始めに、レンズ表面のほこりを、柔らかいハケやブロアーブラシなどで払い落とします。 b. クリーニングペーパーを適当な大きさに折り、一部をレンズクリーナに浸します。 ペーパーの湿った部分で、レンズの中心部から周辺部に向けて渦巻きを描きながら軽く拭きます。 新しいペーパーを使用して、拭き残りがなくなるまでこの作業を繰り返してください。 ■ 湿気の除去 レンズ本体に水分が付着した場合には、まず、速やかに乾いた布で外部の水分を拭き取ってください。 次に、乾燥剤と共にビニール袋に入れて密封し、完全に除湿してください。 ■ 保 管 長期間レンズを使用しないときは、高温、多湿、腐食性ガスのある場所を避けて保管してください。 ■ 点 検 ご使用上不都合が生じた場合には、購入先販売店にご相談ください。 長期間、高性能を維持していただくために、1年に1回の定期点検をお勧めいたします。 なお、お客様のご都合で改造等が行われた製品につきましては、点検 ・ 修理をお引き受けできないこともありま すのでご注意ください。 - 8 -...
- Page 13 仕 様 レンズ型名 HK3.1×14.5-F/M/FA HK4.7×18-F/M/FA 項目 マウント PLマウント 焦点距離 14.5 ~ 45 mm 18 ~ 85 mm ズーム比 3.1× 4.7× 最大口径時 T 値 (T No.) 絞り範囲 T2 ~ T22 24.0 × 13.5 mm 画面寸法 (φ27.5 mm) アスペクト比 1.78 : 1 フランジバック (in Air) 52 mm (調整範囲...
- Page 14 仕 様 レンズ型名 HK7.5×24-F/M/FA HK5.3×75-F/M/FA 項目 マウント PLマウント 焦点距離 24 ~ 180 mm 75 ~ 400 mm ズーム比 7.5× 5.3× T2.8 (7.5~290mm) 最大口径時 T 値 (T No.) T2.6 ~T3.8(400mm) 絞り範囲 T2.6 ~ T22 T2.8 ~ T22 24.0 × 13.5 mm 画面寸法 (φ27.5 mm) アスペクト比...
- Page 15 ENGLISH VERSION This operation manual is composed of the Japanese version, English version, and Technical Drawings. Japanese English Version version Technical Drawings...
- Page 16 MEMO...
-
Page 17: Table Of Contents
TABLE OF CONTENTS ・ Table of Contents ..................................1 ・ For Your Safety Use ................................2 ・ General Description.................................3 ・ Installation ....................................3 (1) Installation ont Camera............................3 (2) About Gelatin Filter Mounting Ring ........................4 (3) About Digital Camera Mount and Film Camera Mount ................5 ・... -
Page 18: For Your Safety Use
FOR YOUR SAFETY FOR YOUR SAFETY This content explains important notices for all the users to use this product safely. Read the content carefully before using, and follow the instructions. △ △ The following signs of WARNING and CAUTION show : △... -
Page 19: General Description
GENERAL DESCRIPTION This Product is a zoom lens designed for 35 mm PL mount cameras. INSTALLATION (1) INSTALLATION ONTO CAMERA Note. Prior to installation of the lens, turn off the power of the camera and, if used, the external power source. WARNING Be sure to attach all the parts securely. -
Page 20: About Gelatin Filter Mounting Ring
(2) About Gelatin Filter Mounting Ring A gelatin filter mounting ring is housed in the mount of the lens. To use a gelatin filter, follow the steps below to mount it on the lens. ① Detach the gelatin filter mounting ring from the lens by pinching it with two fingers over the two slits in the mount. -
Page 21: About Digital Camera Mount And Film Camera Mount
(4) Exchange the mount To exchange the mount for digital camera and mount for film camera, follow the steps below. a. Remove the eight mount fixing screws that fix the mount REAR VIEW to the lens body. SLOTTED (In this step, do not loosen the two slotted head screws.) HEAD SCREWS MOUNT FIXING SCREWS (8 PLACES) -
Page 22: Adjustment Of Flange Focal Length
ADJUSTMENT OF FLANGE FOCAL LENGTH The flange focal length is the distance from the flange (mounting surface) of a lens to the focal plane. Depending on the camera or conditions such as ambient temperature, there may be a case where the back focus is changed. -
Page 23: Operating Instruction
OPERATION FOCUS RING ZOOM RING IRIS RING FOCUS LEVER ZOOM LEVER ■ IRIS OPERATION Iris operation is performed by rotating the iris ring. Clockwise rotation of the ring, viewed from camera side, moves the iris towards the closed side while counter- clockwise rotation moves it towards open side. -
Page 24: Maintenance
MAINTENANCE ■ CLEANING THE LENS Prepare lens cleaning liquid and lens cleaning paper on the market. a. First use a soft brush or blower brush to brush dust off the surface of the lens. b. Fold the cleaning paper to an adequate size, and dip a part of it into the liquid. Lightly wipe the lens from the center to the periphery while drawing a spiral with the wet paper part. -
Page 25: Specifications
SPECIFICATION LENS HK3.1×14.5-F/M/FA HK4.7×18-F/M/FA ITEM Mount PL Mount 14.5 ~ 45 mm Focal Length 18 ~ 85 mm Zoom Ratio 3.1× 4.7× Maximum (T No.) Photometric Aperture Iris Range T2 ~ T22 24.0 × 13.5 mm Image Format (φ27.5 mm) Aspect Ratio 1.78 :... - Page 26 SPECIFICATION LENS HK5.3×75-F/M/FA HK7.5×24-F/M/FA ITEM Mount PL Mount Focal Length 24 ~ 180 mm 75 ~ 400 mm Zoom Ratio 7.5× 5.3× Maximum T2.8 (7.5~290mm) (T No.) T2.6 Photometric Aperture ~T3.8(400mm) Iris Range T2.6 ~ T22 T2.8 ~ T22 24.0 × 13.5 mm Image Format (φ27.5 mm) Aspect Ratio 1.78 :...
- Page 27 技術資料 TECHNICAL DRAWINGS...
- Page 33 ジーメンススター / SIEMENS STAR...
- Page 34 MEMO...
- Page 35 Mail : optical_service@fujifilm.eu District ,Beijing100026,China Optical Device Division FUJIFILM UK Ltd. TEL : +86-10-6539-1866 Ext. 310 10 New Industrial Road Fujifilm Building Singapore Optical Devices Division 536201 FUJIFILM (China) Investment Co., Ltd 88 Bushy Road, Raynes Park, Merton, TEL : +65-6380-5318...
Need help?
Do you have a question about the Fujinon HK3.1x14.5-F and is the answer not in the manual?
Questions and answers