Table of Contents
Advertisement
Advertisement
Table of Contents

Related Manuals for Extreme Networks AP-7522


Summary of Contents for Extreme Networks AP-7522
- Page 1 AP-7522 Access Point Installation Guide Updated March 2017 9035076 Rev00...
- Page 2 Copyright © 2017 Extreme Networks, Inc. All Rights Reserved. Legal Notice Extreme Networks, Inc. reserves the right to make changes in specifications and other information contained in this document and its website without prior notice. The reader should in all cases consult representatives of Extreme Networks to determine whether any such changes have been made.
-
Page 3: Table Of Contents
1.5 AP-7522 Antennas........7... - Page 4 7.0 End-User Software License Agreement ....43 8.0 AP-7522 Access Point China ROHS Compliance ... . 50...
-
Page 5: Introduction
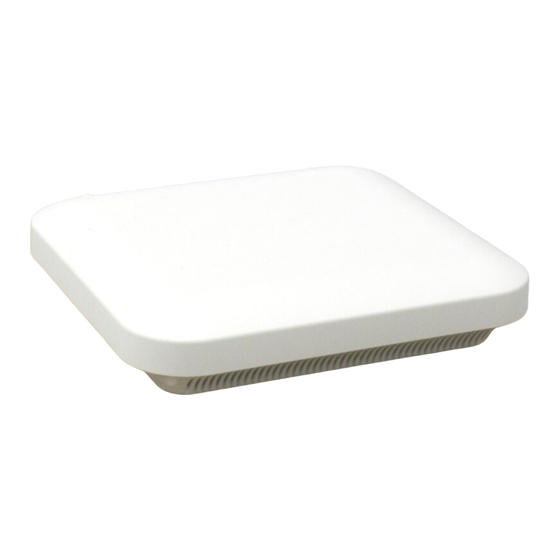
Installation Guide 1 Introduction The AP-7522 external antenna and internal antenna Access Point’s are mid-tier Access Point’s with a relatively small footprint which supports functionality for dependable and efficient network performance.The AP-7522 is a 2x2:2 802.11ac Access Point utilizing one 2.4 GHz 802.11n radio and one 5 GHz 802.11ac radio. -
Page 6: Site Preparation
Verify cable lengths are within the maximum allowable distances for optimal signal transmission. AP-7522 Package Contents An AP-7522 Access Point is available in external antenna (AP-7522) and internal antenna (AP-7522I) configurations. An AP-7522 ships with the following: • AP-7522 Access Point •... -
Page 7: Ap-7522 Antennas
ML-2452-VMM5M3-N72 Patch * This antenna is for indoor placement only. 1.5.2 AP-7522 Dual Band 2.4 GHz / 5 GHz Antennas - EU An external antenna AP-7522 supports the following dual band antenna options for the EU: Part Number Antenna Type 2.4 GHZ Gain (dBi) 5 GHZ Gain (dBi) - Page 8 PIFA 4.13 5.92 1.5.4 AP-7522 Dual Band 2.4 GHz / 5 GHz Antennas - Canada An external antenna AP-7522 supports the following dual band antenna options for Canada: Part Number Antenna Type 2.4 GHZ Gain (dBi) 5 GHZ Gain (dBi)
-
Page 9: Hardware Installation
2 Hardware Installation Installation Instructions An AP-7522 Access Point mounts either on a wall (with M 3.5 x 0.6 x 23 MM pan head screws and mounting bracket- or equivalent) or on a suspended ceiling T-bar. To prepare for the installation: 1. -
Page 10: Precautions
Access Point. Power Injector System An AP-7522 Access Point can receive power via an Ethernet cable connected to the GE1/POE (LAN) port. When users purchase a WLAN solution, they often need to place Access Points in obscure locations. - Page 11 Injector into the console port can damage the port and void the AP-7522’s product warranty. The AP-7522’s supported Power Injector (Part No. AP-PSBIAS-2P3-ATR) is a high power POE Injector delivering up to 30 watts. The Access Point can only use a Power Injector when connecting the unit to the Access Point’s GE1/POE port.
- Page 12 AP-7522 Access Point A separate Power Injector is required for each AP-7522 Access Point comprising the network. The Power Injector can be installed free standing, on an even horizontal surface or wall mounted using the power injector’s wall mounting key holes. The following guidelines should be adhered to before cabling the Power Injector to an Ethernet source and an Access Point: •...
-
Page 13: Wall Mount Instructions
Wall Mount Instructions A wall mount deployment requires hanging the AP-7522 Access Point with the provided mounting bracket and two screws. The AP-7522 can be mounted on to any plaster, wood or cement wall surface using the provided mounting bracket. -
Page 14: Wall Mount Procedure - New Installation
AP-7522 Access Point 2.5.1 Wall Mount Procedure - New Installation This section describes a new AP-7522 installation with no previous Access Point existing on the intended wall surface. 1. Place the mounting bracket against the wall. 2. Mark the screw hole locations depending on the intended deployment orientation of the unit. -
Page 15: Suspended Ceiling T-Bar Mount Installation
Ceiling mount requires holding the AP-7522 up against a T-bar of a suspended ceiling grid and twisting the unit on to the T-bar. If deploying the AP-7522 on a sculpted ceiling T-Bar, the Access Point mounting kit (Part No. KT-135628-01) can optionally be used as well. - Page 16 Access Point. 2. Cable the Access Point using either the Power Injector solution (AP-PSBIAS-2P3-ATR) or the approved AP-7522 power supply (PWRS-14000-54R). For Power Injector installations: a. Connect a RJ-45 CAT5e (or CAT6) Ethernet cable between the network data supply (host) and the Power Injector Data In connector.
- Page 17 Do not actually connect to the power source until the cabling portion of the installation is complete. 3. Verify the unit has power by observing the LEDs. For more information on AP-7522 LED behavior, see LED Indicators on page 19.
- Page 18 AP-7522 Access Point 8. Rotate the Access Point chassis 45 degrees counter-clockwise. The clips click as they fasten to the T-bar. 9. The Access Point is ready to configure.
-
Page 19: Led Indicators
Installation Guide LED Indicators The AP-7522 LED activity indicators are located on the front of the housing and are visible through the enclosure. - Page 20 AP-7522 Access Point The LEDs provide a status display indicating error conditions, transmission, and network activity for the 5 GHz 802.11ac (amber) radio and the 2.4 GHz 802.11n (green) radio. 5 GHz Activity LED (Amber) 2.4 GHz Activity LED (Green)
-
Page 21: Basic Access Point Configuration
Installation Guide 3 Basic Access Point Configuration To set an Access Point basic configuration and access user interface management functions: 1. The Access Point’s IP address is optimally provided using DHCP or from bottom of the Access Point itself (if available). A zero config IP address can also be derived if DHCP resources are unavailable or the IP address is not listed on the bottom of the unit. - Page 22 AP-7522 Access Point If this is the first time the interface has been accessed, a screen displays prompting for the Access Point’s country code. 6. Select the Country Code specific to this Access Point’s deployment location. Selecting the correct country is central to legal operation. Each country has its own regulatory restrictions concerning electromagnetic emissions and the maximum RF signal strength that can be transmitted.
- Page 23 Installation Guide 7. Expand the Configuration menu item and select Basic. 8. Set the following Basic Configuration Settings for this Access Point: • AP Name - Provide an AP Name used as this Access Point’s network identifier. If setting this Access Point as a Virtual Controller, each Access Point managed by this Virtual Controller lists this Access Point’s AP Name as its own.
- Page 24 AP-7522 Access Point Points (NTP clients) periodically synchronize their clock with a master clock (an NTP server). For example, an Access Point resets its clock to 07:04:59 upon reading a time of 07:04:59 from its designated NTP server. 9. Select Apply to implement the updates.
- Page 25 Installation Guide • PPPoE Settings - Optionally enable Point-to-Point Protocol over Ethernet (PPPoE) on the WAN network. If PPPoE is enabled, provide the required Auth Type, Login Name and Login Password. Server Name and Default Gateway are optional settings. PPP is a data-link protocol for dialup connections allowing an Access Point to use a broadband modem (DSL, cable modem, etc.) for access to high-speed data and broadband networks.
- Page 26 AP-7522 Access Point Refer to the LAN IP Interface Settings field, and add a VLAN and Static IP as required for enabling DHCP (within the Configuration > Services screen) for client IP address requests and ensuring routable traffic. 14. Select Apply to commit the updates to the selected Access Point’s configuration.
- Page 27 Installation Guide In respect to the Radio Settings, the professional installer should be aware of the following: The above example includes a field for setting the antenna NOTE gain. This setting is only available for external antenna Access Points and does not display for internal antenna Access Points.
- Page 28 AP-7522 Access Point 16. To create a new WLAN, select + Add from the upper, left-hand side of the Wireless LAN field. 17. Set the following configuration attributes for the new WLAN: • Name - Provide a unique name for the WLAN as its network identifier. This is a required setting.
- Page 29 Installation Guide If selecting Secure-PSK, enter a WPA2 Key to password protect the WLAN. Define whether the key is entered in ASCII or HEX characters. Selecting Show to expose the key is not recommended. If selecting Secure-802.1x, provide an IP address (or hostname) and a shared secret (password) used to access an external RADIUS server resource designated to validate user requests to the Access Point’s WLAN resources.
- Page 30 AP-7522 Access Point 20. Select Enable DHCP Server to ensure the Access Point can provision IP addresses to requesting clients over the specified interface. A VLAN must be already configured and available to the NOTE DHCP server as a viable interface between the Access Point and requesting client.
-
Page 31: Ap-7522 Access Point Specifications
Installation Guide 4 AP-7522 Access Point Specifications Electrical Characteristics An AP-7522 Access Point has the following electrical characteristics: Operating Current 12VDC, 1A (AUX input voltage) & Voltage 12VDC PWRS-14000-54R power supply 48VDC, 0.375A (POE) 802.3at AP-PSBIAS-2P3-ATR Power Injector Physical Characteristics... -
Page 32: Radio Characteristics
AP-7522 Access Point Radio Characteristics The AP-7522 Access Point has the following radio characteristics: Data Rates 802.11b/g: 1,2,5.5,11,6,9,12,18,24,36,48 and 54 Mbps Supported 802.11a: 6,9,12,18,24,36,48, and 54 Mbps 802.11a/n: MCS 0-23 up to 300 Mbps 802.11ac: MCS 0-9 up to 866.7 Gbps Turbo Mode (256QAM) on 2.4 GHz band: up to 400 Mbps... -
Page 33: Regulatory Information
Installation Guide 5 Regulatory Information Regulatory Information This guide applies to the following Model Numbers: AP-7522, AP-7522I. Zebra devices are designed to be compliant with rules and regulations in locations they are sold and will be labeled as required. Local language translations are available at the following Website: www.zebra.com/support... -
Page 34: Country Selection
AP-7522 Access Point 5.2.1 Country Selection Select only the country in which you are using the device. Any other selection will make the operation of this device illegal. Some Access Points are specifically designed to operate in certain countries (Example; -US for the United States, -EU for the European Union). - Page 35 Installation Guide • Keep objects that are used frequently within easy reach • Perform tasks at correct heights • Reduce or eliminate vibration • Reduce or eliminate direct pressure • Provide adjustable workstations • Provide adequate clearance • Provide a suitable working environment •...
-
Page 36: Warnings For The Use Of Wireless Devices
AP-7522 Access Point When driving a car, driving is your first responsibility - Give full attention to driving. Check the laws and regulations on the use of wireless devices in the areas where you drive. Always obey them. 5.3.1 Warnings for the use of Wireless Devices Please observe all warning notices with regard to the usage of wireless devices. -
Page 37: Rf Exposure Guidelines
Installation Guide RF Exposure Guidelines 5.4.1 Safety Information Reducing RF Exposure - Use Properly Only operate the device in accordance with the instructions supplied. 5.4.2 International The device complies with internationally recognized standards covering human exposure to electromagnetic fields from radio devices. For information on “International” human exposure to electromagnetic fields refer to the Declaration of Conformity (DoC) at: www.zebra.com/doc 5.4.3 EU... -
Page 38: Power Supply
AP-7522 Access Point Remote and Standalone Antenna Configurations To comply with FCC RF exposure requirements, Antennas that are mounted externally must be professionally installed at a fixed location and operate with a minimum distance of 30cm from all persons. To comply with FCC Antenna requirements, the Antenna must be adjusted such that the RF emission lobes are below 30 degrees elevation. -
Page 39: Radio Frequency Interference Requirements - Canada
This radio transmitter (AP-7522, AP-7522I) has been approved by Industry Canada to operate with the antenna types listed below and having a maximum gain allowable and the impedance required for each type of antenna. -
Page 40: Ce Marking And European Economic Area (Eea)
AP-7522 Antennas on page 7 initially approved for use with AP-7522 and AP7522I Access Points. Le présent émetteur radio (AP-7522, AP-7522I) a été approuvé par Industrie Canada pour fonctionner avec les types d'antenne énumérés ci-dessous et ayant un gain admissible maximal et l'impédance requise pour chaque type d'antenne. -
Page 41: Other Countries
Brazil Declarações Regulamentares para AP-7522 - Brasil Nota: A marca de certificação se aplica ao Transceptor, modelo AP-7522. Este equipamento opera em caráter secundário, isto é, não tem direito a proteção contra interferência prejudicial, mesmo de estações do mesmo tipo, e não pode causar interferência a sistemas operando em caráter primário. -
Page 42: Waste Electrical And Electronic Equipment (Weee)
AP-7522 Access Point S. Korea Taiwan 在 5.25-5.35 秭赫頻帶內操作之無線資訊傳輸設備,限於室內使用 Thailand Hong Kong This equipment is restricted to indoor operation in the 5.15-5.35GHz band for Hong Kong. 5.12 Waste Electrical and Electronic Equipment (WEEE) English: For EU Customers: All products at the end of their life must be returned to Zebra for recycling. For information on how to return product, please go to: www.zebra.com/weee. - Page 43 Installation Guide Български: За клиенти от ЕС: След края на полезния им живот всички продукти трябва да се връщат на Zebra за рециклиране. За информация относно връщането на продукти, моля отидете на адрес: www.zebra.com/weee. Deutsch: Für Kunden innerhalb der EU: Alle Produkte müssen am Ende ihrer Lebensdauer zum Recycling an Zebra zurückgesandt werden.
-
Page 44: Turkish Weee Statement Of Compliance
AP-7522 Access Point 5.13 TURKISH WEEE Statement of Compliance EEE Yönetmeliğine Uygundur... -
Page 45: Support
Installation Guide 6 Support If you have a problem with your equipment, contact support for your region. Contact information is available at: www.zebra.com/support When contacting support, please provide the following information: • Serial number of the unit • Model number or product name •... -
Page 46: End-User Software License Agreement
AP-7522 Access Point 7 Zebra Technologies Corporation ("Zebra") End-User Software License Agreement BY INSTALLING AND/OR USING THIS PRODUCT, YOU ACKNOWLEDGE THAT YOU HAVE READ THIS AGREEMENT, UNDERSTAND IT AND AGREE TO BE BOUND ITS TERMS. IF YOU DO NOT AGREE TO THE TERMS OF THIS AGREEMENT, ZEBRA IS NOT WILLING TO LICENSE THE PRODUCT TO YOU, AND YOU MUST NOT INSTALL OR USE THIS PRODUCT. -
Page 47: Limited Warranty
Installation Guide Portions of the Products are protected by United States patent and copyright laws, international treaty provisions, and other applicable laws. Therefore, you must treat the Products like any other copyrighted material (e.g., a book or musical recording) except that you may make one copy of the Product solely for back-up purposes. Unauthorized duplication of the Products constitutes copyright infringement, and in the United States is punishable in federal court by fine and imprisonment. - Page 48 AP-7522 Access Point BEEN ADVISED OF THE POSSIBILITY OF SUCH DAMAGES. Some jurisdictions do not permit limitations of liability for incidental or consequential damages, so the above exclusions may not apply to you. This Limitation of Liability provision survives the termination of this Agreement and applies notwithstanding any contrary provision in this Agreement.
- Page 49 Installation Guide Assignment Except as otherwise provided in this section, neither party may assign this Agreement, or any of its rights or obligations under this Agreement, without the prior written approval of the other party, which will not be unreasonably withheld. Any attempted assignment, delegation, or transfer without the necessary approval will be void.
- Page 50 AP-7522 Access Point Third Party Software The Products may contain one or more items of Third-Party Software. The terms of this Agreement govern your use of any Third-Party Software UNLESS A SEPARATE THIRD-PARTY SOFTWARE LICENSE IS INCLUDED, IN WHICH CASE YOUR USE OF THE THIRD-PARTY SOFTWARE WILL THEN BE GOVERNED BY THE SEPARATE THIRD-PARTY LICENSE.
-
Page 51: Ap-7522 Access Point China Rohs Compliance
光学和光学组件 (Optics and Optical Components) 电池 (Batteries) 本表格依据 SJ/T 11364 的规定编制。 O: 表示该有害物质在该部件所有均质材料中的含量均在 GB/T 26572 规定的限量 要求以下。 X:表示该有害物质至少在该部件的某一均质材料中的含量超出GB/T 26572 规定 的限量要求。 (企业可在此处,根据实际情况对上表中打“×”的技术原因进 行进一步说明。 ) This table was created to comply with China RoHS requirements for AP-7522 and AP-7522I Access Points. - Page 52 AP-7522 Access Point...
- Page 53 Installation Guide...
- Page 54 AP-7522 Access Point...
Need help?
Do you have a question about the AP-7522 and is the answer not in the manual?
Questions and answers